Subscriber Exclusive
Investigating Increases: 5 to Try for Visible (or Invisible) Results
Take a close look at five common increases—which should you use? We'll show you both the knit side and purl side so you can choose the best increase for your next knit.
Take a close look at five common increases—which should you use? We'll show you both the knit side and purl side so you can choose the best increase for your next knit. <a href="https://farmfiberknits.com/investigating-increases/">Continue reading.</a>
https://farmfiberknits.com/cdn-cgi/image/format=auto/https://www.datocms-assets.com/101500/1738371135-zephyr-vest.jpg?auto=format&w=900
When you need to add stitches to shape your knitting, do you have a go-to increase? I’ll wager most knitters would say their default increase is a Make 1 (M1) or Knit Front and Back (kfb). Either of these will do the job of adding a stitch. But like most things in knitting, there are many methods of increasing stitches, each with their own pros and cons.
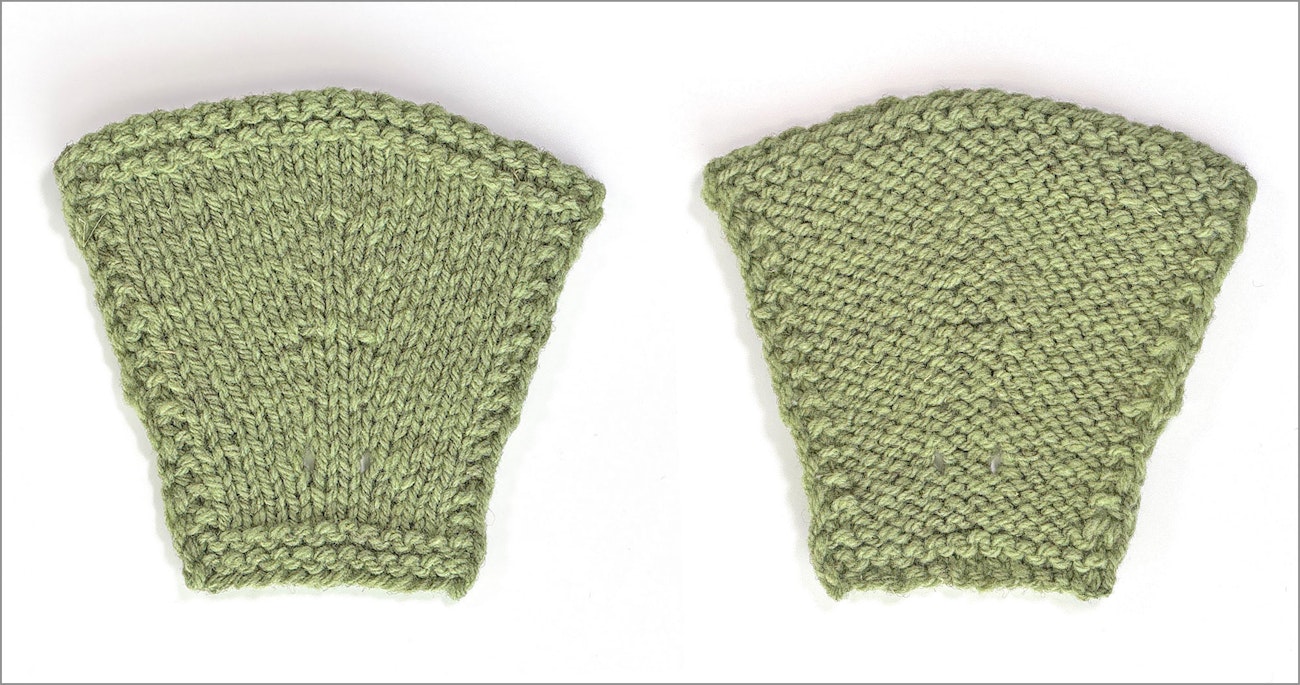
To enable informed decisions about which increase to use in different situations, nothing beats a side-by-side comparison. I knitted a Stockinette stitch swatch using five different increase methods and including both the right-leaning and left-leaning versions where applicable. Let’s look at both the “right” side and the “wrong” side of this swatch (because sometimes Reverse Stockinette stitch is the right side!). We’ll evaluate each increase method based on two criteria: ease of working the increase and appearance in the fabric.
 Increases are shown on Sandi's swatches, with stockinette stitch on the left and reverse stockinette stitch on the right. All swatch photos by Sandi Rosner
In this swatch, the increases are worked in pairs, with 2 stitches between the increases, and 3 rows between each increase row.
In the order worked, from bottom to top, here are the increases I tested:
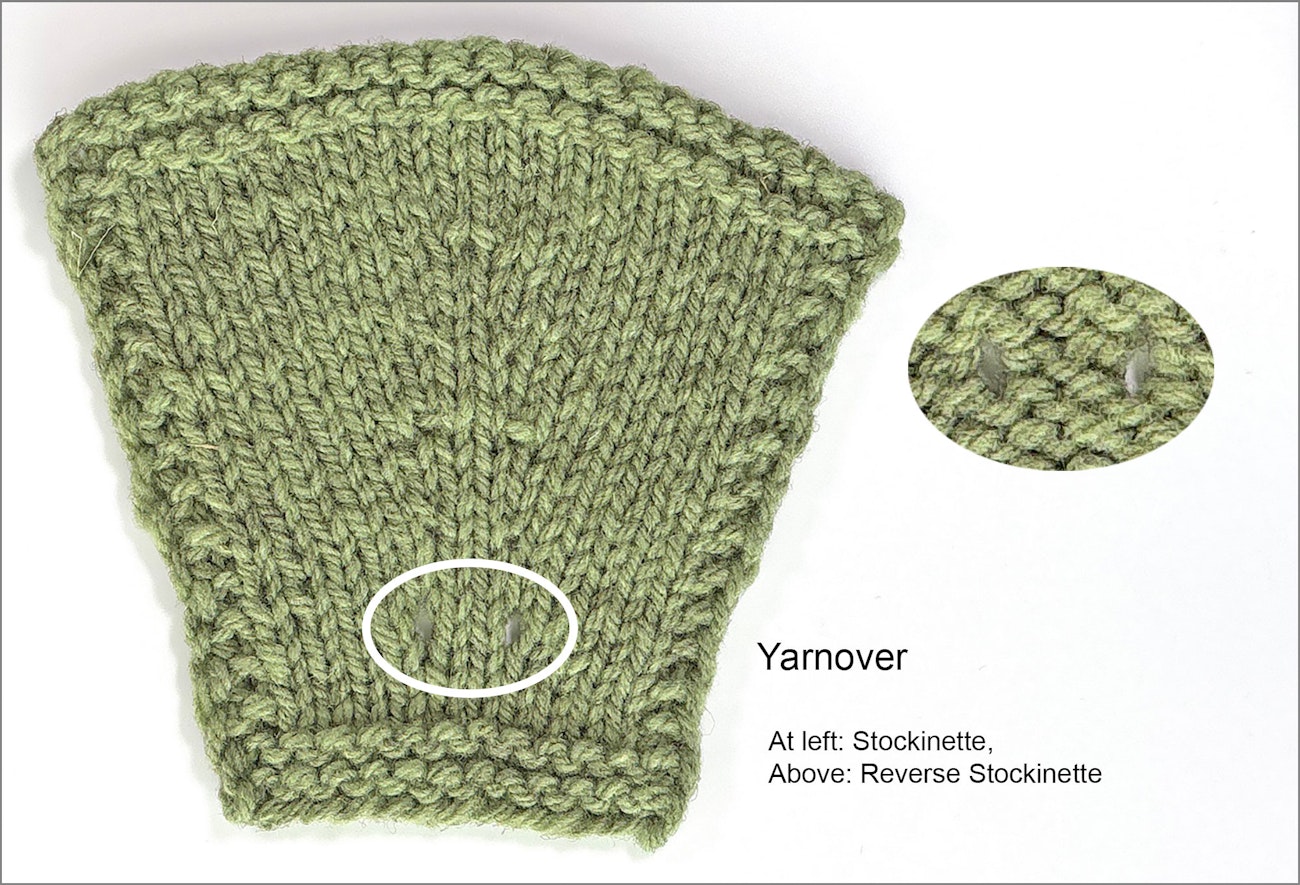
Yarnover (YO)
This is the first increase most beginning knitters encounter, usually by accident. The simple yarnover does not lean either right or left. It is easy to work, but it creates a hole in the fabric.
These holes can be a decorative design element, especially if they are worked at regular intervals. The yarnover is often the increase of choice for lace projects, since the holes can be incorporated into the lace pattern.
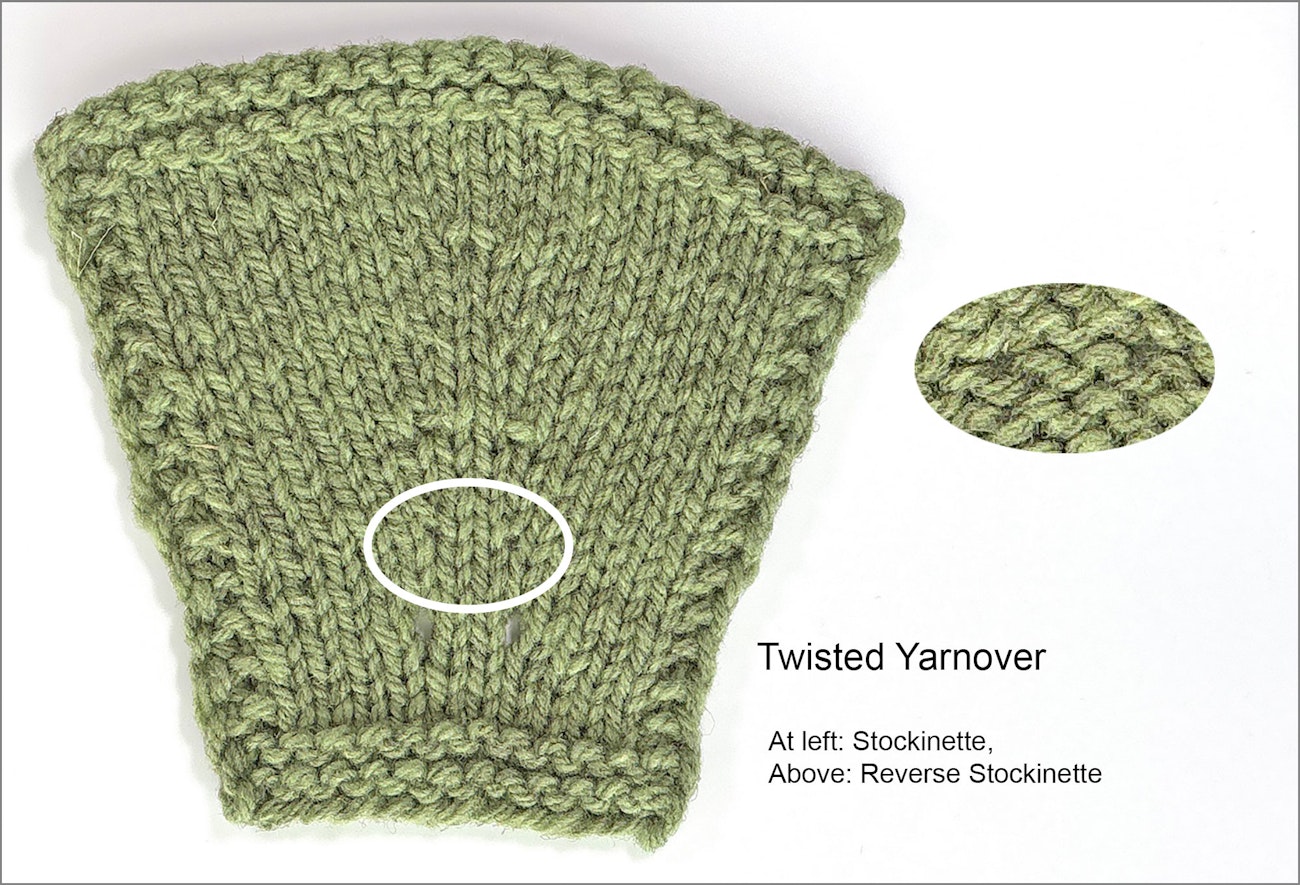
Twisted Yarnover
This increase is a variation on the simple yarnover. It is the only increase tested here that is worked over 2 rows.
For a right-leaning Twisted Yarnover, yarnover backwards (yob): When you come to that backwards yarn over on the next row, knit (or purl) it through the front loop to twist it, closing the hole.
SUBSCRIBER EXCLUSIVE
When you need to add stitches to shape your knitting, do you have a go-to increase? I’ll wager most knitters would say their default increase is a Make 1 (M1) or Knit Front and Back (kfb). Either of these will do the job of adding a stitch. But like most things in knitting, there are many methods of increasing stitches, each with their own pros and cons.
To enable informed decisions about which increase to use in different situations, nothing beats a side-by-side comparison. I knitted a Stockinette stitch swatch using five different increase methods and including both the right-leaning and left-leaning versions where applicable. Let’s look at both the “right” side and the “wrong” side of this swatch (because sometimes Reverse Stockinette stitch is the right side!). We’ll evaluate each increase method based on two criteria: ease of working the increase and appearance in the fabric.
Increases are shown on Sandi's swatches, with stockinette stitch on the left and reverse stockinette stitch on the right. All swatch photos by Sandi Rosner
In this swatch, the increases are worked in pairs, with 2 stitches between the increases, and 3 rows between each increase row.
In the order worked, from bottom to top, here are the increases I tested:
Yarnover (YO)
This is the first increase most beginning knitters encounter, usually by accident. The simple yarnover does not lean either right or left. It is easy to work, but it creates a hole in the fabric.
These holes can be a decorative design element, especially if they are worked at regular intervals. The yarnover is often the increase of choice for lace projects, since the holes can be incorporated into the lace pattern.
Twisted Yarnover
This increase is a variation on the simple yarnover. It is the only increase tested here that is worked over 2 rows.
For a right-leaning Twisted Yarnover, yarnover backwards (yob): When you come to that backwards yarn over on the next row, knit (or purl) it through the front loop to twist it, closing the hole.[PAYWALL]
For a left-leaning Twisted Yarnover, yarnover in the normal manner: When you come to that yarnover on the next row, knit (or purl) it through the back loop to twist it, closing the hole.
I like the look of this increase, and I think it is the least obtrusive increase on the reverse-stockinette stitch side. It does leave a tiny hole at the base of the new stitch. The only trouble with the Twisted Yarnover is that you must think about it not only during the increase row, but during the following row as well. For those of us who sometimes knit on autopilot, this can be a challenge.
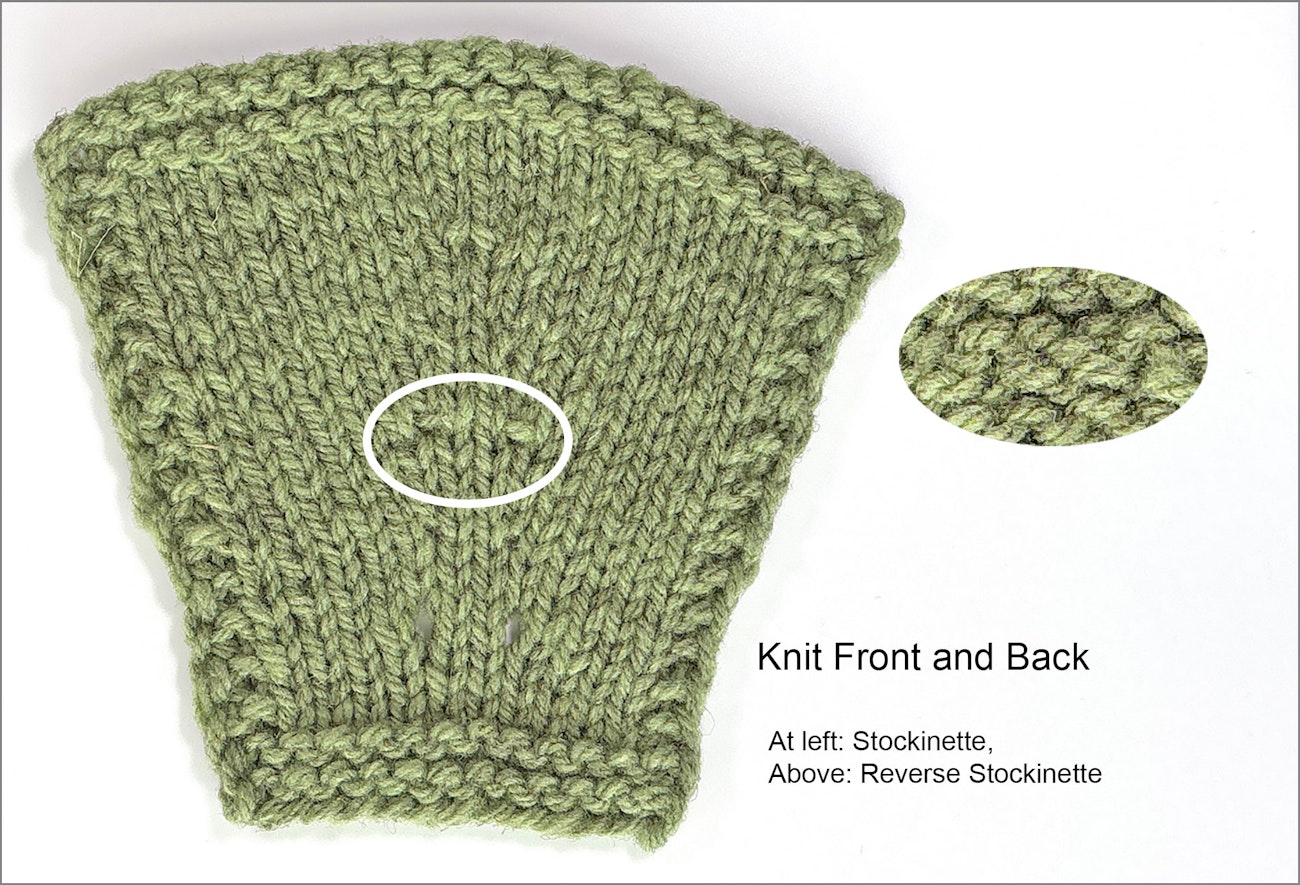
Knit Front and Back (KFB)
This is an increase most of us learn early in our knitting careers. Simply knit into both the front and the back of the same stitch. Easy peasy. But many knitters abandon this increase because it has some issues.
The knit front and back always creates the new stitch to the left of the stitch in which the increase is worked. This lack of symmetry can disrupt the rhythm of something like paired raglan increases if it isn't worked into the design.
The new stitch created by a knit front and back always has a little bump at its base. This bump makes the increase stand out against a smooth field of stockinette stitch.
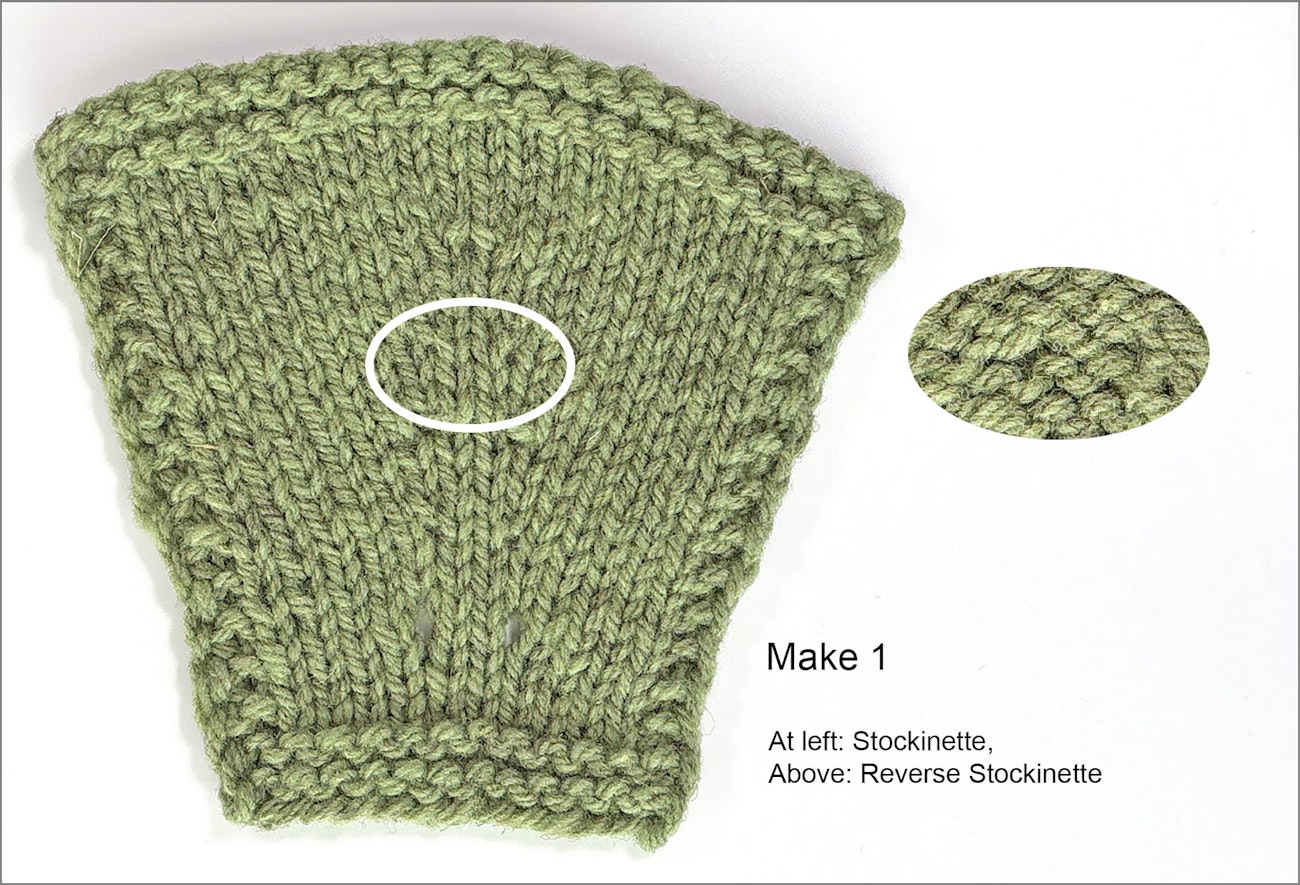
Make 1 (M1)
This is the increase most commonly used for garment shaping by contemporary designers.
For a right-leaning Make 1 (M1R): Insert the tip of your left-hand needle from back to front under the strand of yarn running between the stitch you just knitted and the next stitch. Lift this strand and knit through the front.
For a left-leaning Make 1 (M1L): Insert the tip of your left-hand needle from front to back under the strand of yarn running between the stitch you just knitted and the next stitch. Lift this strand and knit through the back.
The Make 1 is quick and easy. It blends well into the field of Stockinette stitch, and it’s my favorite increase in most situations. But it does cause a slight distortion of the stitches on either side of the increase.
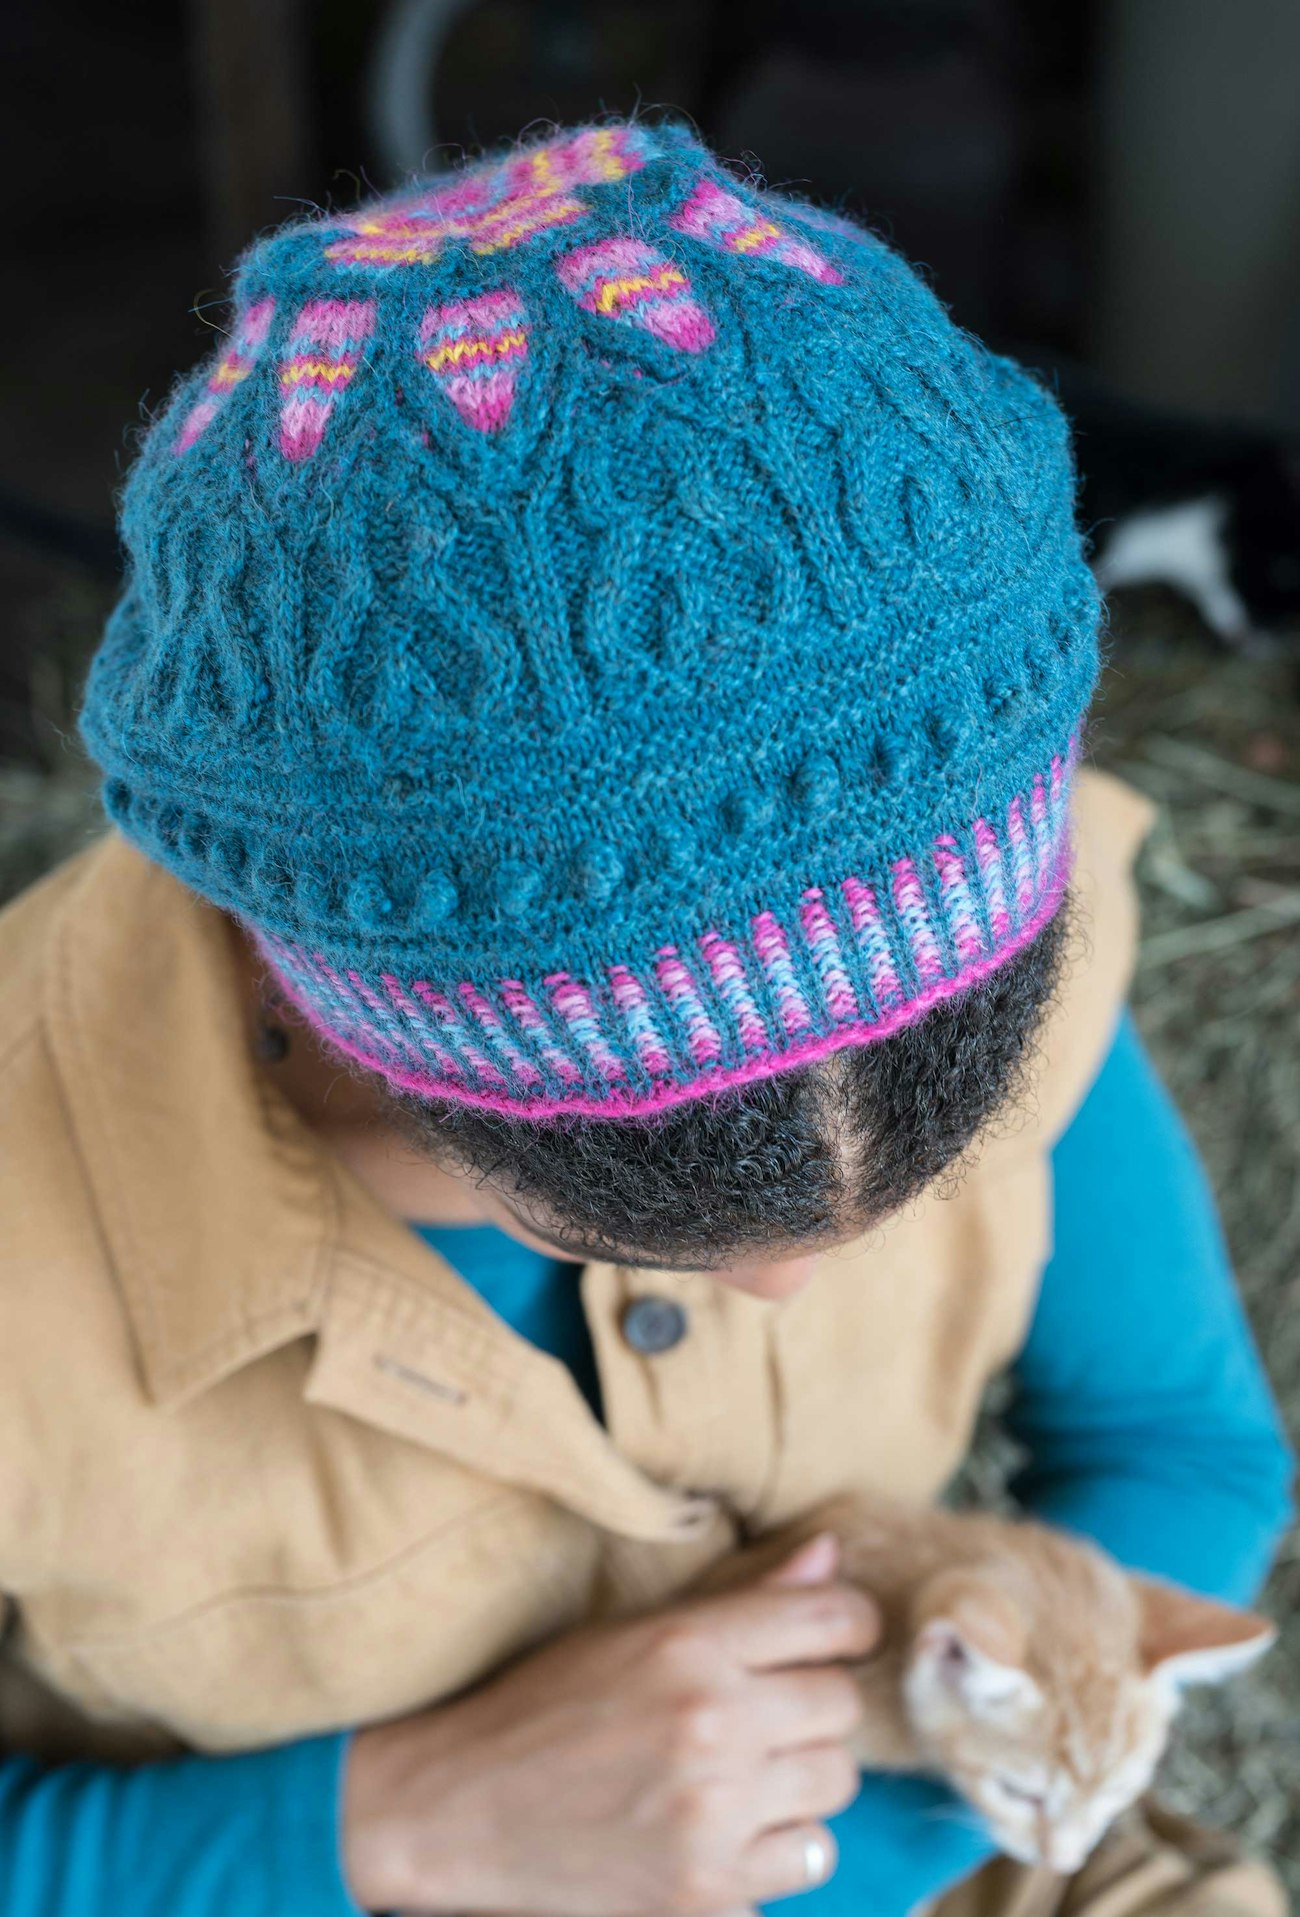 The Notre Dame Tam is a good example of a project that uses M1 increases with nearly invisible results. Photo by Gale Zucker
Fun fact: The path travelled by the yarn is the same for the Make 1 as it is for the Twisted Yarnover. Yet the Twisted Yarn over doesn’t cause the same distortion. When you lift the strand between two stitches for a Make 1, you’re stealing a little yarn from those stitches to create the loop at the base of your new stitch. With the Twisted Yarnover, you reserve the yarn to create that loop when you make the yarn over, so there is no need to borrow yarn from the neighboring stitches.
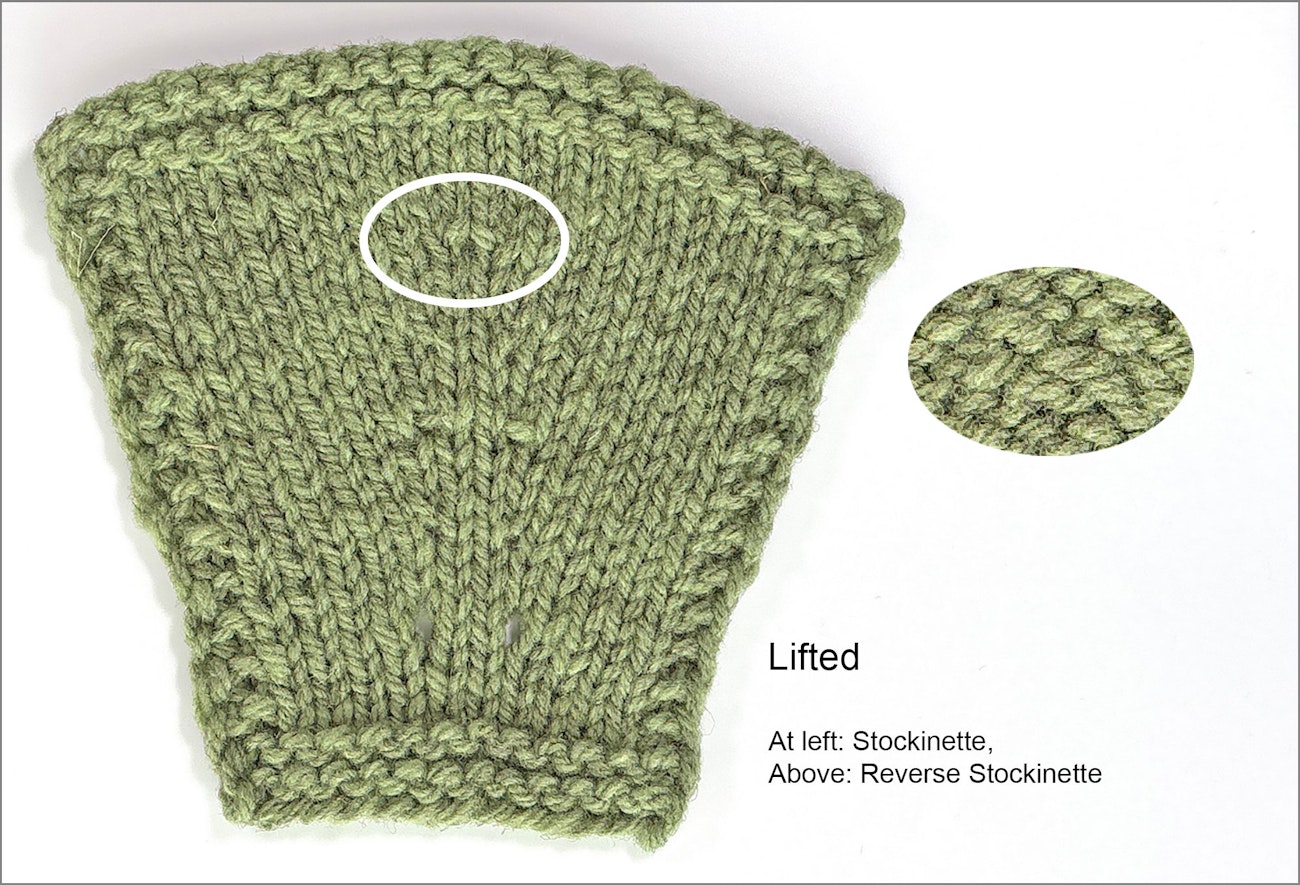
Lifted Increases
To work lifted increases, it is helpful to think in terms of “generations” of stitches in a column. It works like this: the stitch on your needle is the child, which comes from the mother, which comes from the grandmother. Got it?
To make a Right Lifted Increase (RLI): Knit into the top of the stitch below the next stitch on your needle—the mother of that next stitch.
To make a Left Lifted Increase (LLI): Knit into the top of the stitch two rows below the stitch you just knitted—the grandmother.
 The Turnout Shawl uses lifted increases. Photo by Gale Zucker
Lifted Increases require a bit more thought than some of the other methods. But with a little practice, they are no more difficult than a Make 1.
I’m not a big fan of the lifted increase. Because you are knitting into a stitch (either the mother or the grandmother) twice, there is a distortion of the fabric.
When in Doubt, Make a Swatch
I knit my test swatch using Wooldreamers’ La Rinconada, a round, plush, 3-ply, DK-weight yarn made with organic Merino wool grown and spun in Spain. I worked at a gauge that produced a fabric suitable for a sweater—cohesive but with a little drape.
It’s important to remember that your milage may vary. The yarn you use and the gauge at which you knit can make a big difference in the appearance of your increases. When in doubt, take the time to make your own comparison swatch, using the yarn and needles you’ll use for your project. Making a thoughtful choice about the increase method you use will make your knitting look more polished and professional.