Subscriber Exclusive
Make Your Mark: Easy Embroidery for Knits
Simple stitches can have a big personality, and we've gathered 11 easy techniques for you to try!
Simple stitches can have a big personality, and we've gathered 11 easy techniques for you to try! <a href="https://farmfiberknits.com/make-your-mark-easy-embroidery-for-knits/">Continue reading.</a>
https://farmfiberknits.com/cdn-cgi/image/format=auto/https://www.datocms-assets.com/101500/1745938837-luisetta-vest-back-side.jpg?auto=format&w=900
Embroidery is one of the first crafts I learned as a child. My great-grandmother took it upon herself to teach young left-handed me using floss, iron-on transfers, and tea towels. I chose colors at random for those playful elephants stitched in stem stitch that held flowers with French knot centers. Embroidery is not just for wall hangings or the kitchen sink. Simple stitches can be used to add spirit and color to your knitted garments.
It’s easy to get overwhelmed when looking at different embroidery techniques—there are thousands of stitches! Just a few basics are all you need to get started, and there are three main types of embroidery I’d like to show you here. At the bottom of the page, we’ve also included a gallery of basic stitches.
 Hannah began sketching the flowers in her garden by simplifying each flower into basic shapes. Photo by Gale Zucker
Pro Tip: Stitching on Knitted Fabric
Most embroidery is done on tightly woven fabric or speciality fabric that has a grid woven into it. These fabrics have very little stretch or give to their structure, and must be pierced with a sharp needle or stitched through holes that are woven in.
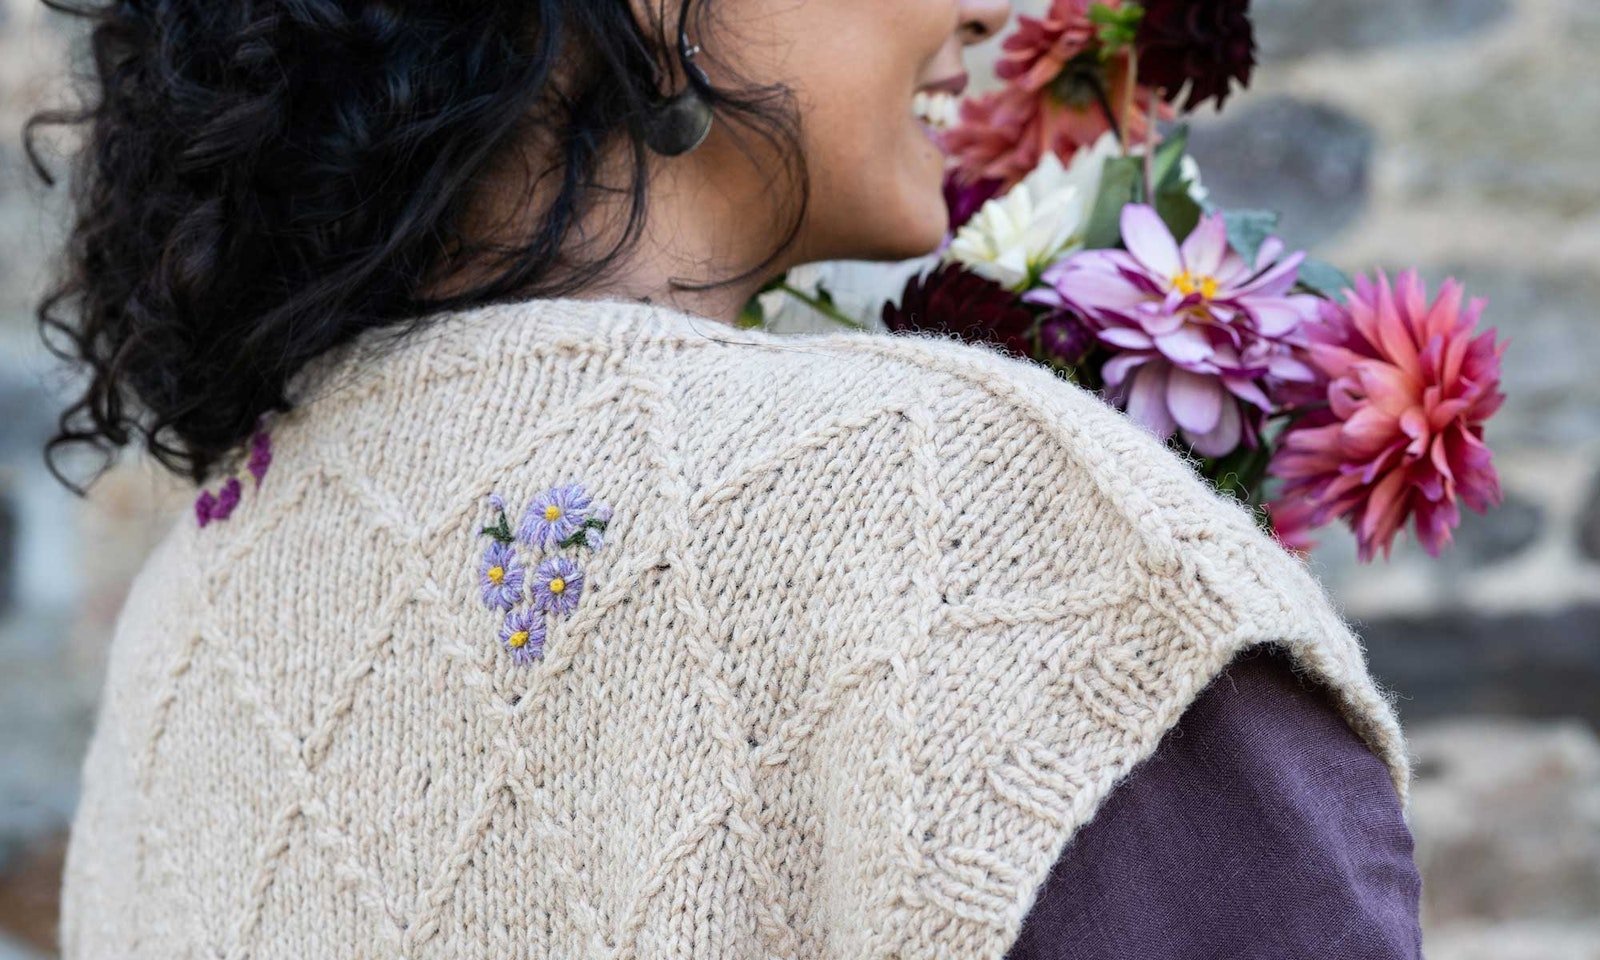
Due to the stretchy nature of knit fabric, there are two options to stabilize it for stitching. The first option would be to knit in a non-superwash wool and wet-felt the garment. This draws the fibers together to create a stable surface. The second option, which Hannah Thiessen Howard used in her Luisetta Vest, is to use a washaway stabilizer. The area to be stitched is attached to the stabilizer and embroidered. Once stitching is done, soak the garment to release the stabilizer.
SUBSCRIBER EXCLUSIVE
Embroidery is one of the first crafts I learned as a child. My great-grandmother took it upon herself to teach young left-handed me using floss, iron-on transfers, and tea towels. I chose colors at random for those playful elephants stitched in stem stitch that held flowers with French knot centers. Embroidery is not just for wall hangings or the kitchen sink. Simple stitches can be used to add spirit and color to your knitted garments.
It’s easy to get overwhelmed when looking at different embroidery techniques—there are thousands of stitches! Just a few basics are all you need to get started, and there are three main types of embroidery I’d like to show you here. At the bottom of the page, we’ve also included a gallery of basic stitches.
Hannah began sketching the flowers in her garden by simplifying each flower into basic shapes. Photo by Gale Zucker
Pro Tip: Stitching on Knitted Fabric
Most embroidery is done on tightly woven fabric or speciality fabric that has a grid woven into it. These fabrics have very little stretch or give to their structure, and must be pierced with a sharp needle or stitched through holes that are woven in.
Due to the stretchy nature of knit fabric, there are two options to stabilize it for stitching. The first option would be to knit in a non-superwash wool and wet-felt the garment. This draws the fibers together to create a stable surface. The second option, which Hannah Thiessen Howard used in her Luisetta Vest, is to use a washaway stabilizer. The area to be stitched is attached to the stabilizer and embroidered. Once stitching is done, soak the garment to release the stabilizer.
[PAYWALL]
1) Duplicate Stitch
Duplicate stitch is the first technique knitters learn about with embroidery. The technique does exactly as it says by duplicating the stitch below by stitching over the top of the stitch in a different color of yarn. Small accents of colorwork can easily be added this way to save yarn and add a pop of color. Another common use for duplicate stitch is adding names to handknitted holiday decorations, such as Christmas stockings and ornaments. Duplicate stitch is also great for mending; see how with “Visible Mending for Handknits”.
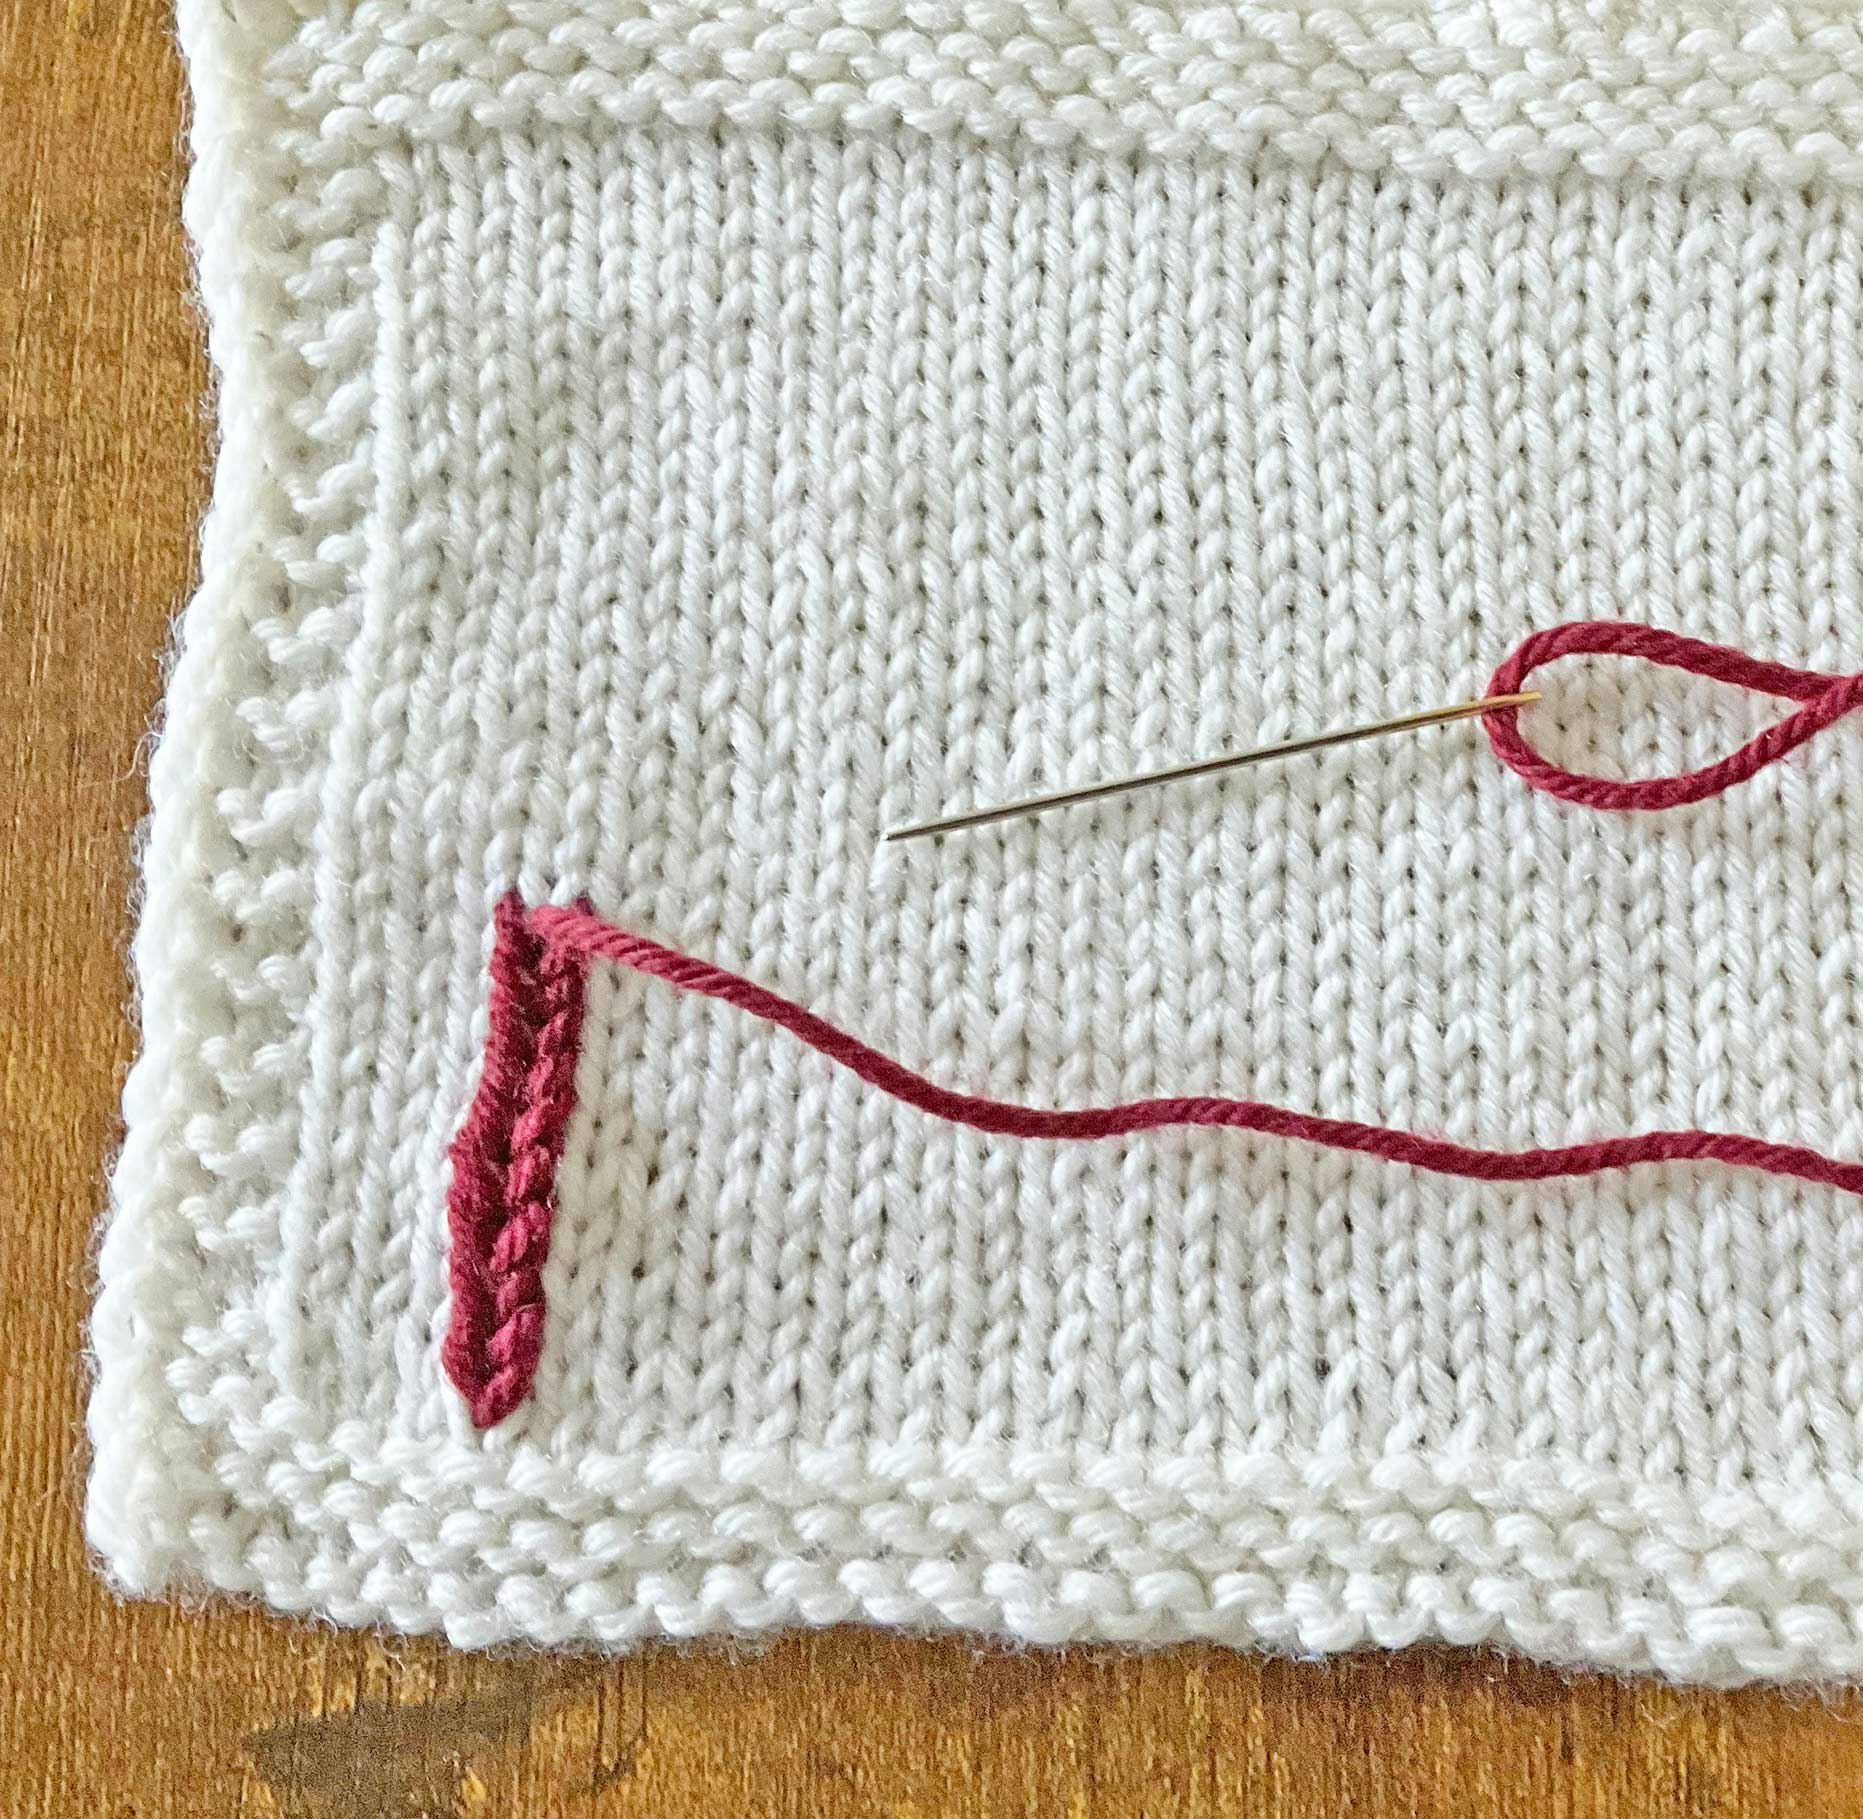
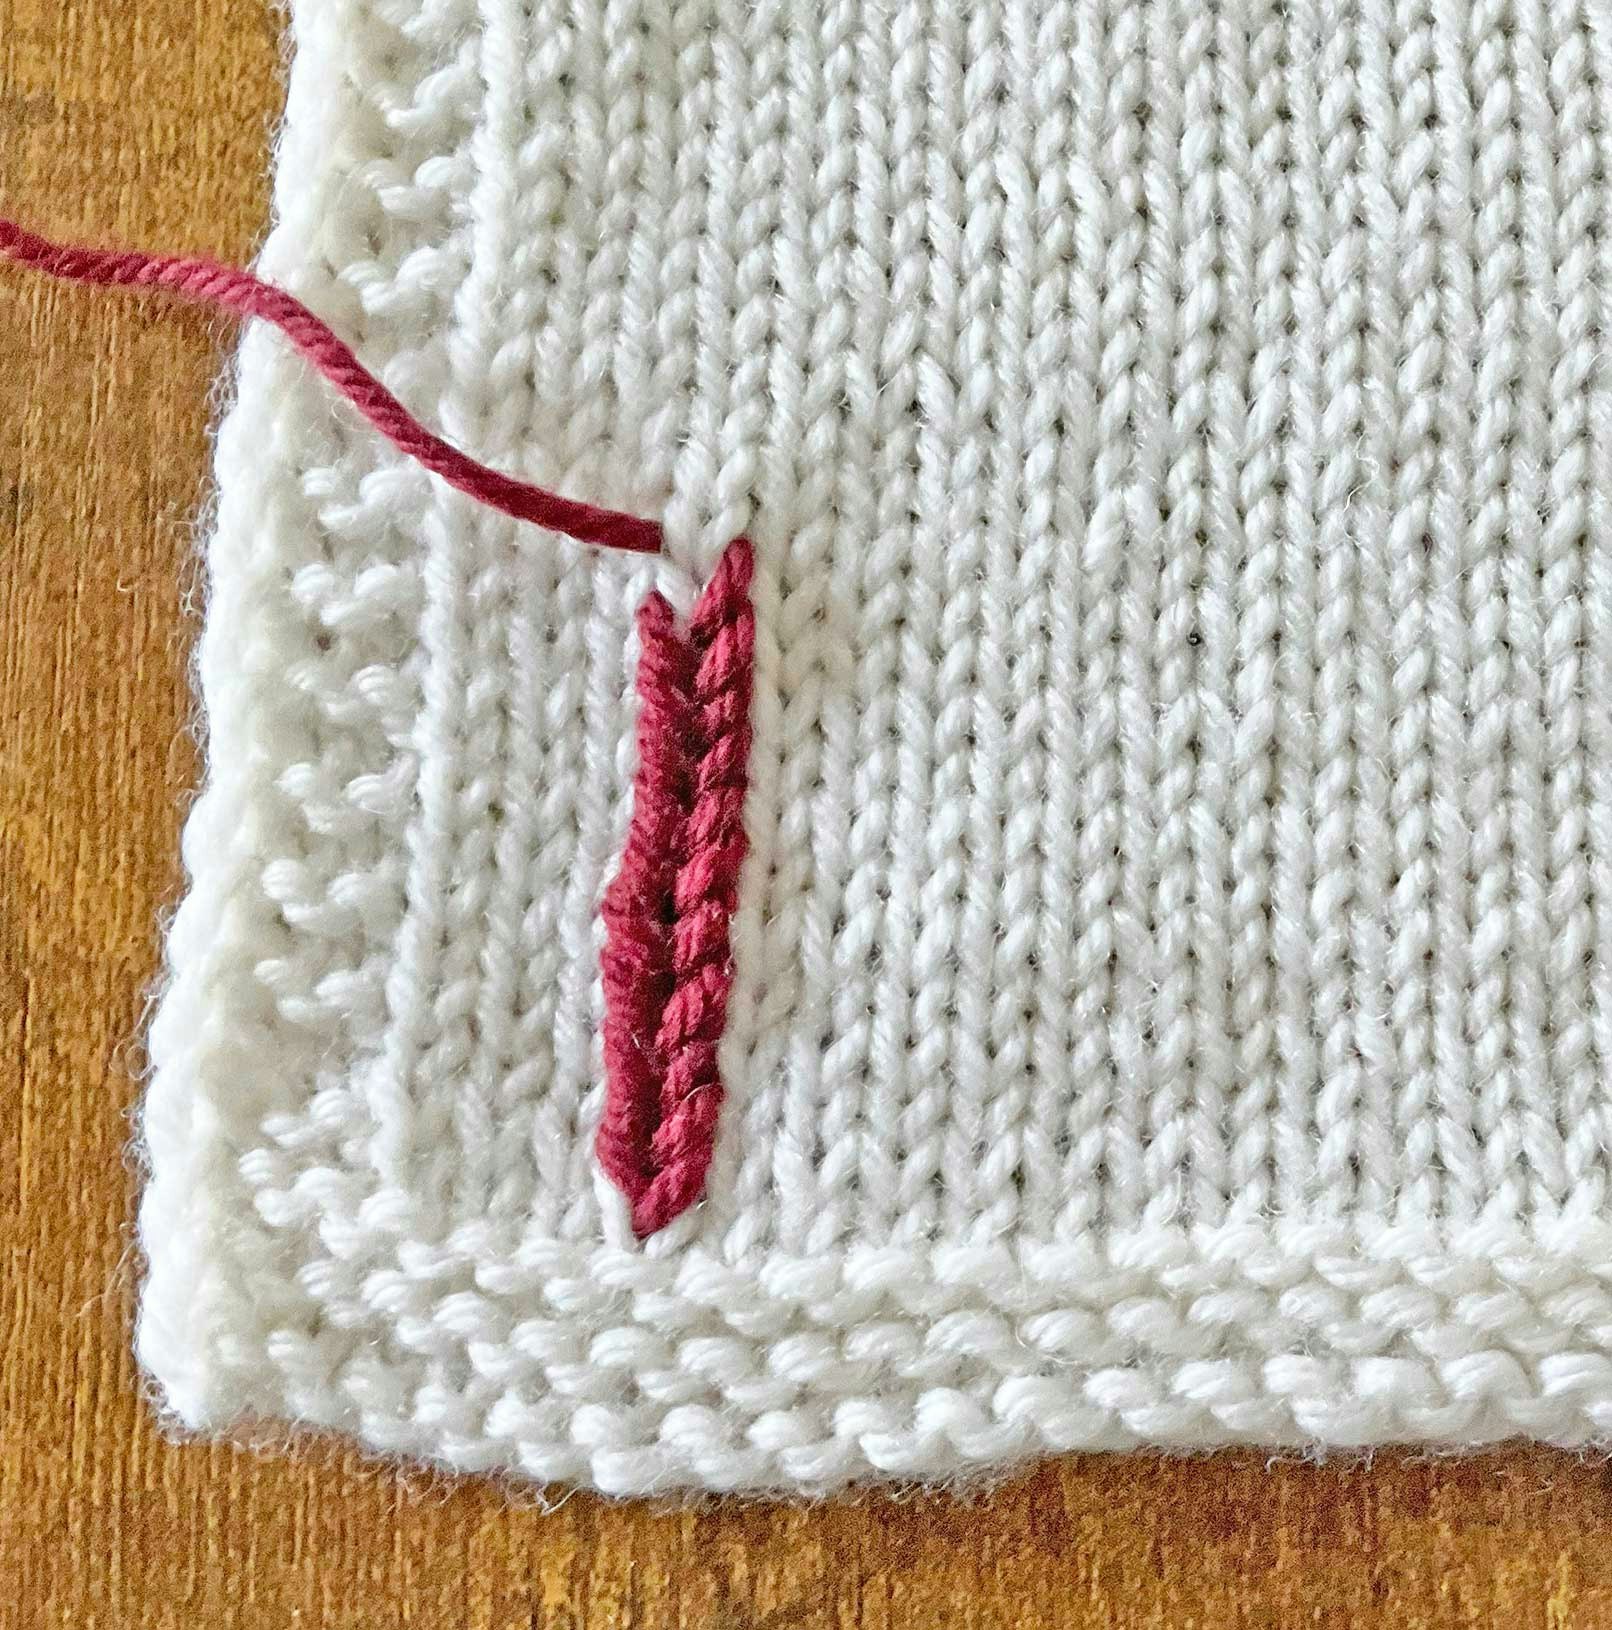
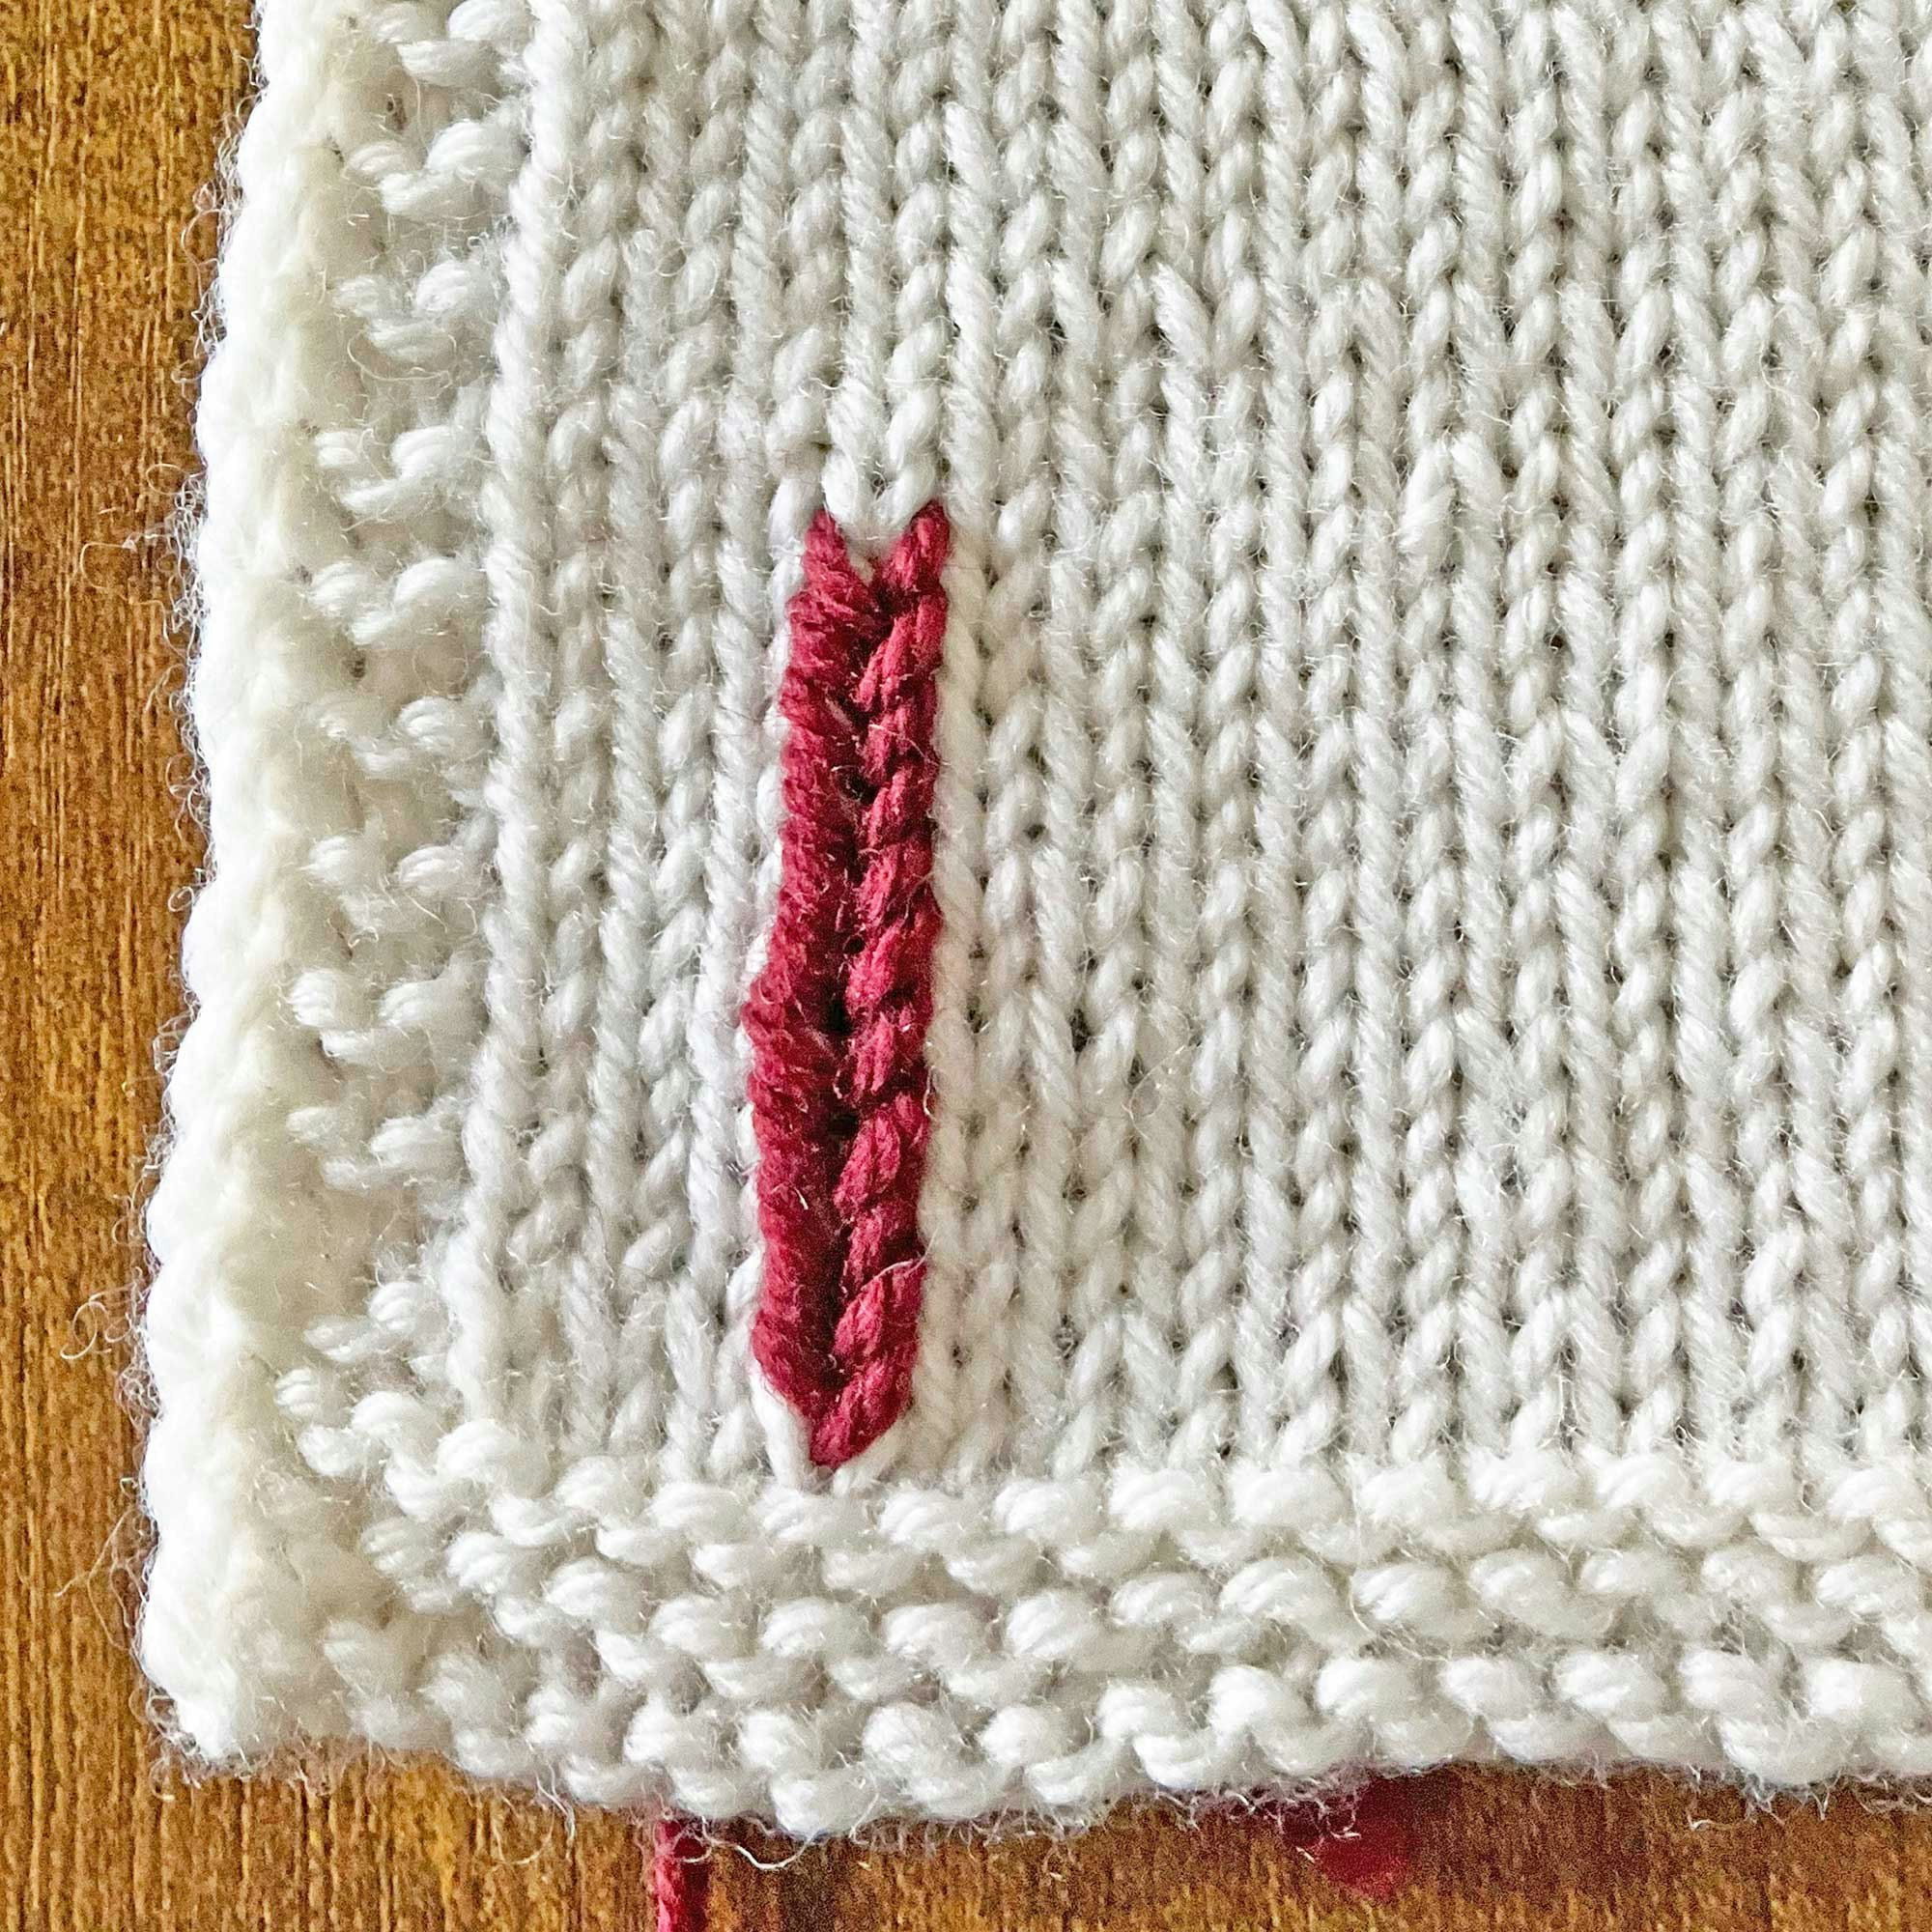
Get a closer look at the duplicate stitch, step by step! Click any image in the gallery below to open it in full-screen mode and read the instructions. Photos by Katrina King
Duplicate stitch is worked by starting at the base of the stitch to be covered, passing the yarn under the top of the stitch, and back to the starting point to cover both legs of the stitch.
2) Counted Techniques
Embroidery that uses a specific grid is a counted technique and uses that grid as a framework for its construction. Patterns follow the squares woven in the fabric to create X’s or other geometric-shaped stitches with the corners and sides as guidelines.
 Cross-stitch is most often worked on evenweave or Aida cloth (shown here) where the stitching grid is woven into the fabric. Sample by John Flaherty, photo by Katrina King
This same technique can be applied to stitching on the knit side of a garment or project with a slight modification. Knit stitches are usually not square; they are rectangular. Stitches tend to be slightly wider than they are tall. To adjust for this when creating a design, use knitting graph paper to plot out the grid. A quick online search for “knitting graph paper” will lead you to several free options.
 Cross-stitch on knits using each stitch as a square.
Cross-stitch is worked in squares stitching a diagonal line in one direction and then crossing back over it to create the X. The key to the stitch: working in a consistent manner with your diagonals.
3) Freehand Options
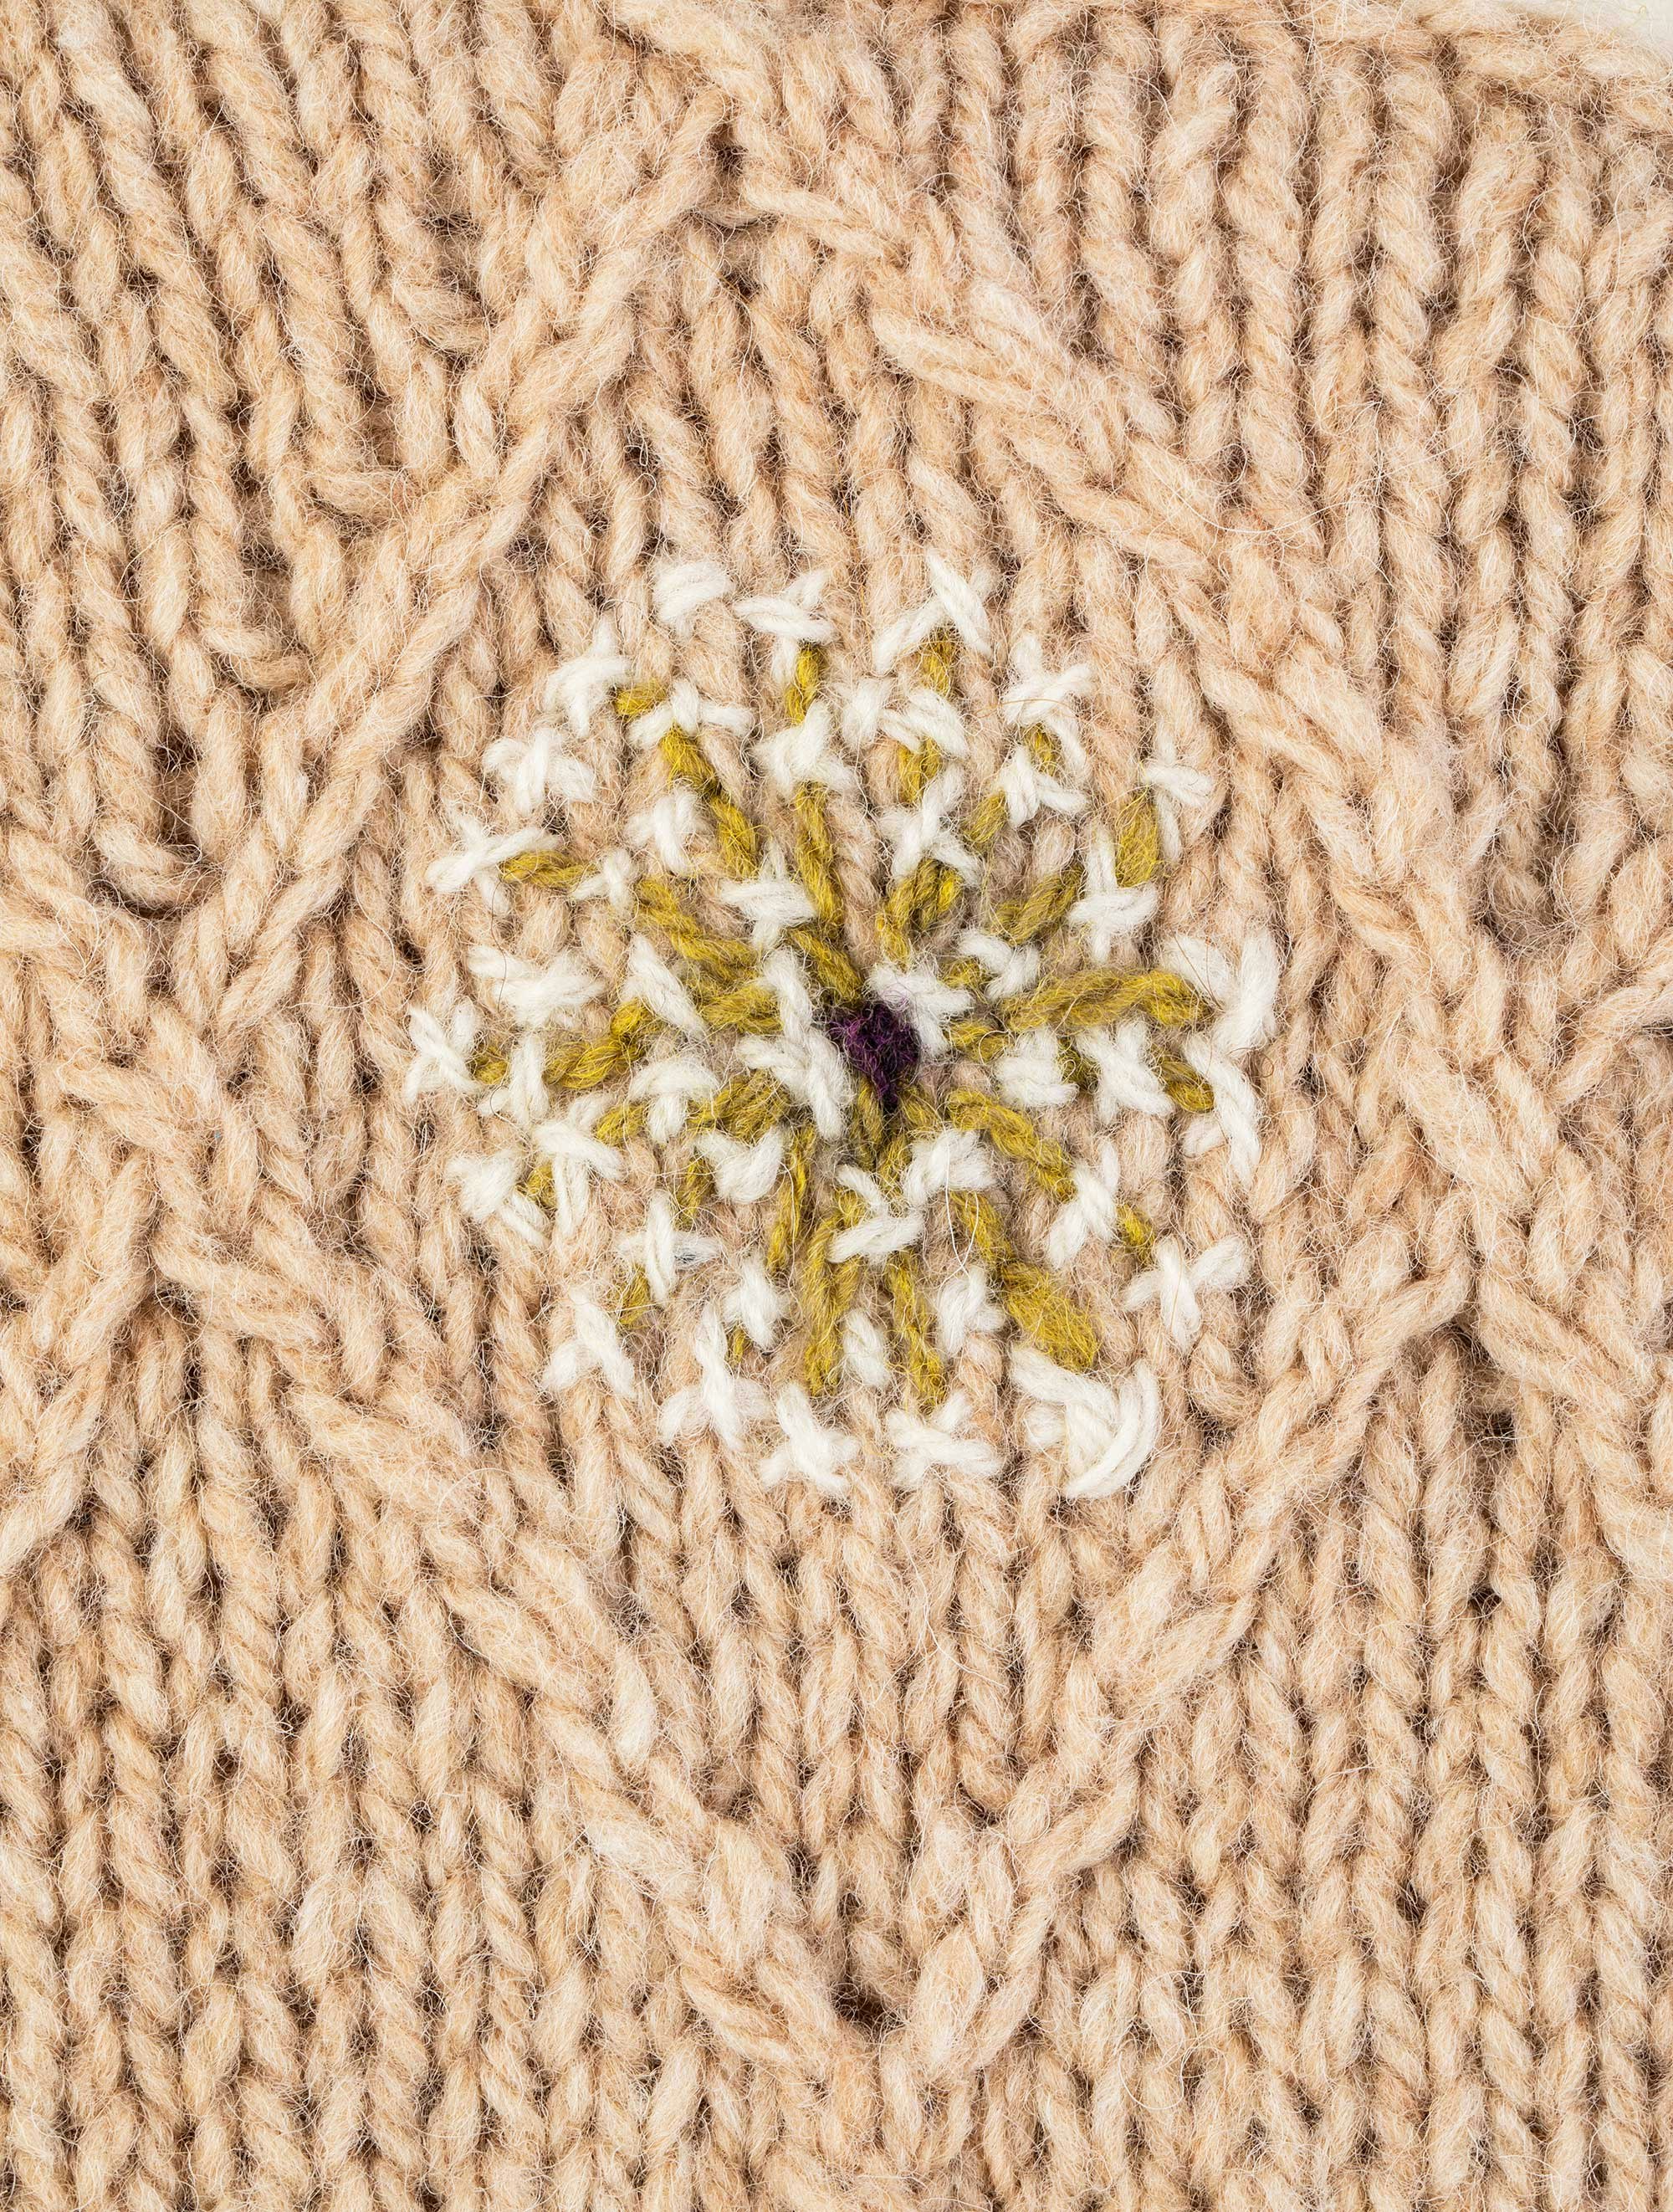
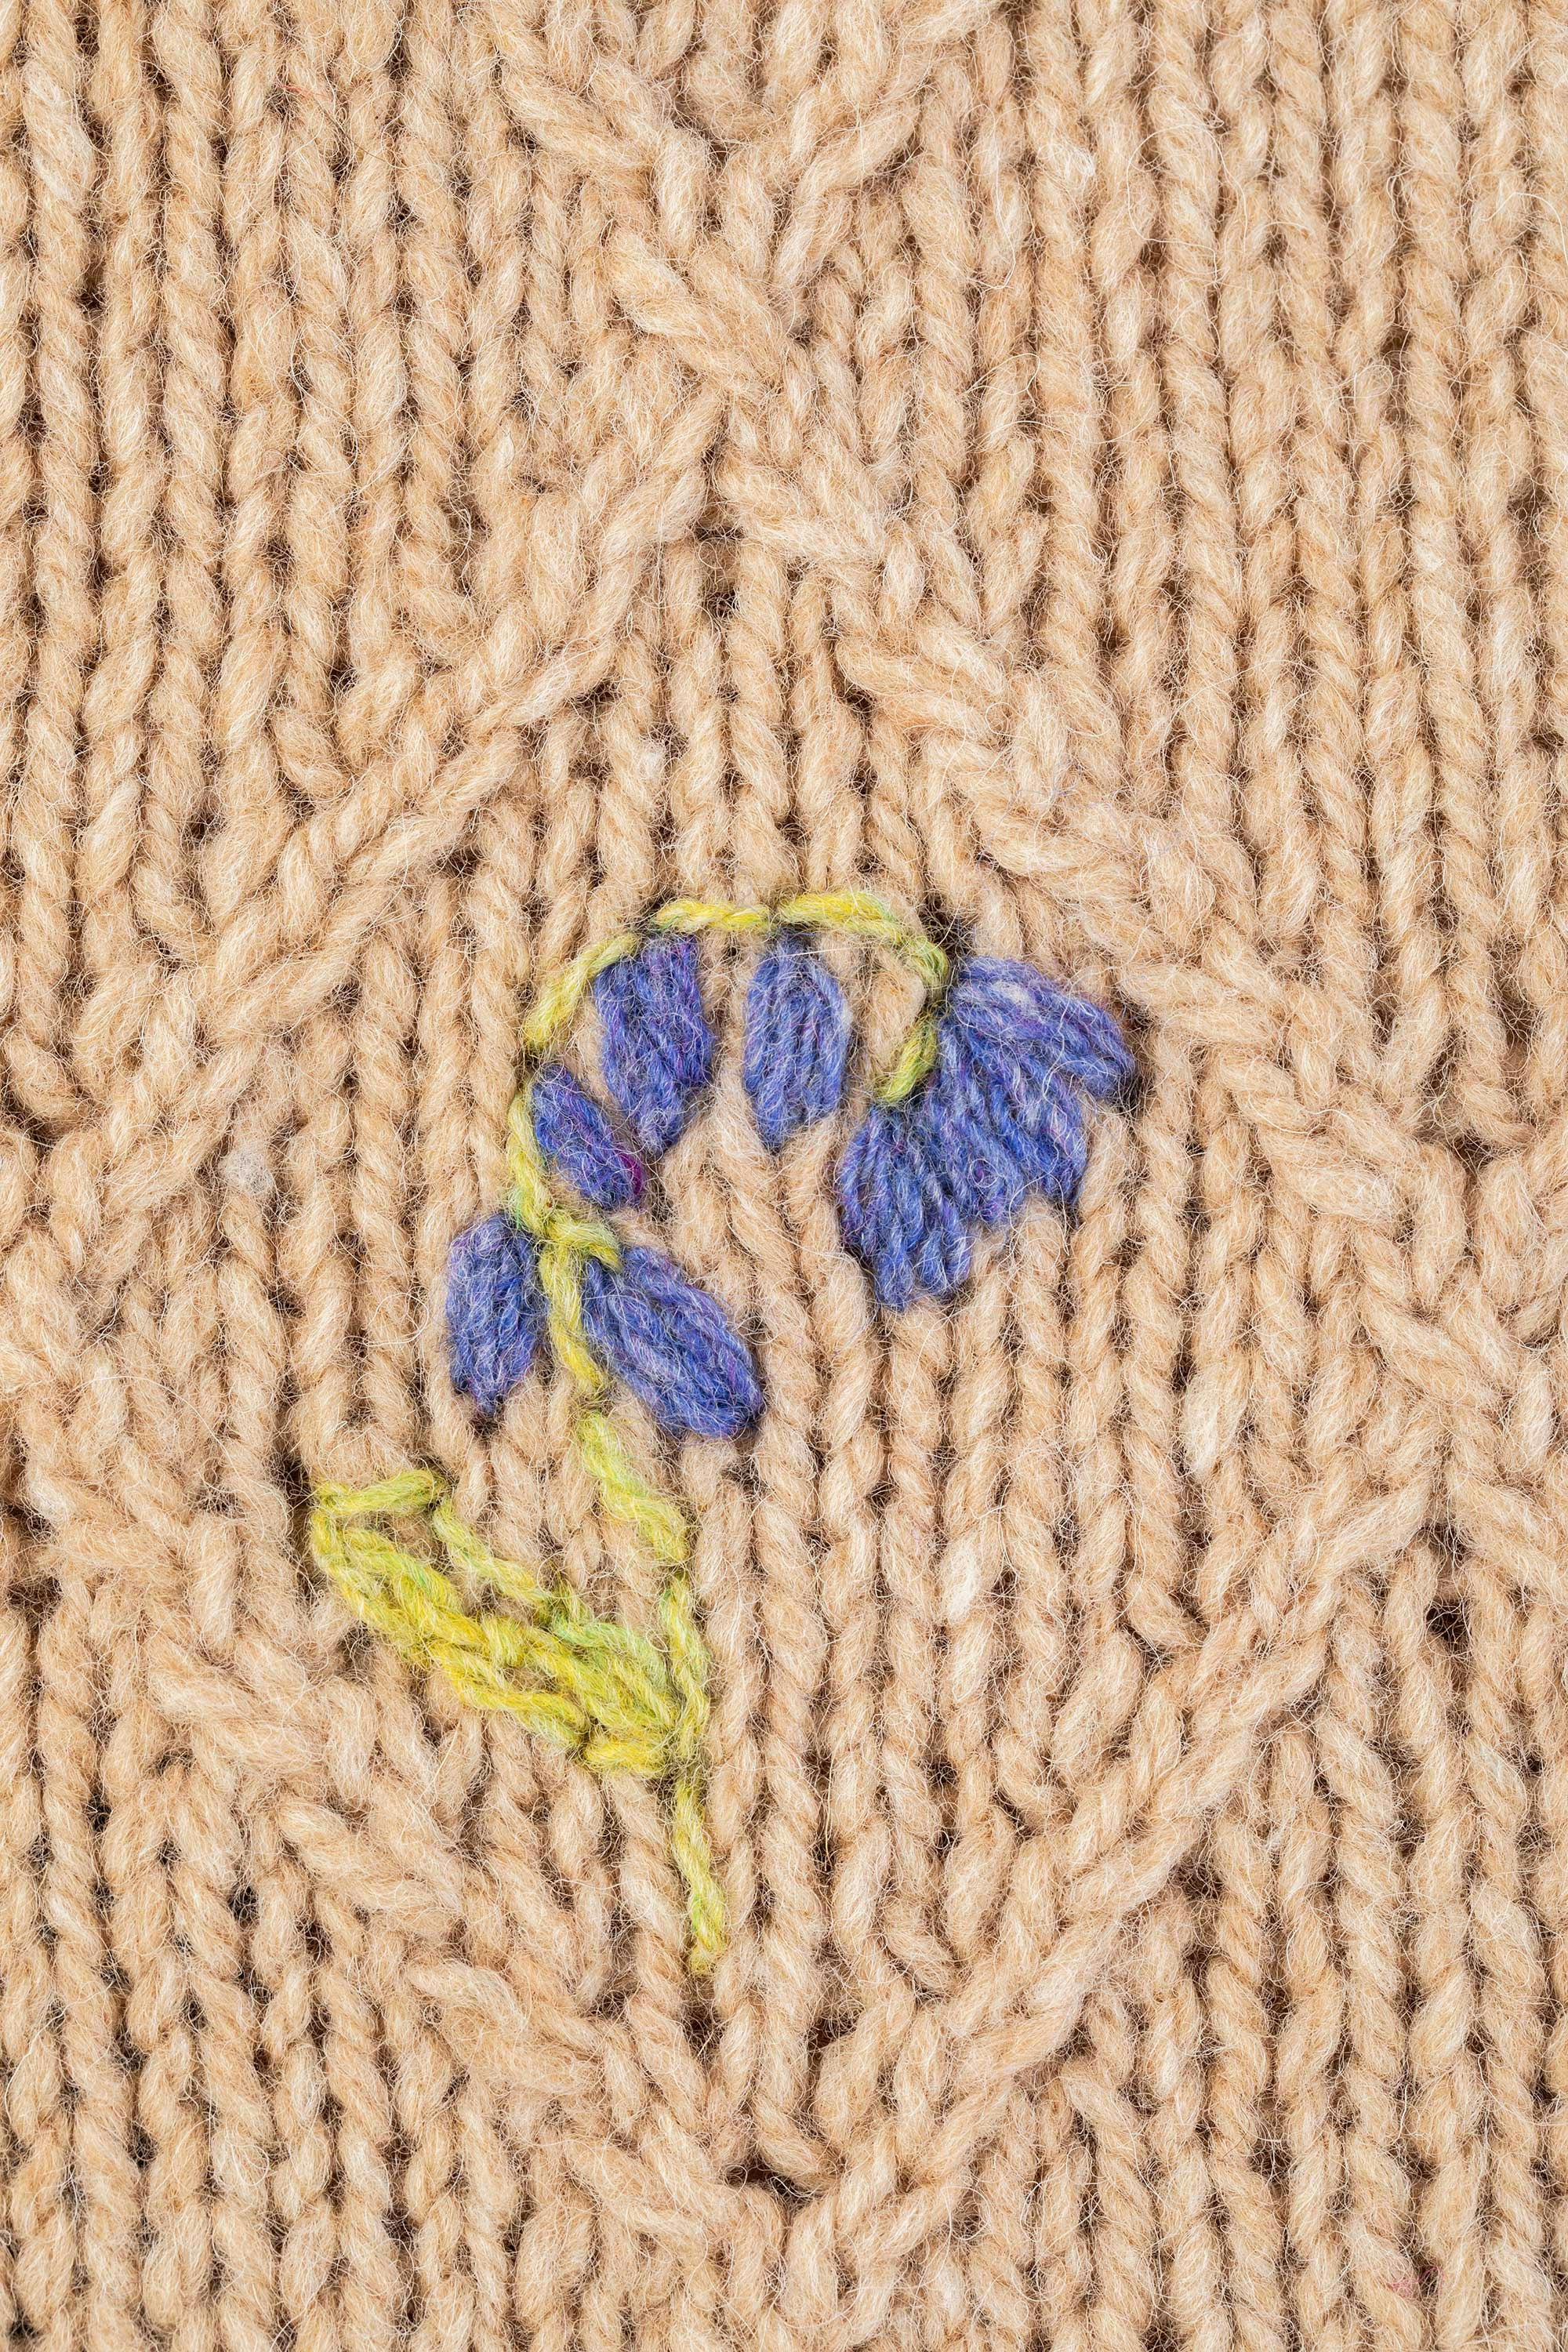
When most people hear the term embroidery, this is the style they think of. This technique does not follow a grid, and the only limit is your imagination. For the Luisetta Vest, Hannah Thiessen Howard used a variety of stitches to create the garden of flowers on her vest, including stem stitch, satin stitch, French knots, and more. Plus, Hannah recommends using a fluffier strand of wool instead of a traditional embroidery thread. She said, “This helped the designs feel cohesive against the fabric, and hid a lot of my beginner mistakes.”
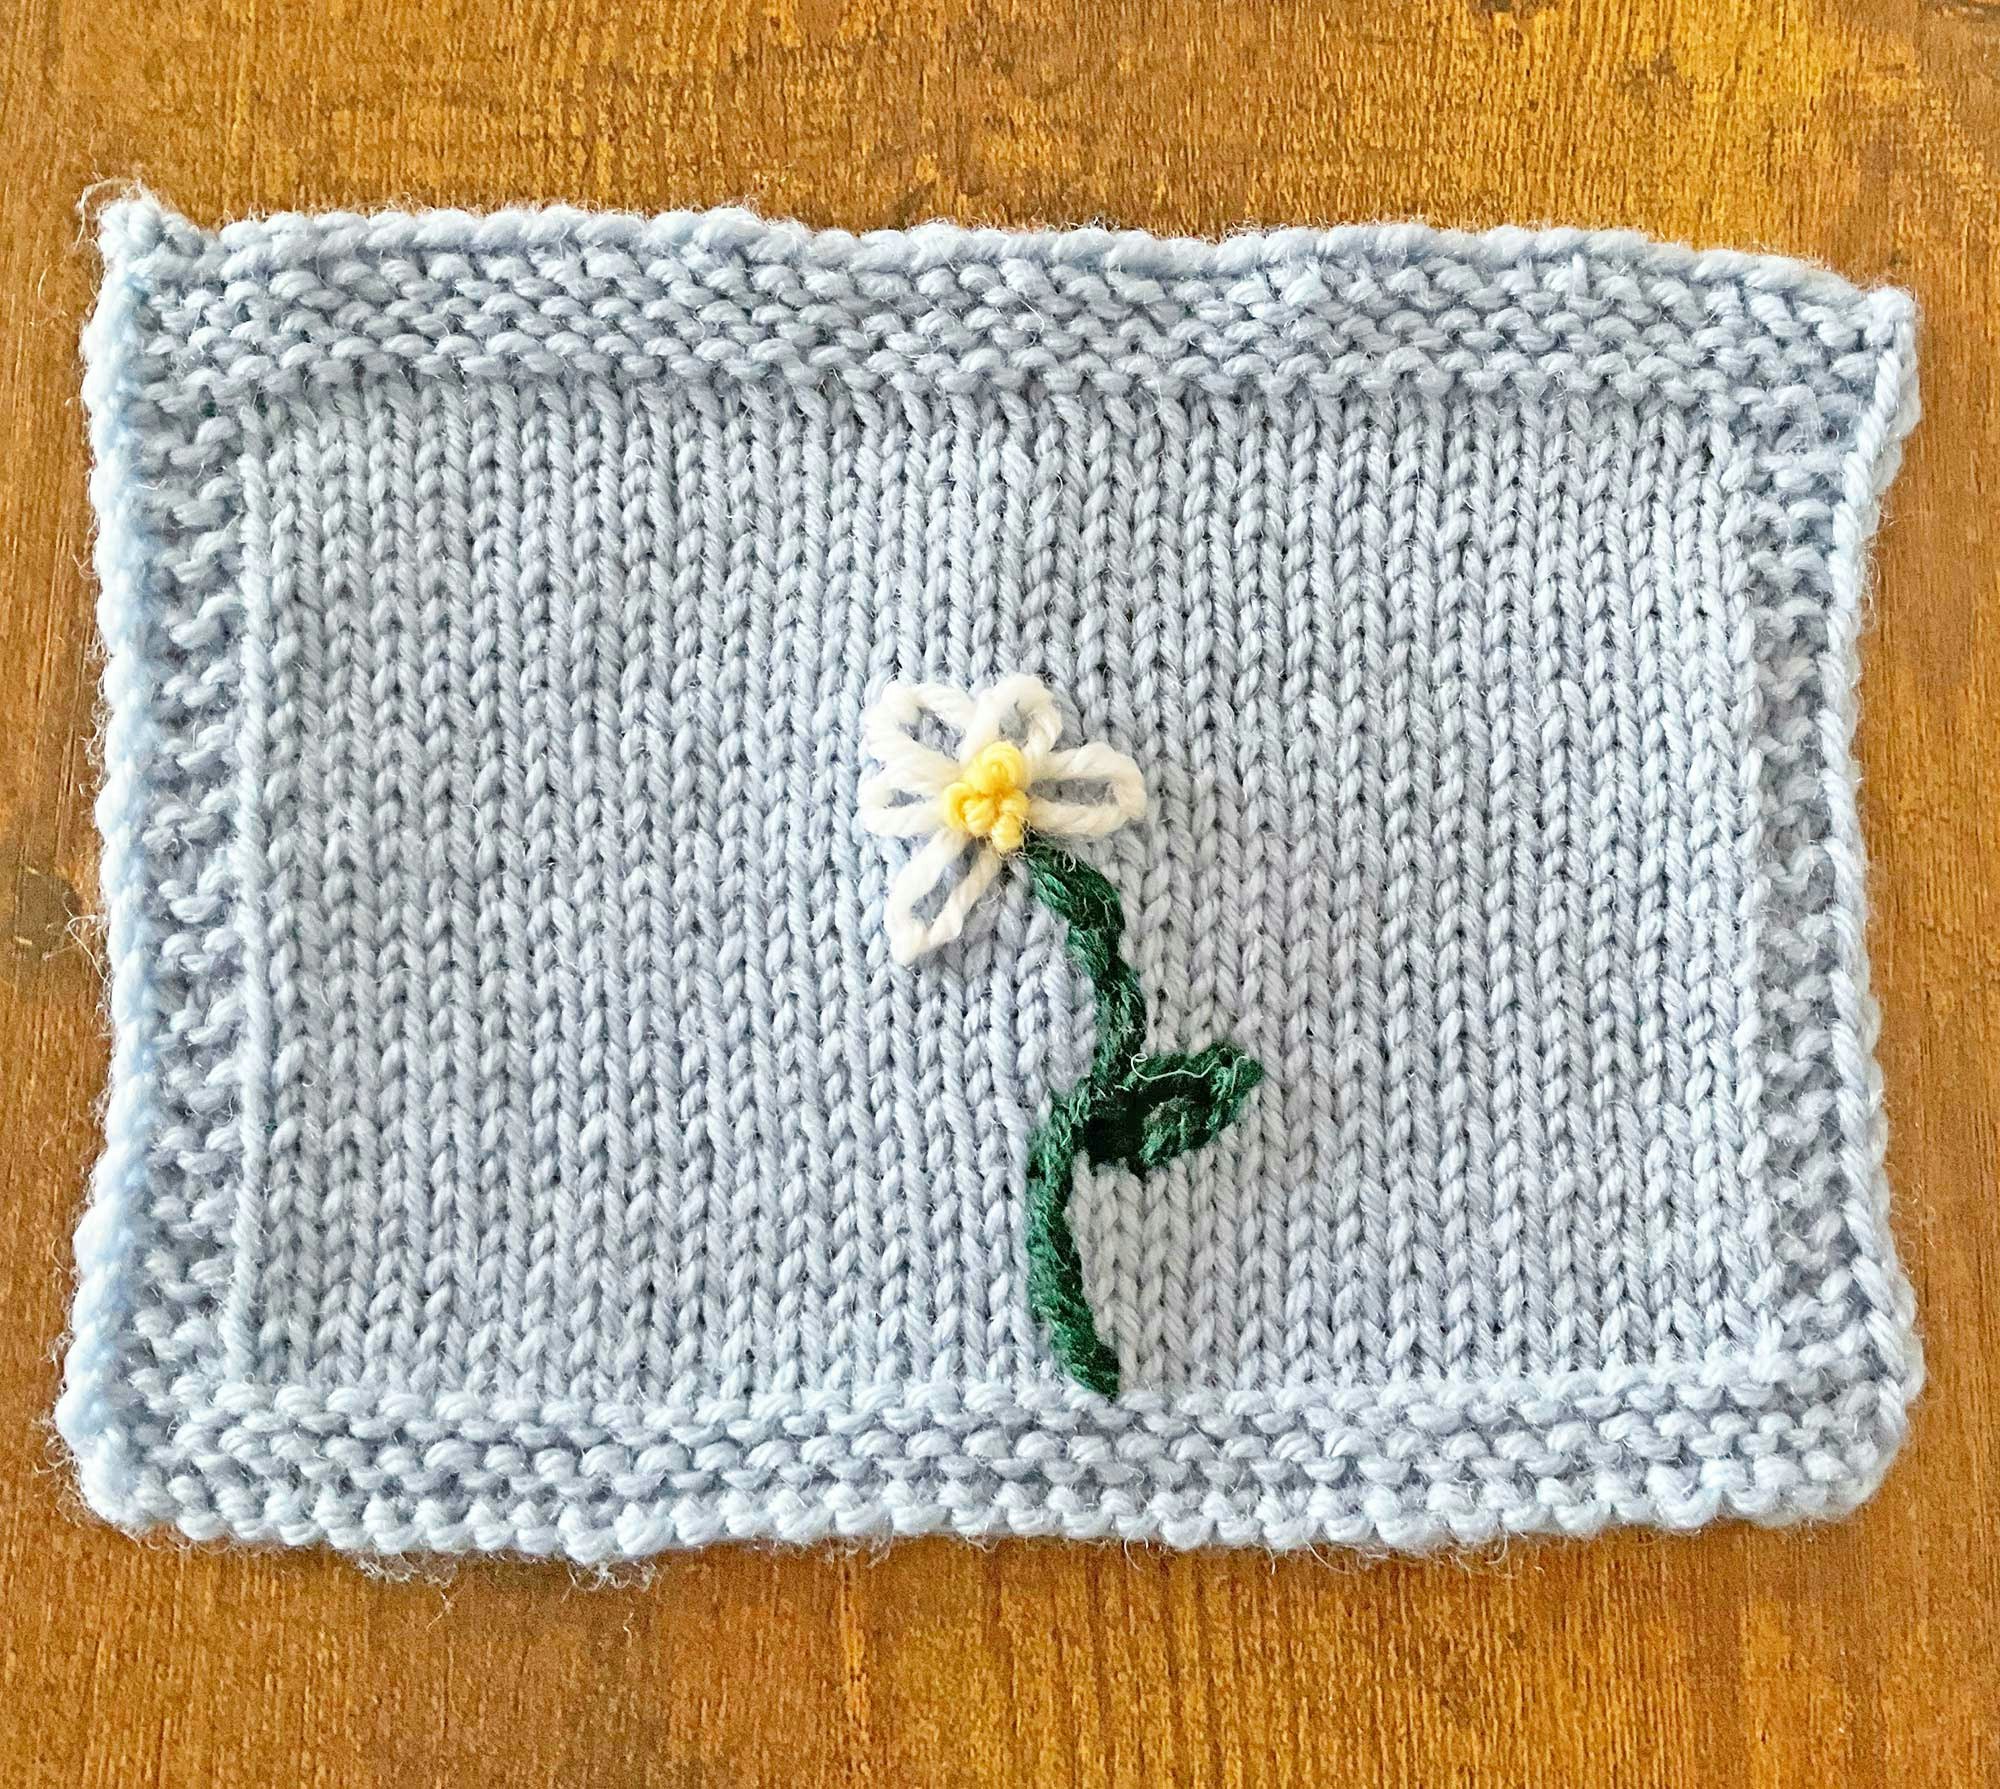
Get a closer look at Katrina's and Hannah's embroidered details! Click any image in the gallery below to open it in full-screen mode.
Embroidery might not be your first craft, as it was for me. It can be a lovely way to add a personal element to your handknits. Stitching a name on a Christmas stocking for a child, charting a pattern of decorative flowers, or letting your inspiration run wild with needle and thread can bring a touch of cheer to your wardrobe.
—Katrina
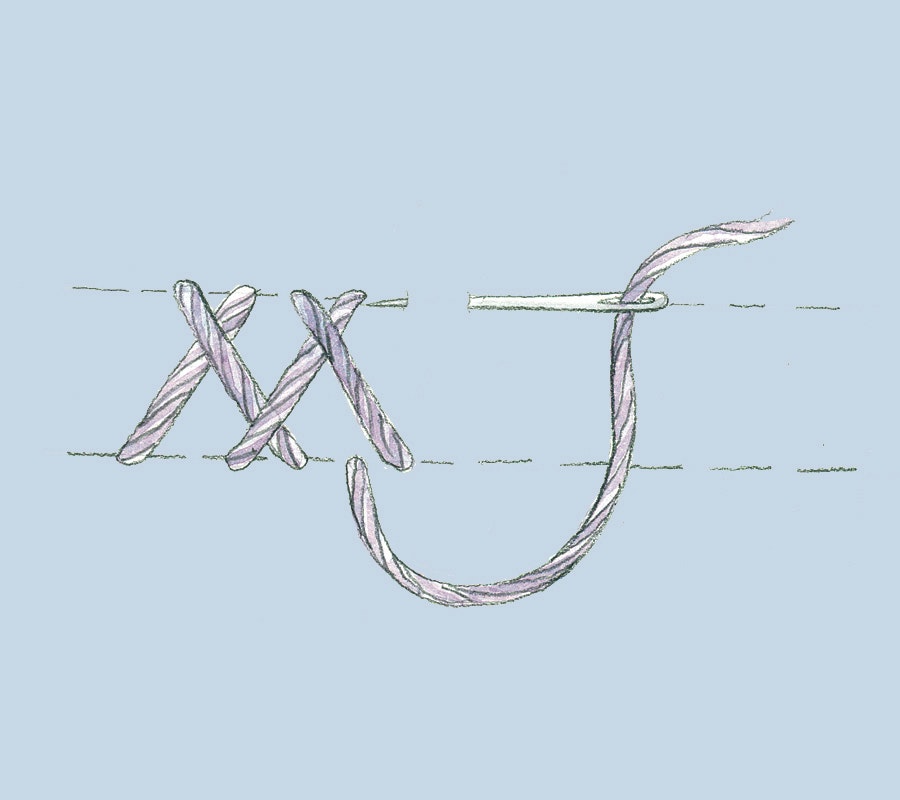
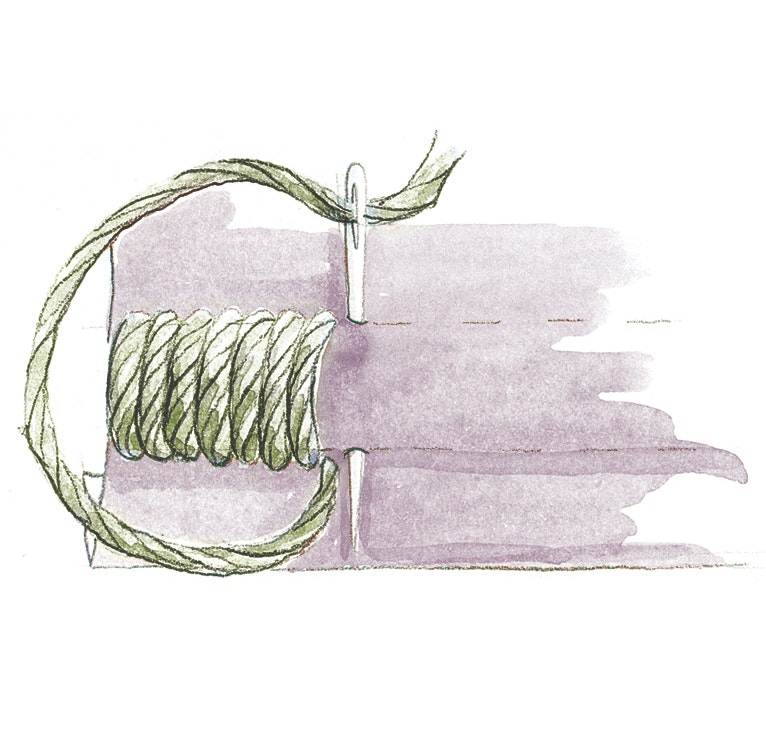
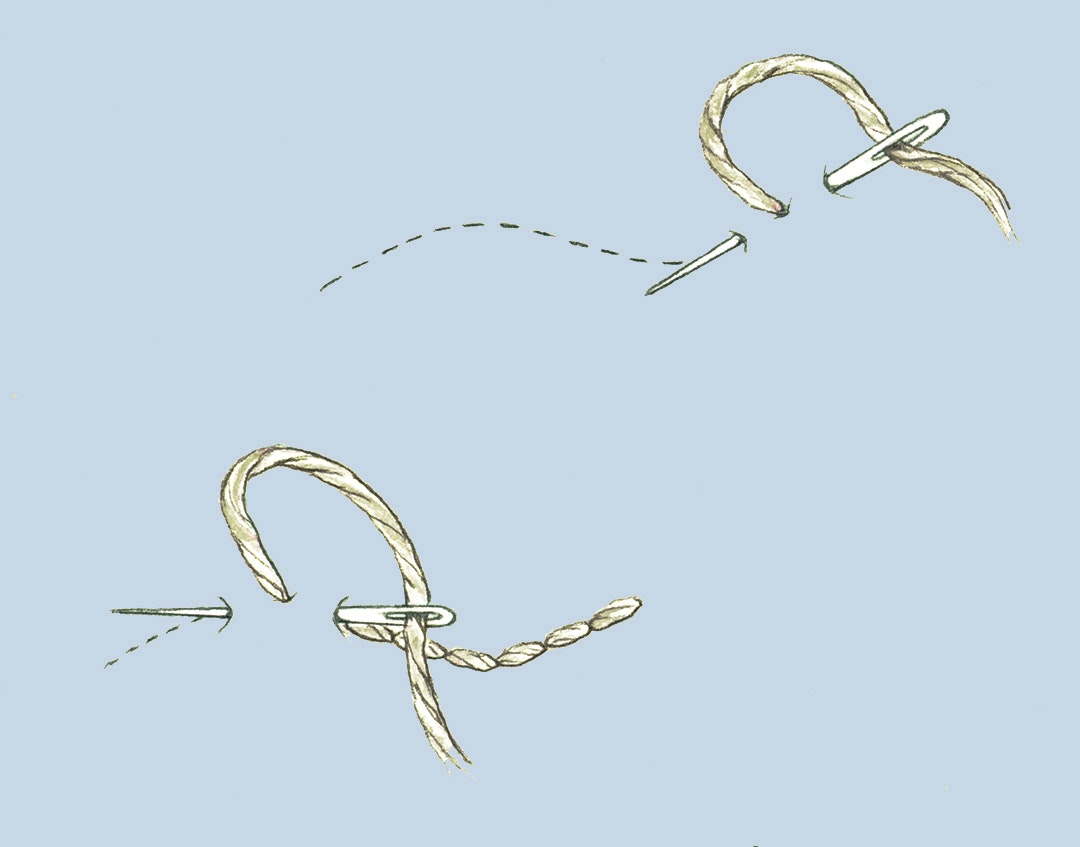
Basic Embroidery Stitches
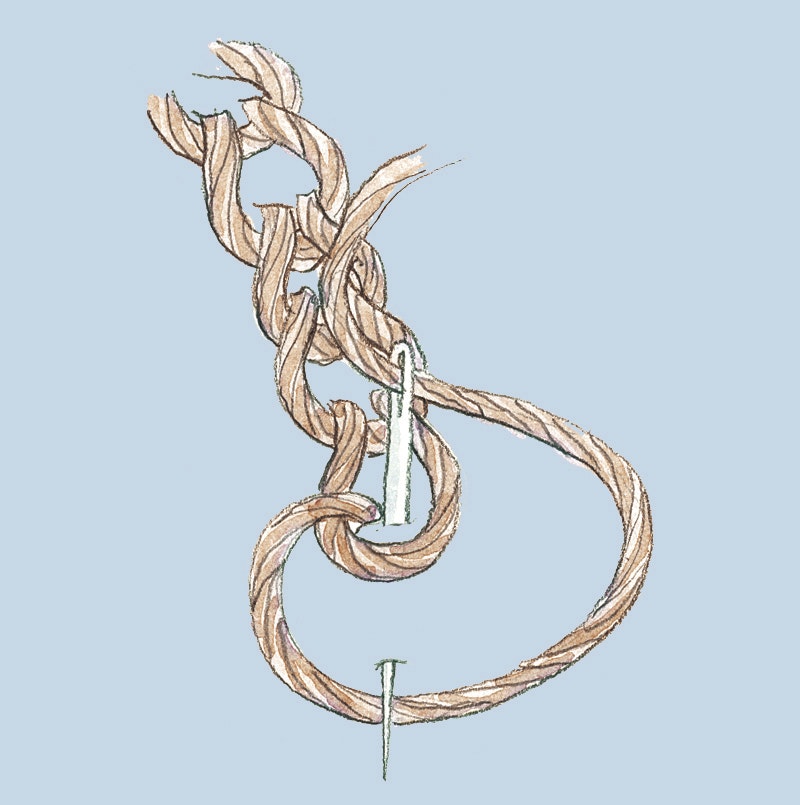
We've gathered some suggested stitches that work well on knits in this visual primer. If you are totally new to embroidery or just need a quick reminder of certain stitches, illustrations like these are all you need! They can be easier to interpret than long-form instructions for many of us.
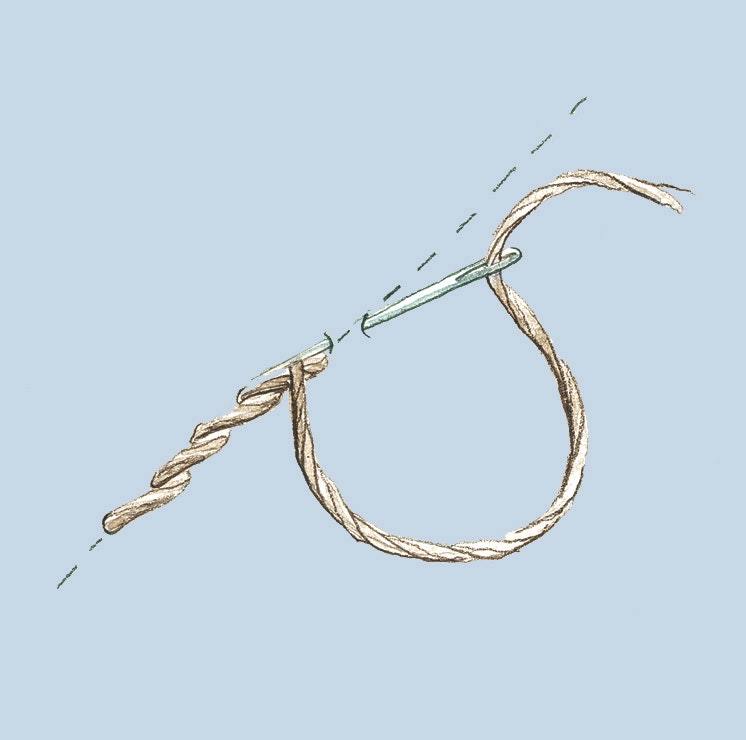
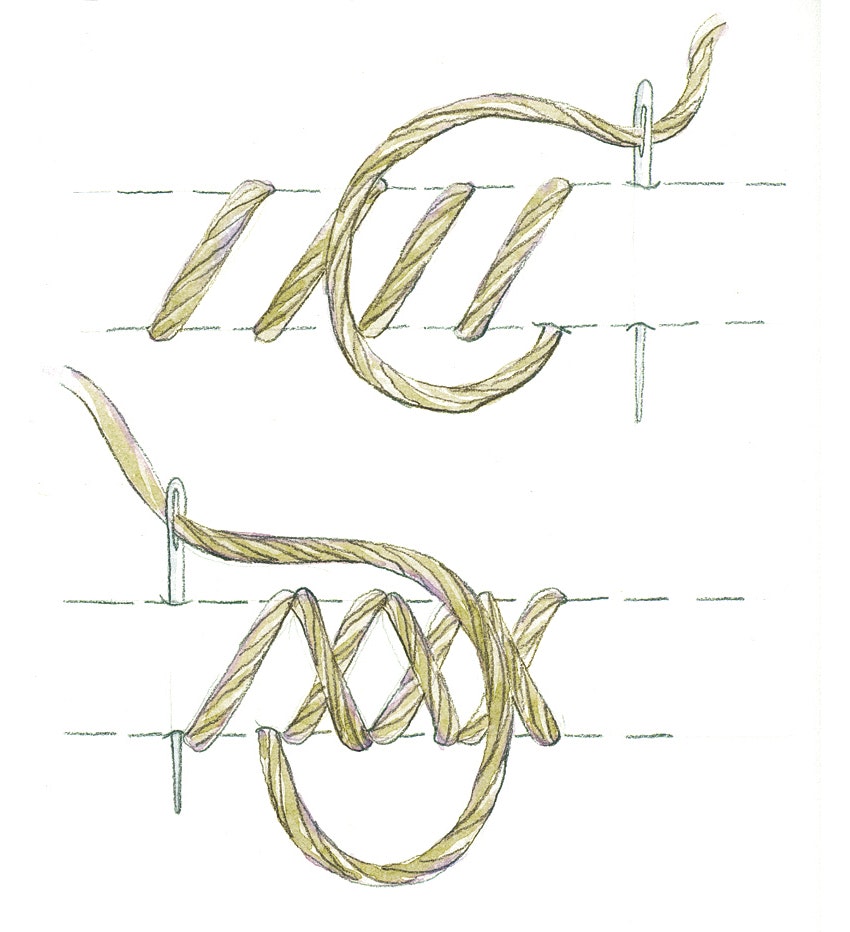
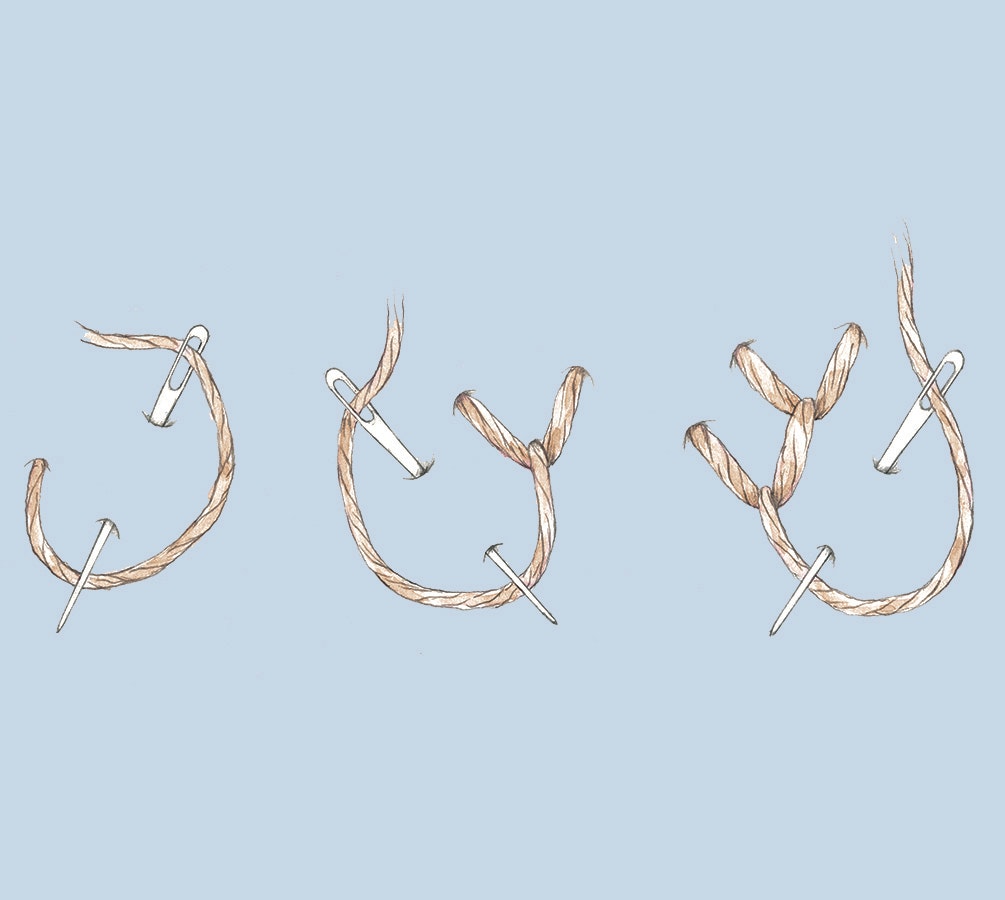
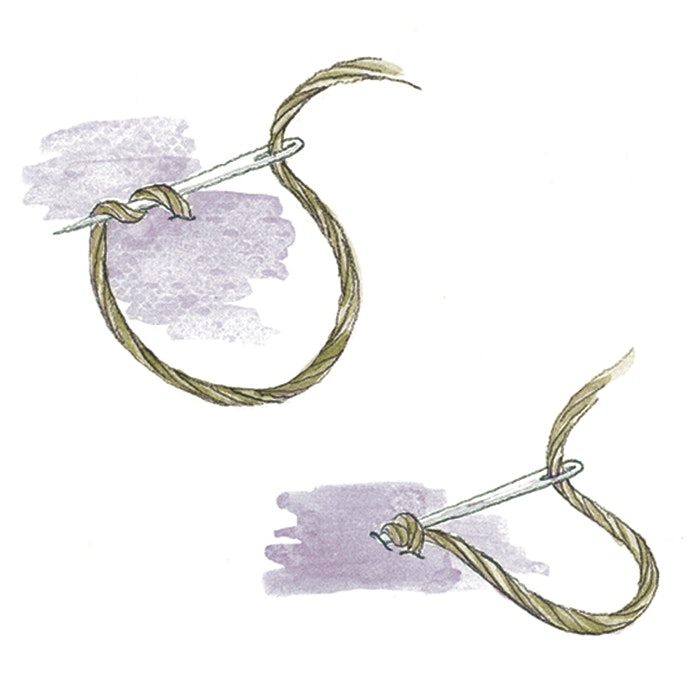
Take a close look at where the needle enters and exits the fabric.
Note where the working thread loops so it stays out of the way.
See if the needle is pointing in the direction the stitches are forming, at an angle to them, or in the opposite direction. (Examples from the top row below: For chain stitch, the needle points in the direction the stitches are forming. For blanket stitch, the needle is perpendicular to the row of stitches. For stem stitch, the needle is pointing the opposite direction.)
Click on any image in the gallery below for a closer look at each stitch and its name. Illustrations by Ann Sabin Swanson