Visible Mending for Handknits: Darning Looms and More
Learn three ways of mending your beloved sweaters before you put them away for the summer. Plus, see how to get started using a darning loom with our helpful video.
Learn three ways of mending your beloved sweaters before you put them away for the summer. Plus, see how to get started using a darning loom with our helpful video. <a href="https://farmfiberknits.com/visible-mending-for-handknits-darning-looms-and-more/">Continue reading.</a>
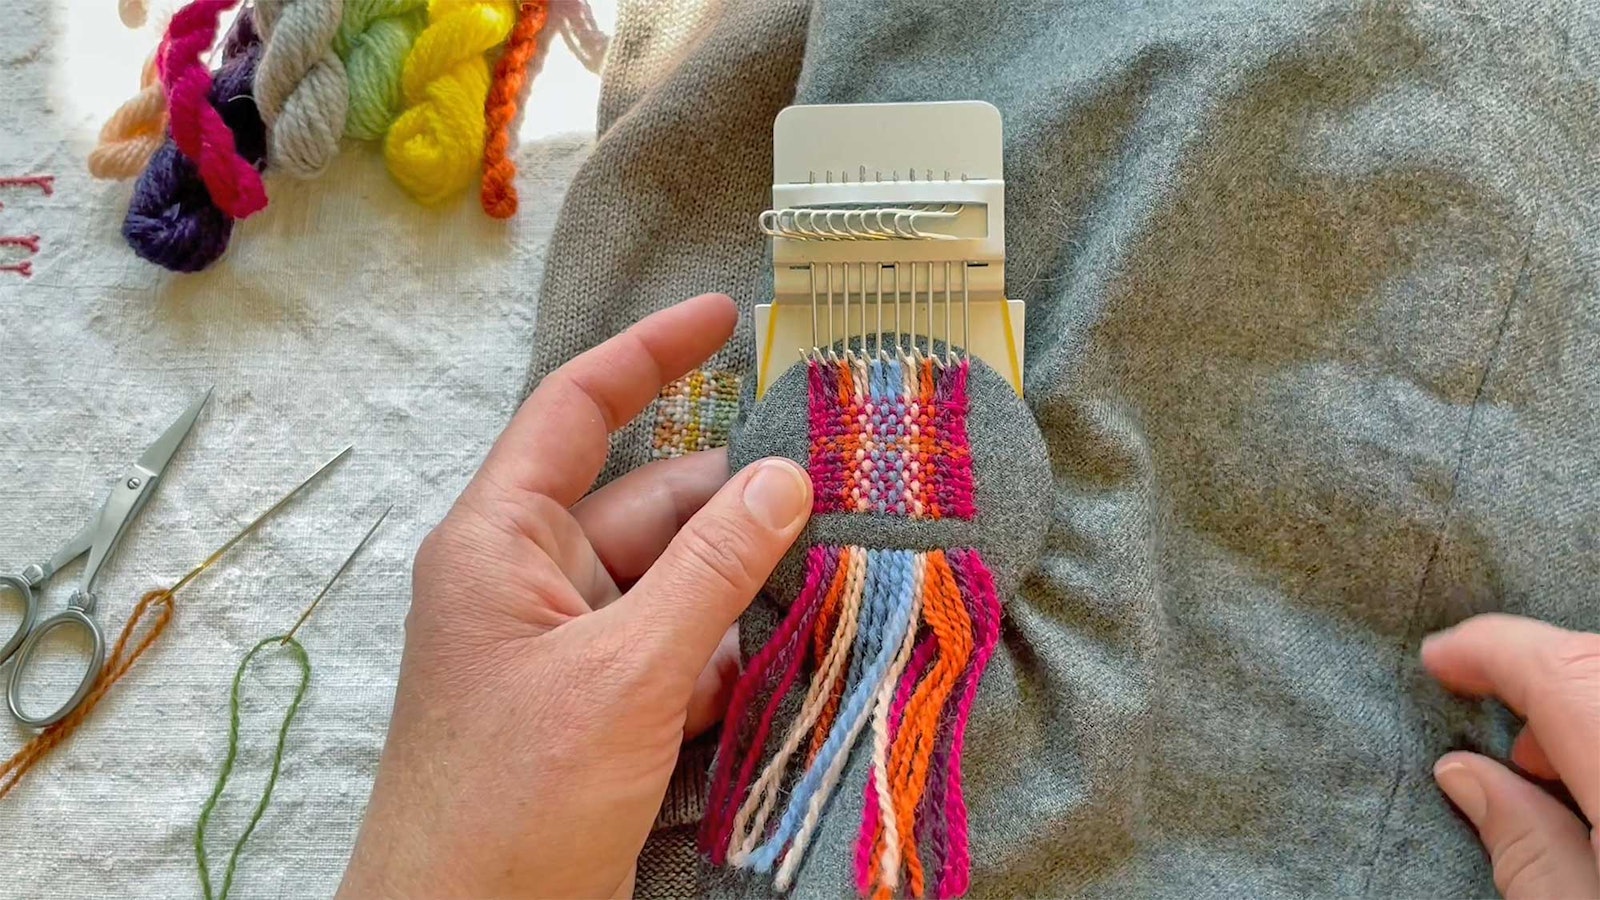
Do you love the look of visible mending but feel like you need some help getting started? Darning looms are a great way to help you get the hang of the darning process. Photo from Visible Mending with a Darning Loom, Long Thread Media
Many of us are used to darning the holes in our handknit socks. But you may be unsure how to mend a hole that’s been worn in the elbow of a favorite sweater or how to repair a spot left behind by a moth. Swiss darning is a great way to cover up a moth hole and will look seamless if you use a matching yarn. Or you may choose to create a colorful embellishment using a palette of colors. Create woven patches with a pin loom and stitch on top of the worn spot, or use a darning loom to weave a patch into the fabric itself.
Swiss Darning
Swiss darning—also called duplicate stitch—is one method that’s easy to learn. Adding new yarn over the top of knitted stitches allows the new stitches to stretch in the same directions as the knitted base.
Swiss Darning Steps
Tools:
* Tapestry (blunt) needle
* Mending yarn
* A form of some type, such as a darning egg or mushroom (a plastic lid or an apple will work equally well)
Photos by Matt Graves
Step 1. Secure your knitted fabric over the form using a ribbon or elastic so the fabric is stable but not stretched. Insert the needle a few inches from where you intend to begin your mend. Bring the needle point to the right side (RS) in the center of the stitch below the one you want to duplicate.
Step 2. Insert the needle behind both legs of the stitch above the one you wish to duplicate; pull the yarn through.
Step 3. Insert the needle at the base of the stitch you are duplicating, pass it behind one leg of the stitch below and one leg of the adjacent stitch below; pull the yarn through. Repeat Steps 2 and 3 until you have duplicated the final stitch of the row. The working yarn will be one stitch beyond the end of your mend.
SUBSCRIBER EXCLUSIVE
Unlock the Full Article with a Farm & Fiber Knits Subscription
Get instant access to this article and the entire Farm & Fiber Knits library of projects, inspiration, and expert instruction. With your subscription, you'll receive:
Connect more deeply with your yarn—learn the stories of farmers, shepherds, and dyers
Knit patterns that celebrate natural fibers and slow, intentional making
Support a community of small farms, women makers, and independent yarn companies
Includes print and digital issues of Farm & Fiber Knits, delivered directly to you
With must-knit projects and unforgettable stories, Farm & Fiber Knits invites you to see the craft world through fresh eyes.
Plans start at just $5.83/month (paid annually). Cancel anytime.
Many of us are used to darning the holes in our handknit socks. But you may be unsure how to mend a hole that’s been worn in the elbow of a favorite sweater or how to repair a spot left behind by a moth. Swiss darning is a great way to cover up a moth hole and will look seamless if you use a matching yarn. Or you may choose to create a colorful embellishment using a palette of colors. Create woven patches with a pin loom and stitch on top of the worn spot, or use a darning loom to weave a patch into the fabric itself.
Swiss Darning
Swiss darning—also called duplicate stitch—is one method that’s easy to learn. Adding new yarn over the top of knitted stitches allows the new stitches to stretch in the same directions as the knitted base.
Swiss Darning Steps
Tools:
* Tapestry (blunt) needle
* Mending yarn
* A form of some type, such as a darning egg or mushroom (a plastic lid or an apple will work equally well)
Photos by Matt Graves
Step 1. Secure your knitted fabric over the form using a ribbon or elastic so the fabric is stable but not stretched. Insert the needle a few inches from where you intend to begin your mend. Bring the needle point to the right side (RS) in the center of the stitch below the one you want to duplicate.
Step 2. Insert the needle behind both legs of the stitch above the one you wish to duplicate; pull the yarn through.
Step 3. Insert the needle at the base of the stitch you are duplicating, pass it behind one leg of the stitch below and one leg of the adjacent stitch below; pull the yarn through. Repeat Steps 2 and 3 until you have duplicated the final stitch of the row. The working yarn will be one stitch beyond the end of your mend. [PAYWALL]
Step 4. Now insert the needle from left to right, catching the bar on the WS of the fabric beside the mend. Bring the needle tip to the RS in the center of the stitch below the one you wish to duplicate; pull the yarn through.
Step 5. The working yarn is now secured below the next stitch to be duplicated, which is in the row above the one just worked. Insert the needle from left to right behind the two legs of the stitch above the one you will be duplicating; pull the yarn through. Continue creating duplicated stitches in this way until you have completed your mend.
Step 6. When the mend is finished, pull the yarn tails to the back and secure.
You can weave small patches on a pin loom and stitch them together for a decorative edging, as shown on the collar of this sweater. Photo by Susan Horton
Pin-Loom Patches
Former Handwoven editor Susan Horton used a hexagon-shaped pin loom to add a decorative edge to a sweater where the seam was falling apart. With visible mending in mind, Susan wove six gray and white hexagons using a 1" loom and soft cotton yarn. She then used the tails to sew them together into a strip and sewed the strip over the seam.
Create plain-weave patches in one color on a darning loom, or add stripes by using scraps of different colored yarns. Photo from the videoVisible Mending with a Darning Loom,Long Thread Media
Darning Loom
Visible mending using a darning loom is another great way to breathe new life into your well-worn handknits. Darning looms are a great way to corral your mends and help you get the hang of the darning process.
What Is a Darning Loom?
Darning looms, also known as Speedweves, are an easy way to mend or simply embellish your garments. Some looms have a mechanism that flips hooks left and right to change the shed to make weaving faster. The warp threads can be continuous, as in the orange yarn above, or separate, as in the image at top. Using separate threads allows you to use more colors during warping, and it also lets you adjust the warp-thread tension during weaving.
Spinner, weaver, and instructor Kate Larson shows you how to warp using the two most common methods in the following video. Play with functional and fun designs as you mend, repair, and decorate with visible mending and colorful patches.
Spin Off contributor Madeline Keller-King mended her sister’s beloved cardigan with two different mending looms: the pocket patch was woven with an Alexon Ver Speedweve-style loom (shown below), and the sleeve patch was woven with a Katrinkles Bigger darning loom. Contributor Miriam Felton shares a great hack for adapting a darning loom to the larger-gauge yarn she wanted to use. Most mending looms are based on vintage designs that used fine yarns (think fingering and laceweight yarns). When mending her handknitted cardi Miriam wanted to use a handspun DK-weight yarn, so she skipped every other hook on the loom.
Madeline Keller-King used two types of mending looms to create woven patches of different sizes. Photo by Matt Graves
Final Thoughts on Mending
Not all mends need to be indestructible. If a woven patch will cover a moth hole or stain, it might not be in the area of the garment that receives much abrasion. Using a yarn with a medium or low twist means that the fiber has more space to open up and create loft, resulting in a softer darned patch that melds into the original garment more effectively.
Consider how your fabric will be used and laundered. Will you want to use cotton threads for a sturdy garment? Or silk on delicate items that will be hand-washed? A safe approach is to mend like with like—wool with wool, cotton with cotton. However, there are no rules. With some practice, you’ll learn what you like and repair your textiles in the process.
Keep in mind that it’s best to mend knitted fabrics before they develop holes from wear (such as on sweater elbows) or as soon as you find a hole (such as from moth damage). While it is possible to use a darning loom to patch gaps in the fabric, it is certainly more difficult. Mending while the fabric is still intact and unstretched is faster, easier, and leads to neater mends.
Debbie Blair is the associate editor of Spin Off magazine. A lifelong crafter and avid reader, she finds her happy place reading and relaxing next to a mountain stream.

 Photos by Matt Graves
 You can weave small patches on a pin loom and stitch them together for a decorative edging, as shown on the collar of this sweater. Photo by Susan Horton
 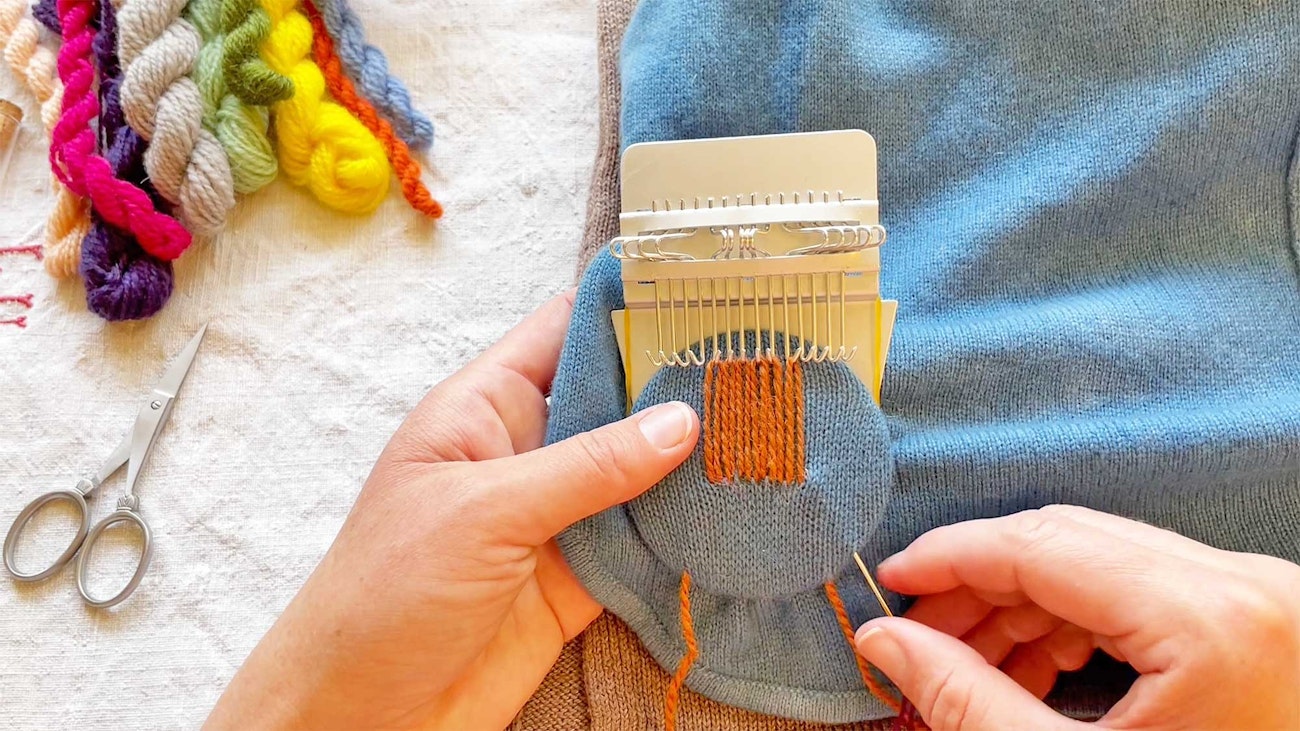 Create plain-weave patches in one color on a darning loom, or add stripes by using scraps of different colored yarns. Photo from the video
  Madeline Keller-King used two types of mending looms to create woven patches of different sizes. Photo by Matt Graves