Subscriber Exclusive
Learn Magic Loop: How to Knit in the Round with Just One Needle
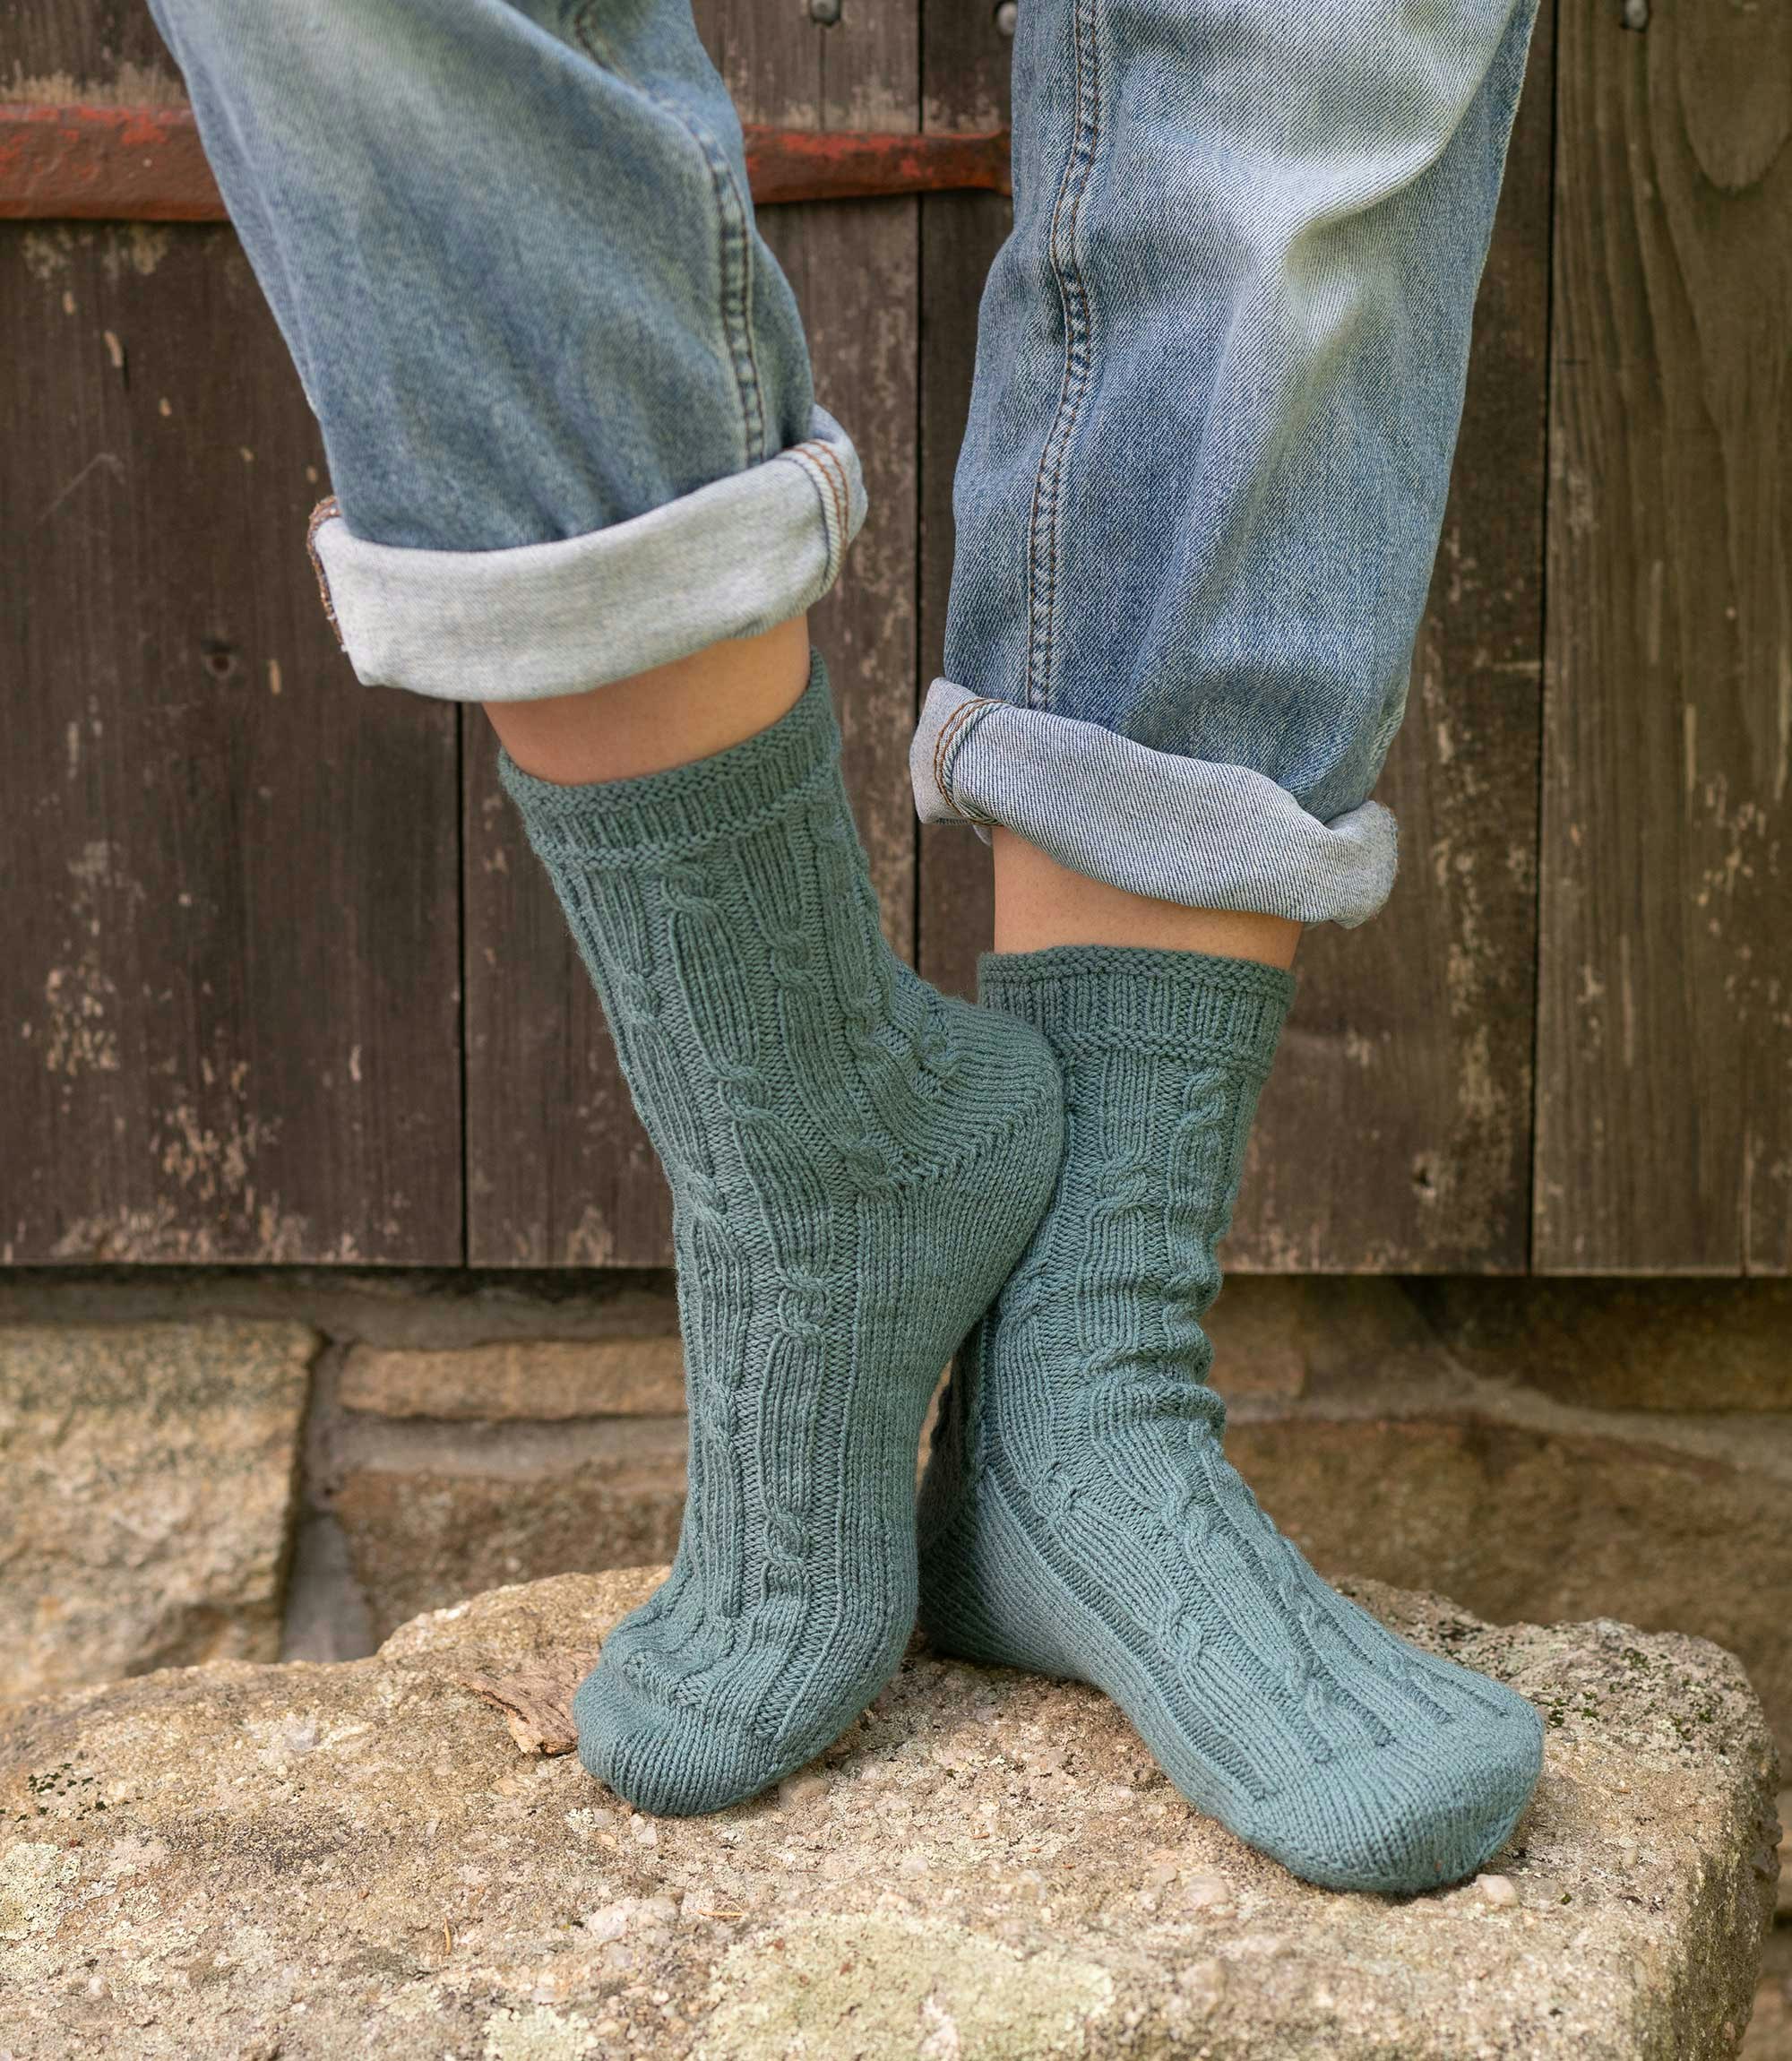
Knit socks, sleeves, and more in the round—no DPNs required!
Knit socks, sleeves, and more in the round—no DPNs required! <a href="https://farmfiberknits.com/learn-magic-loop-knit-in-the-round/">Continue reading.</a>
https://farmfiberknits.com/cdn-cgi/image/format=auto/https://www.datocms-assets.com/101500/1759440561-magic-loop-header.jpg?auto=format&w=900
With the Magic Loop, you can knit just about any project using only a long (32" or longer) circular needle.
Maybe you’ve never been comfortable knitting with double-pointed needles. Perhaps you’re away from home with a hat as your travel-knitting project and you forgot to pack double-pointed needles to shape the crown. Or you might prefer to limit the amount of money and/or storage space dedicated to your knitting tools. With a single 40" long circular needle, it is possible to knit an entire seamless sweater (no matter the size) in the round.
In the 1980s, knitter Sarah Hauschka developed the Magic Loop for knitting small-circumference tubes—think socks, gloves, or sleeve cuffs—in the round using a long circular needle. The method was popularized in a small booklet called The Magic Loop published by Fiber Trends in 2002.
Which Needles Work Best for the Magic Loop?
The cord connecting the needle tips is the key to a good experience with Magic Loop. A stiff cord will resist the bends that create the loops. A floppy cord will prevent the stitches from flowing smoothly from the cord onto the needle tip.
Look for a cord that is supple but not limp. For the photos, I used a 32" long Addi Ewenicorn Turbo needle. The cord has just the right degree of pliability for Magic Loop.
As to length, most devotees of the Magic Loop recommend 32" or 40". You need ample cord between the two needle tips.
How to Cast On for Magic Loop
To work the Magic Loop, cast on all of the stitches of the first round, then arrange them on the needles with the help of a removable stitch marker.
Click any image in the gallery below to open it in full-screen mode and follow the instructions.
SUBSCRIBER EXCLUSIVE
With the Magic Loop, you can knit just about any project using only a long (32" or longer) circular needle.
Maybe you’ve never been comfortable knitting with double-pointed needles. Perhaps you’re away from home with a hat as your travel-knitting project and you forgot to pack double-pointed needles to shape the crown. Or you might prefer to limit the amount of money and/or storage space dedicated to your knitting tools. With a single 40" long circular needle, it is possible to knit an entire seamless sweater (no matter the size) in the round.
In the 1980s, knitter Sarah Hauschka developed the Magic Loop for knitting small-circumference tubes—think socks, gloves, or sleeve cuffs—in the round using a long circular needle. The method was popularized in a small booklet called The Magic Loop published by Fiber Trends in 2002.
Which Needles Work Best for the Magic Loop?
The cord connecting the needle tips is the key to a good experience with Magic Loop. A stiff cord will resist the bends that create the loops. A floppy cord will prevent the stitches from flowing smoothly from the cord onto the needle tip.
Look for a cord that is supple but not limp. For the photos, I used a 32" long Addi Ewenicorn Turbo needle. The cord has just the right degree of pliability for Magic Loop.
As to length, most devotees of the Magic Loop recommend 32" or 40". You need ample cord between the two needle tips.
How to Cast On for Magic Loop
To work the Magic Loop, cast on all of the stitches of the first round, then arrange them on the needles with the help of a removable stitch marker.
Click any image in the gallery below to open it in full-screen mode and follow the instructions.
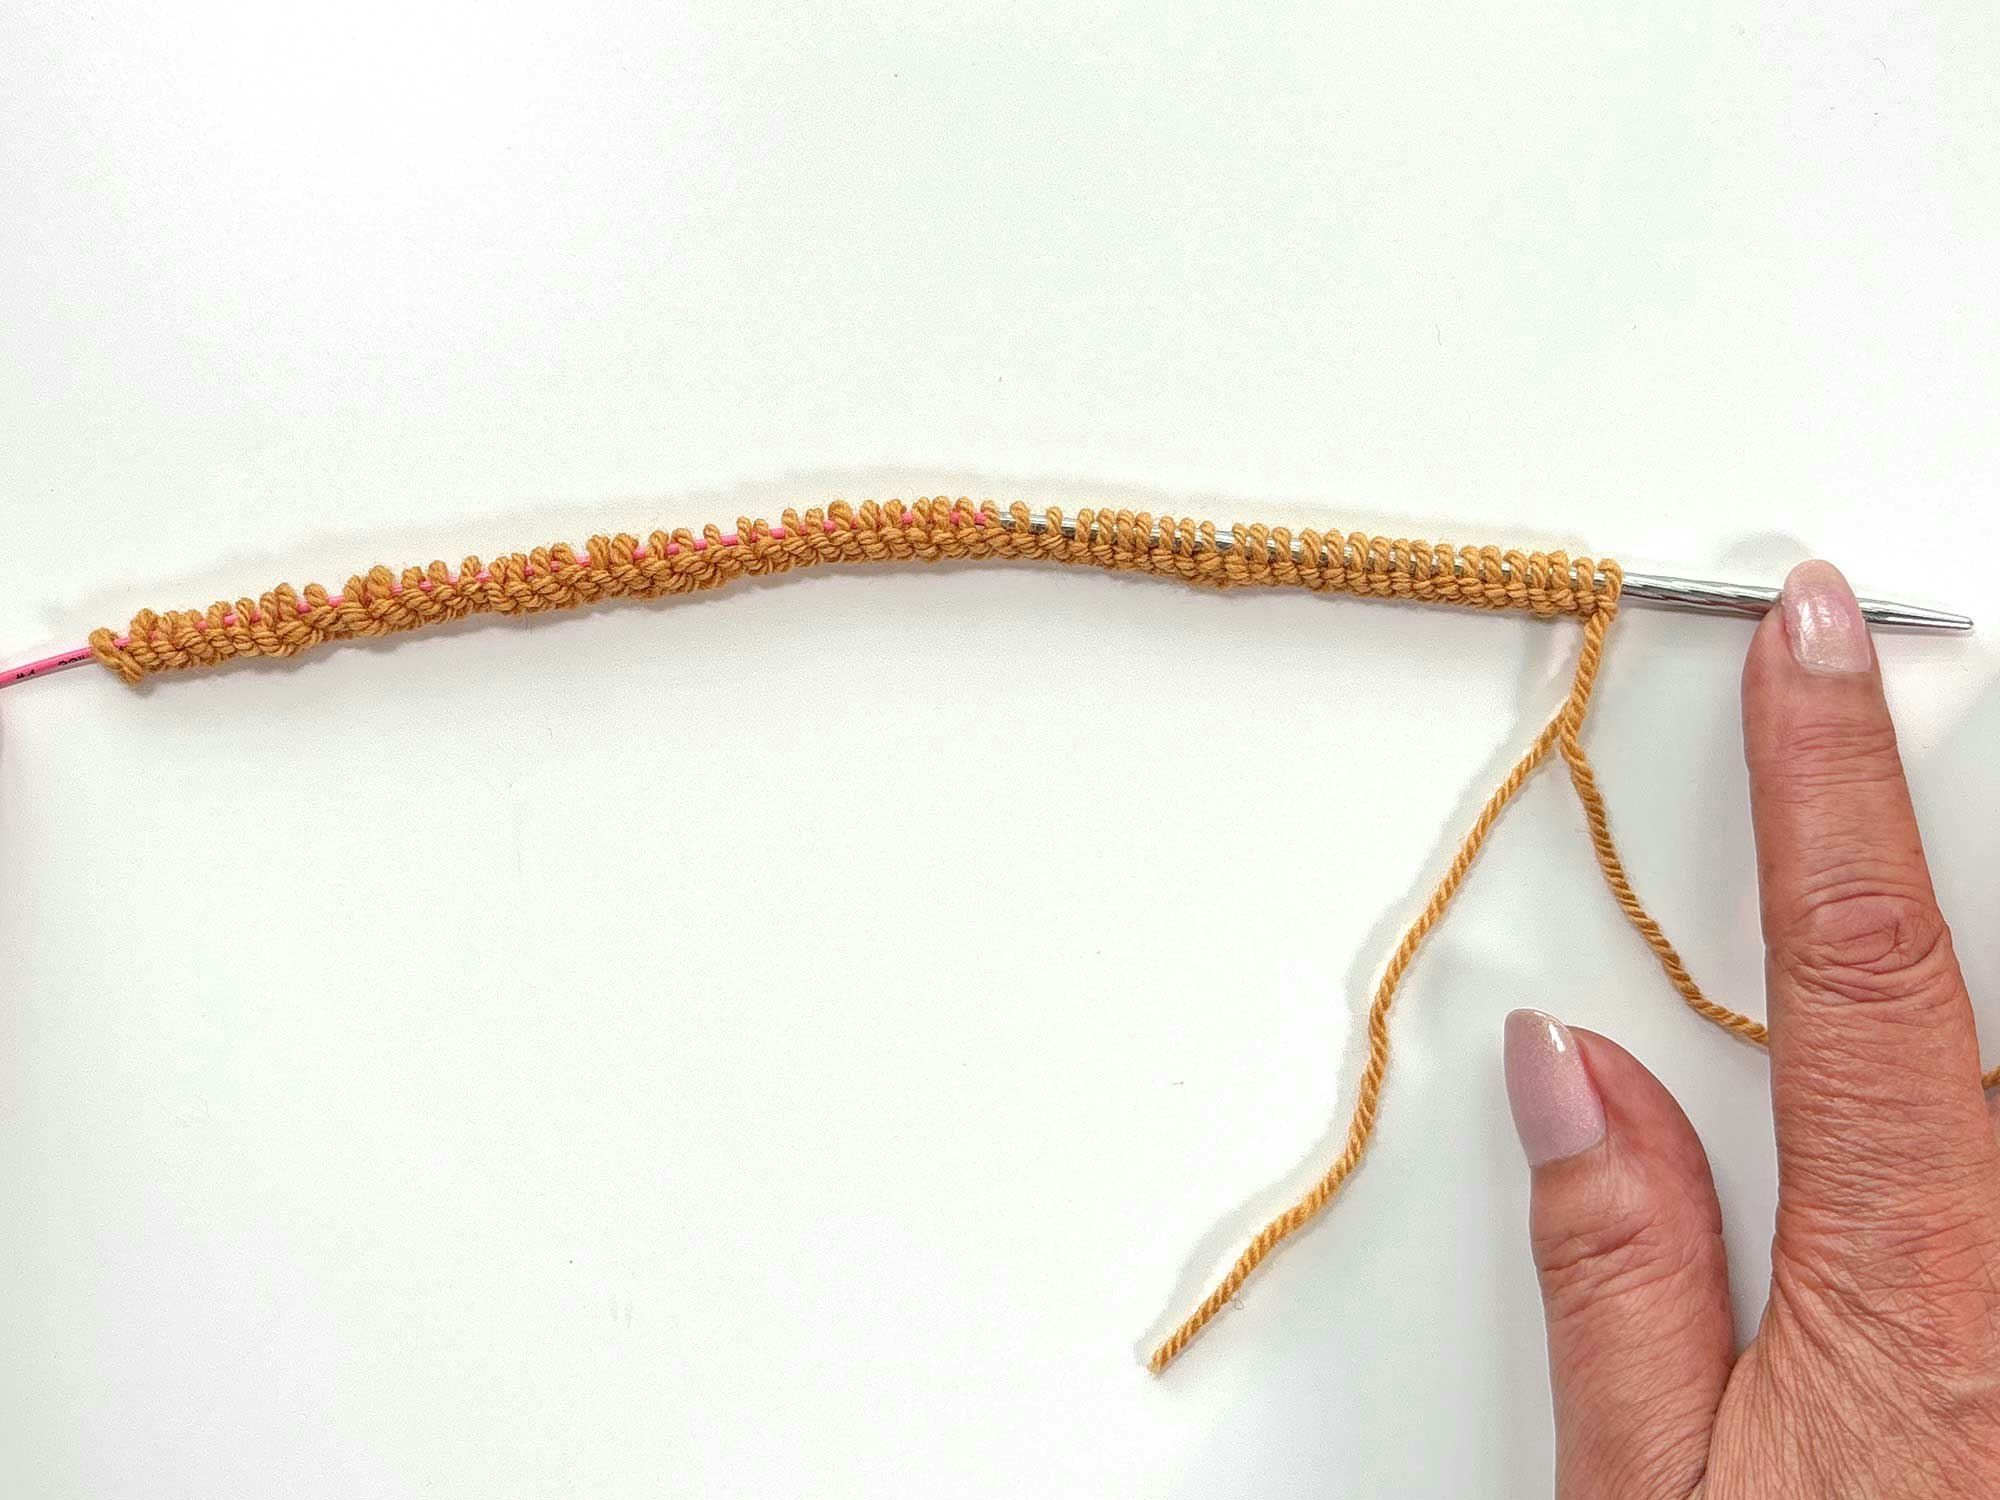
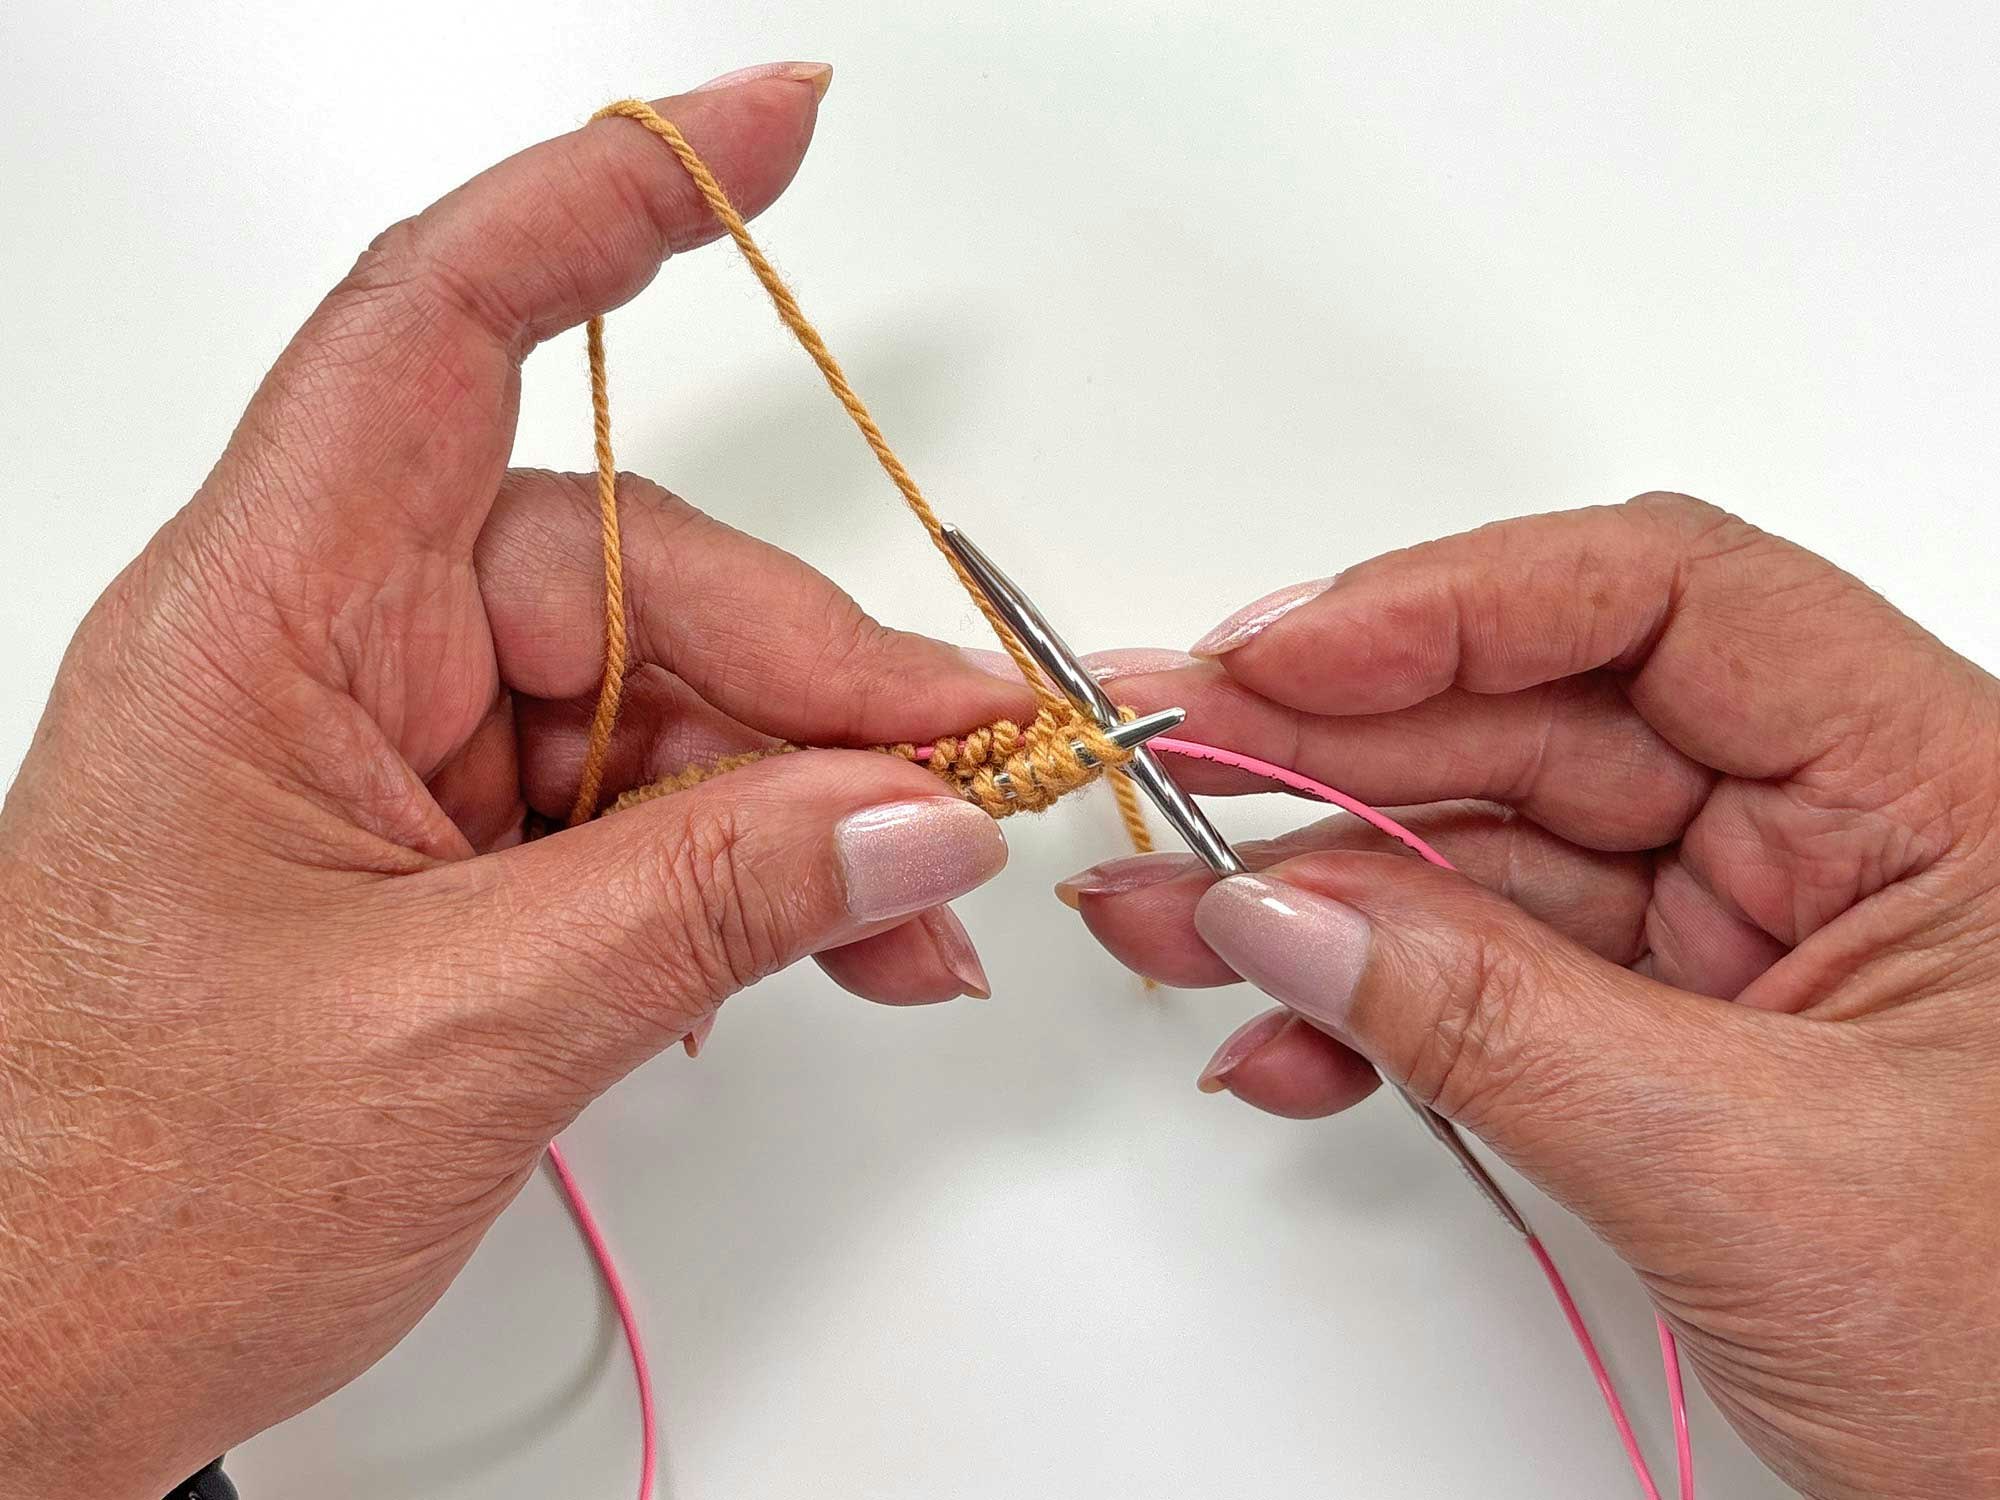
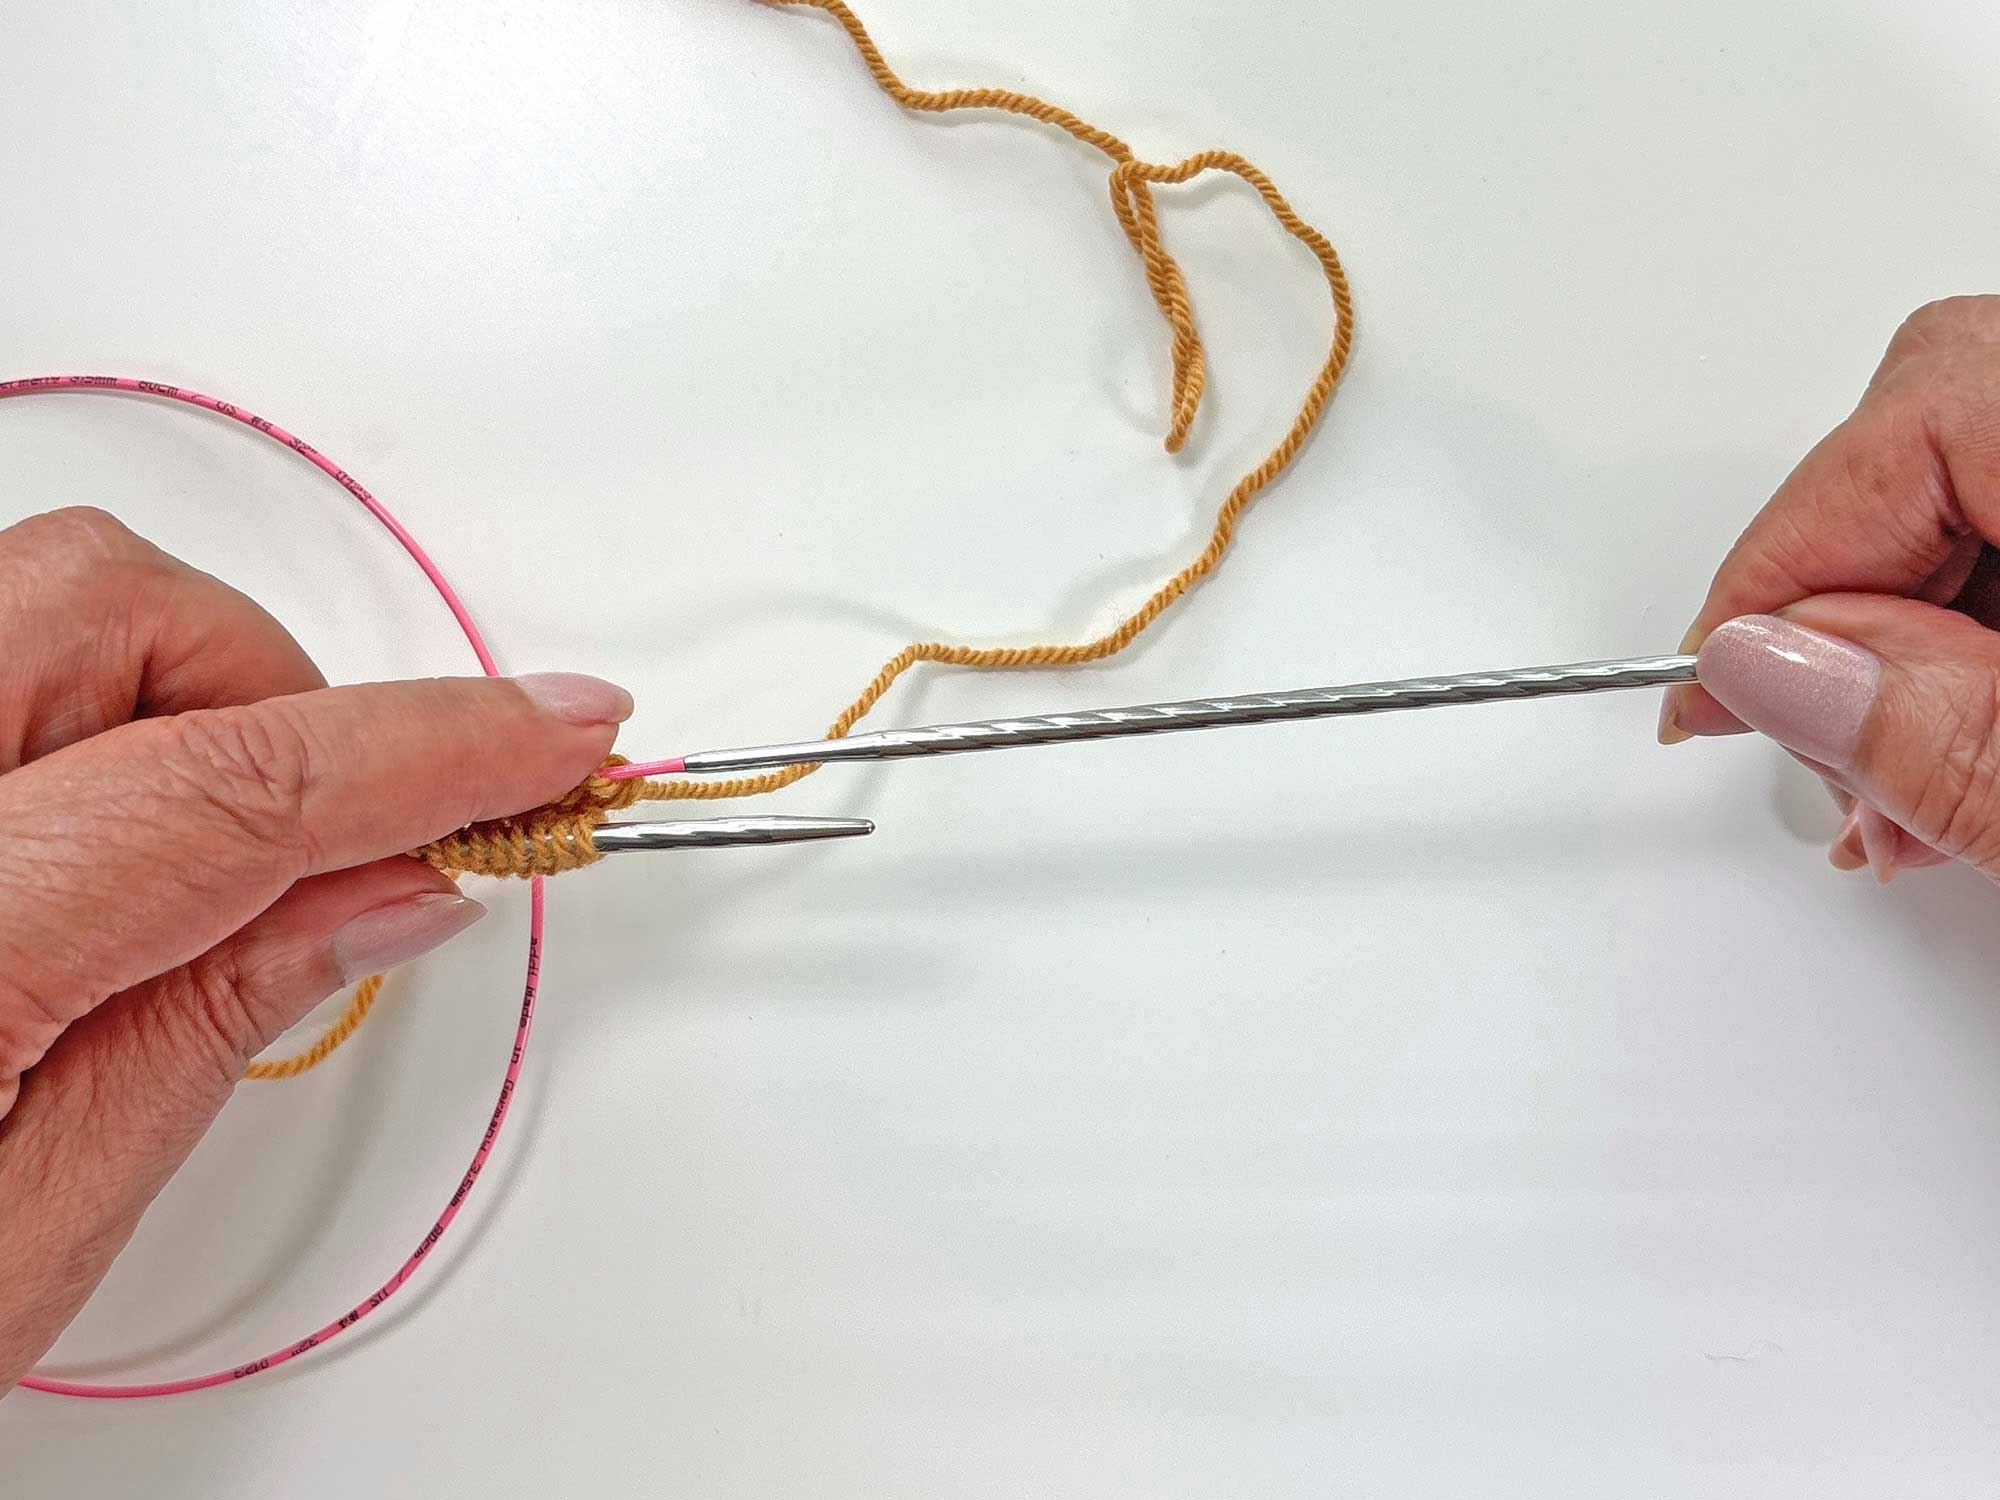
[PAYWALL]Step 1: Begin by casting on the desired number of stitches on your circular needle. In this example, I’m working with 60 stitches.
Step 2: Move your stitches to the center of the cord between the needle tips.
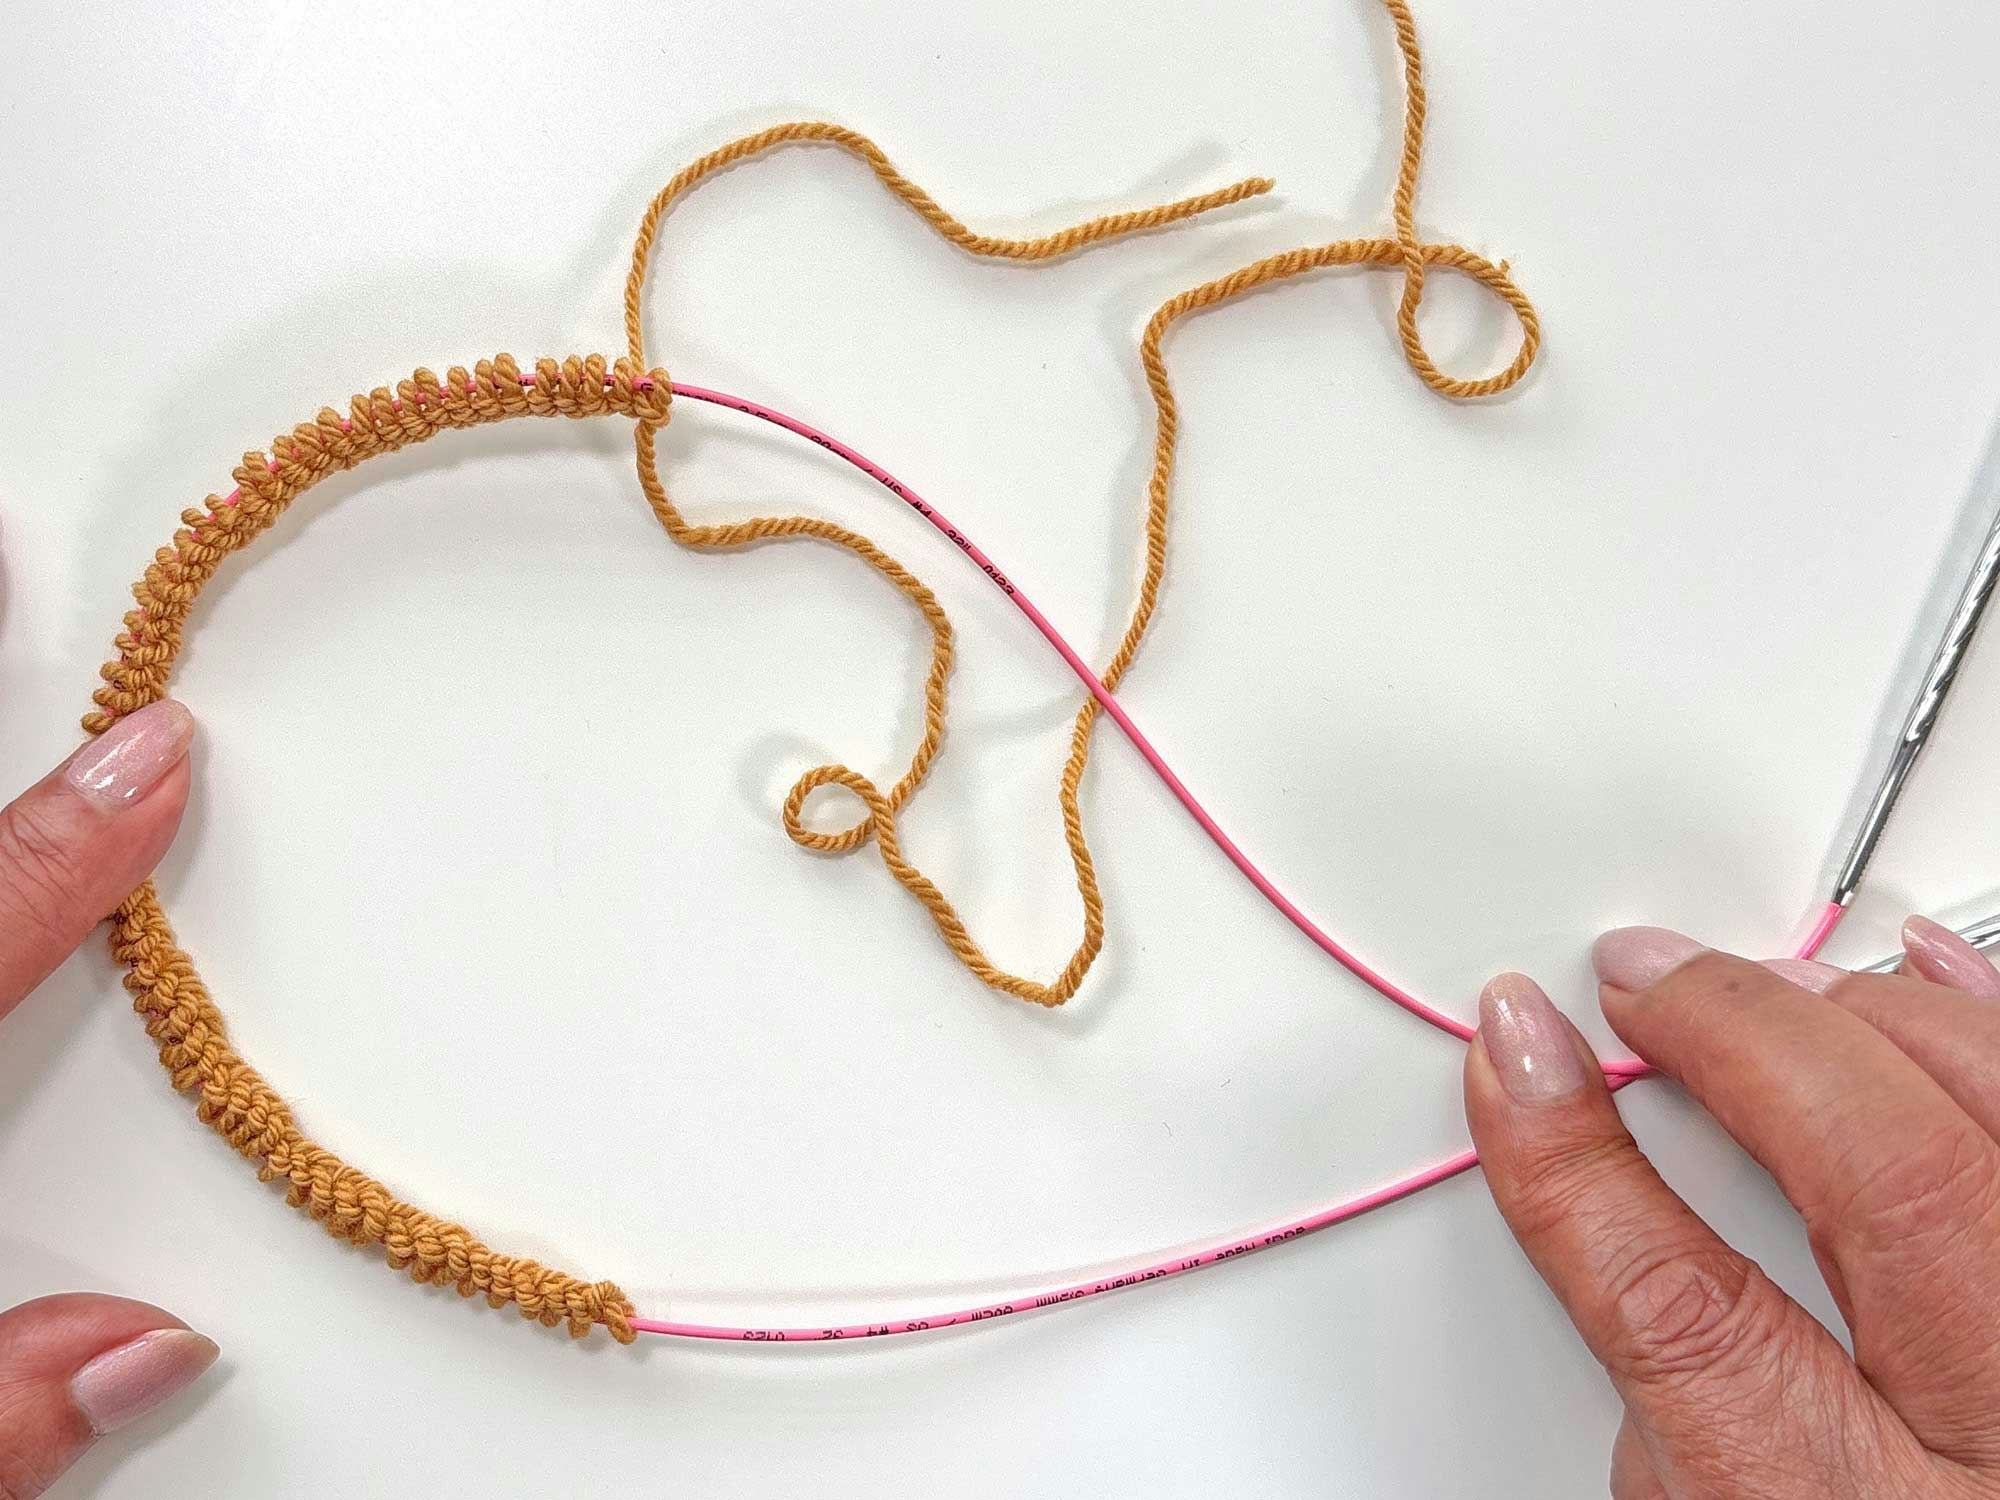
Step 3: Place a removeable stitch marker on the needle cord in the middle of the stitches. In the example, there are 30 stitches on each side of the black stitch marker.
Step 4: Use one hand to hold the stitches on the cord, and use the other hand to grasp the stitch marker and pull, forming a loop of cord between the stitches. Remove the marker.
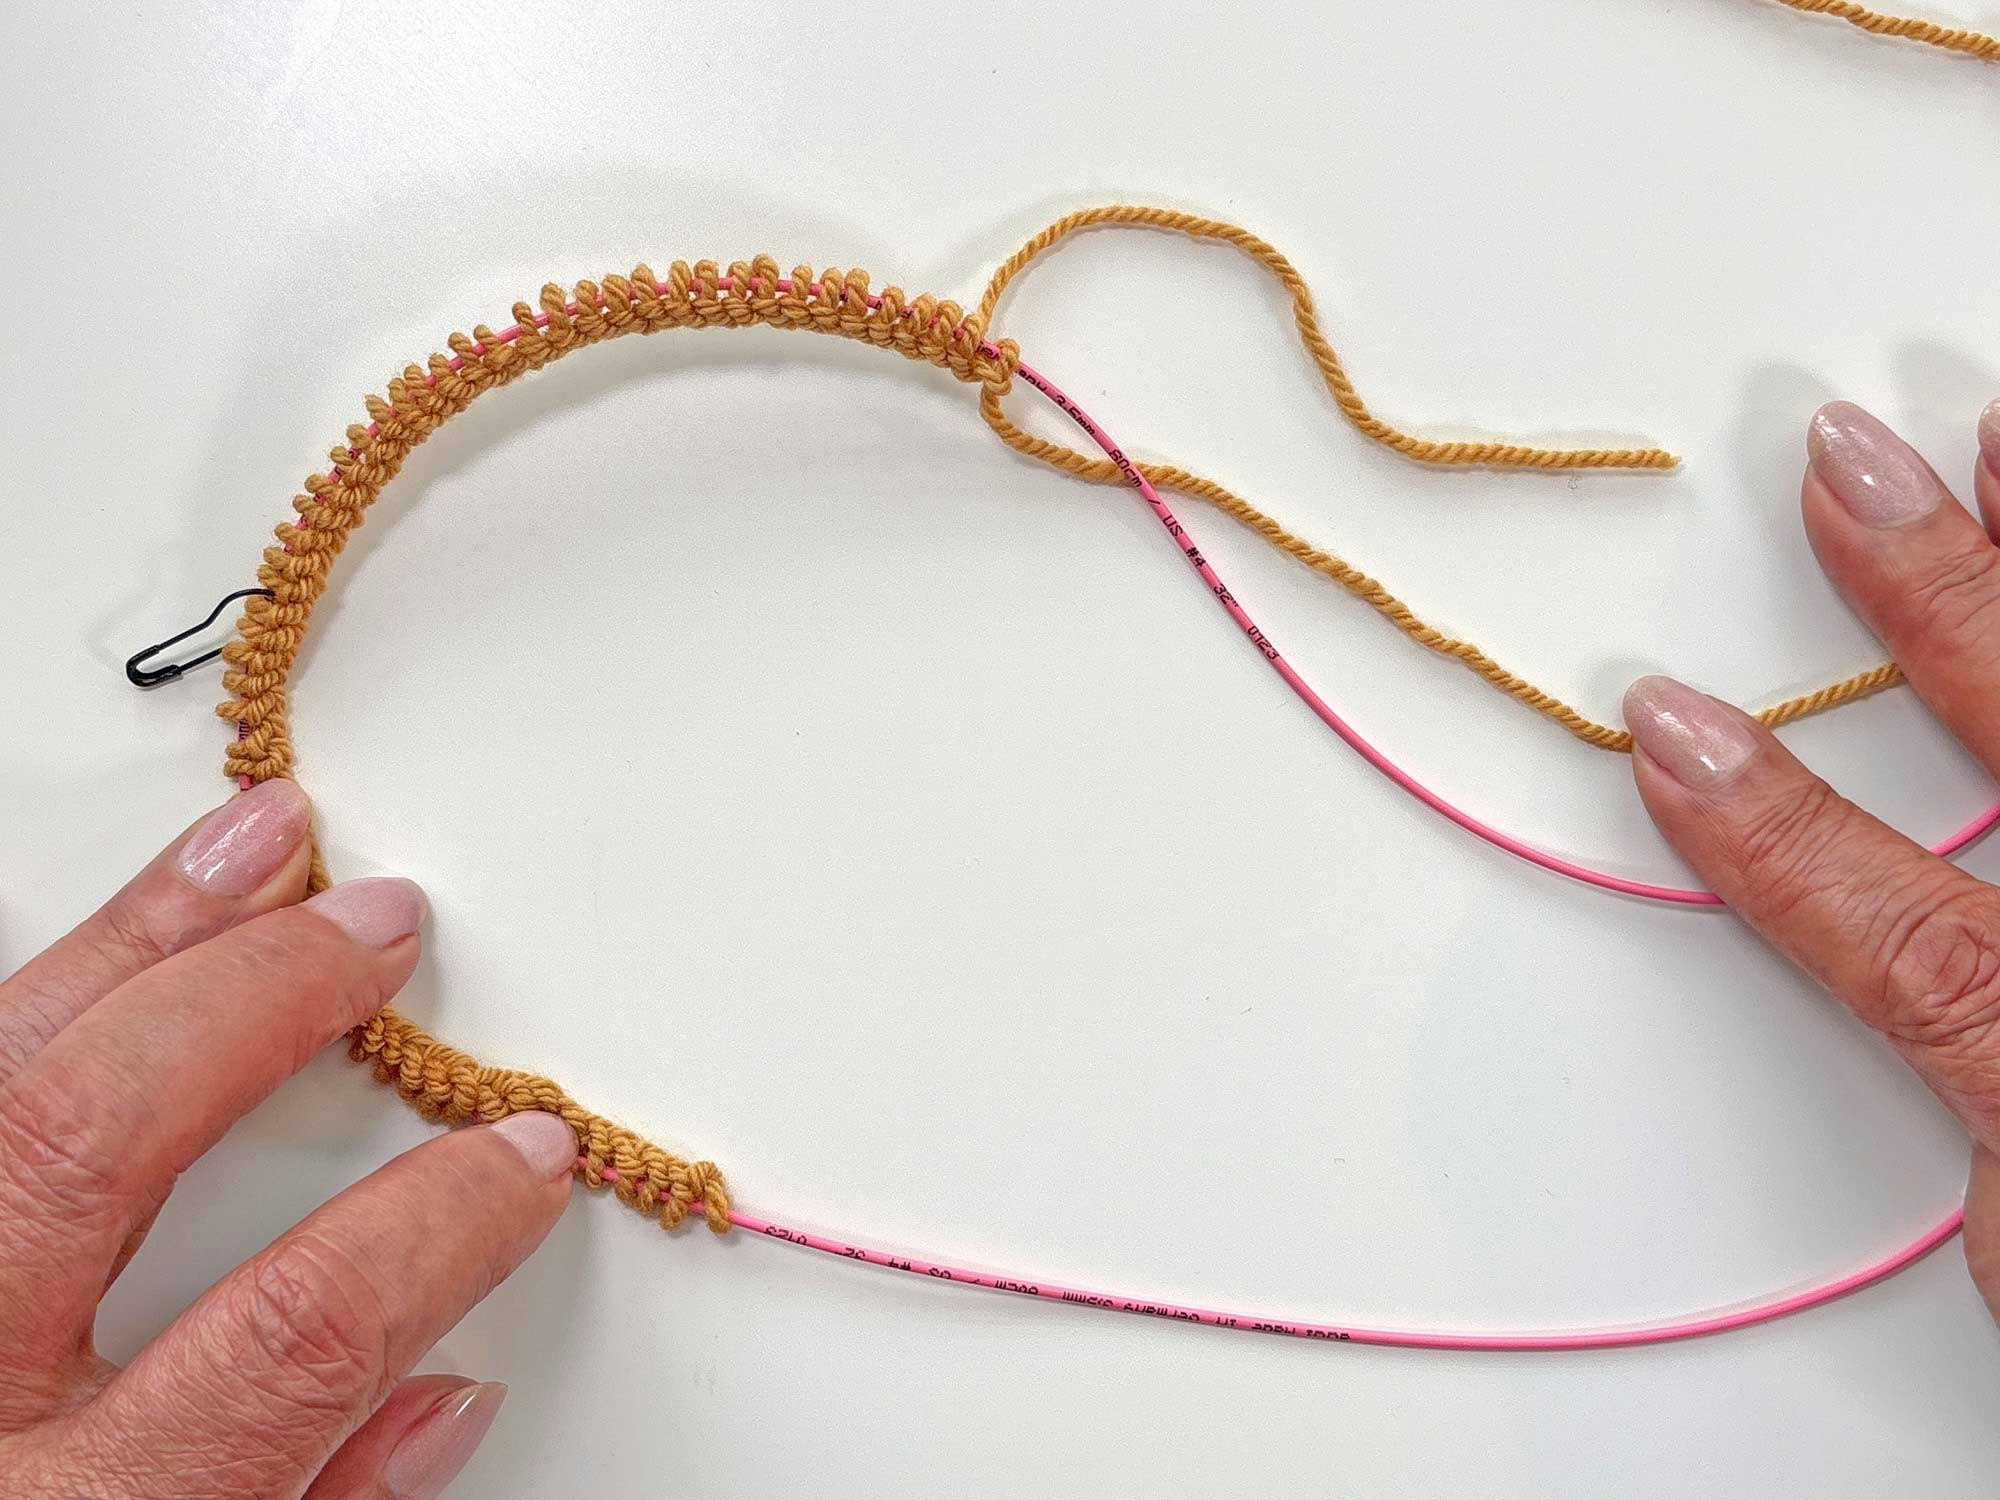
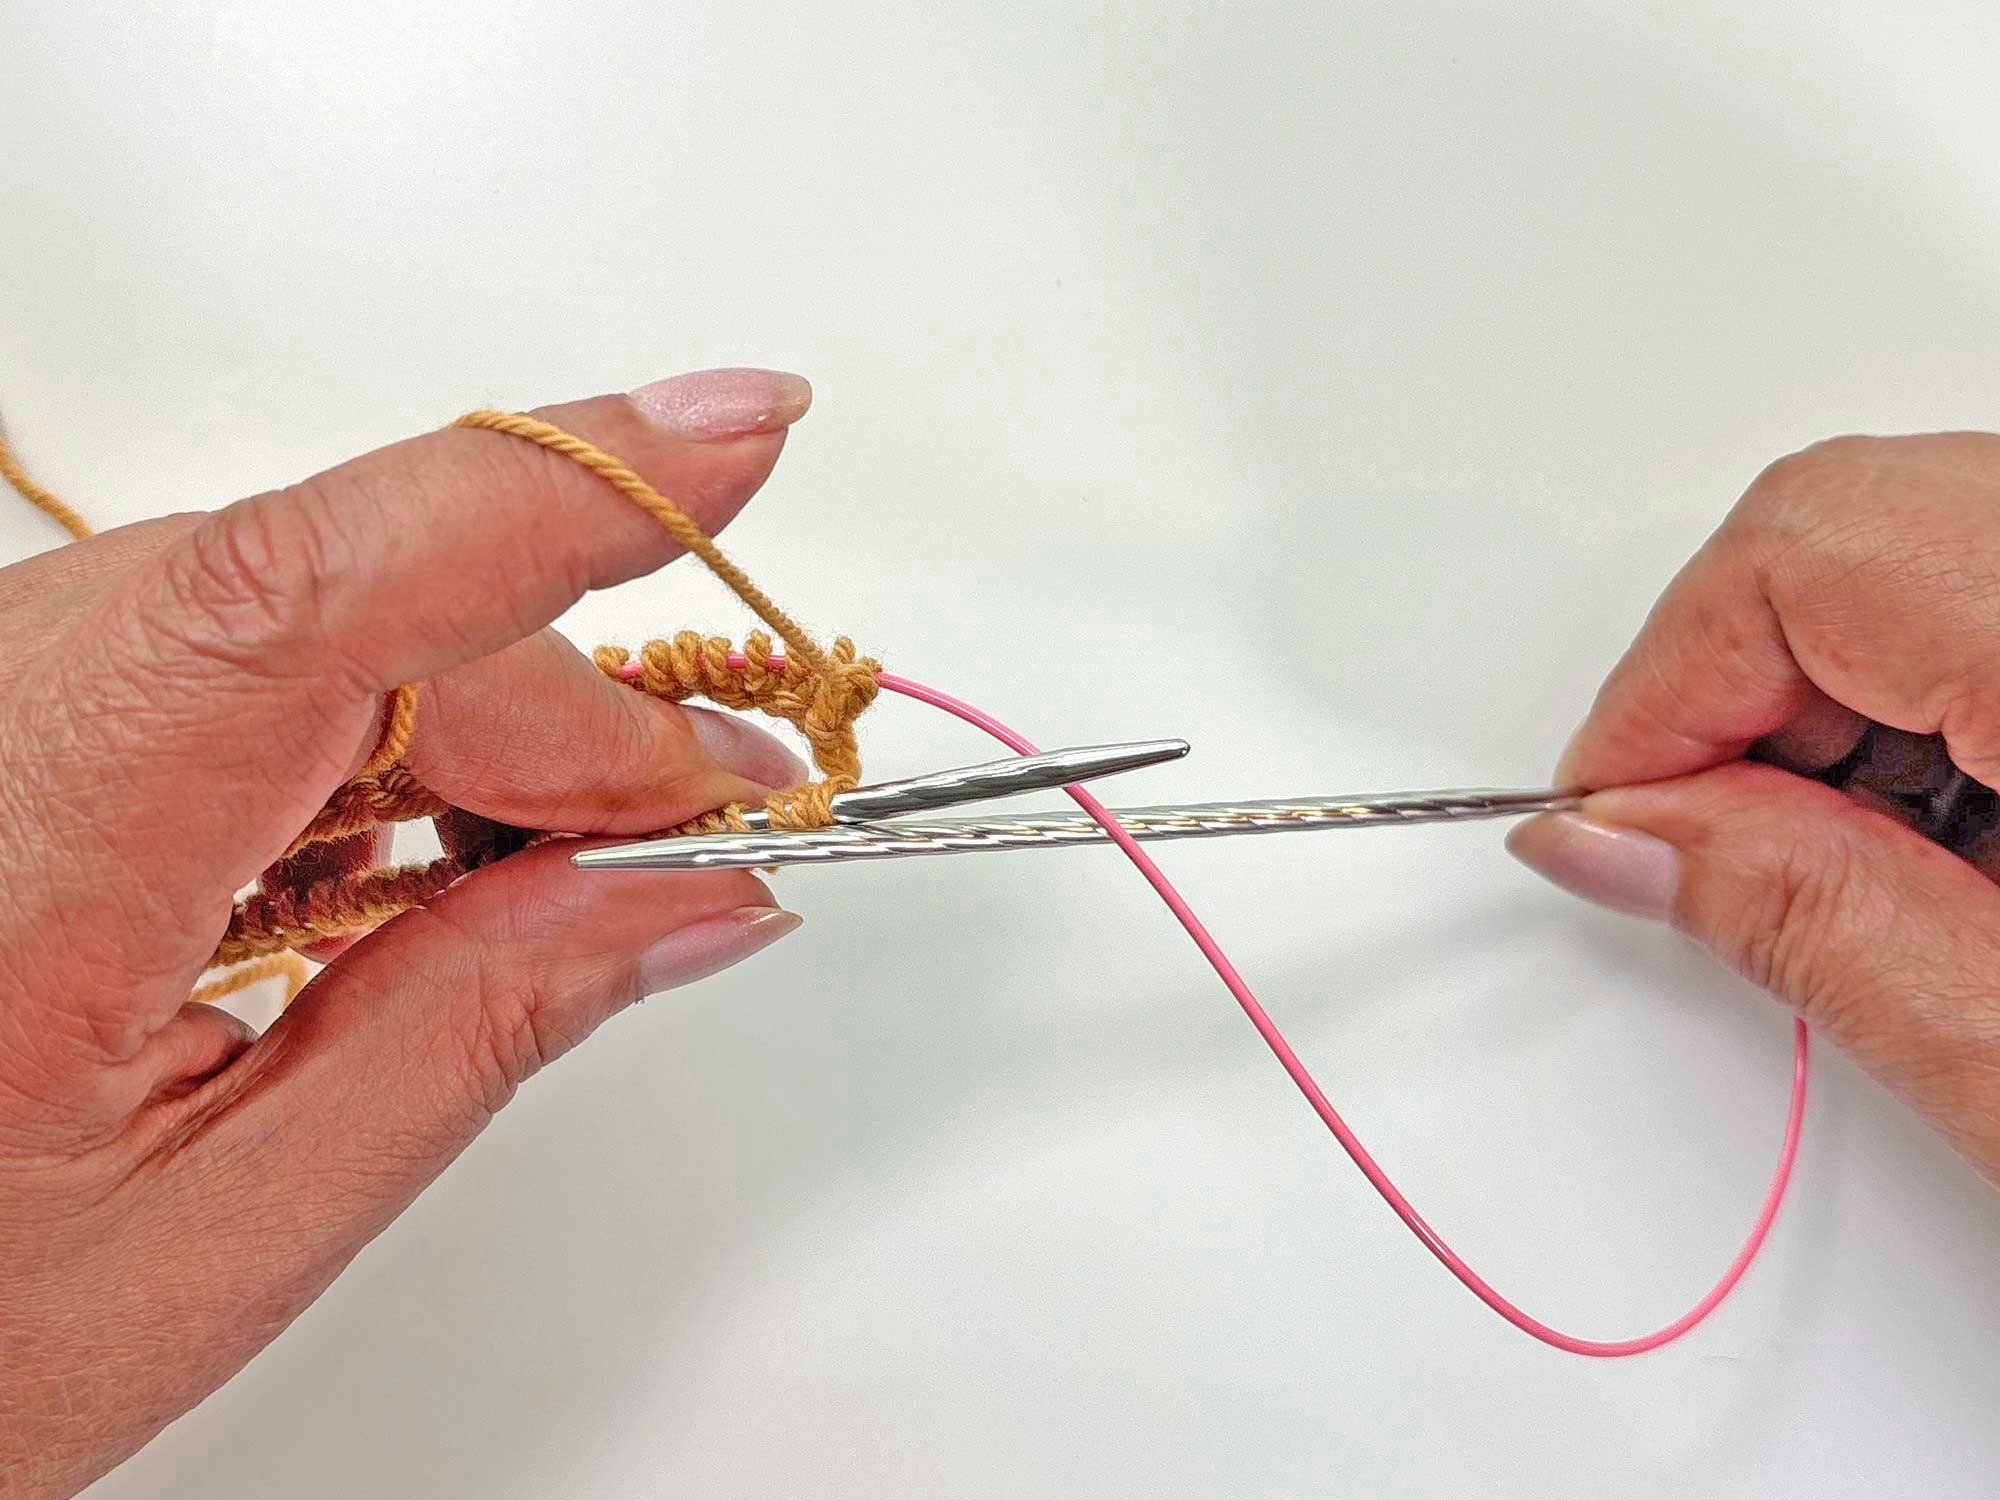
Step 5: Keep pulling on the cord until the stitches rest on the needle tips. The first half of the round should rest on the front needle. The second half of the round should rest on the back needle, and the working yarn should be attached to these stitches. Note: The loop of cord should be more or less in the middle of your stitches, but it does not need to be exactly centered. You may find your stitch pattern is easier to work if you have full repeats of the pattern on each needle, so feel free to shift the placement to one side or the other if you prefer.
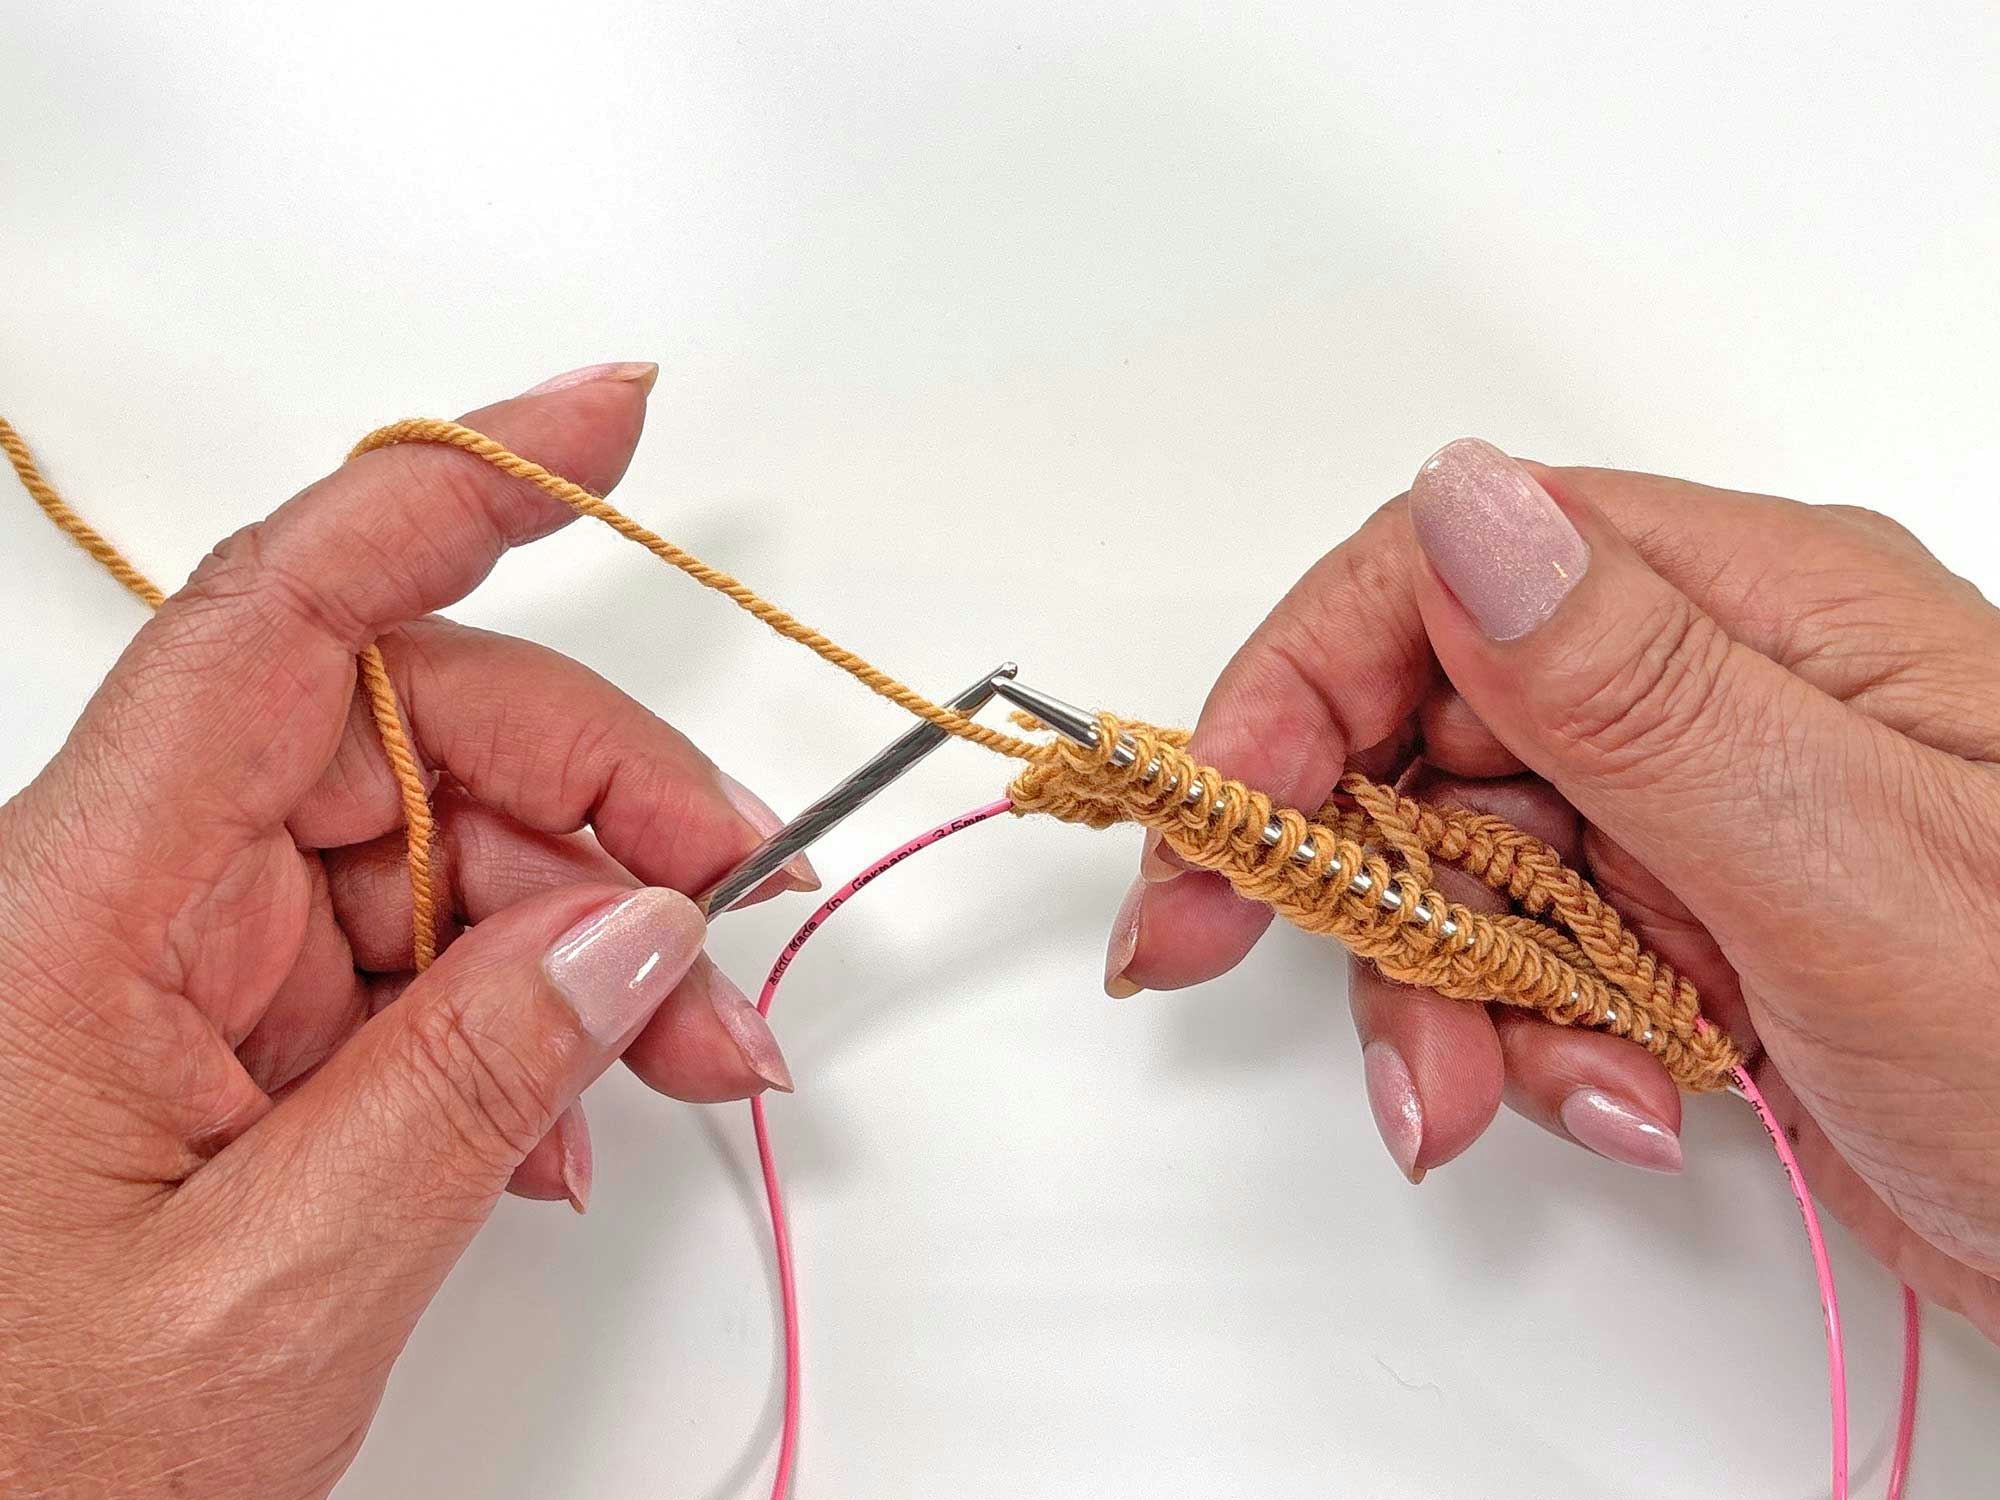
Step 6: Grasp the tip of the back needle and pull it until the stitches of the second half of the round are resting on the cord.
Step 7: Keep pulling the back needle until you have enough slack in the cord to turn the needle tip and use it to knit the stitches on the front needle.
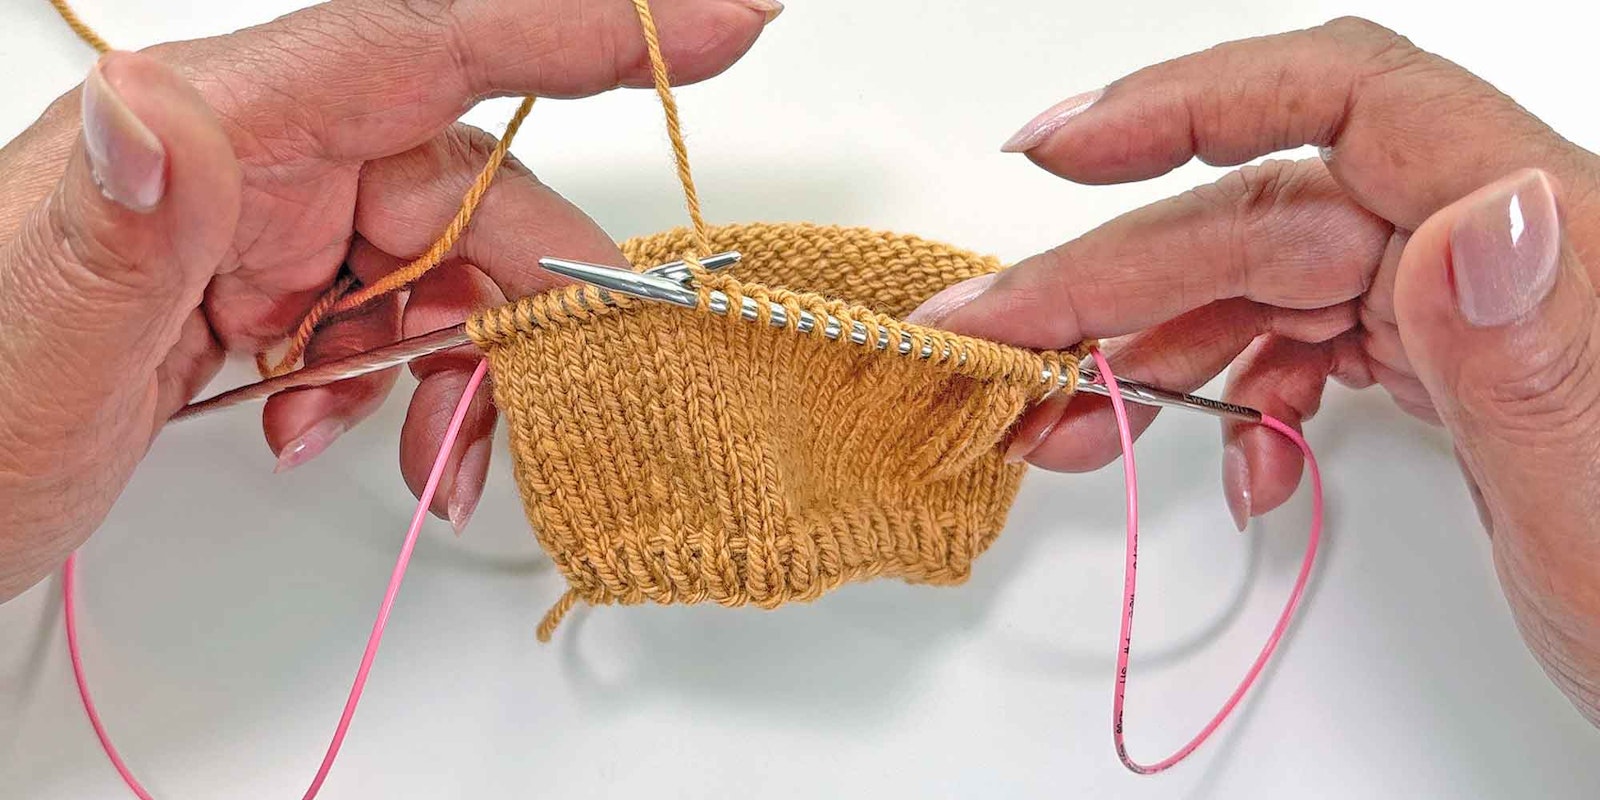
Working the First Round
Work half of the stitches in the first round, then slide the stitches along the cord before knitting the second half.
Step 1: Maintaining a loop of cord at each side, knit across the stitches on the front needle.
Step 2: When the first half of the round is complete, you’ll have one needle free.
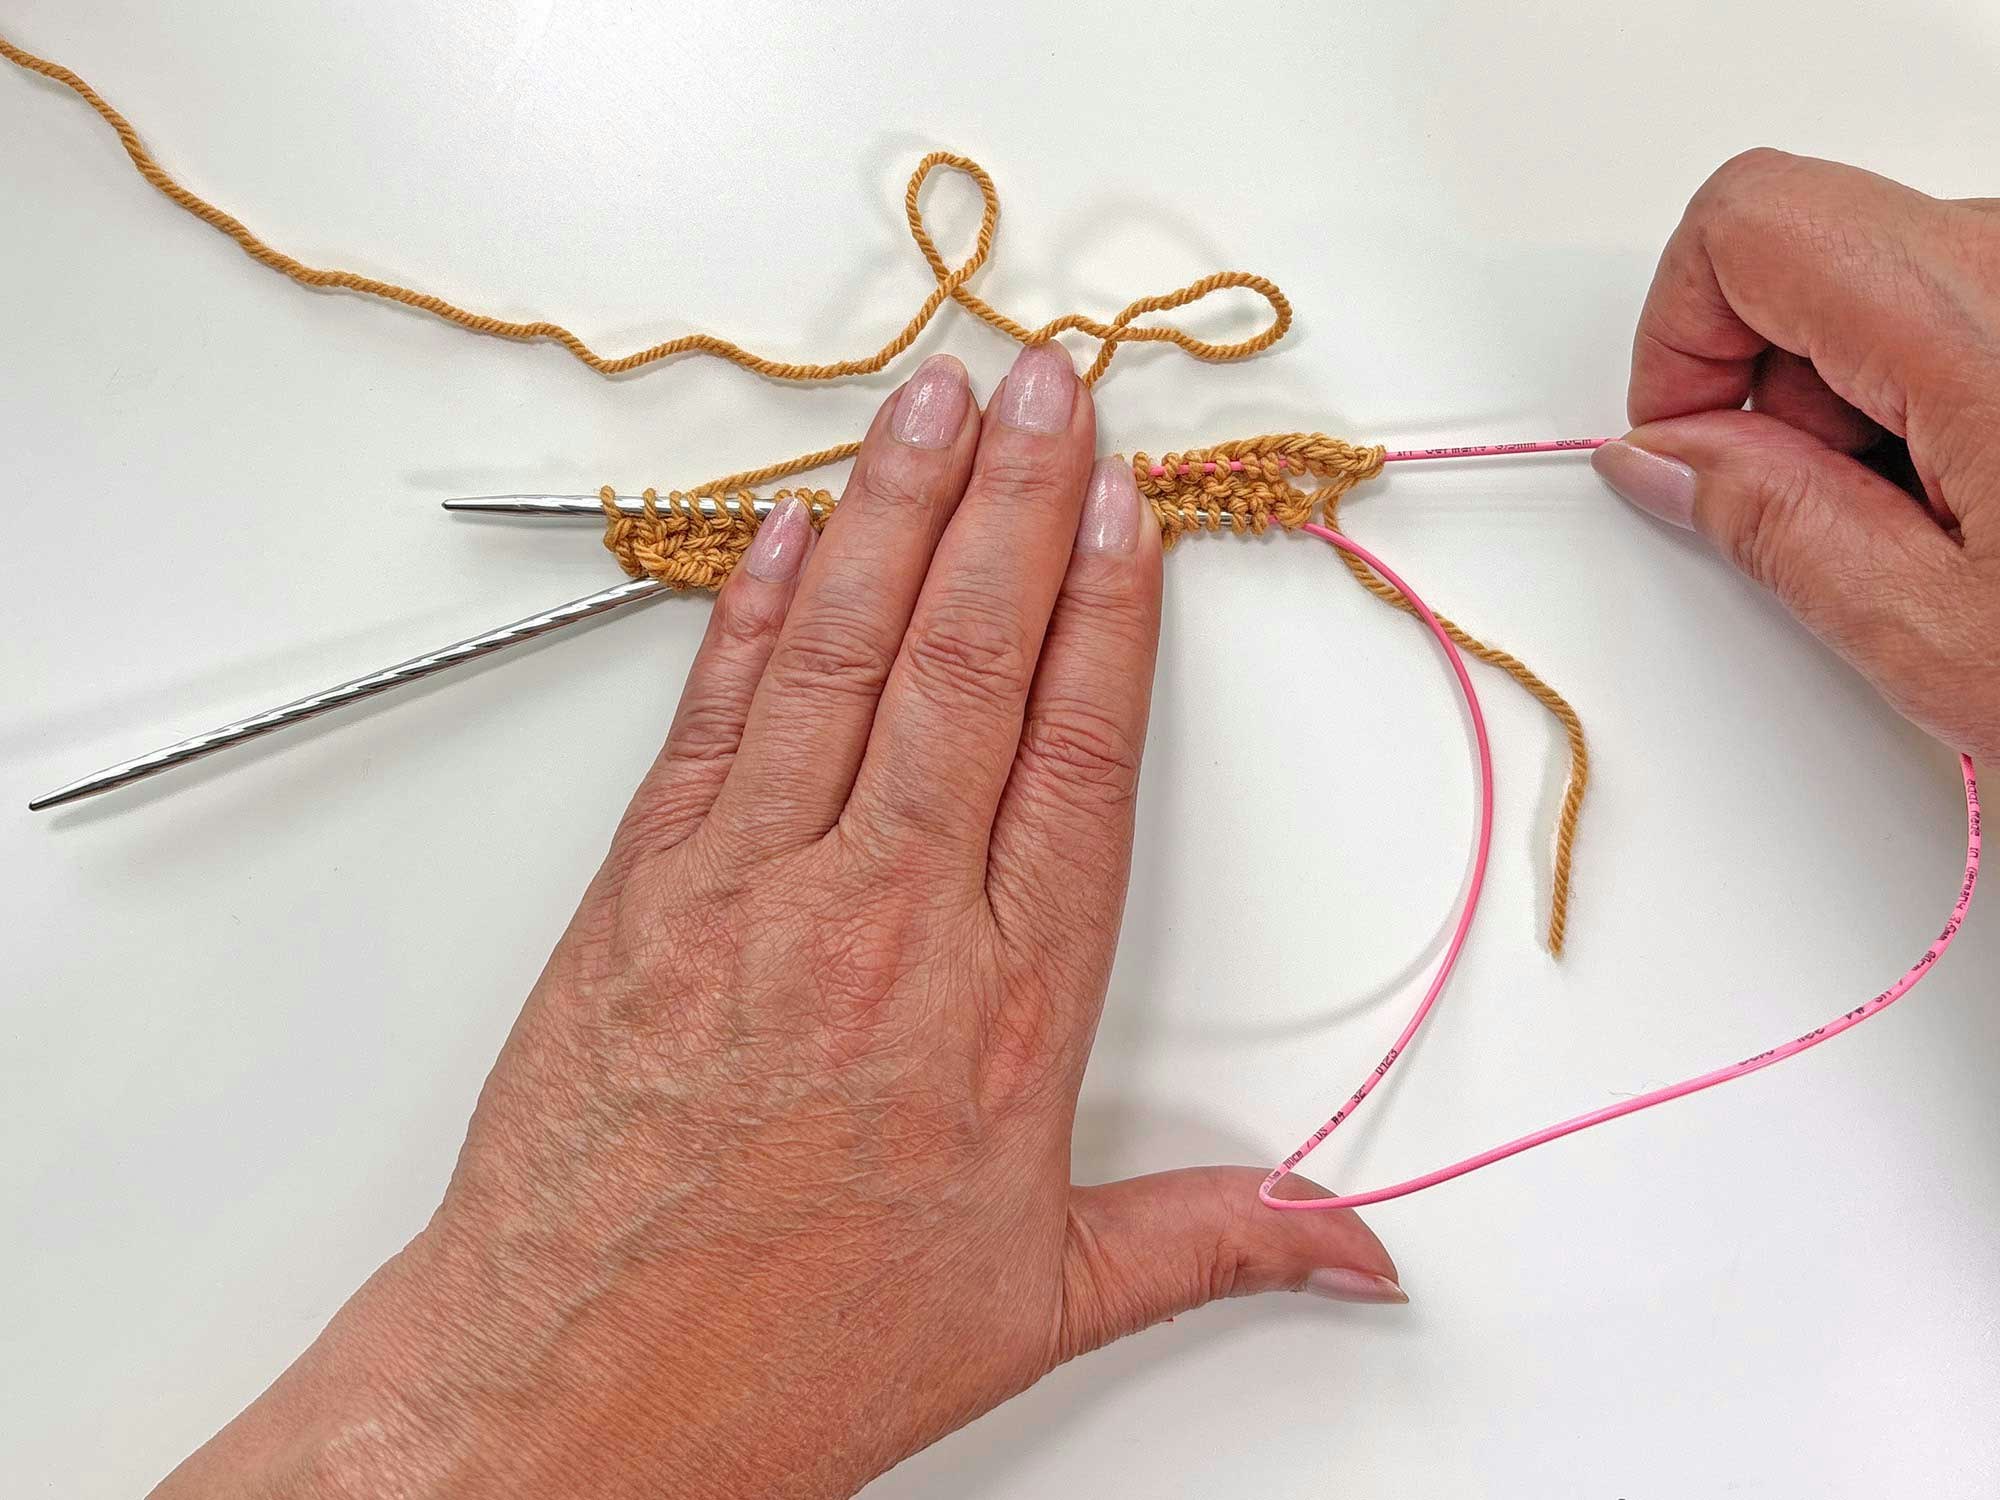
Step 3: Pull the cord through the cast-on stitches on the back needle until those stitches sit on the needle tip.
Step 4: Turn the work. The loop of cord is now to the left side, the needle pointing to the right. The remaining cast-on stitches are on the front needle. The stitches you’ve just knit are on the back needle.
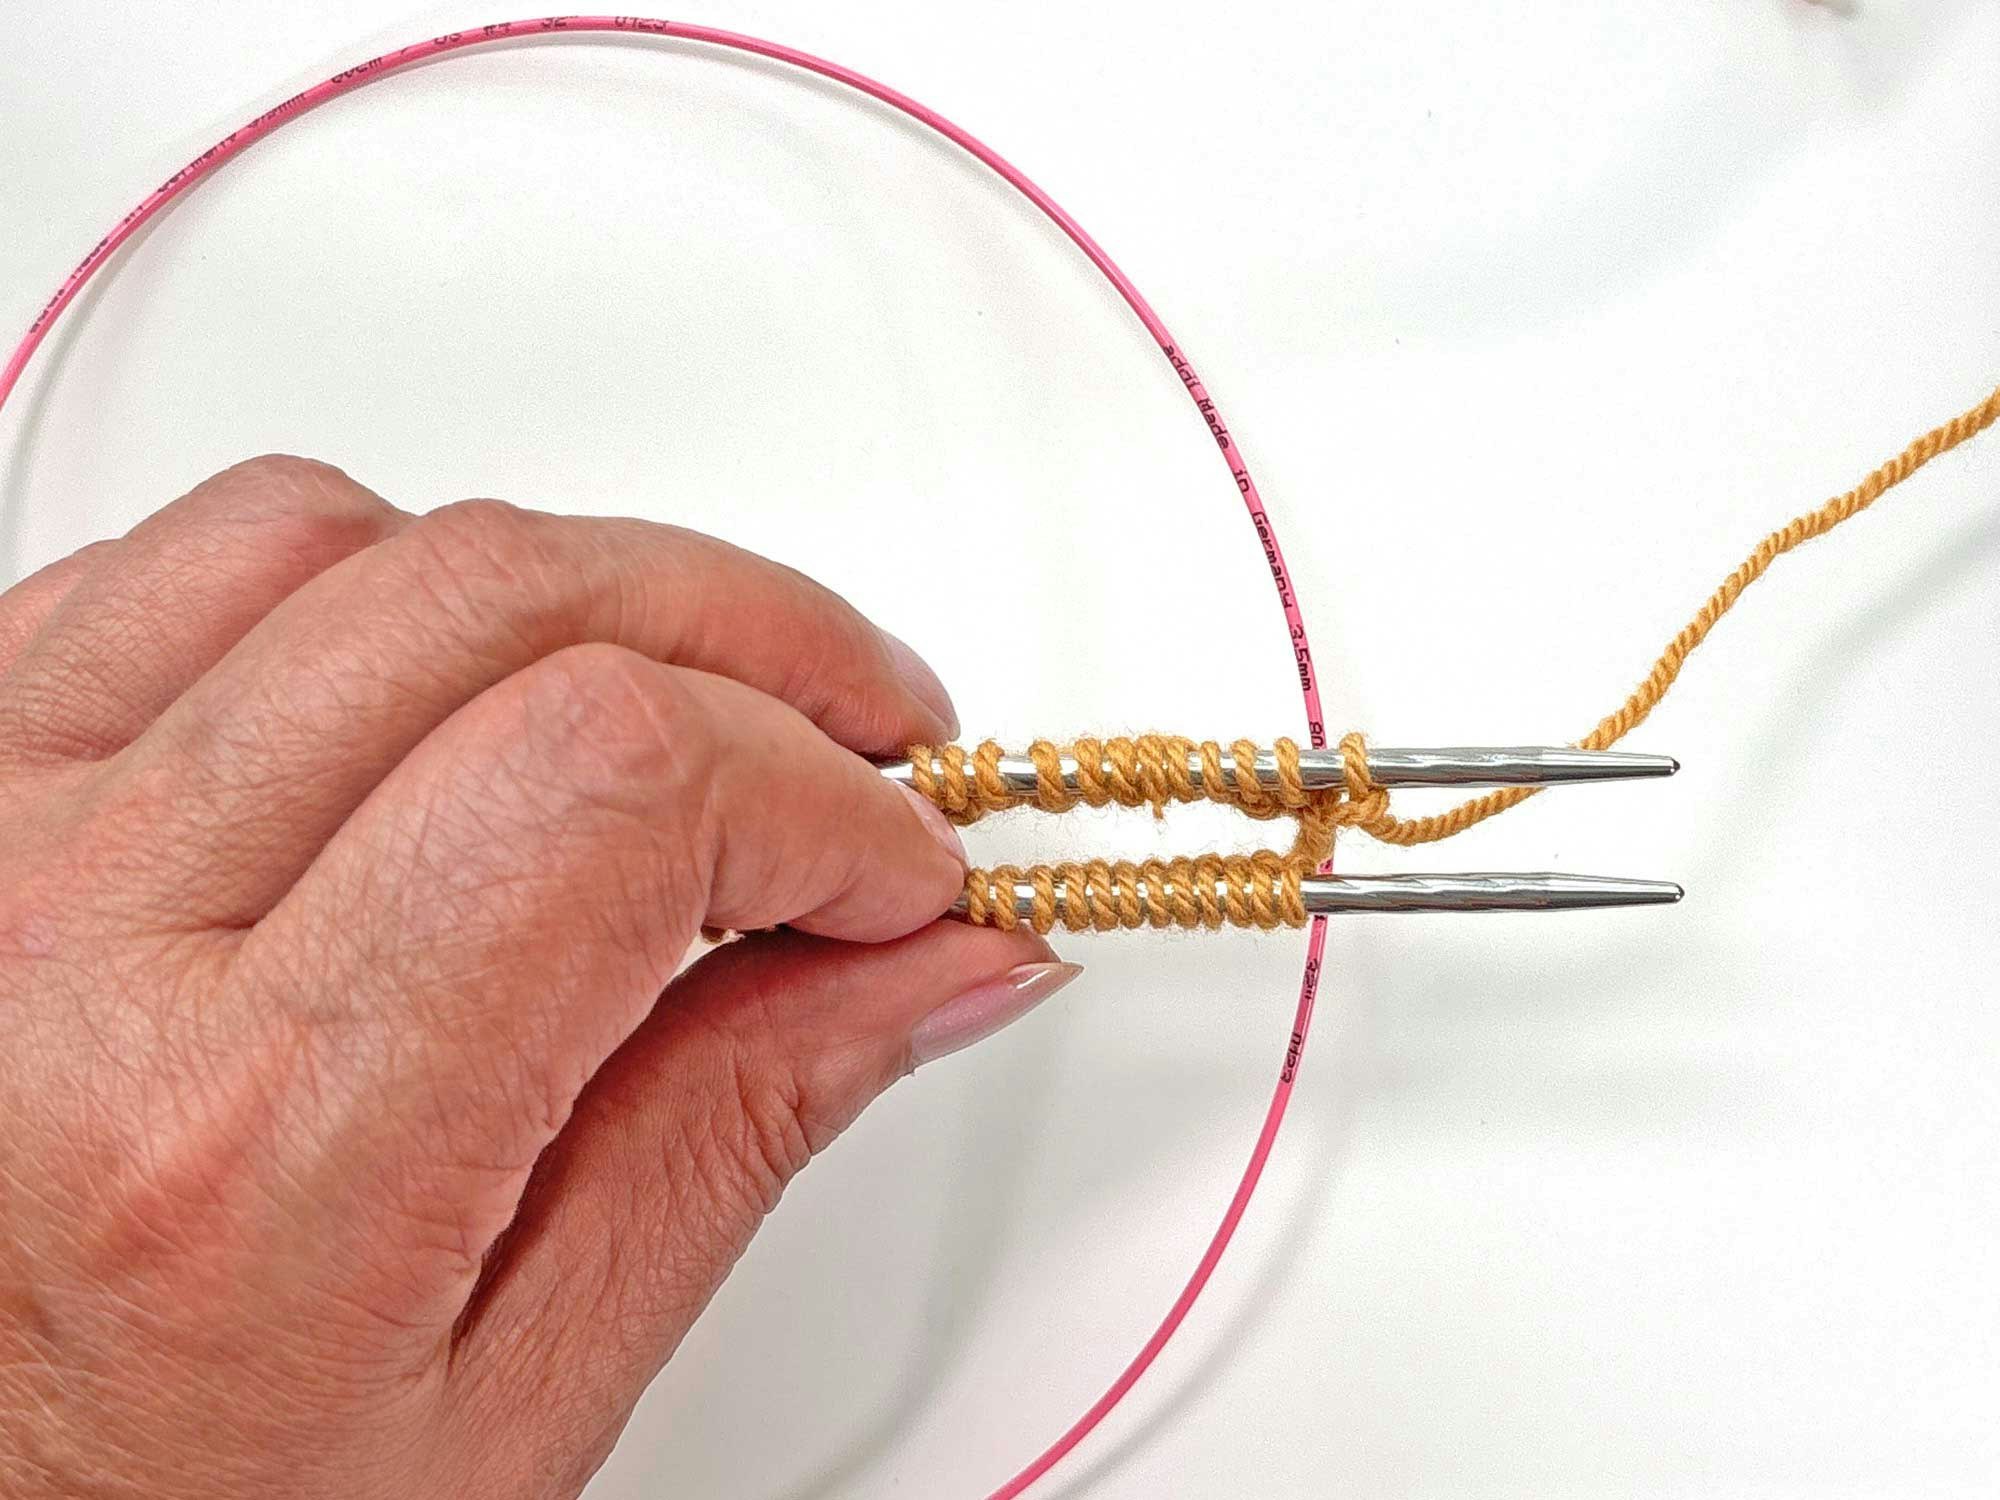
Step 5: Grasp the tip of the back needle and pull it until the stitches you just knit are resting on the cord.
Step 6: Keep pulling the back needle until you have enough slack in the cord to turn the needle tip and use it to knit the remaining cast-on stitches.
Before moving on to the next round, take a moment to double-check for a twist in your piece. It can be easy for the cast-on to become twisted when starting a new project with Magic Loop. An accidental twist is easier to see once you’ve completed the first round, and you can untwist at this point without any problems.
Working the Subsequent Rounds
 Maintain a loop of cord at each side of the piece.
Follow the same sequence for the following rounds, maintaining a loop of cord on both sides throughout. Knit across the stitches on one needle, pull the free needle tip into the stitches of the other half, and turn the piece. Pull the back needle tip free of the stitches just knit and use it to knit the remainder of the round.
 The “active” stitches are at the tip of the needle, ready to be knit. The “resting” stitches hang out on the cord behind the active stitches, patiently waiting their turn.
How to Avoid “Ladders” in the Knitting
Some knitters complain that they get gaps between the column of stitches at each side when they use the Magic Loop. These ladders occur when the loops of cord push the stitches apart.
 This full-circle loop in this cord allows the stitches to sit close together.
To prevent these ladders, use a needle with a flexible cord. A stiff cord will resist bending to create the loops. Encouraging the cord loop to twist into a full circle will also allow the stitches on each side of the loop to sit closer together, eliminating pesky gaps.
Even if you’re a confirmed member of Team Double-Pointed Needles (me, too—we should get T-shirts made!), spend some time practicing the Magic Loop. The day may come when having this technique in your knitting toolbox will let you finish a project without an emergency visit to the yarn store.
Resources
Hauschka, Sarah. The Magic Loop: Working Around on One Needle. Fiber Trends, 2002.
Put your new knowledge to work with any of these patterns in the Farm & Fiber Knits Library!