Subscriber Exclusive
How & Why to Steek Your Swatches
Swatching for a project knitted in the round can be awkward and inconsistent. Steeking your knitted swatches makes it easy to explore colorways, check gauge, and practice cutting your knitting—eep!
Swatching for a project knitted in the round can be awkward and inconsistent. Steeking your knitted swatches makes it easy to explore colorways, check gauge, and practice cutting your knitting—eep! <a href="https://farmfiberknits.com/how-why-to-steek-your-swatches/">Continue reading.</a>
https://farmfiberknits.com/cdn-cgi/image/format=auto/https://www.datocms-assets.com/101500/1752798108-skellister-vest-header.jpg?auto=format&w=900
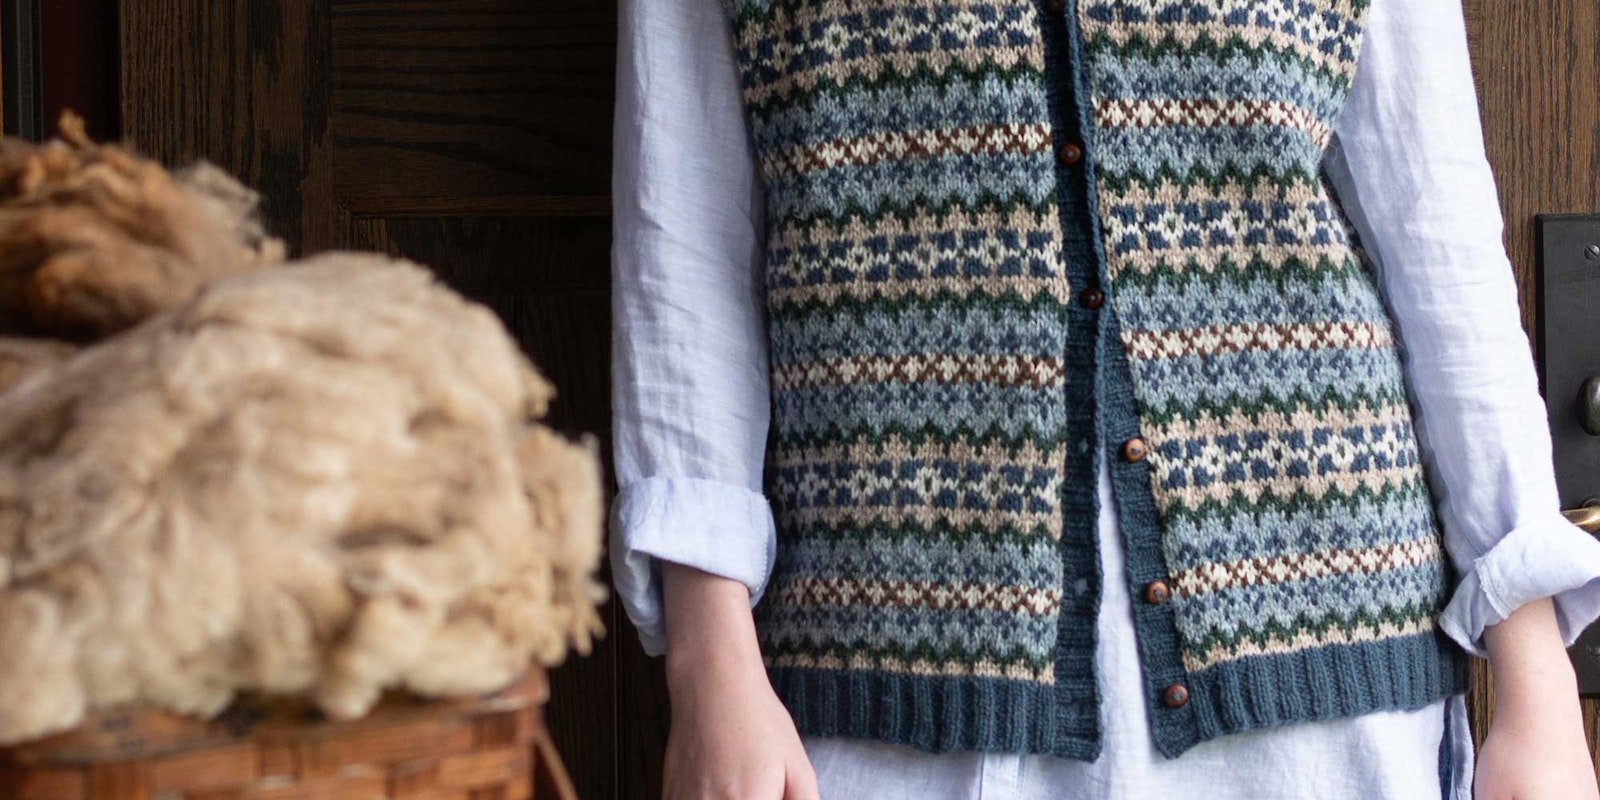
In the Fall issue of Farm & Fiber Knits, I demonstrated needlefelting to reinforce a steek in the Skellister Vest. But the finished project isn’t the only part of the process to use a steek. As early as sampling colorways for the design, I used the technique on my swatches.
Steek is a common term for an extra panel of stitches added to a project that will later be cut open to create armholes, necklines, and more. Steeks are important for designs such as this one, and the technique can also be used to sample for projects that will be knitted in the round.
Traditional Inspiration for a Modern Vest
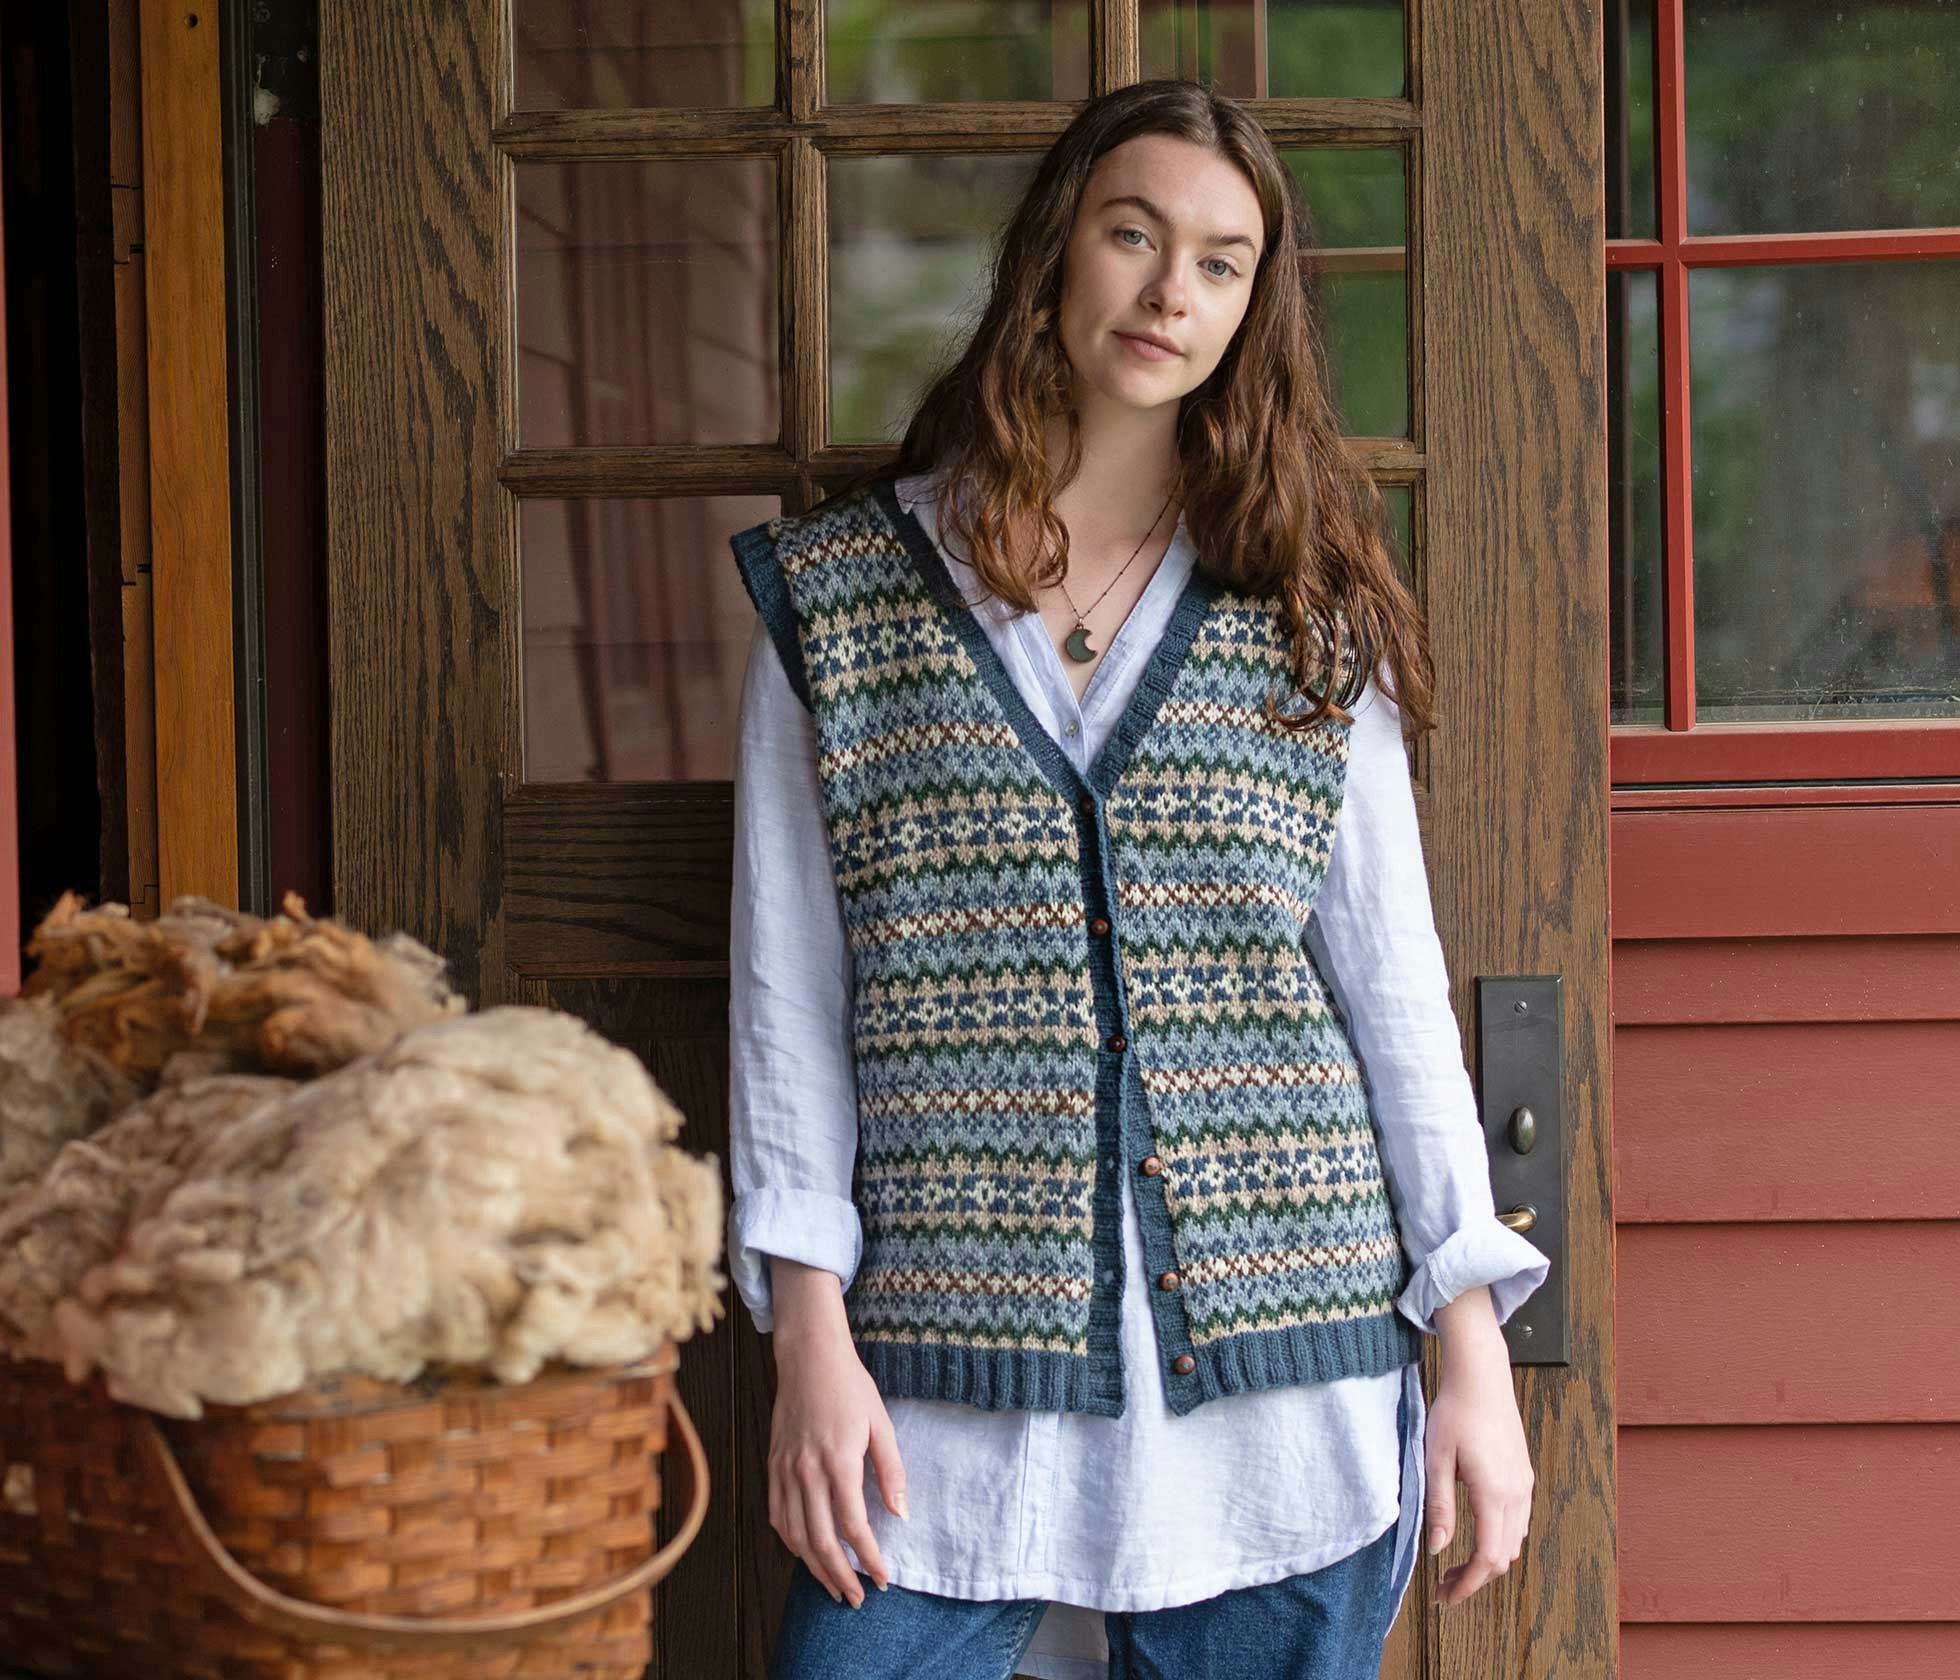
When I proposed this design, I had just finished watching the latest season of All Creatures Great and Small on PBS. That show is full of knitwear, but I particularly love the colorwork pullover vests that the men wear under their tweed jackets, like this one worn by the character Tristan Farnon.
Perfectly suited to the Yorkshire countryside of the 1940s, a colorwork vest is a classic garment that can be easily integrated into modern wardrobes.
I chose to make the Skellister Vest with a button front instead of a pullover style but to knit it in the round, both because that’s the traditional method and because I don’t enjoy purling over a stranded colorwork pattern. When knitting in the round, every row of the colorwork pattern is knitted on the right side of the fabric.
Get a closer look! Click any image in the gallery below to open it in full-screen mode.
Knitting in the round also meant an opportunity to showcase an underappreciated technique: steeks! Even experienced knitters often shiver at the thought of taking a pair of scissors to their knitting. Traditional methods of securing steeks, such as sewing by hand or machine, can be tedious.
A few years ago, I learned to use needlefelting to secure steeks, and it was a revelation. Fast, fun, and effective, needlefelting is now my go-to method when I need to secure stitches before cutting.
How to Audition Colorways with Steeked Swatches
The Fair Isle sweaters of the 1930s and 40s that inspired this design often combined the natural colors of undyed wool with surprisingly bright dyed hues. My original proposal echoed this theme, with green, blue, gold, and berry combined with Mooskit, an undyed light brown.
 The colors in my original proposal for the Skellister Vest.
Selecting yarn colors online is always a challenge, and choosing yarns for a multicolored project is even more difficult. Our perception of color is influenced by the colors that surround it. You can never really know if a color combination works until you see it in the swatch.
Editor Kate Larson and I selected ten colors of Jamieson’s DK weight, including the six I originally suggested, and I started playing with palettes when the box arrived. We wanted to use the deep blue of Stonehenge for the ribbing on this vest, but the rest of the colors were up for grabs.
I swatched four options—all at once—by using a steeked swatch method. Here are the results:
Get a closer look at Sandi’s swatches. Click on any image below to view it in full-screen mode and learn about the colors used. Photos by Matt Graves
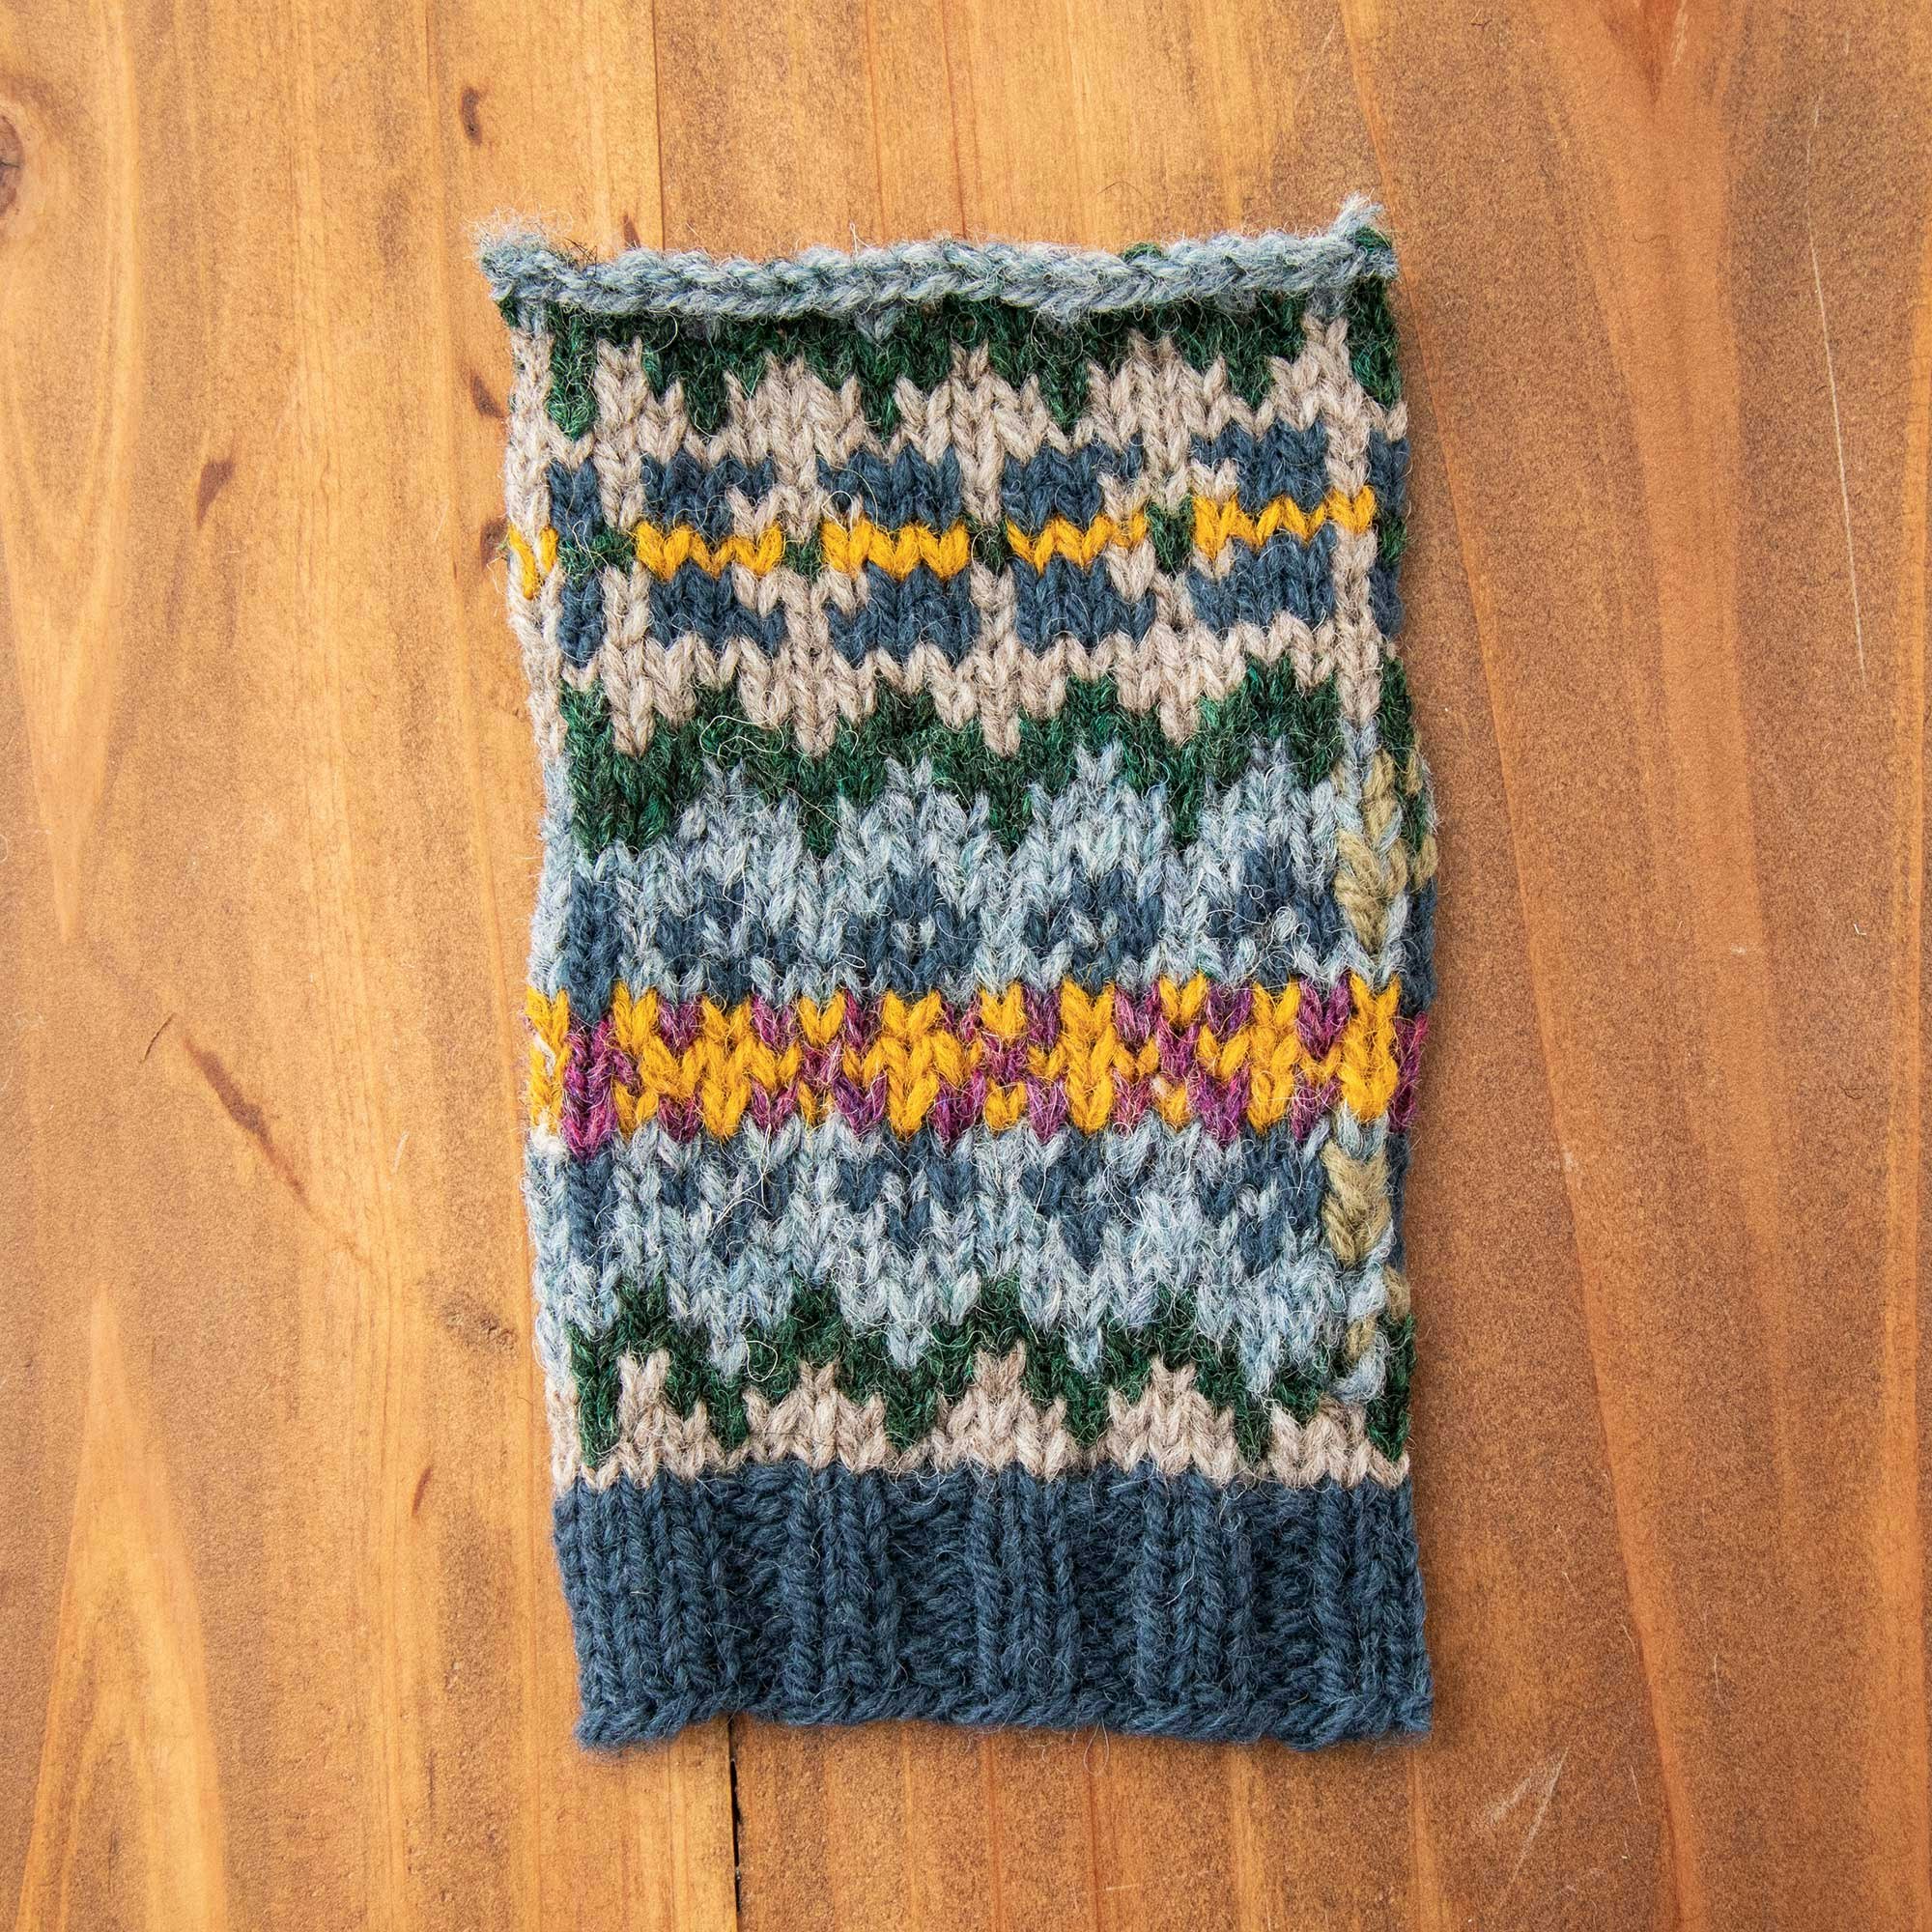
 Stonehenge, Mooskit, Conifer, Highland Mist, Foxglove, and Mustard.
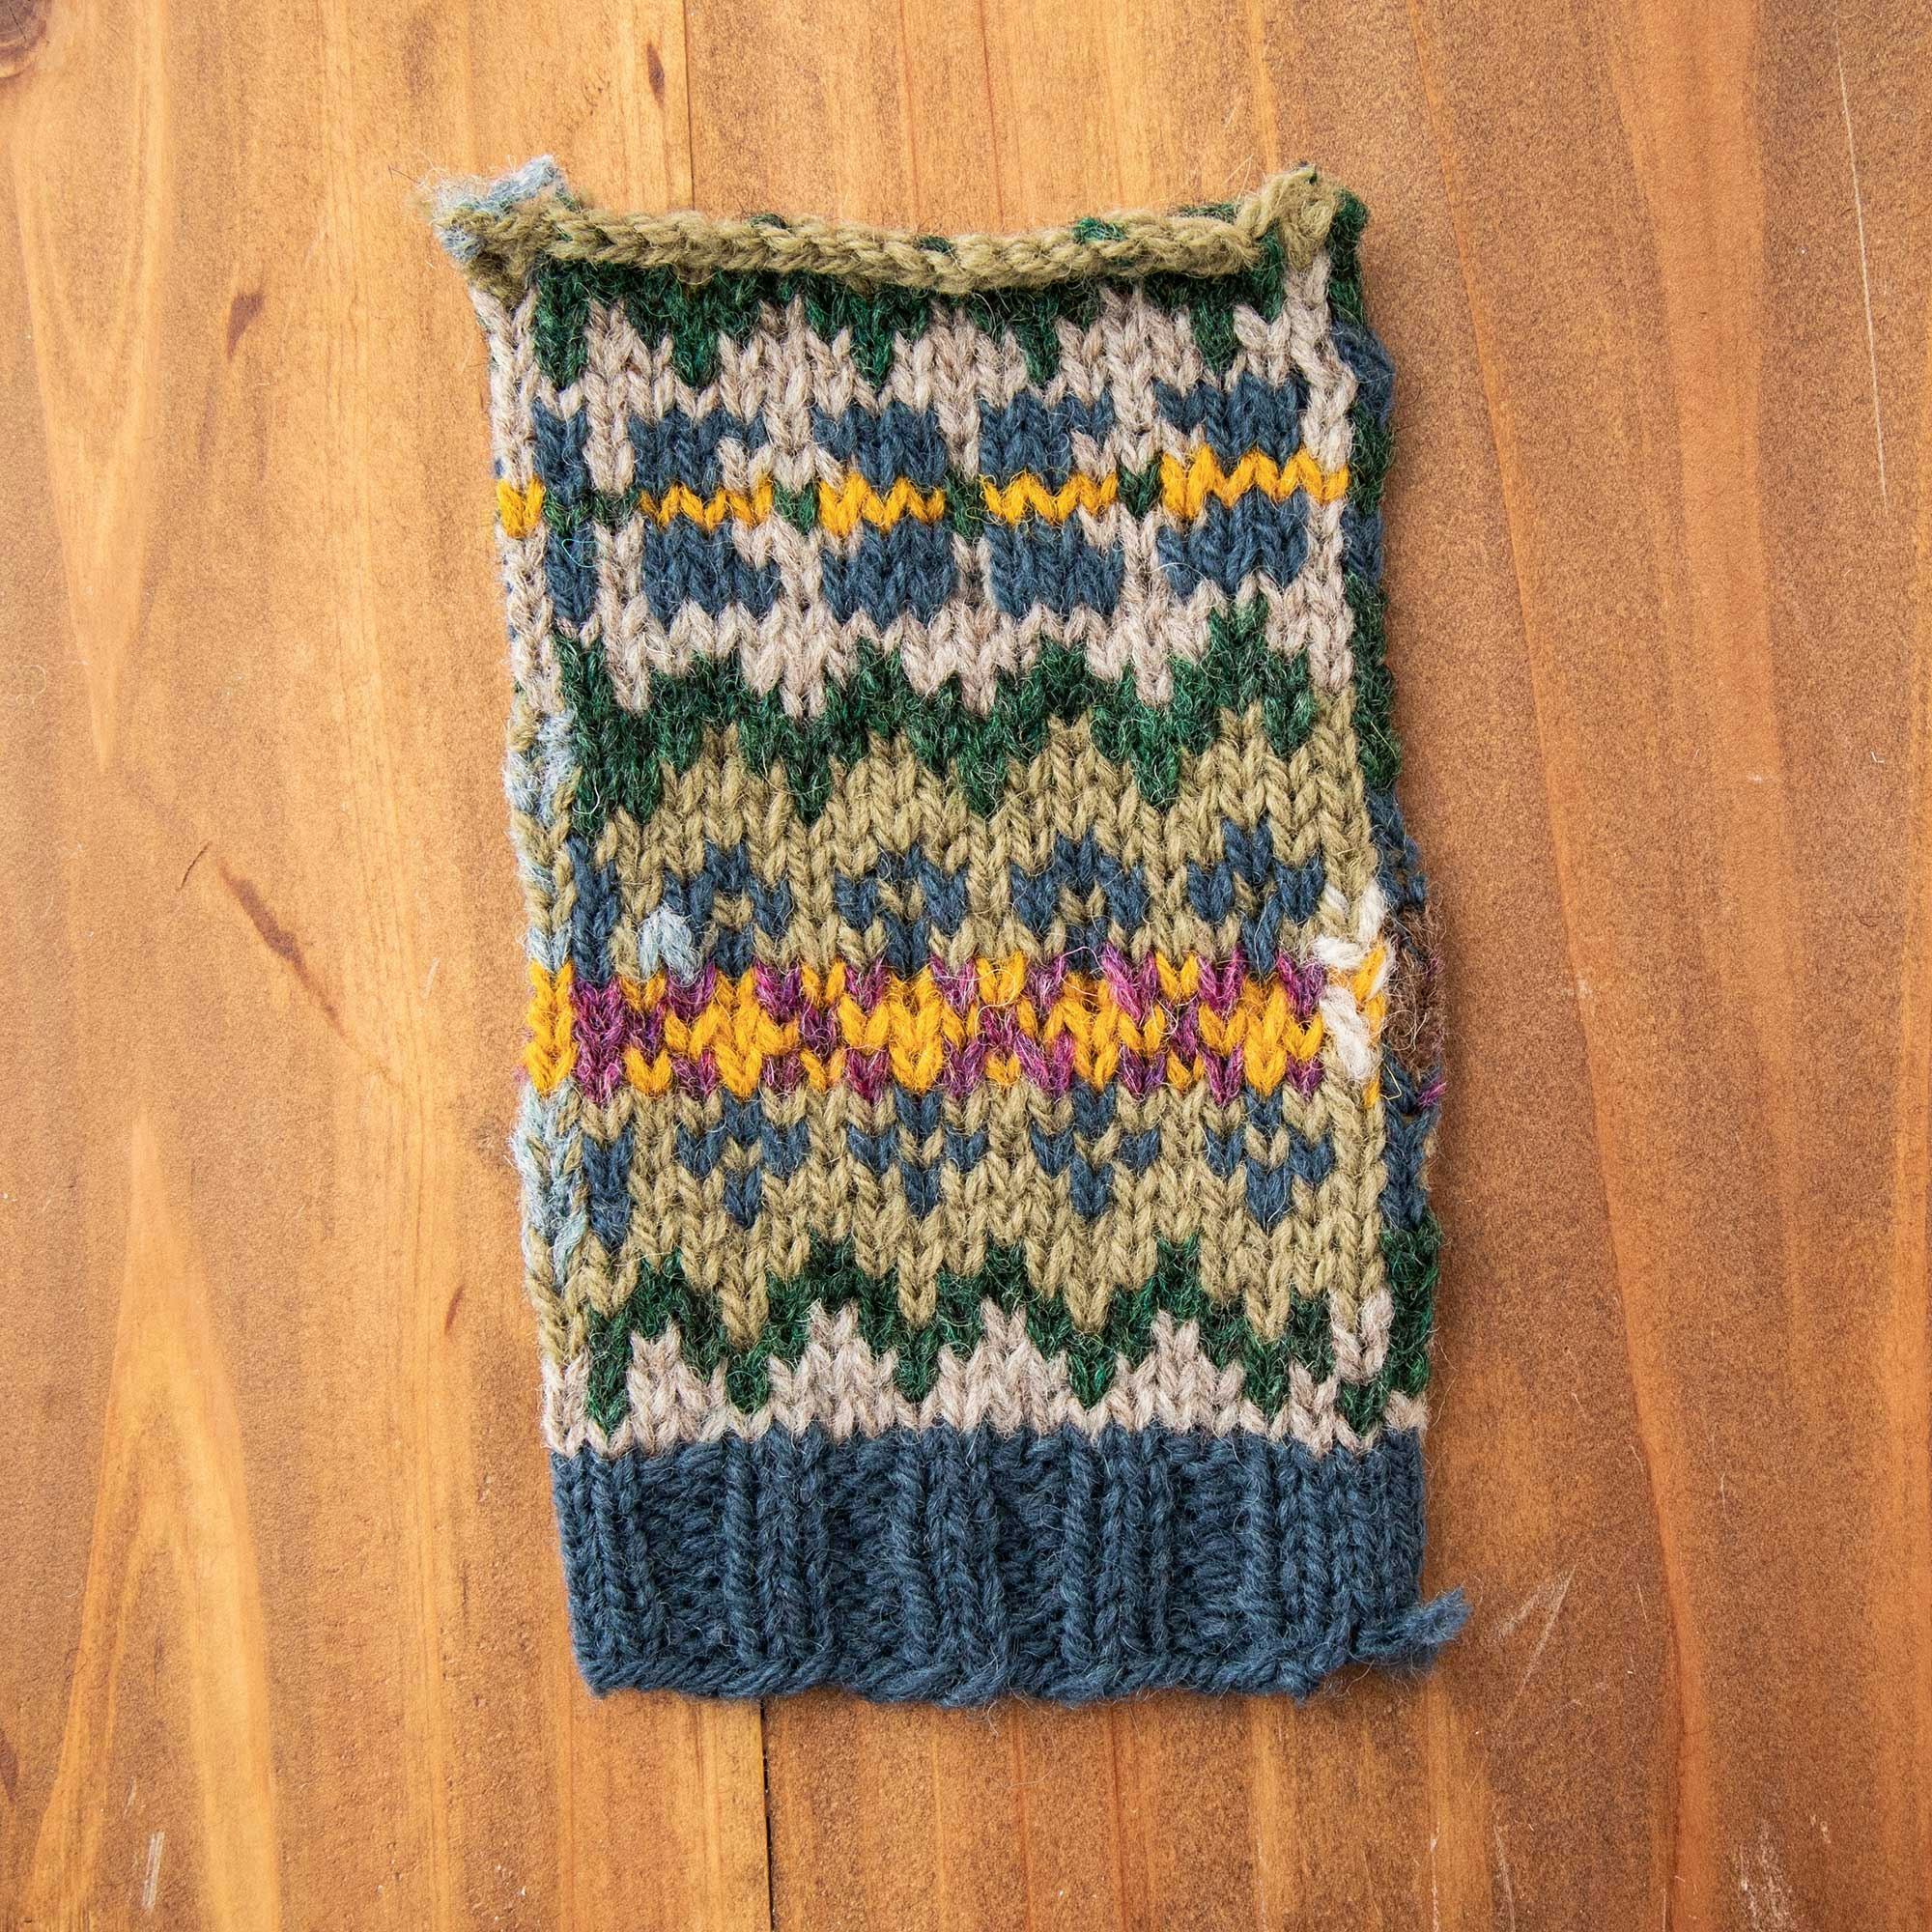
 Stonehenge, Mooskit, Conifer, Marjoram, Foxglove, and Mustard.
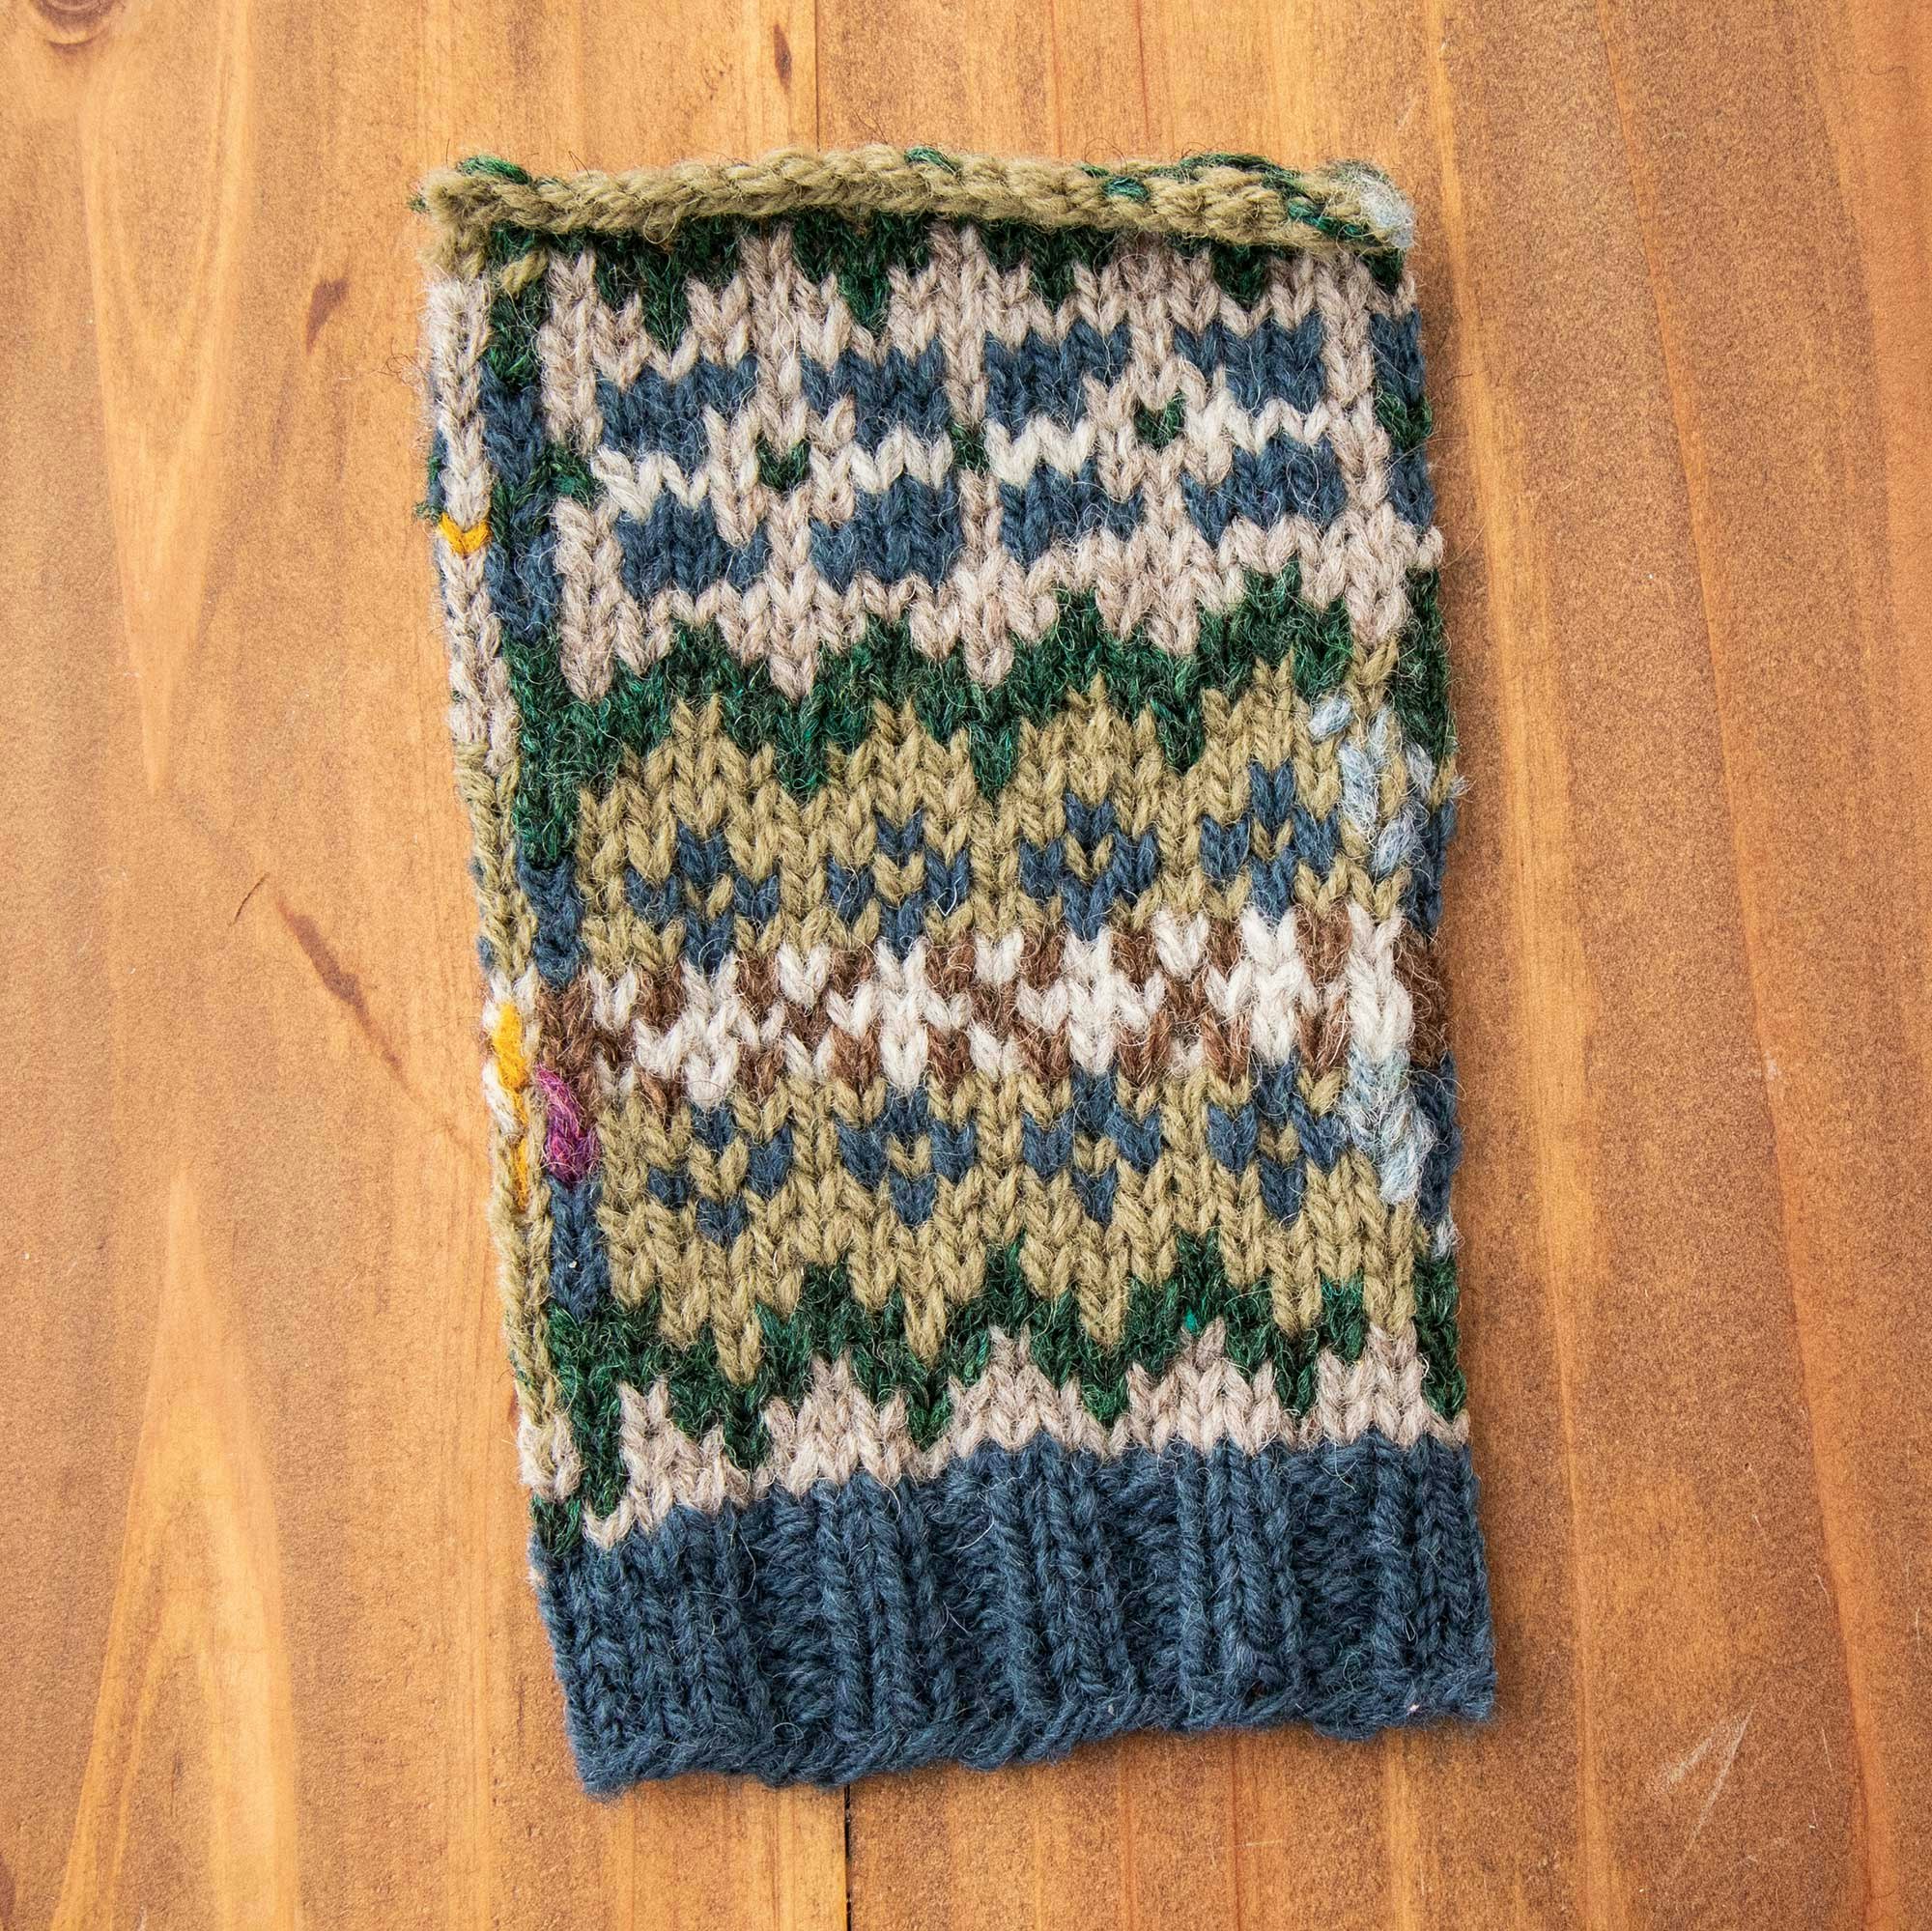
 Stonehenge, Mooskit, Conifer, Marjoram, Moorit, and Pebble.
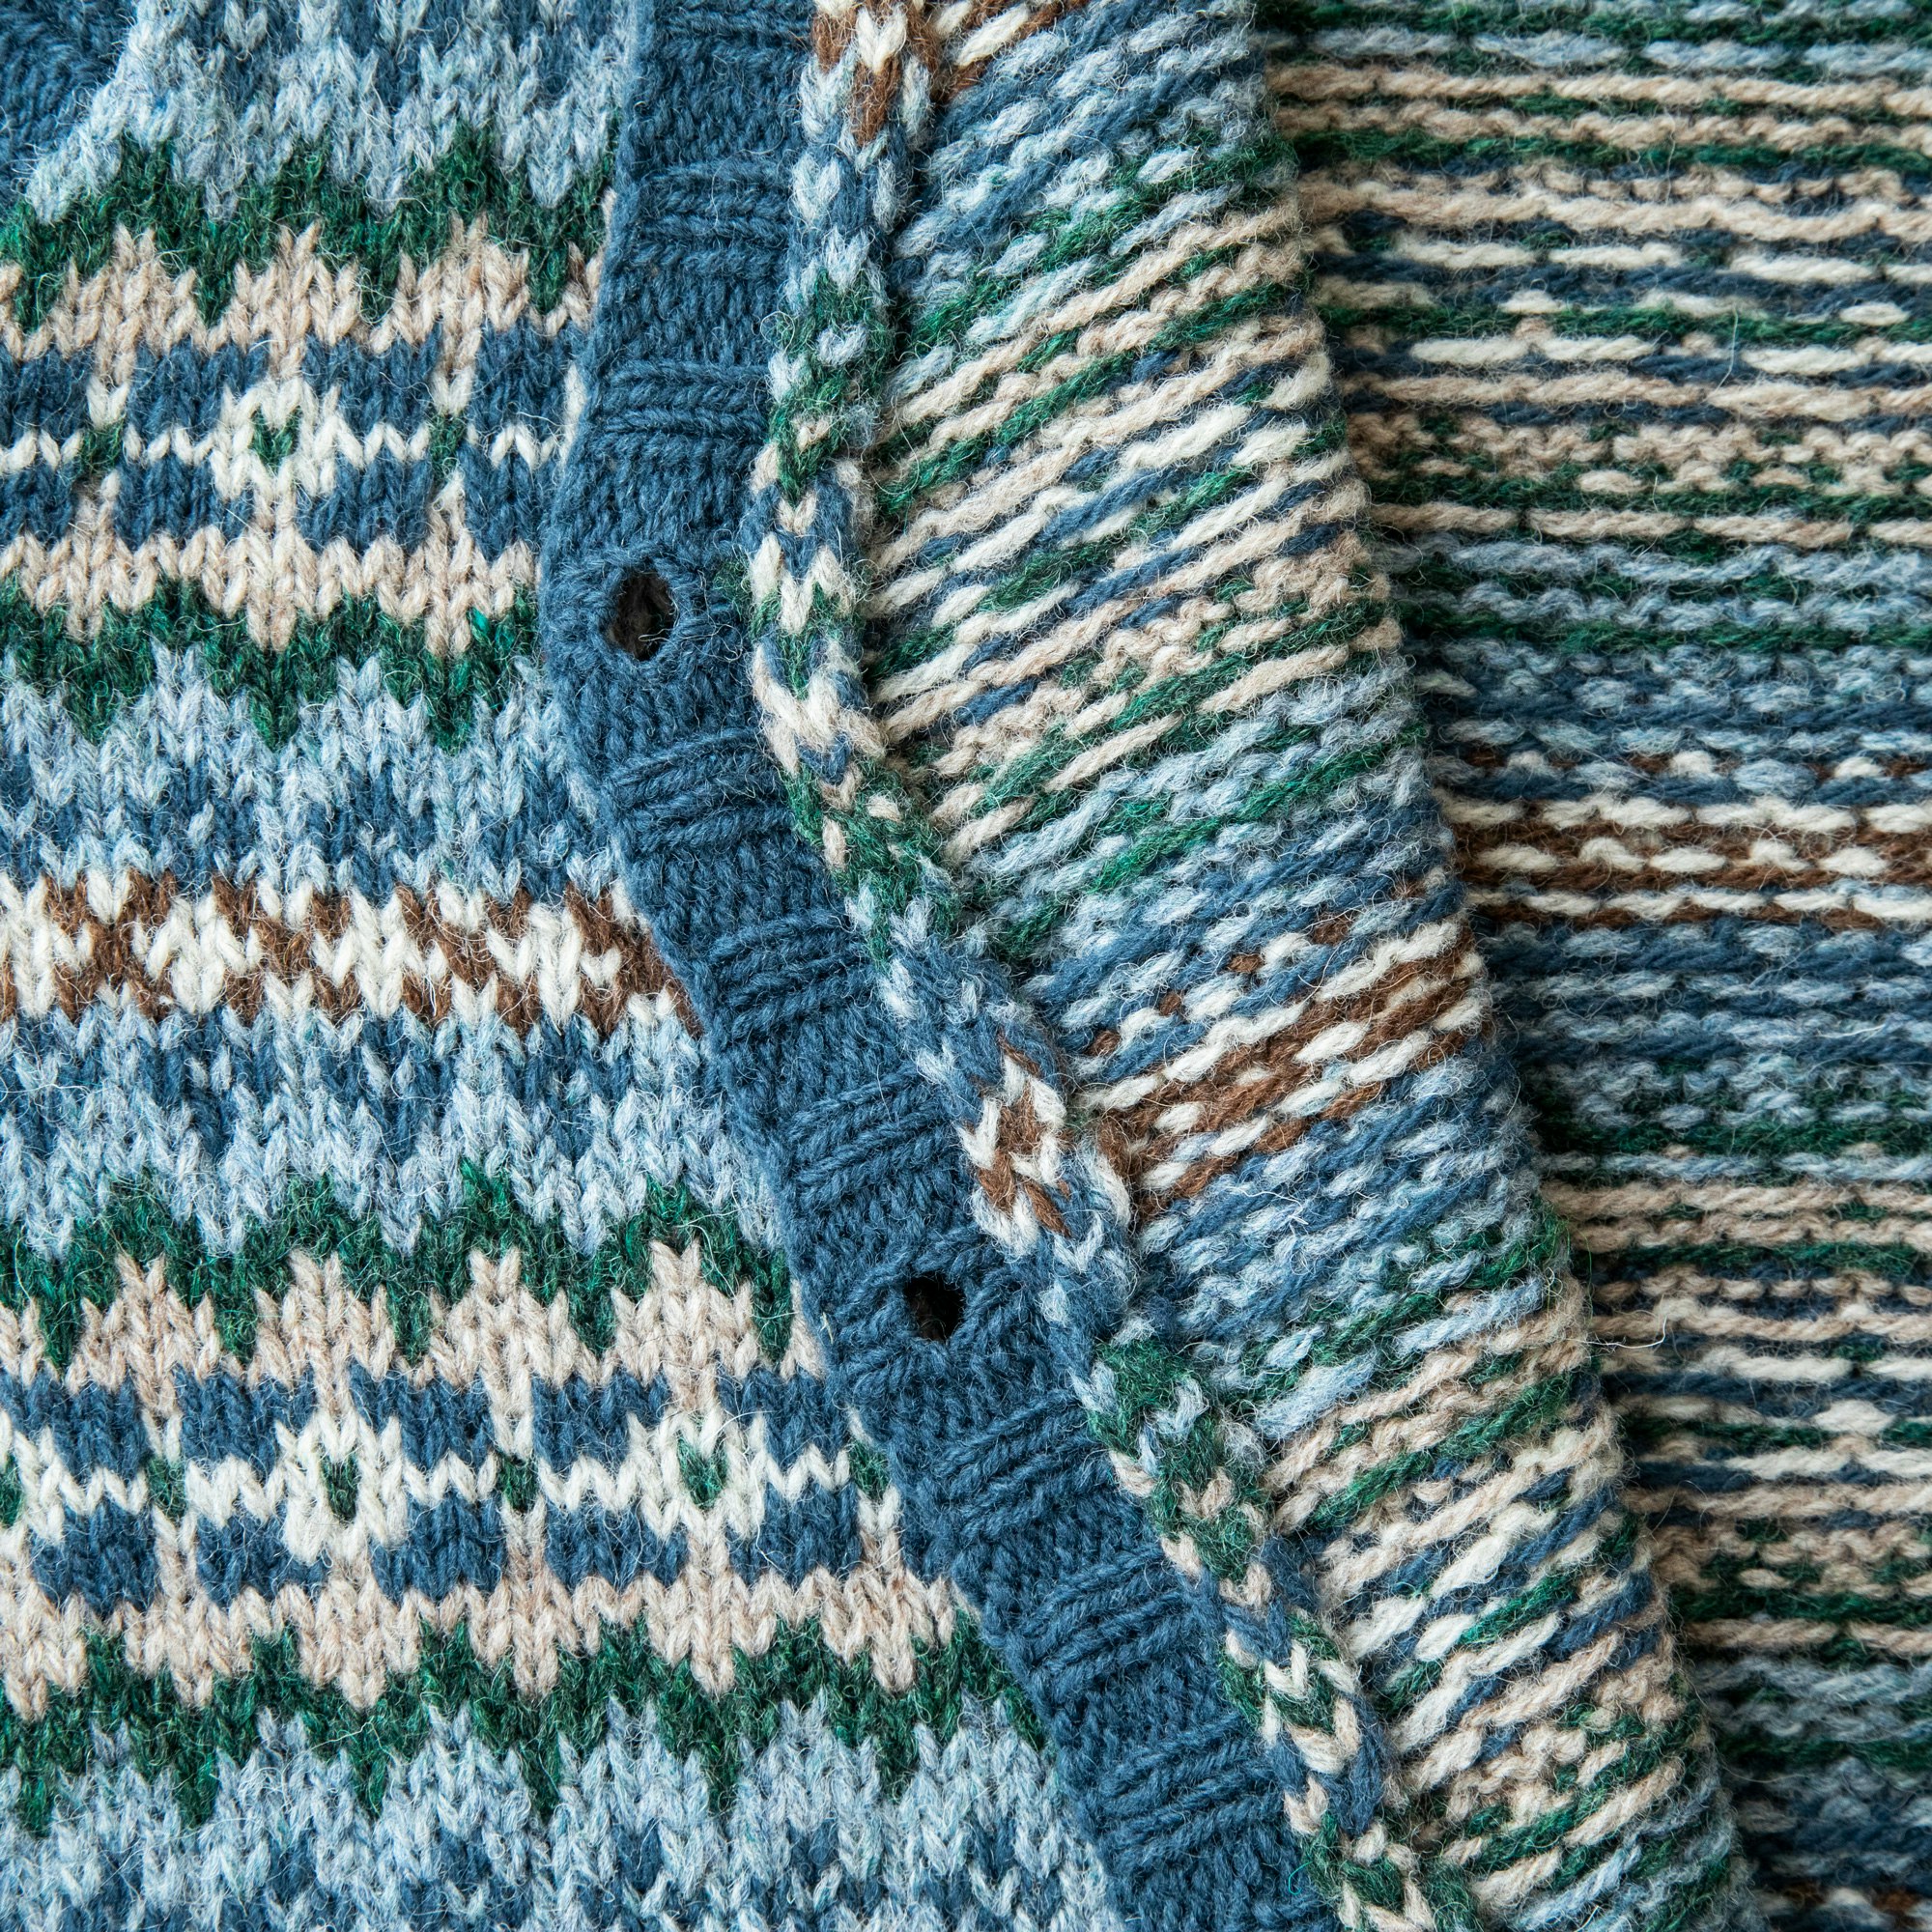
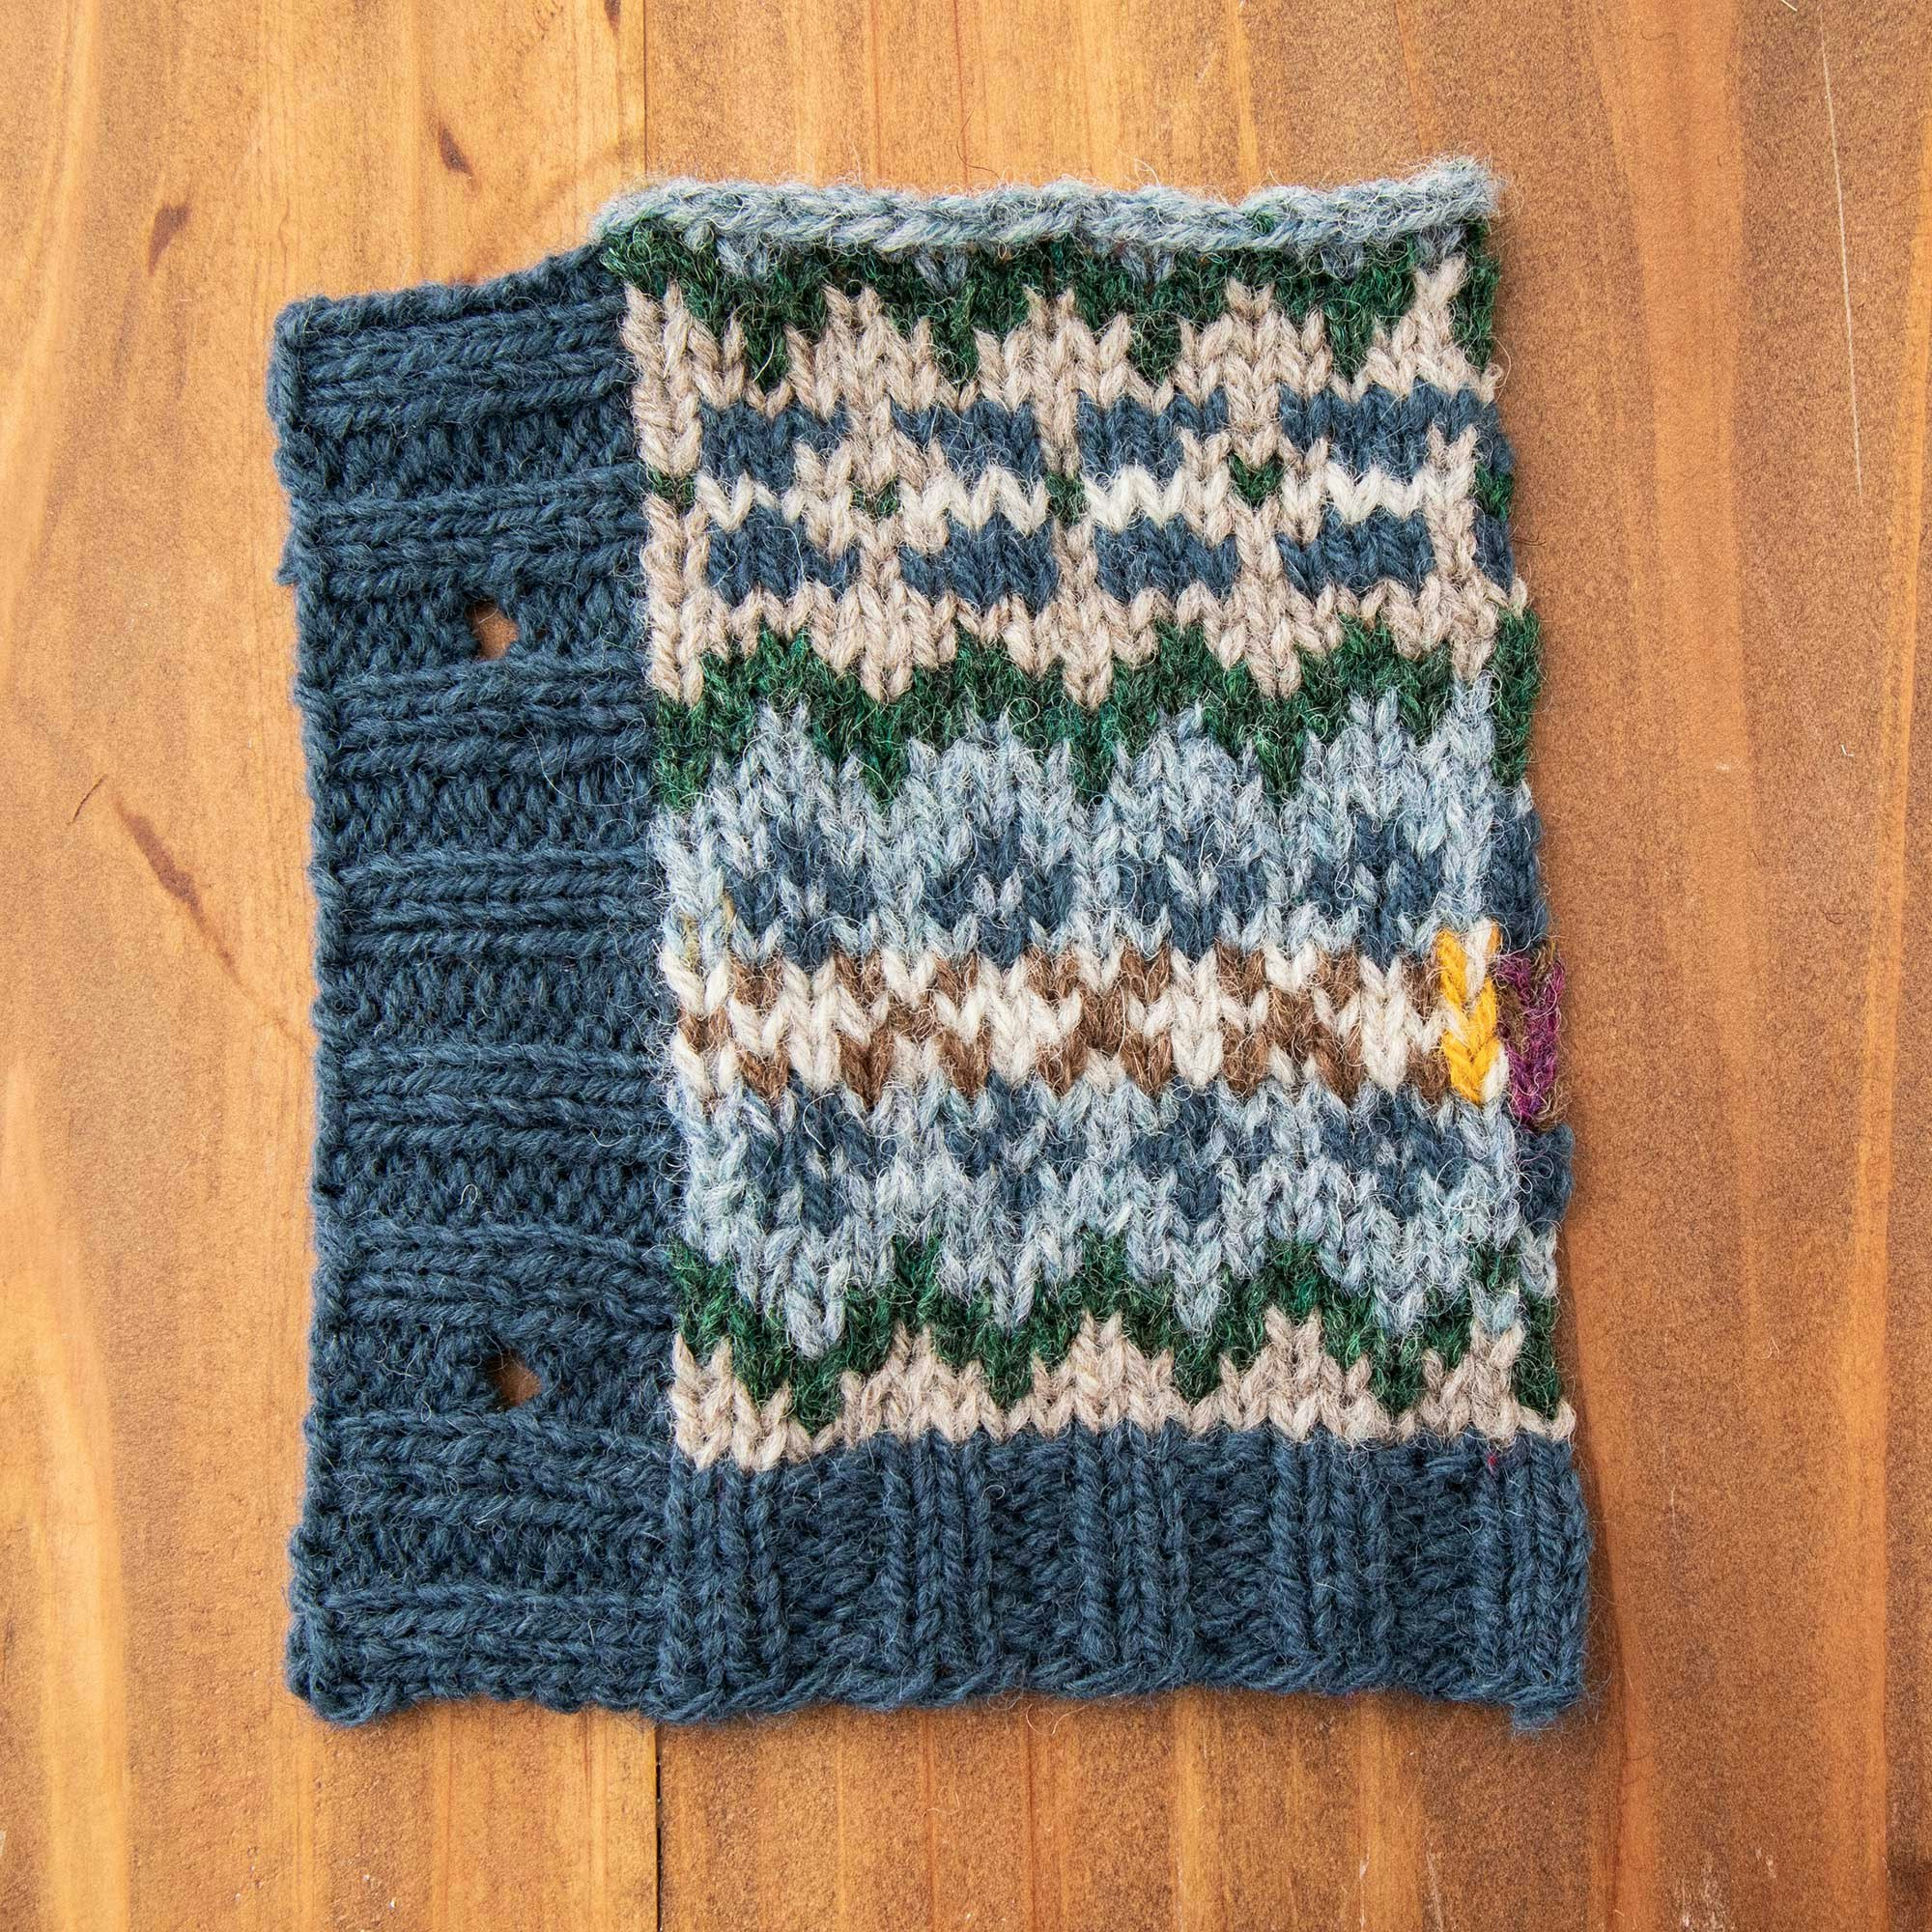
 Stonehenge, Mooskit, Conifer, Highland Mist, Moorit, and Pebble. Sandi used this swatch to sample the front-edge ribbing. After the swatch was cut from its neighbors, she picked up and knit the vertical rib.
The gold and berry hues felt a little over the top. Choosing blues, greens, and three different neutrals gave us a fabric that is both lively and easy to wear.
Swatching with Steeks—How It Works
Swatching in the round with steeks allowed me to test several different colorways without knitting multiple small pieces. A tubular swatch is a closer approximation of the techniques and tension I’ll use when knitting the vest, allowing me to measure gauge more accurately. And, if you’re a little hesitant about cutting open the steeks, separating the swatches is a perfect opportunity to practice. I’ll show you how I used the steeked swatch method for the Skellister Vest, but you can easily adapt this to any other project.
SUBSCRIBER EXCLUSIVE
In the Fall issue of Farm & Fiber Knits, I demonstrated needlefelting to reinforce a steek in the Skellister Vest. But the finished project isn’t the only part of the process to use a steek. As early as sampling colorways for the design, I used the technique on my swatches.
Steek is a common term for an extra panel of stitches added to a project that will later be cut open to create armholes, necklines, and more. Steeks are important for designs such as this one, and the technique can also be used to sample for projects that will be knitted in the round.
Traditional Inspiration for a Modern Vest
When I proposed this design, I had just finished watching the latest season of All Creatures Great and Small on PBS. That show is full of knitwear, but I particularly love the colorwork pullover vests that the men wear under their tweed jackets, like this one worn by the character Tristan Farnon.
Perfectly suited to the Yorkshire countryside of the 1940s, a colorwork vest is a classic garment that can be easily integrated into modern wardrobes.
I chose to make the Skellister Vest with a button front instead of a pullover style but to knit it in the round, both because that’s the traditional method and because I don’t enjoy purling over a stranded colorwork pattern. When knitting in the round, every row of the colorwork pattern is knitted on the right side of the fabric.
Get a closer look! Click any image in the gallery below to open it in full-screen mode.
Knitting in the round also meant an opportunity to showcase an underappreciated technique: steeks! Even experienced knitters often shiver at the thought of taking a pair of scissors to their knitting. Traditional methods of securing steeks, such as sewing by hand or machine, can be tedious.
A few years ago, I learned to use needlefelting to secure steeks, and it was a revelation. Fast, fun, and effective, needlefelting is now my go-to method when I need to secure stitches before cutting.
How to Audition Colorways with Steeked Swatches
The Fair Isle sweaters of the 1930s and 40s that inspired this design often combined the natural colors of undyed wool with surprisingly bright dyed hues. My original proposal echoed this theme, with green, blue, gold, and berry combined with Mooskit, an undyed light brown.
The colors in my original proposal for the Skellister Vest.
Selecting yarn colors online is always a challenge, and choosing yarns for a multicolored project is even more difficult. Our perception of color is influenced by the colors that surround it. You can never really know if a color combination works until you see it in the swatch.
Editor Kate Larson and I selected ten colors of Jamieson’s DK weight, including the six I originally suggested, and I started playing with palettes when the box arrived. We wanted to use the deep blue of Stonehenge for the ribbing on this vest, but the rest of the colors were up for grabs.
I swatched four options—all at once—by using a steeked swatch method. Here are the results:
Get a closer look at Sandi’s swatches. Click on any image below to view it in full-screen mode and learn about the colors used. Photos by Matt Graves
Stonehenge, Mooskit, Conifer, Highland Mist, Foxglove, and Mustard.
Stonehenge, Mooskit, Conifer, Marjoram, Foxglove, and Mustard.
Stonehenge, Mooskit, Conifer, Marjoram, Moorit, and Pebble.
Stonehenge, Mooskit, Conifer, Highland Mist, Moorit, and Pebble. Sandi used this swatch to sample the front-edge ribbing. After the swatch was cut from its neighbors, she picked up and knit the vertical rib.
The gold and berry hues felt a little over the top. Choosing blues, greens, and three different neutrals gave us a fabric that is both lively and easy to wear.
Swatching with Steeks—How It Works
Swatching in the round with steeks allowed me to test several different colorways without knitting multiple small pieces. A tubular swatch is a closer approximation of the techniques and tension I’ll use when knitting the vest, allowing me to measure gauge more accurately. And, if you’re a little hesitant about cutting open the steeks, separating the swatches is a perfect opportunity to practice. I’ll show you how I used the steeked swatch method for the Skellister Vest, but you can easily adapt this to any other project.
[PAYWALL]
Using a short circular needle, I cast on enough stitches for all four swatches plus four steeks, with markers dividing the piece into sections. I needlefelted the four steeks and cut the swatches apart.
How to Knit and Steek a Swatch
To avoid confusion while I was knitting my swatches, I charted each of the colorways I wanted to test. (I made this chart using Adobe Illustrator, but colored pencils on graph paper works just as well.)
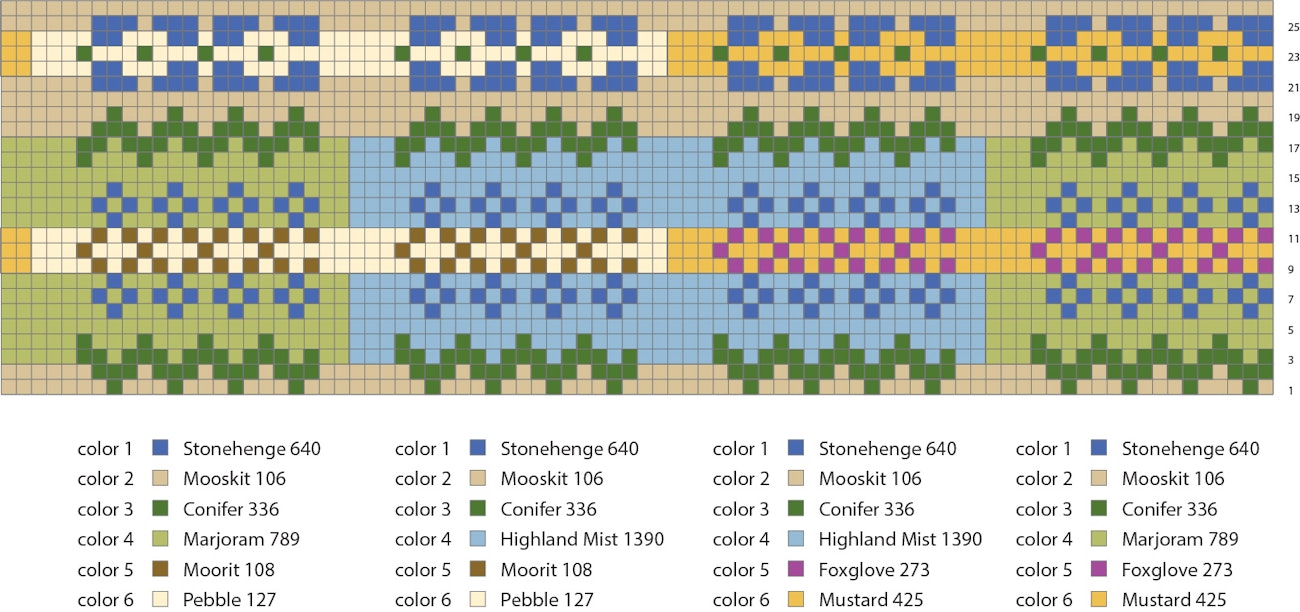
For each color combination you want to test, cast on 21 stitches—16 stitches for two repeats of the 8-stitch pattern, plus 5 stitches for the steek. I was testing four colorways, so I cast on 84 stitches onto a 16" circular needle. Place a marker for the beginning of the round, and join to work in the round.
Begin by knitting an inch or two of K2, P2 ribbing with the main color. This provides a partial “frame” for your swatches that will help you evaluate the colors.
Now work a setup round with the main color to mark your sections: * Knit 16, place marker, knit 5, place marker; repeat from * to end of round.
Start working the colorwork chart. Where the color changes in the middle of a round, knit a stitch or two with both colors held together, then break the old color and keep knitting with the new color. Don’t worry about tidying up the ends; you can just leave them hanging.
Work enough rounds to give you a clear idea of how all the colors play together. I worked Rounds 1–26, then repeated Rounds 1–4.
Then bind it all off.
Your tubular swatch will be horribly shaggy on the inside. To needlefelt the steek sections, you’ll need a needlefelting tool and brush or pad (see the tutorial in the Fall 2025 issue). With your fingers, brush the loose ends away from the center of one of the steek sections and position your felting brush pad inside the tube under that steek. Needlefelt the steek and cut it open. Repeat the felting and cutting for each of the remaining steeks, and trim away the loose yarn tails.
Now you’re ready to block your swatches, evaluate your color combinations, and measure your gauge. As you can see in the swatch photos above, I also used one of my swatches to test the rate at which I picked up stitches for the front band and to determine the size of my buttonholes.
Don’t be afraid to play with color and make it your own!
— Sandi
Learn More in the Fall Issue!
Head to the library to find Sandi’s Skellister Vest pattern, along with a tutorial on needlefelting steeks, in Farm & Fiber Knits Fall 2025.