
Emily Lymm of Wool & Palette is a natural dyer and fiber artist working with responsibly sourced wool and plant-based color. Her practice combines traditional dye methods with a deep focus on chemistry, resulting in richly saturated, cohesive palettes.
Here, she details the process she used to create the Auburn color, which took 13 tries to get just right. Emily says of the process, “I made a display box for my last fiber festival to show customers the process, and people LOVED it! It’s a little bit of science and art museum wrapped into one.”
As a dyer, there’s a moment in the development of every color where it either becomes what you’re looking for or it doesn’t. Auburn was one of those colors that refused to resolve quickly.
I wasn’t trying to make “a brown” or “a red.” I was looking for something very specific: a deep, warm auburn that sits precisely between the two. Not too red, not too flat, but similar to the color of a chestnut. It needed to feel rich, grounded, and wearable.
That kind of color doesn’t happen by accident.
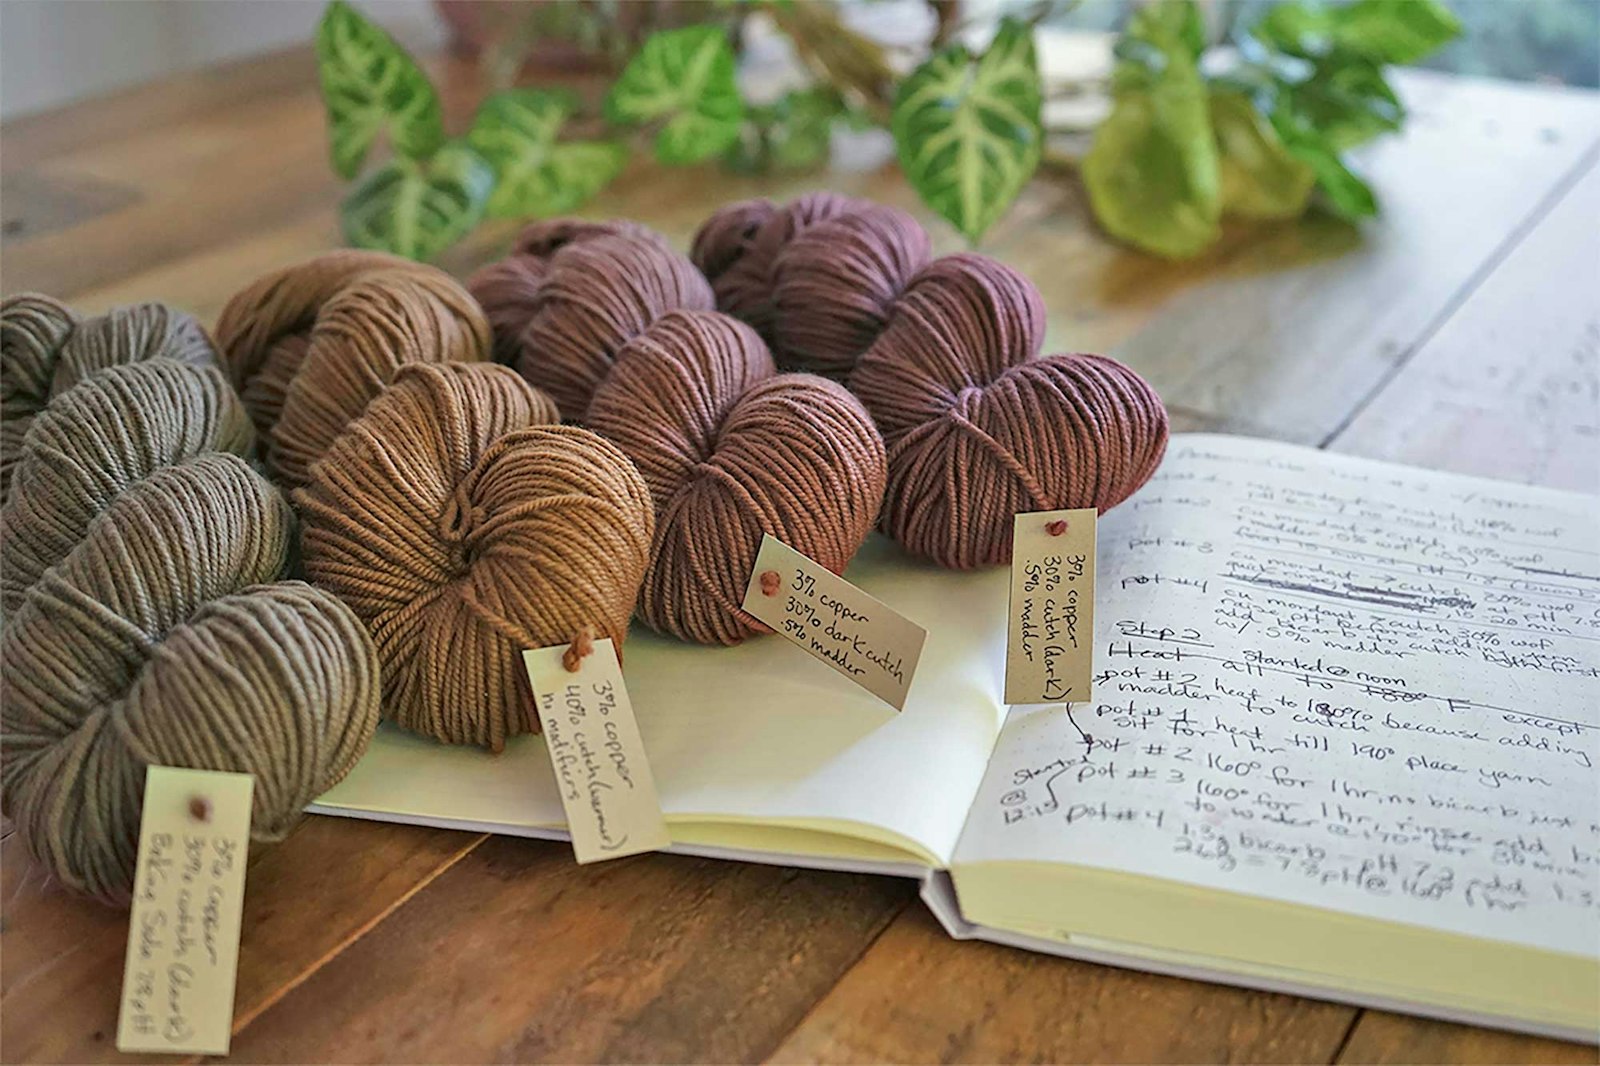
 A full view of the color study, spanning three dye sessions and thirteen samples, each capturing small shifts in material, timing, and outcome.
To get there, I ran a series of structured tests—three experiments in total—producing thirteen distinct samples. Each one was a small adjustment in materials or timing. Another experiment sought to answer a simple question: what happens if I push this just a little further? What became clear early on was that pushing harder wasn’t the answer.
Cutch, a dye sourced from wood, gave me the structure I needed, but the more I tried to deepen it, the flatter the color became. I also began wasting more material. A darker brown didn’t bring me closer to auburn—it pulled me away from it. So I stopped trying to force depth and started building it instead.
Click on the images below to read details about Emily‘s first and second rounds of testing.

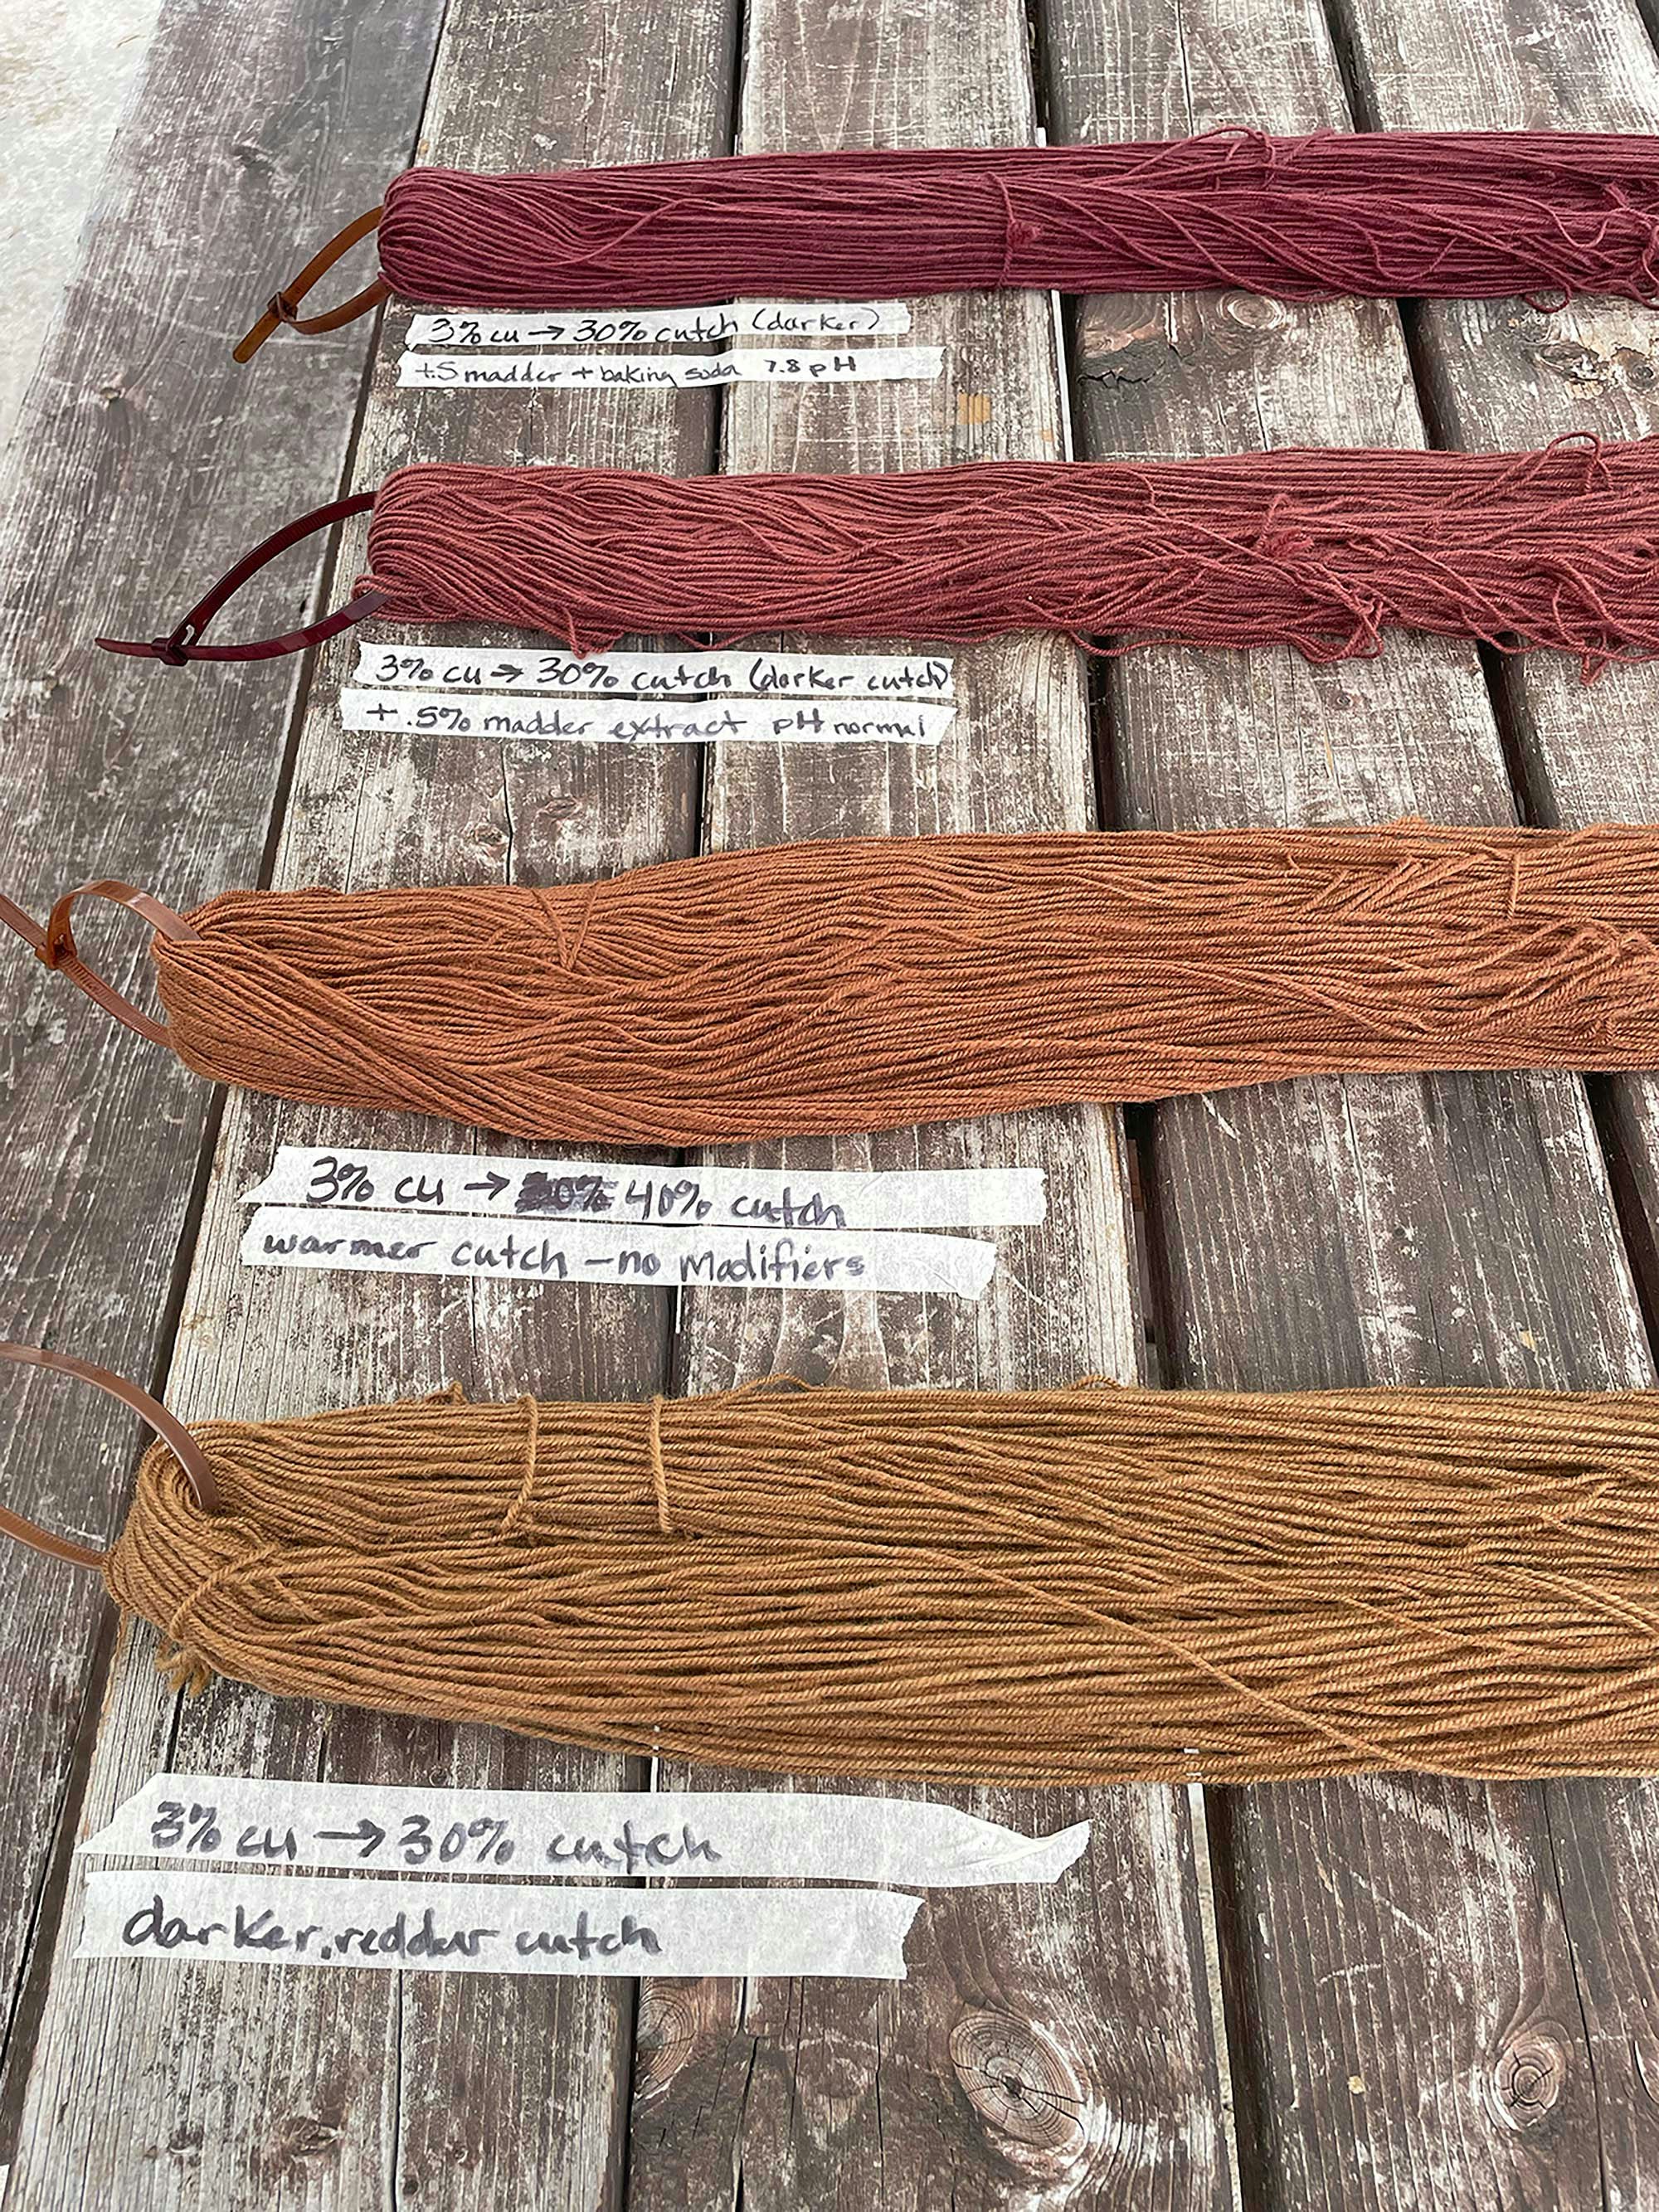
Adding madder, a red dye that comes from the roots of the madder plant, changed everything. Not in large amounts, but in small, deliberate additions. Instead of overpowering the brown, madder clarified it. The color shifted from something heavy to something warm and dimensional, as if it were catching light instead of absorbing it.
The Experiment That Surprised Me
At one point, I introduced soda ash to shift the pH, expecting it to push the color darker and slightly more purple. Instead, the yarn turned streaky.
What happened was subtle but important. At higher alkalinity, some of the copper mordant began to precipitate, falling out of solution and forming tiny particles that settled unevenly onto the fiber. Instead of a smooth, cohesive color, I ended up with something mottled and inconsistent. It was a reminder that even small shifts don’t just affect the dye—they can change the chemistry of the mordant itself. At higher pH levels, metal ions like copper or iron can react with hydroxide ions to form insoluble compounds. These can settle unevenly onto the fiber, creating the visible streaks or spotting.
Pro tip: If you’re trying to gently raise the pH and nudge the color toward warmer brown tones, baking soda is easier to control than soda ash. It’s a milder alkali and naturally buffered, typically sitting around pH 8-8.5. Soda ash raises pH more quickly, which can lead to uneven results when working with metal mordants like copper or iron.
Additional note: Relying heavily on pH to adjust color can also affect long-term stability. Colors shifted primarily through alkalinity are more likely to change again during washing. Building color through layered dyes, with only subtle pH adjustments, tends to produce more stable results.
![]() Uneven color caused by copper precipitating in an alkaline bath, leaving darker deposits on the fiber.
Uneven color caused by copper precipitating in an alkaline bath, leaving darker deposits on the fiber.
From there, the work became quieter and even more focused. It was less about making big changes and more about paying attention.
I learned that copper adds a depth and richness that alum alone can’t quite achieve, but it needs restraint. Too much intervention, especially with pH, quickly throws the balance off, dulling the red and flattening the color. So I adjusted course, adding more cutch for structure, and small additions of madder to build red. By the final round of testing, the process felt less like experimenting and more like refining. I wasn’t searching anymore, but narrowing in on the perfect color. In the end, the auburn I was looking for came from restraint. I built the color slowly, and stopped at the right moment.
 The final result: Wool & Palette‘s 3-ply Merino/Rambouillet Worsted in Auburn.
Dyeing isn’t just adding color to fiber. Color forms over time through chemical interactions, shaped by temperature, concentration, and timing. Sometimes the only way to find it is to follow the process all the way through, and to recognize when it finally feels right.
Learn more!
Hear from Emily herself in the Long Thread podcast.
Step inside Emily‘s dye studio to learn more about her sourcing and experimenting for achieving the perfect color.
Find out how to wash your naturally dyed wools to preserve the depth, nuance, and beauty with Emily‘s expert advice.