Subscriber Exclusive
A Better Cast-On for Stretchy Edges: The Alternating Long-Tail Cast-On
Ready for ribbing? This CO is a game changer.
Ready for ribbing? This CO is a game changer. <a href="https://farmfiberknits.com/alternating-long-tail-cast-on/">Continue reading.</a>
https://farmfiberknits.com/cdn-cgi/image/format=auto/https://www.datocms-assets.com/101500/1745509877-altco-sidebyside.jpg?auto=format&w=900
The long-tail cast-on is a favorite for many knitters. It creates a stable edge with a row of knit stitches on the needle ready to go. But it’s not the best choice for every project. The long-tail cast-on is notorious for creating a tight edge that impedes the stretchiness of knitting. Let’s take a closer look to find out why.
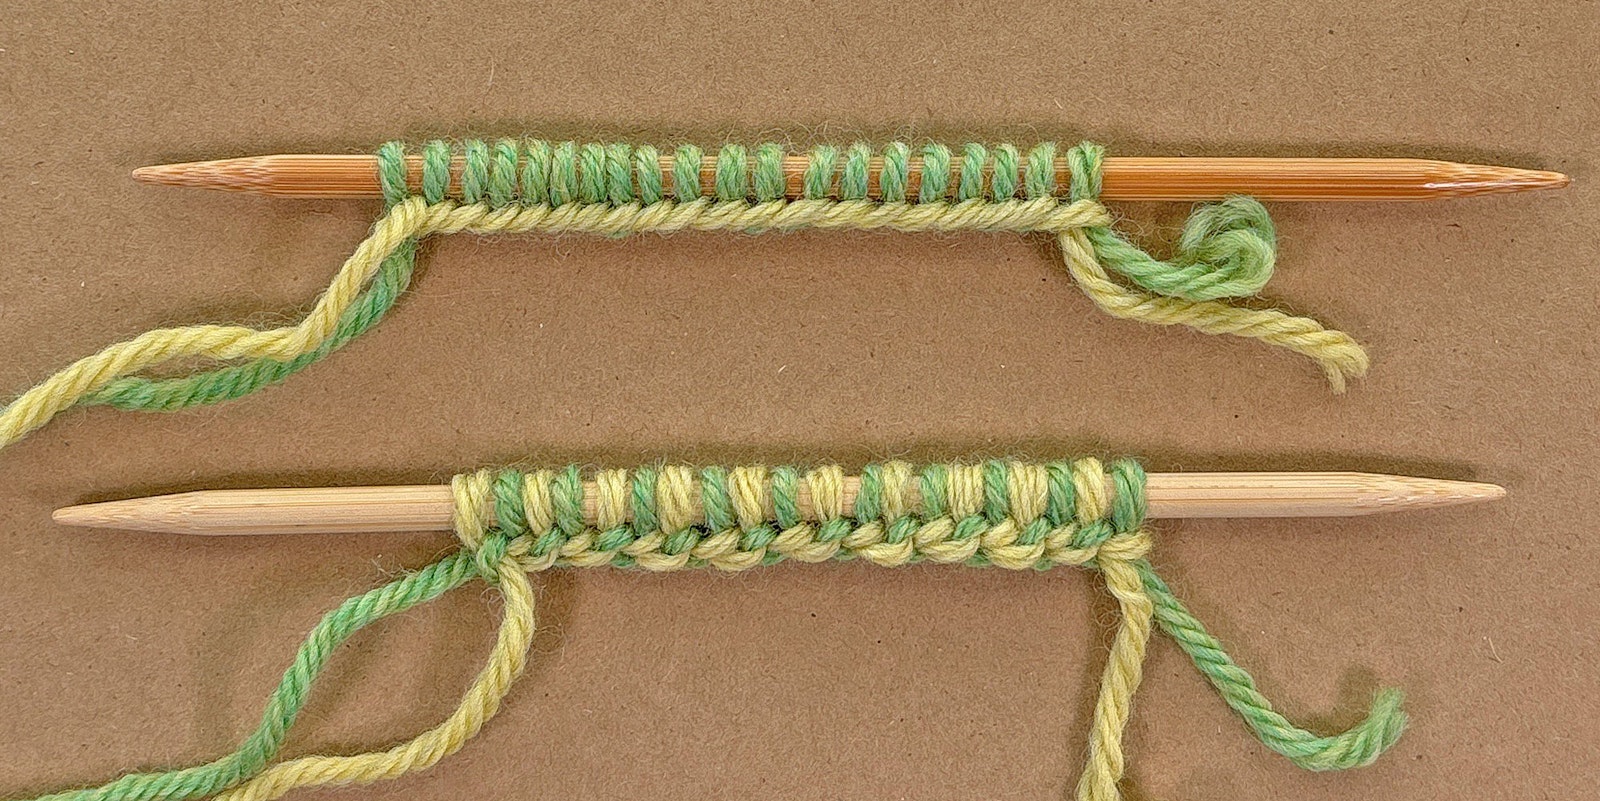
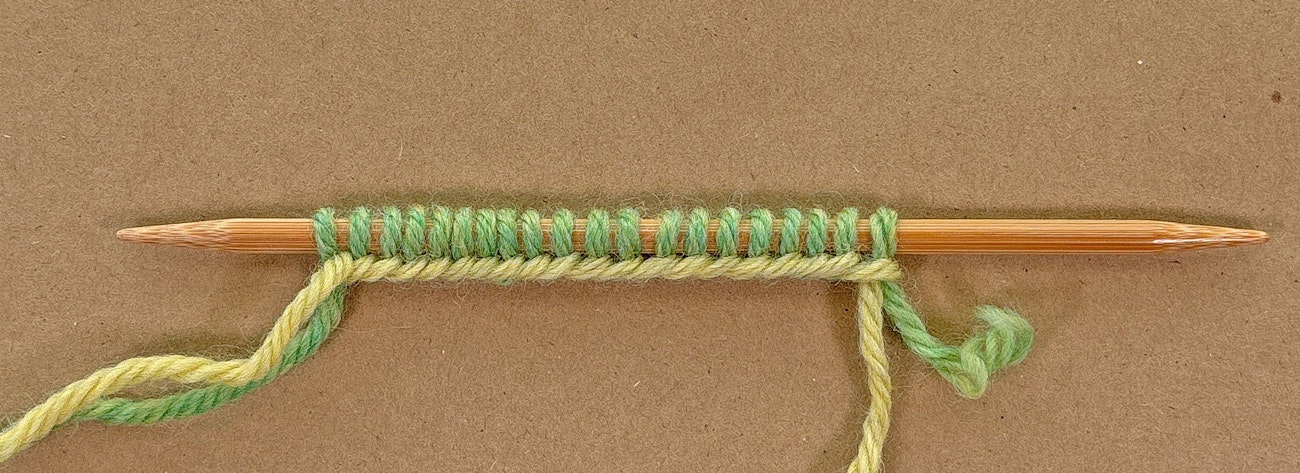 A standard long-tail cast-on worked in two colors for clarity.
For this example, yellow yarn was used for the “tail” and held over the thumb while casting on. Green yarn was used for the “working yarn” and held over the index finger while casting on. You can see that the working yarn forms the stitches on the needle, while the tail yarn forms a series of foundation loops anchoring each stitch in place.
The path traveled by the tail yarn is much shorter than that traveled by the working yarn. And that tail yarn is what limits the ability of the edge to stretch. You may have been advised to cast on with a bigger needle or with two needles held together to avoid a tight edge. Now you know why that isn’t a good solution. Using a larger needle does not add length to the tail yarn; it simply enlarges the first row of stitches.
A Better Solution: The Alternating Long-Tail Cast-On
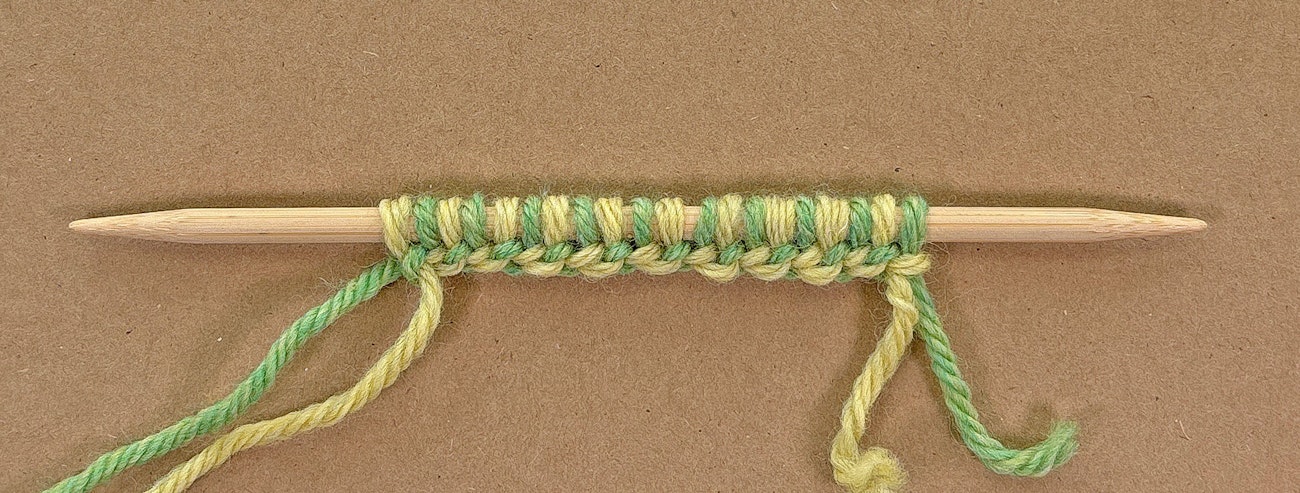 The alternating long-tail cast-on worked in two colors for clarity.
If your project starts with ribbing, an alternating long-tail method might be a perfect fit. As in the previous example, yellow yarn was used for the tail and held over the thumb; green yarn was used for the working yarn and held over the index finger. Knit stitches are formed with the working yarn and purl stitches are formed with the tail. Both strands of yarn travel the same path around the needle, alternating between forming the stitch and forming the foundation loop. This longer path for the tail yarn builds in enough length to allow the edge to stretch as much as the ribbing that will arise from it.
SUBSCRIBER EXCLUSIVE
The long-tail cast-on is a favorite for many knitters. It creates a stable edge with a row of knit stitches on the needle ready to go. But it’s not the best choice for every project. The long-tail cast-on is notorious for creating a tight edge that impedes the stretchiness of knitting. Let’s take a closer look to find out why.
A standard long-tail cast-on worked in two colors for clarity.
For this example, yellow yarn was used for the “tail” and held over the thumb while casting on. Green yarn was used for the “working yarn” and held over the index finger while casting on. You can see that the working yarn forms the stitches on the needle, while the tail yarn forms a series of foundation loops anchoring each stitch in place.
The path traveled by the tail yarn is much shorter than that traveled by the working yarn. And that tail yarn is what limits the ability of the edge to stretch. You may have been advised to cast on with a bigger needle or with two needles held together to avoid a tight edge. Now you know why that isn’t a good solution. Using a larger needle does not add length to the tail yarn; it simply enlarges the first row of stitches.
A Better Solution: The Alternating Long-Tail Cast-On
The alternating long-tail cast-on worked in two colors for clarity.
If your project starts with ribbing, an alternating long-tail method might be a perfect fit. As in the previous example, yellow yarn was used for the tail and held over the thumb; green yarn was used for the working yarn and held over the index finger. Knit stitches are formed with the working yarn and purl stitches are formed with the tail. Both strands of yarn travel the same path around the needle, alternating between forming the stitch and forming the foundation loop. This longer path for the tail yarn builds in enough length to allow the edge to stretch as much as the ribbing that will arise from it.[PAYWALL]
For this example, and the how-to that follows, we’ve worked in K1 P1 ribbing. But the alternating long-tail cast-on is equally effective for K2 P2 and other ribbing patterns where the knit and purl stitches are well balanced. It also works well for brioche knitting.
Here’s How It’s Done
For these instructions, the tail yarn is green, and the working yarn is yellow. If working the cast-on in a single color, form a slip knot on the needle and call the slip knot your first knit stitch.
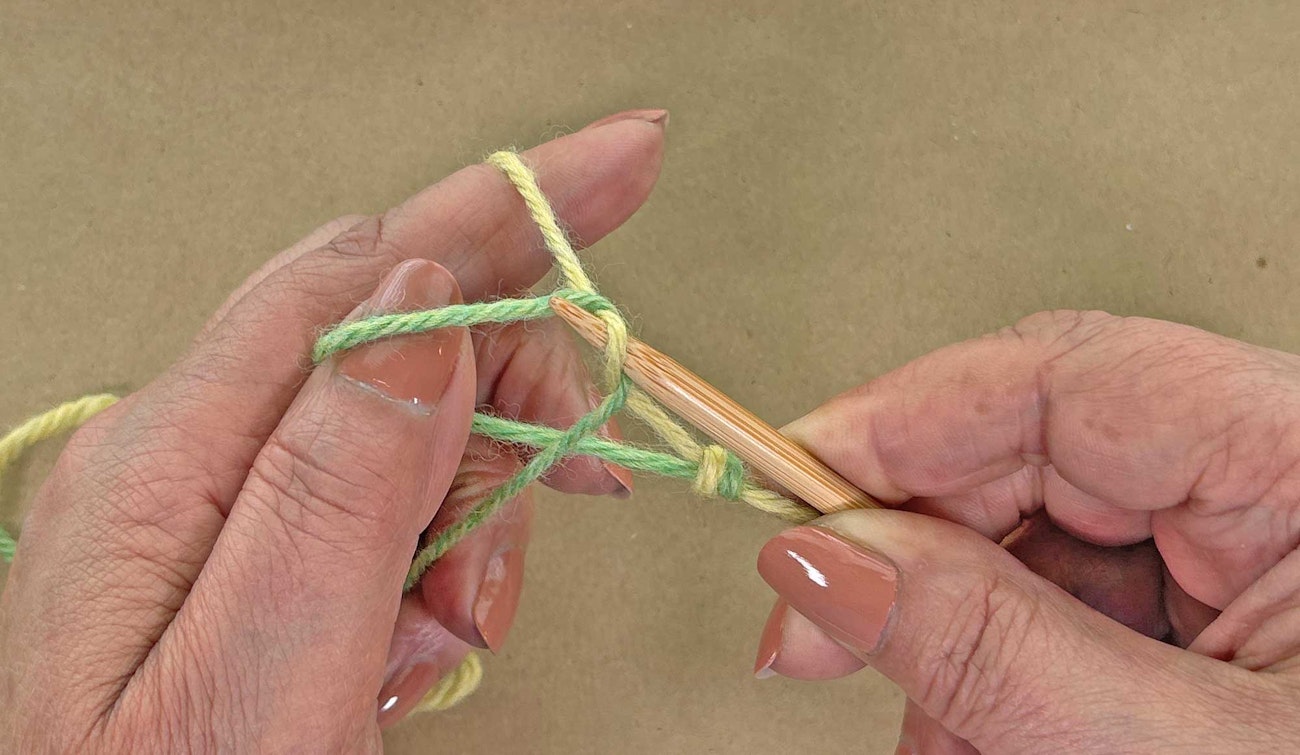
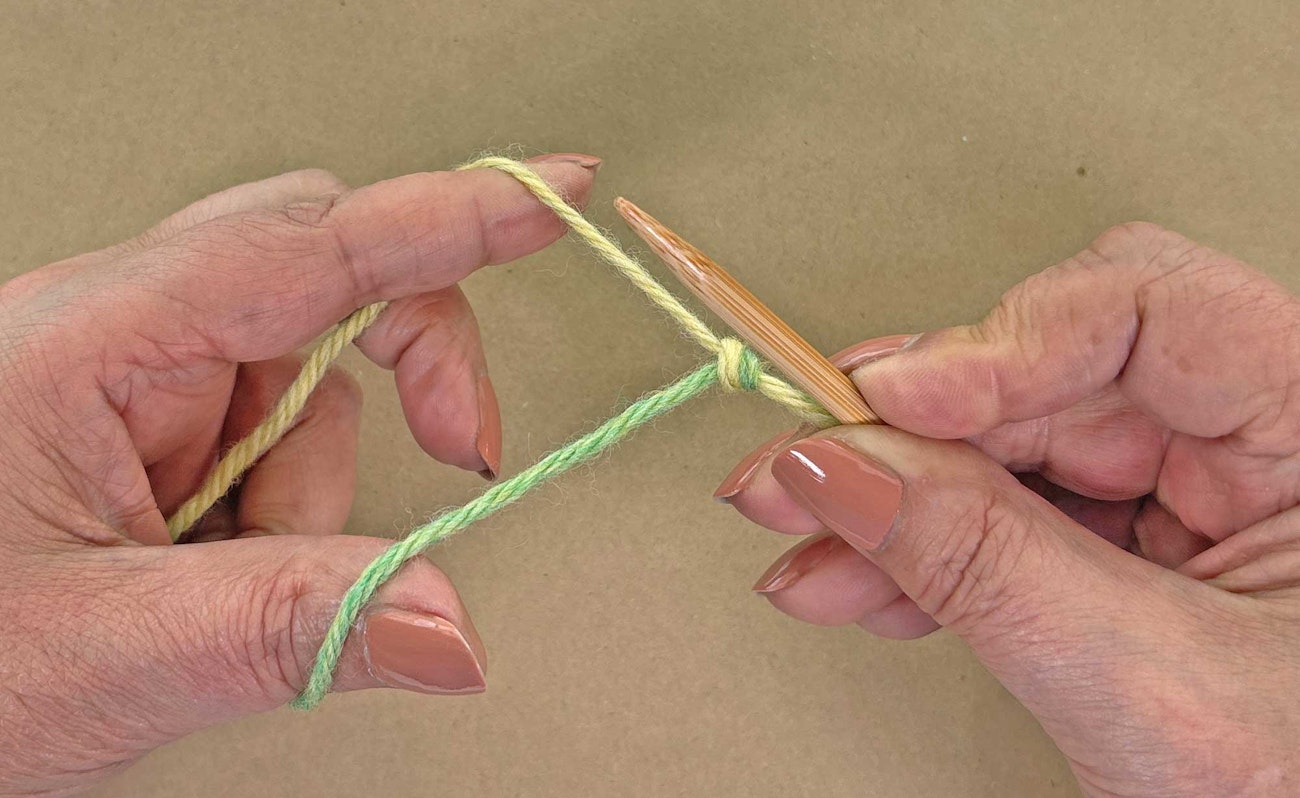 Step 1
Step 1: We’ll start with a knit stitch, which is worked exactly the same as in a standard long-tail cast-on. The working yarn travels from the needle over the index finger and across the palm. The tail yarn travels from the needle over the thumb and across the palm. Both strands are held against the palm with the remaining ring and pinky fingers.
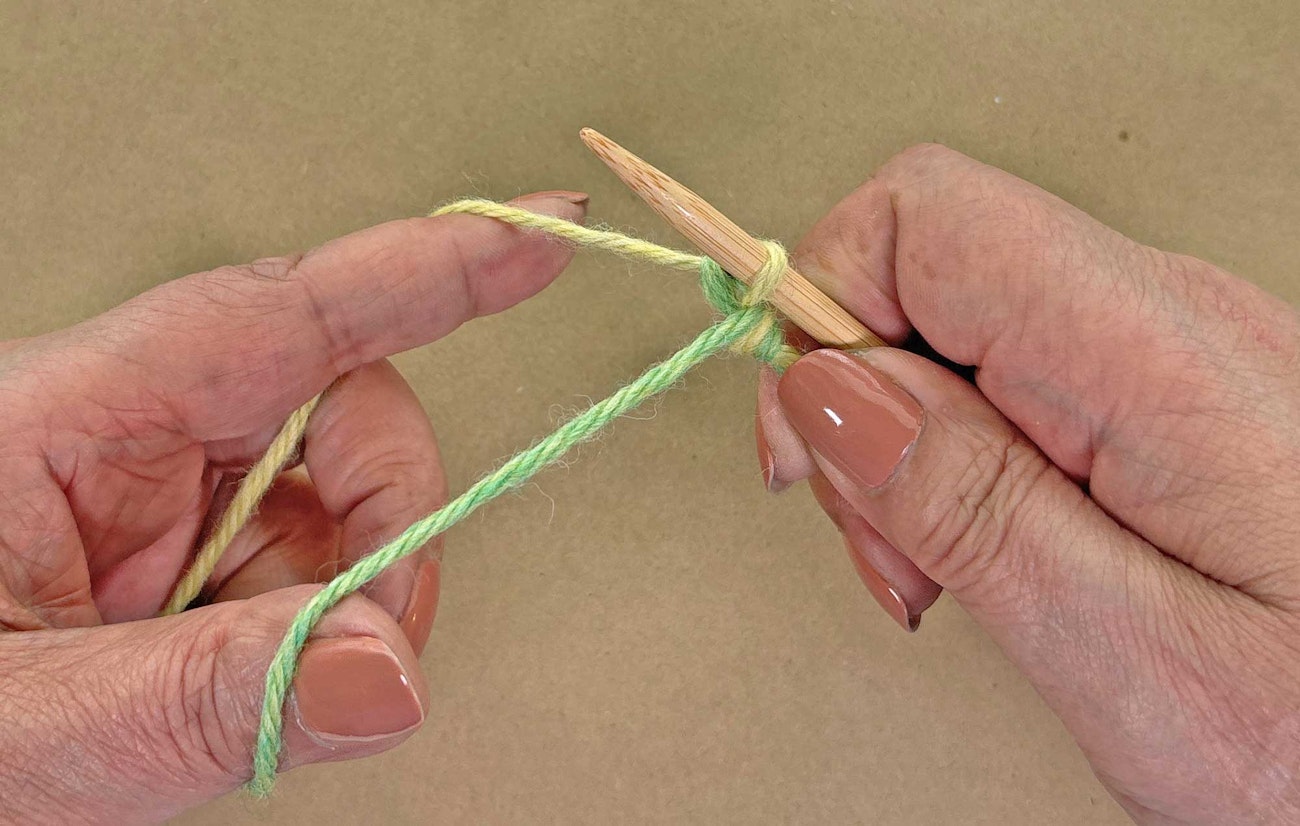
 Step 2
Step 2: Scoop up the strand of yarn running from the outside of the thumb to the palm, forming a loop in the thumb yarn.
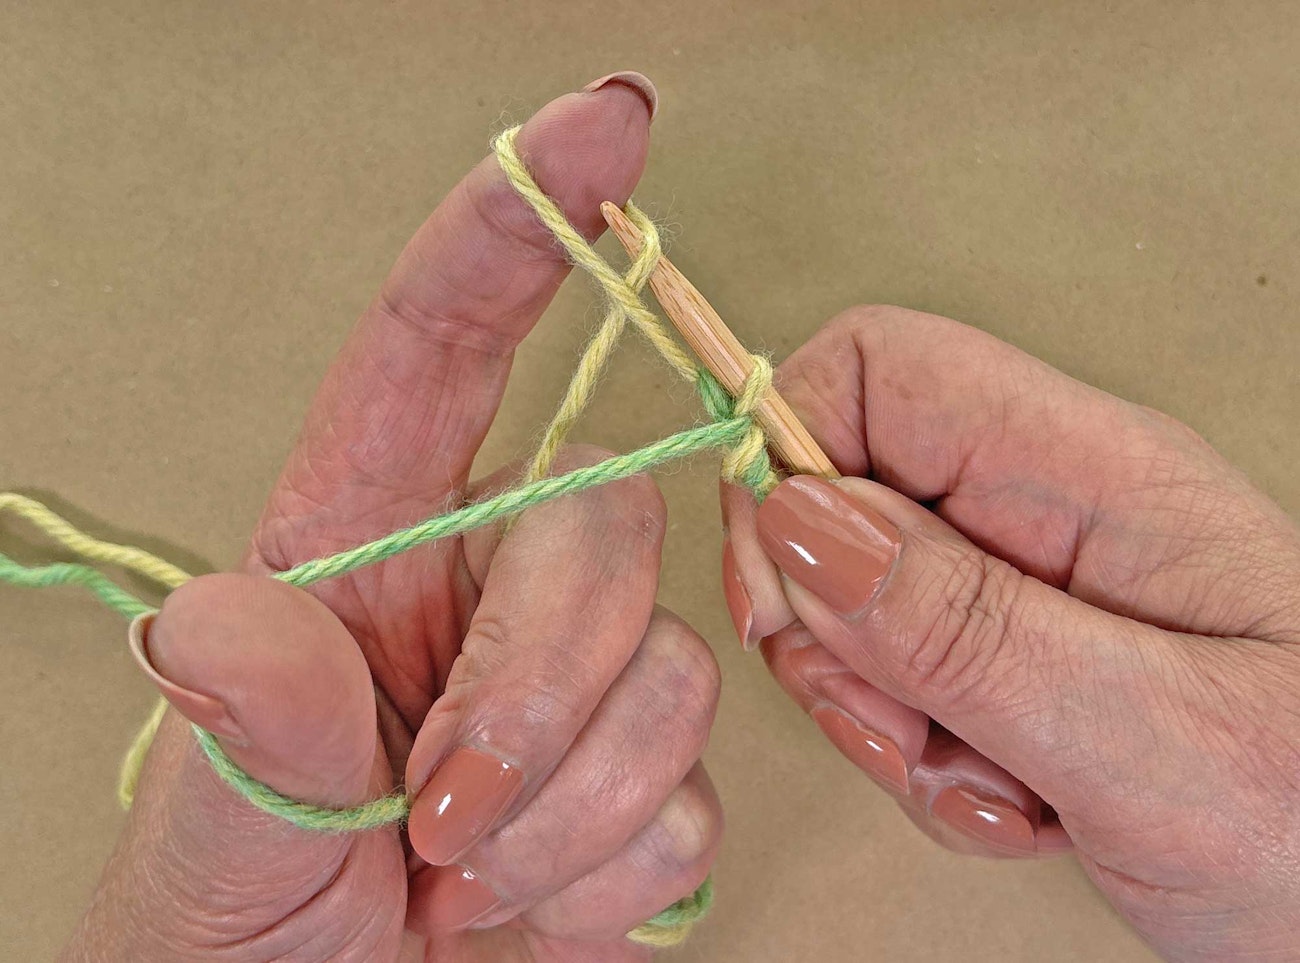
 Step 3
Step 3: Move your needle point over the top of the strand of yarn running from the needle to the index finger, then bring the needle point down and toward you to catch that strand and bring it through the loop.
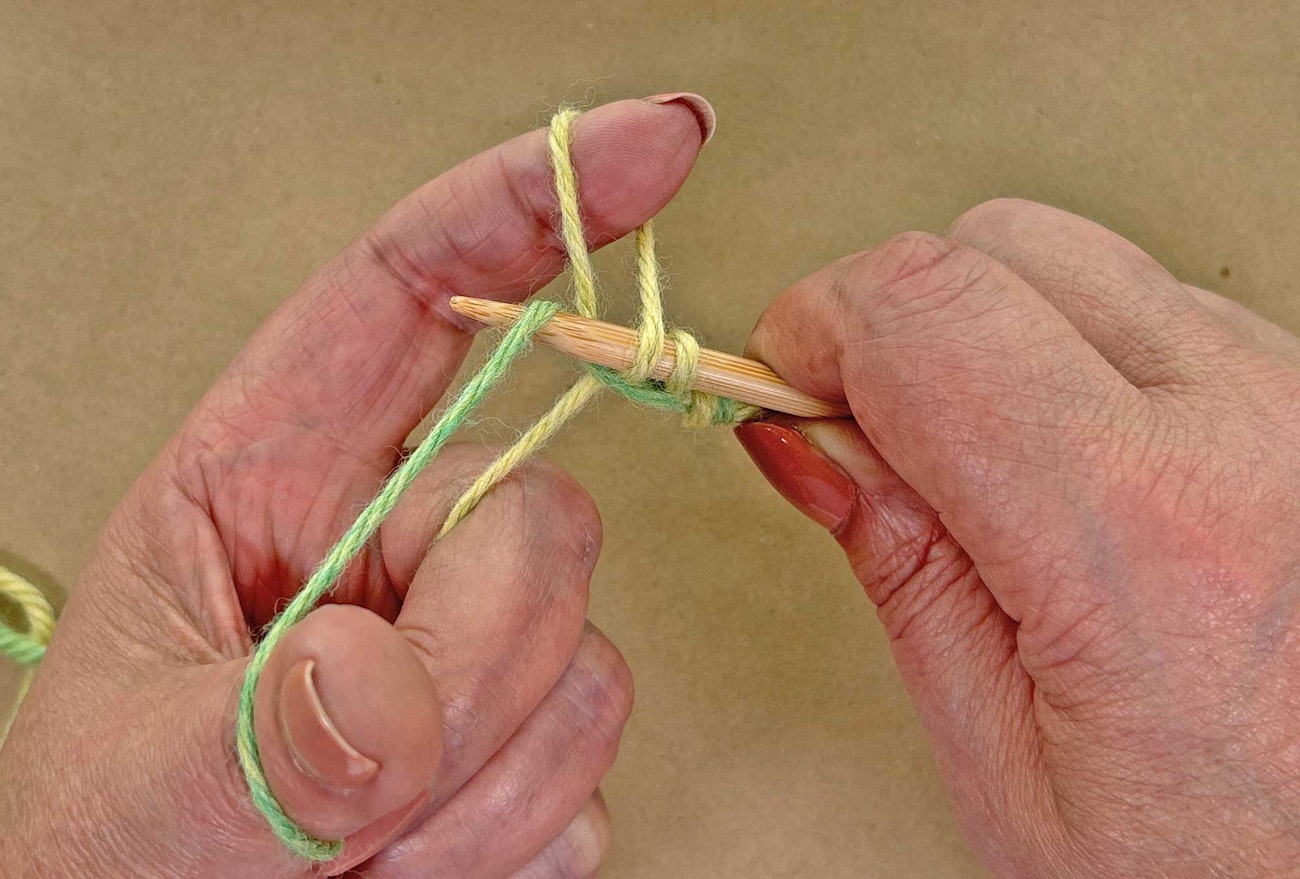
 Step 4
Step 4: Remove your thumb from the loop and reposition it under the tail yarn, snugging up the loop as you extend your thumb. You have created a knit stitch with the working yarn and a foundation loop with the tail yarn.
 Step 5
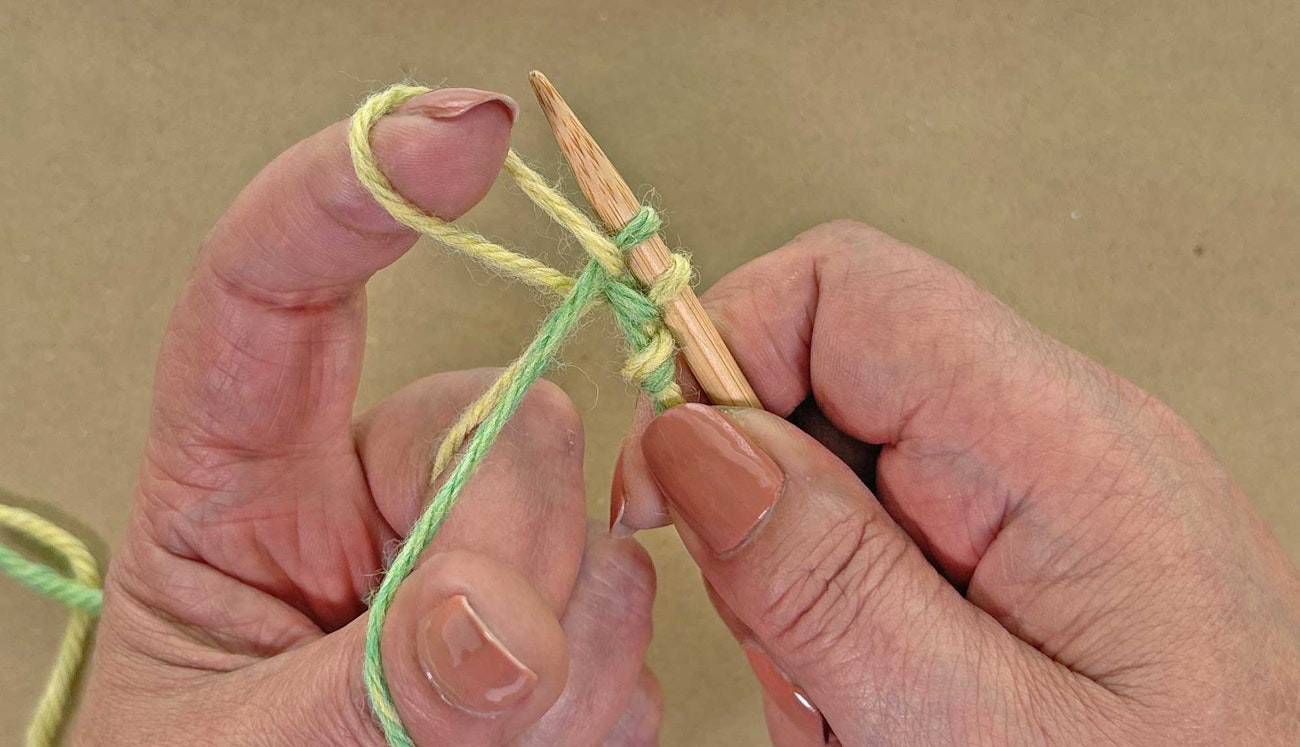
Step 5: Now we’ll make a purl stitch. Scoop up the strand of yarn running from the outside of your index finger to the palm, forming a loop in the working yarn.
 Step 6
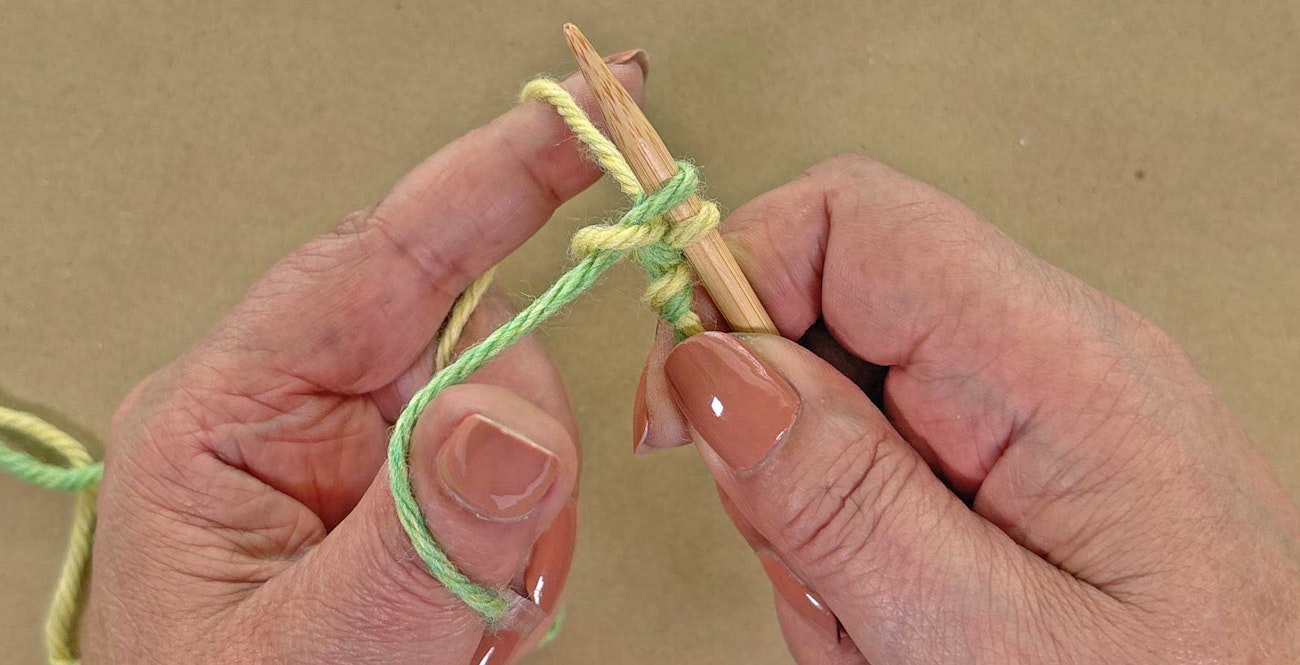
Step 6: Move your needle tip over the top of the strand of yarn running from the needle to the thumb, then bring the needle point down and away from you to catch that strand.
 Step 7
Step 7: Draw the strand of tail yarn through the loop of working yarn.
 Step 8
Step 8: Remove your index finger from the loop and reposition it under the tail yarn, snugging up the loop as you extend your finger. You have created a purl stitch with the tail yarn and a foundation loop with the working yarn.
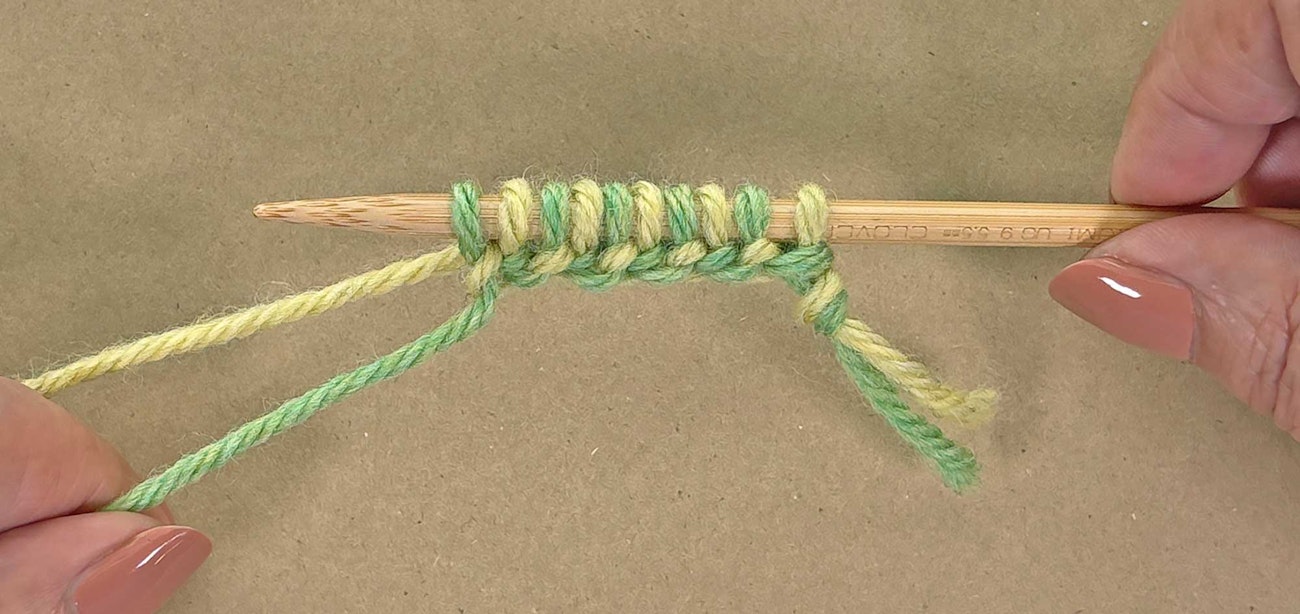 Ten stitches made with the alternating long-tail cast-on method.
Repeat Steps 1–8 to cast on in K1 P1 ribbing. The working yarn and the tail yarn alternate between forming a stitch and forming the foundation loop at the base of a stitch.
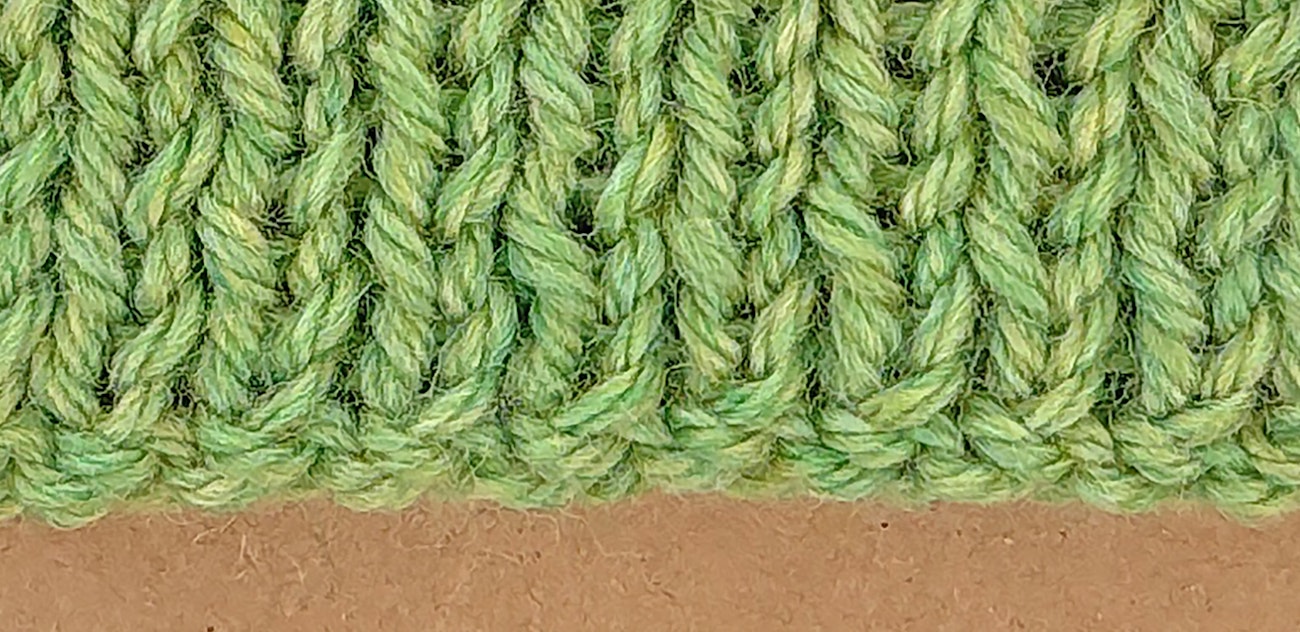 Worked in one color, the alternating long-tail cast-on makes a neat, stretchy edge.
As with any new technique, give yourself some time to practice. The starting position is familiar, and your hands will want to do what they have always done. Retraining your muscle memory will take a few repetitions. Soon enough, you’ll settle into a comfortable rhythm.
Having a variety of techniques to choose from enables you to select the best cast-on for each project. The alternating long-tail cast-on may become your favorite cast-on for ribbed edges. You’ll never again knit a cuff-down sock that won’t stretch past the heel, or a top-down pullover that won’t pull over the head.