Subscriber Exclusive
Adapting Sweater Patterns for Small-Batch Yarn
Finding the perfect pattern for a small-batch farm yarn can feel tricky—but a little sweater math opens up far more possibilities than you might think.
Finding the perfect pattern for a small-batch farm yarn can feel tricky—but a little sweater math opens up far more possibilities than you might think. <a href="https://farmfiberknits.com/adapting-sweater-patterns-for-small-batch-yarn/">Continue reading.</a>
https://farmfiberknits.com/cdn-cgi/image/format=auto/https://www.datocms-assets.com/101500/1729634449-sheep-station-cardi-header.jpg?auto=format&w=900
One of the great joys of visiting fiber festivals and local farms is treating yourself to a sweater’s worth of beautifully sheepy yarn, especially from a conservation breed. There’s something delightful about making a sweater from sheep you’ve actually met. However, it can be a little challenging to find a pattern that works perfectly with your small-batch yarn.
One of the challenges—and beauties—of working with farm yarns is that they’re not quite the same as commercial yarns. The twist and weight of small-batch yarns are often less standardized than the larger-scale, familiar yarns you might find in an LYS, so using patterns written for a specific yarn can cause some challenges. You could write your own pattern from scratch, but why reinvent the wheel? Using some basic math, you can convert almost any pattern to work with yarn from your local fibershed.
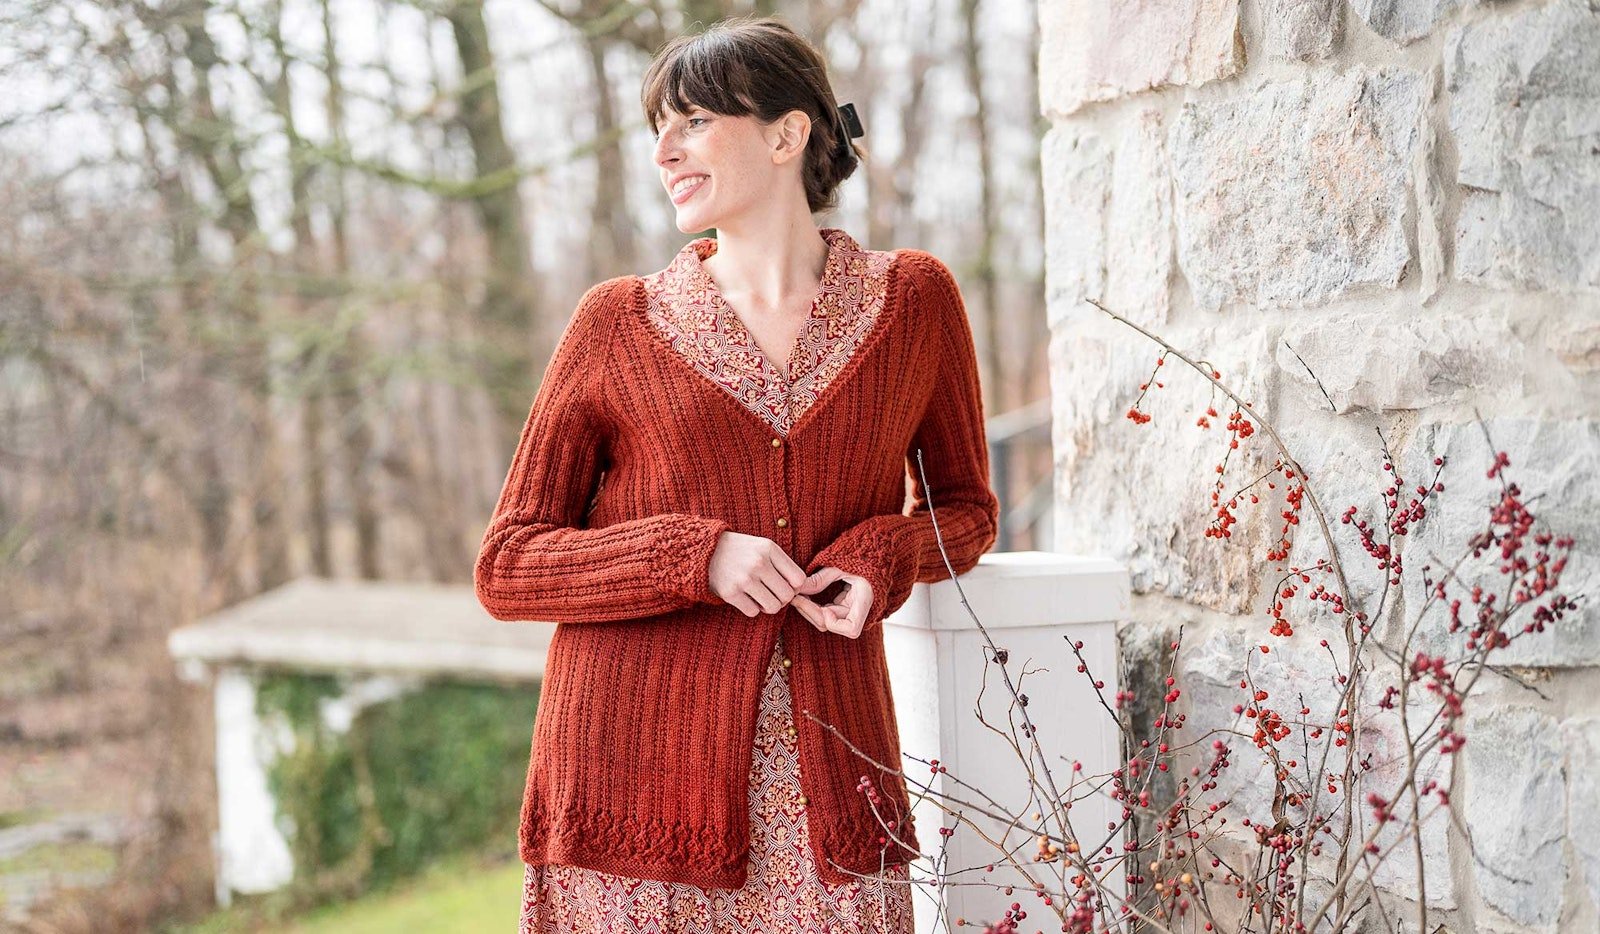
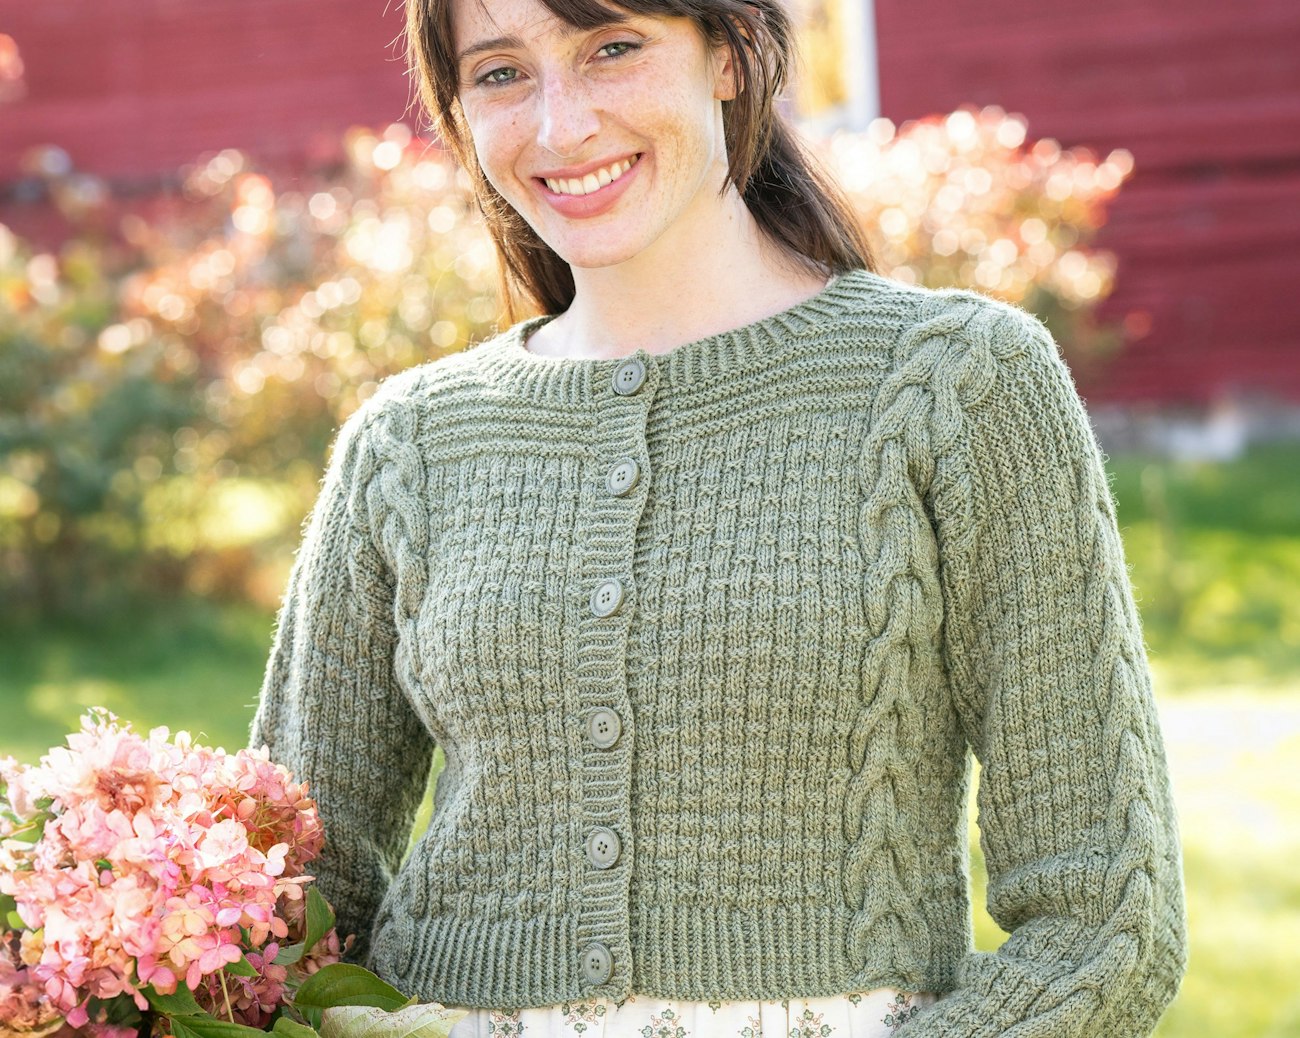
Let's look at two beautiful designs, the Wee Cardi and then the Sheep Station Cardigan, to break down the process into steps.
Getting to Know Your Yarn: Why Swatching Matters
The first step for any project is swatching. The yarn probably won’t have a recommended gauge, so try a few different needle sizes and see which fabric you like best. Keep in mind that different kinds of sheep will produce very different yarns. For example, yarn made from longwool sheep such as Lincoln or Wensleydale tends to have
SUBSCRIBER EXCLUSIVE
One of the great joys of visiting fiber festivals and local farms is treating yourself to a sweater’s worth of beautifully sheepy yarn, especially from a conservation breed. There’s something delightful about making a sweater from sheep you’ve actually met. However, it can be a little challenging to find a pattern that works perfectly with your small-batch yarn.
One of the challenges—and beauties—of working with farm yarns is that they’re not quite the same as commercial yarns. The twist and weight of small-batch yarns are often less standardized than the larger-scale, familiar yarns you might find in an LYS, so using patterns written for a specific yarn can cause some challenges. You could write your own pattern from scratch, but why reinvent the wheel? Using some basic math, you can convert almost any pattern to work with yarn from your local fibershed.
Let's look at two beautiful designs, the Wee Cardi and then the Sheep Station Cardigan, to break down the process into steps.
Getting to Know Your Yarn: Why Swatching Matters
The first step for any project is swatching. The yarn probably won’t have a recommended gauge, so try a few different needle sizes and see which fabric you like best. Keep in mind that different kinds of sheep will produce very different yarns. For example, yarn made from longwool sheep such as Lincoln or Wensleydale tends to have[PAYWALL] more drape and less bounce than Merino or Jacob wools. Experiment with a few simple stitch patterns to see how the yarn behaves in lace, cables, stockinette stitch, etc.
 Farm & Fiber Knits editors tried out four different yarns for the Wee Cardi before casting on, and each yarn behaved slightly differently. Clockwise from top left: Ístex Einband (100% wool); Green Mountain Spinnery Mountain Mohair (40% Targhee, 30% medium wool, 30% fine mohair); Wing & a Prayer Farm The Happiest Yarn (100% Clun Forest); and Kelbourne Woolens Scout (100% wool). Photo by Matt Graves
Once you’ve decided on a pattern and needle size, work at least a 6-inch square in the stitch pattern for your project. Always block your swatch as you plan to block your project. If you’re planning to wash your sweater (and I hope you are!), throw your swatch in with some wool wash and let it dry. This will help cut down on surprises later—there’s nothing worse than finishing a sweater, only to have it double in size when you block it. Once it’s blocked, measure your gauge in the center four inches of the swatch.
Turning Measurements into Stitch Counts
After you have your gauge sorted out, compare it to the gauge in the pattern. Is it close enough? If there’s less than a one-stitch difference in gauge, try changing needle sizes, just like you would when using commercial yarn. If there’s a more significant difference, it will take a little bit of math to adjust the pattern.
For an accurate adjustment, calculate the number of stitches or rows at the new gauge for each of the eight measurements on this schematic. The most thorough approach is to calculate the number of stitches needed using your gauge. Calculate the number of stitches needed for that body circumference by multiplying the desired measurement by the gauge per inch. You can find all the relevant measurements for these calculations on the schematic. For example, a 48-inch sweater worked at 20 stitches per 4 inches would need 240 stitches in the body section. It can take some time to calculate each individual measurement, but it’s a very accurate way to reconfigure a pattern.
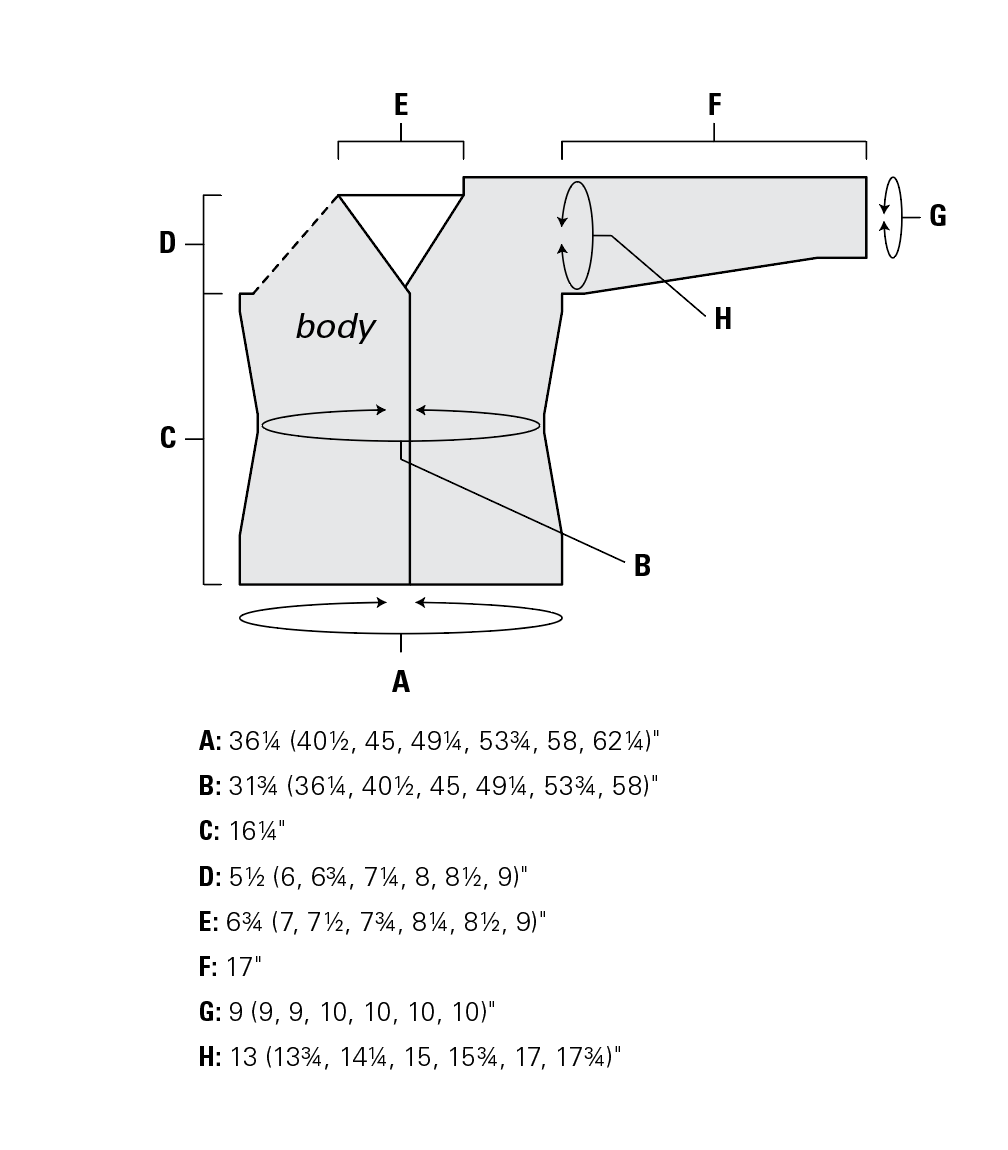
For an easier but slightly less accurate shortcut, you can find the ratio between your actual gauge and the pattern gauge, then use that to figure out which pattern size will give you the desired measurement. For this example, the Sheep Station Cardigan calls for a gauge of 22 stitches per 4 inches, and your yarn is working up to 18 stitches per 4 inches. Divide your gauge by the pattern gauge to get the ratio.
(18 sts/4") ÷ (22 sts/4") = ~0.82
Then multiply the ratio by your desired size.
48" x 0.82 = 39½"
This tells you that directions with a gauge of 22 stitches per 4 inches for a 39½-inch sweater worked will make a 48-inch sweater at 18 stitches per 4 inches. It may not result in an exactly 48-inch sweater, but it will be close.
Getting the Best Results from Pattern Math
There are a few caveats with this approach. First, this method doesn’t take row gauge into account, so make sure to use the body length, armhole depth, and sleeve length measurements from your original size. Second, it works best for small differences in gauge and for patterns with a fairly wide range of sizes. For example, if you tried to make a 48-inch sweater with a gauge of 12 stitches per 4 inches following the pattern for the Sheep Station Cardigan, you’d need to follow directions for a 30½-inch sweater!
Using your gauge and a little bit of math, you can adapt almost any pattern to work with yarn from your local shepherd.
More to learn
Plus! Find the patterns for the Sheep Station Cardigan and the Wee Cardi in the Farm & Fiber Knits Library.
The swatch study for the Wee Cardi shown above can be found in the Spring 2026 issue of Farm & Fiber Knits.