Subscriber Exclusive
5 Easy Ways to Join a New Yarn for a Professional Finish
Discover which yarn-joining method works best for your fiber, project type, and knitting style.
Discover which yarn-joining method works best for your fiber, project type, and knitting style. <a href="https://farmfiberknits.com/5-easy-ways-to-join-a-new-yarn/">Continue reading.</a>
https://farmfiberknits.com/cdn-cgi/image/format=auto/https://www.datocms-assets.com/101500/1762455821-5waystojoinyarn-header.jpg?auto=format&w=900
Unless you’re knitting a small project or working from a cone of yarn that holds a thousand yards or more, the time will come when you need to join yarn. How you perform this small task can have a big impact on the amount of time you’ll need to devote to finishing once all the knitting is done.
Let’s look at five common methods for joining yarn and examine the pros and cons of each. All swatches were knit with Purl Soho’s Till, a worsted-weight 4-ply 100% Andean Highland wool. All joins were made in the center of the 11th row of stockinette stitch.
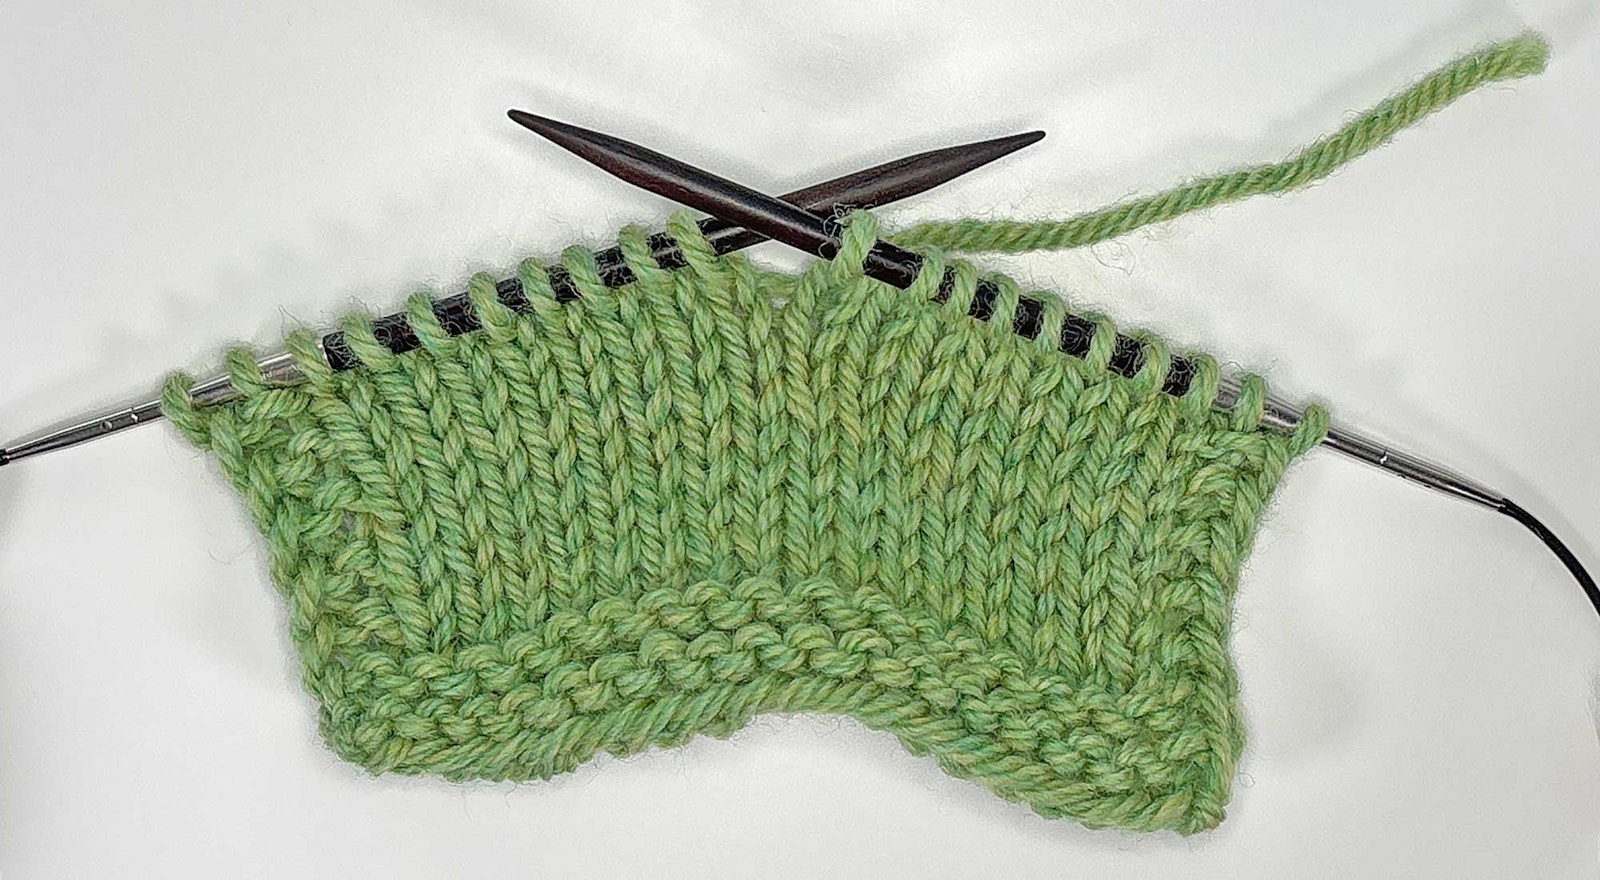
Method 1: Do Nothing
You can simply drop the old yarn and continue knitting with the new yarn, leaving generous tails of both.
Click to view the images in full-screen mode.
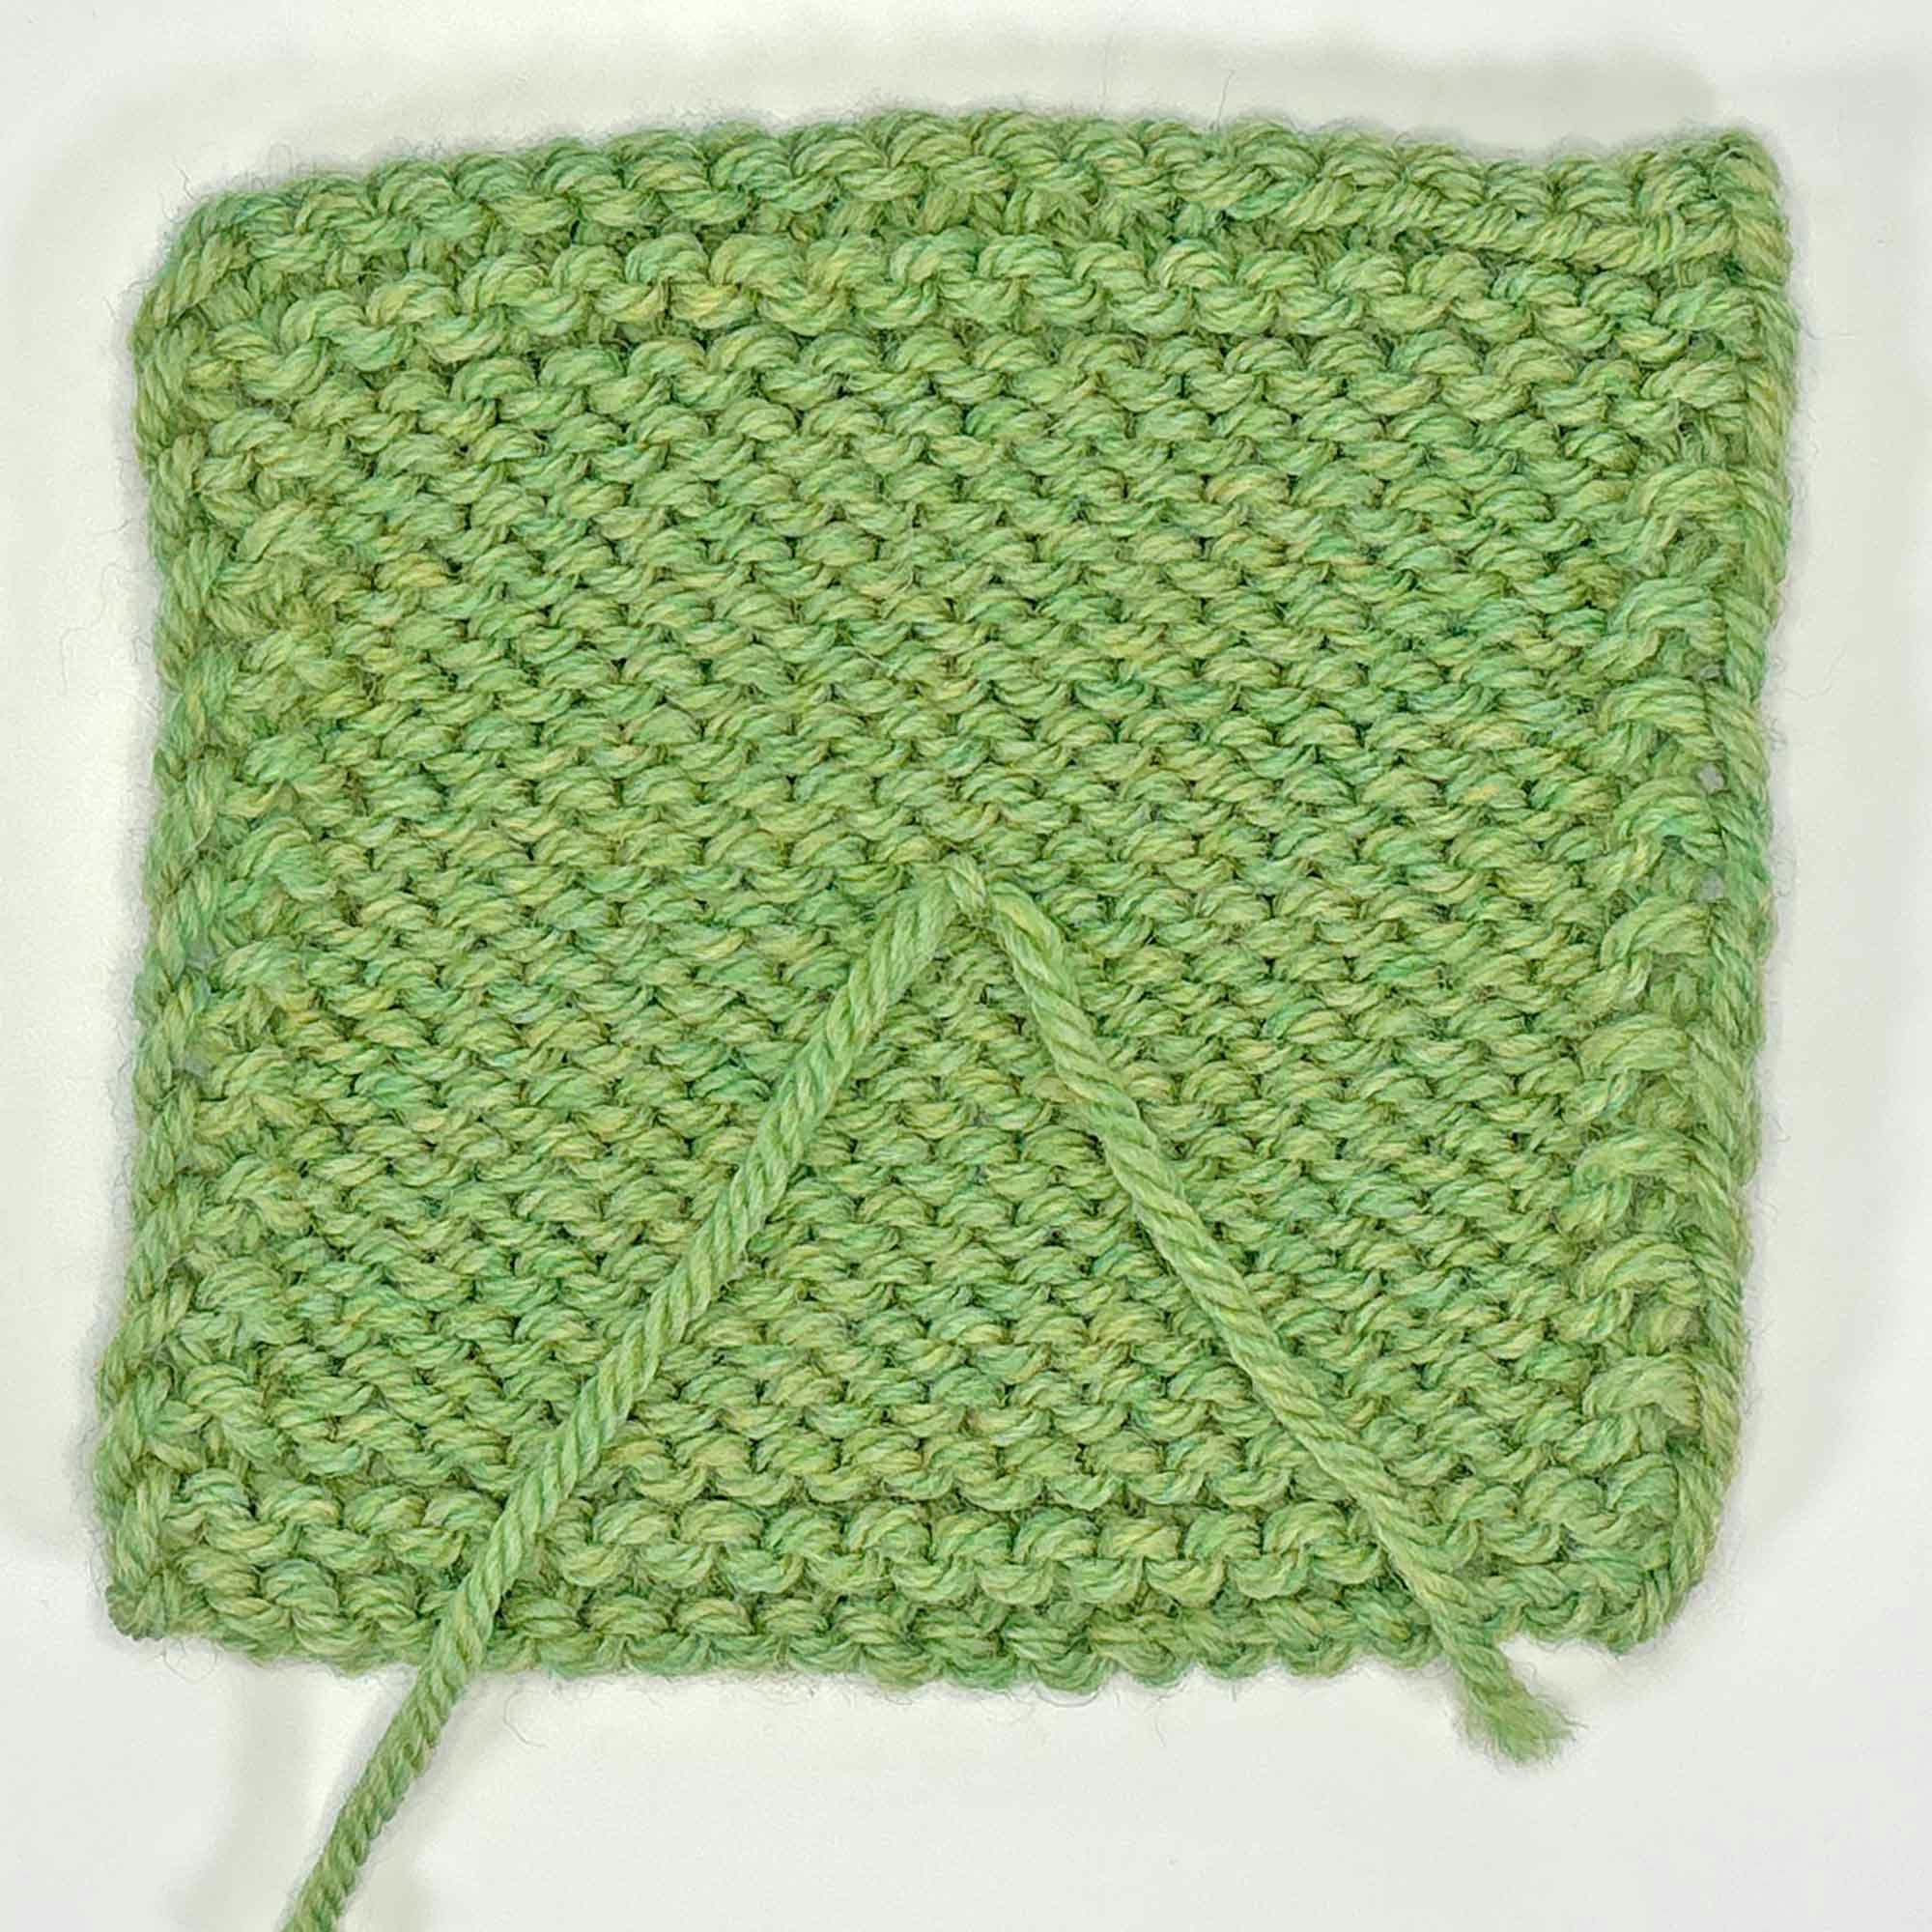
Dropping the old yarn and picking up the new yarn without any intervention leaves a visible hole with loose stitches on either side.
Doing nothing is quick and easy. You barely need to interrupt your knitting rhythm. But doing nothing will leave you with a hole. That hole will have one or more loose stitches on each side. Those loose stitches may be awkward to knit into on the following row. When it comes time to weave in your ends, you’ll need to adjust those loose stitches so the tension matches the surrounding knitting. And
SUBSCRIBER EXCLUSIVE
Unless you’re knitting a small project or working from a cone of yarn that holds a thousand yards or more, the time will come when you need to join yarn. How you perform this small task can have a big impact on the amount of time you’ll need to devote to finishing once all the knitting is done.
Let’s look at five common methods for joining yarn and examine the pros and cons of each. All swatches were knit with Purl Soho’s Till, a worsted-weight 4-ply 100% Andean Highland wool. All joins were made in the center of the 11th row of stockinette stitch.
Method 1: Do Nothing
You can simply drop the old yarn and continue knitting with the new yarn, leaving generous tails of both.
Click to view the images in full-screen mode.
Dropping the old yarn and picking up the new yarn without any intervention leaves a visible hole with loose stitches on either side.
Doing nothing is quick and easy. You barely need to interrupt your knitting rhythm. But doing nothing will leave you with a hole. That hole will have one or more loose stitches on each side. Those loose stitches may be awkward to knit into on the following row. When it comes time to weave in your ends, you’ll need to adjust those loose stitches so the tension matches the surrounding knitting. And[PAYWALL] you’ll need to take care to cross those tails while weaving them in to close the hole.
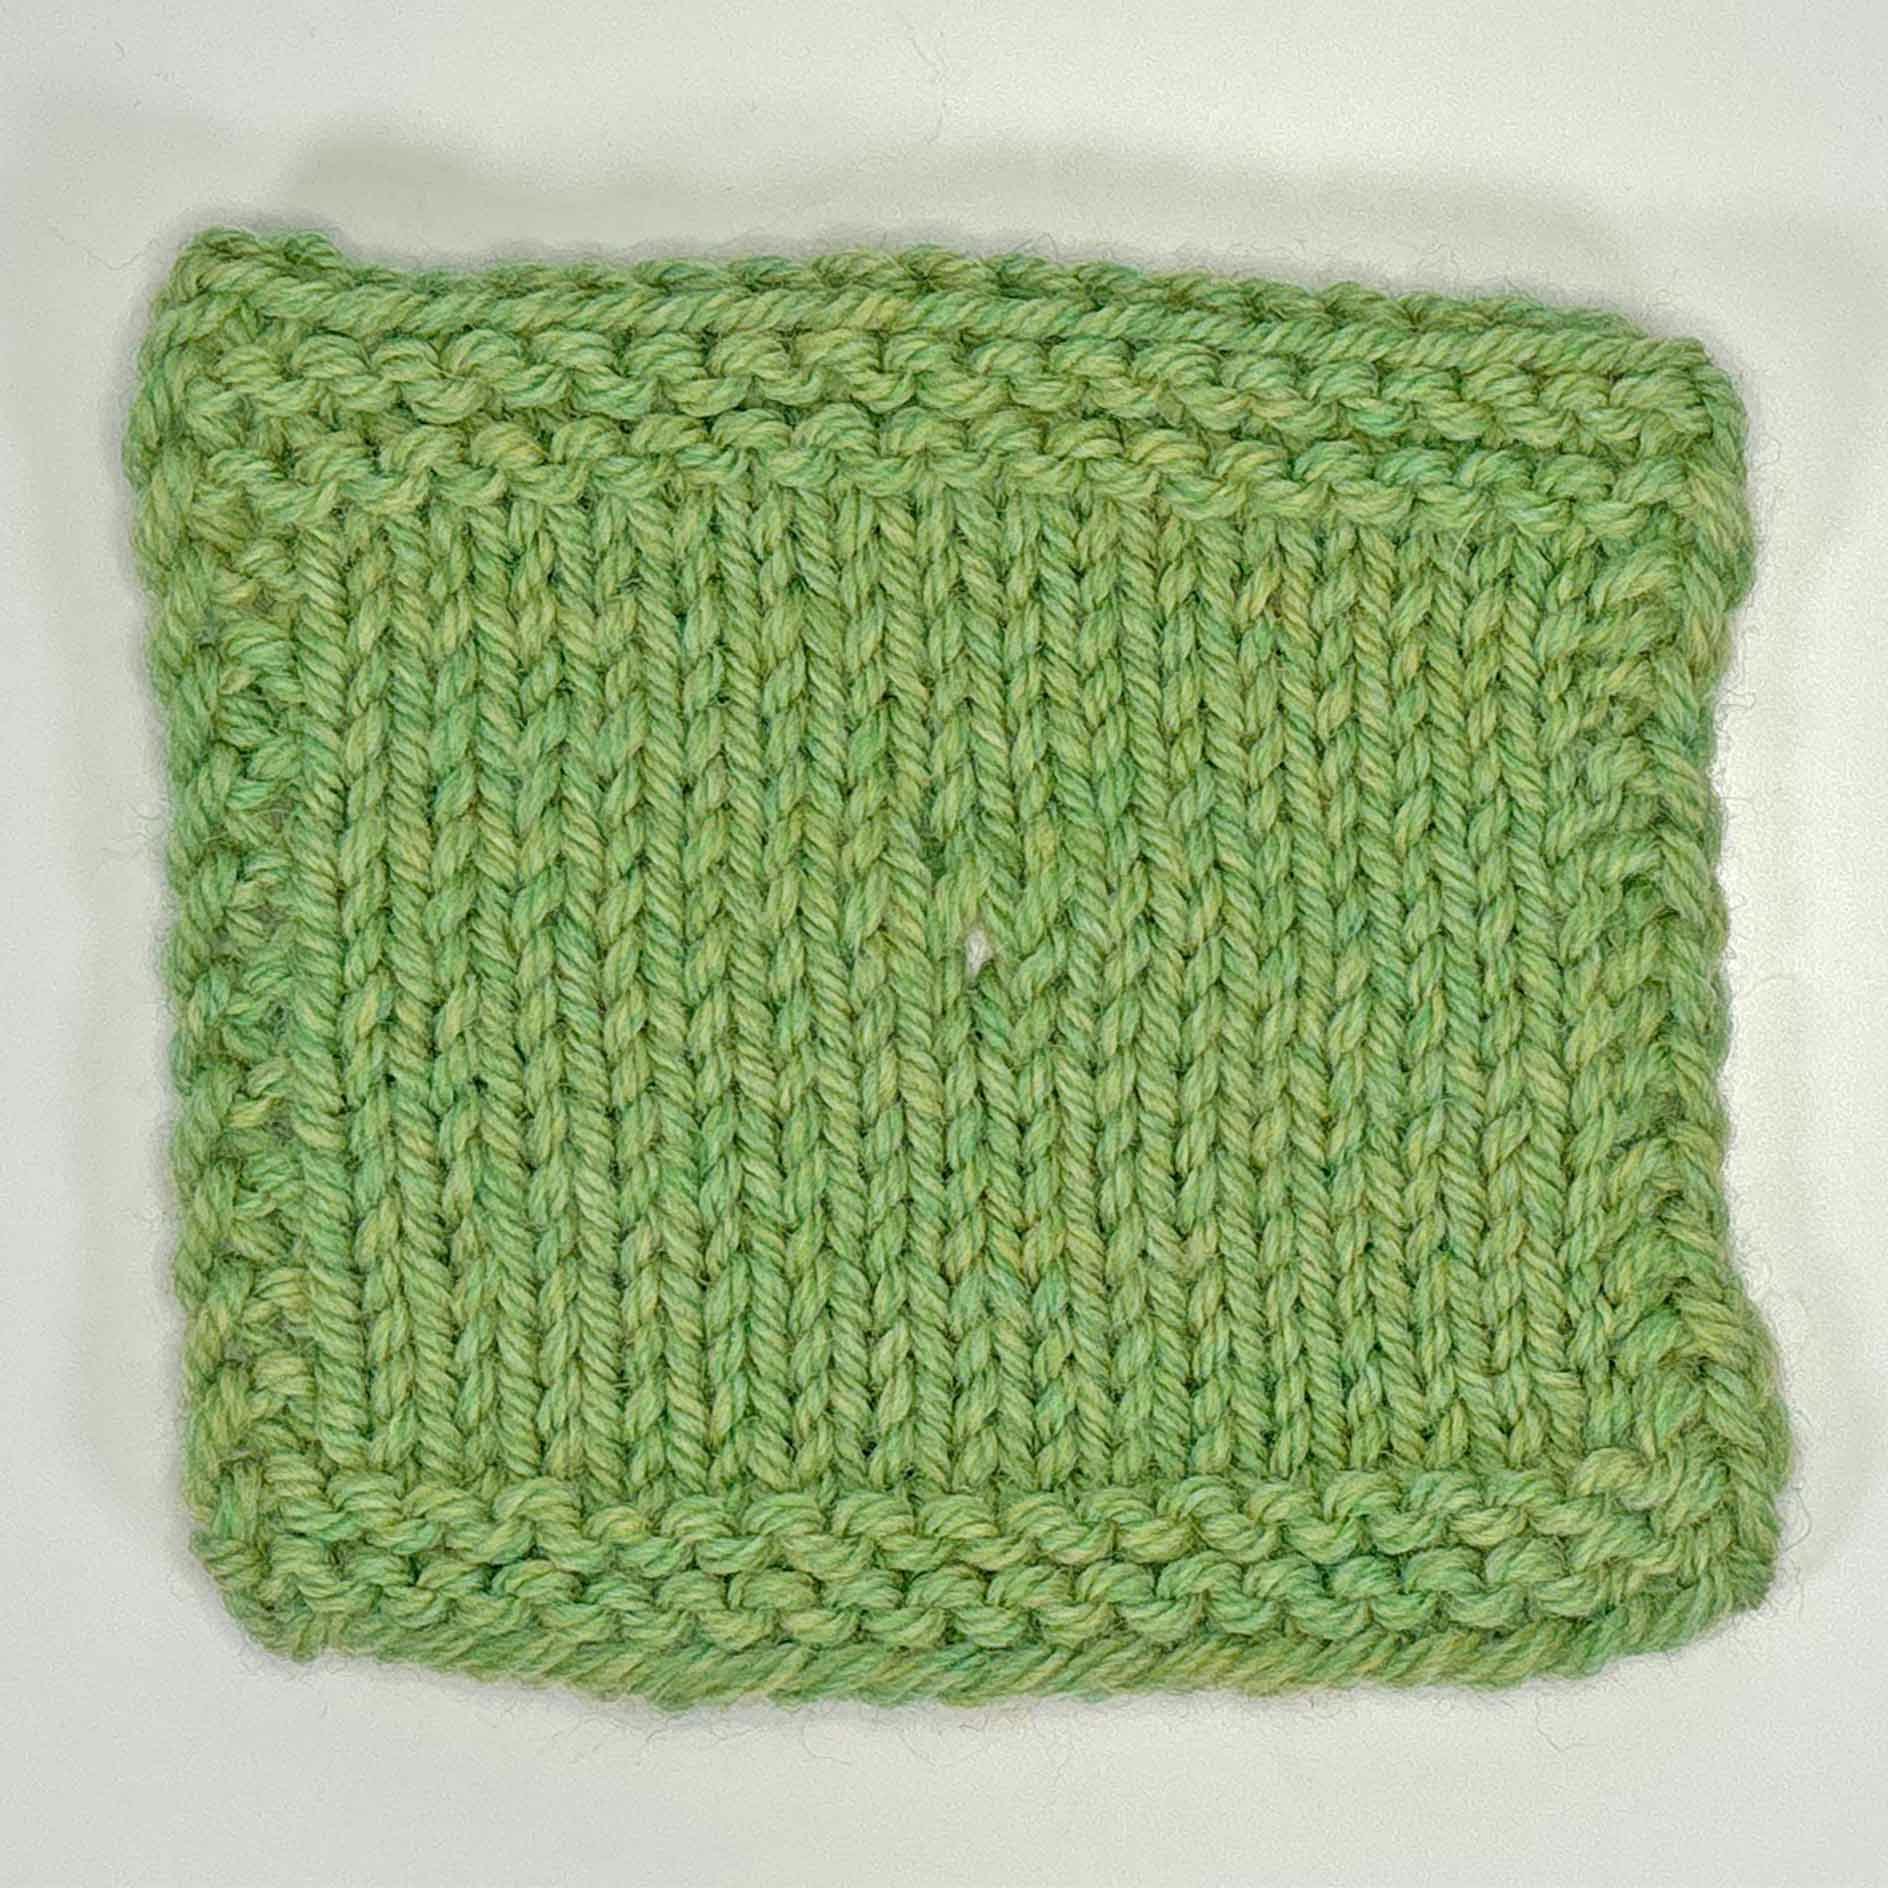
Method 2: Tie a Knot
Some knitters consider joining their yarn using a knot a crime against knitting. Other knitters join yarn with knots all the time. It’s your knitting and your choice.
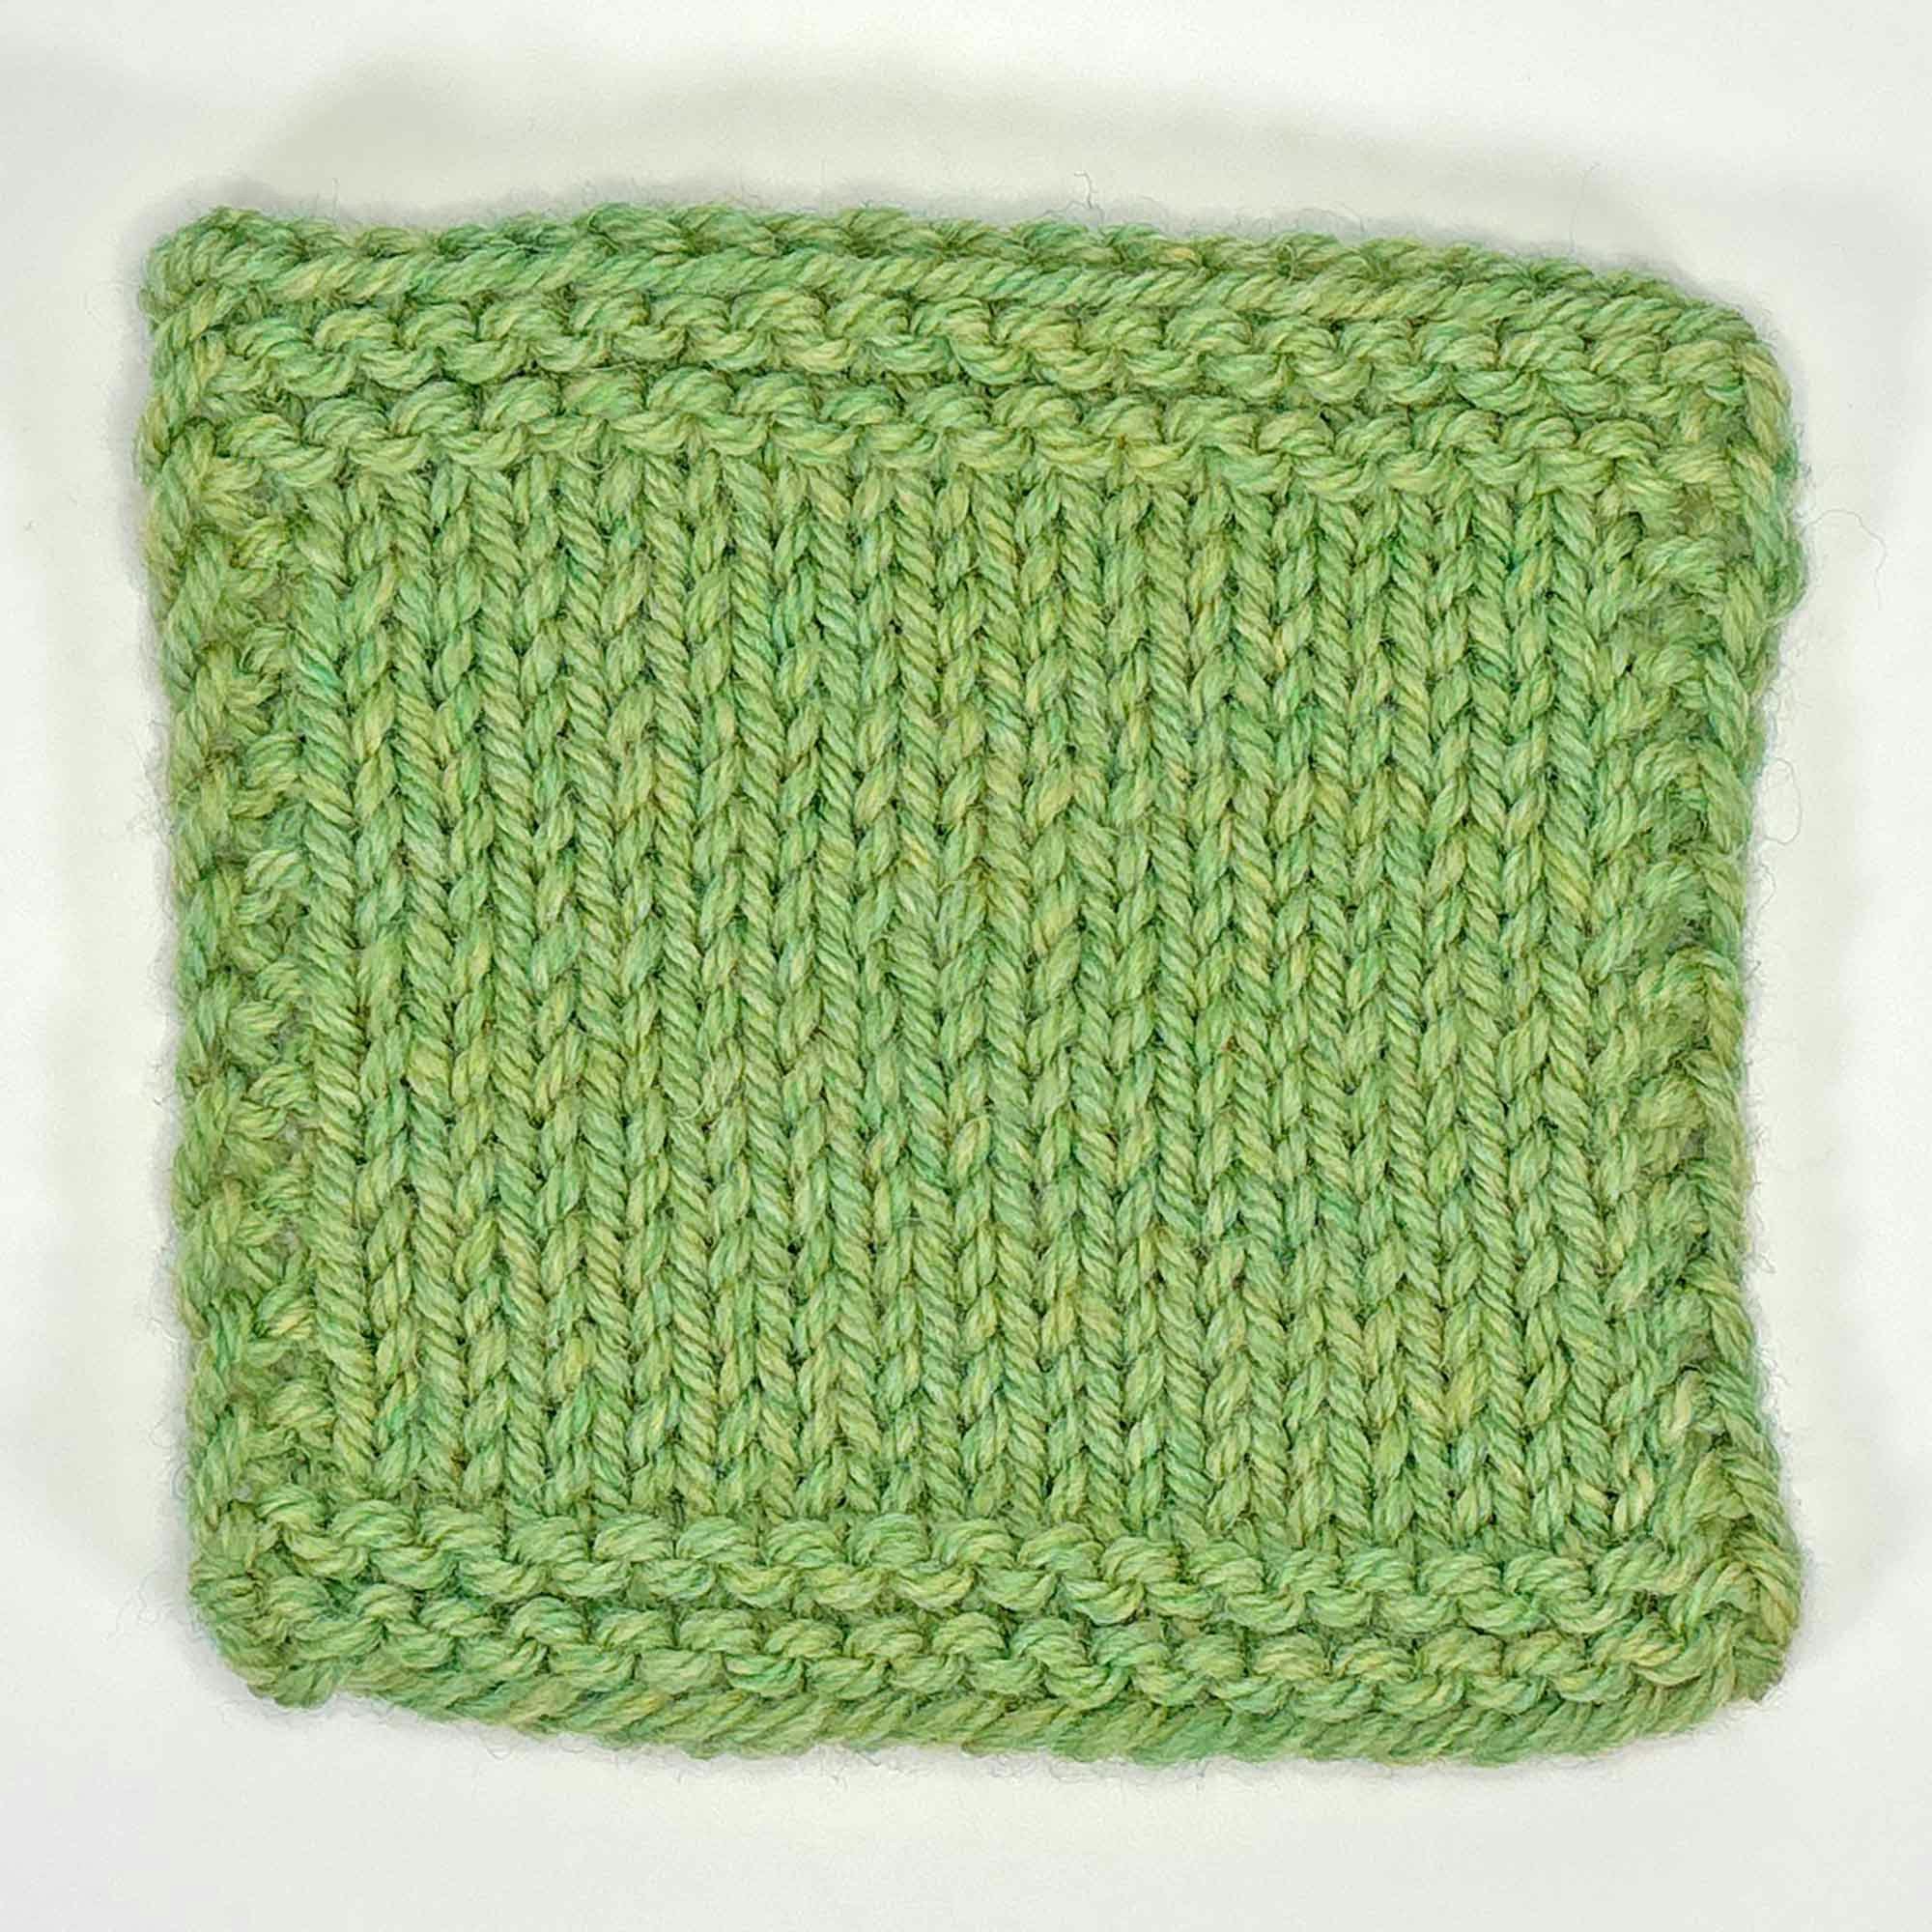
In the swatch, the ends have been joined with a weaver’s knot. Looking at the right side, the stitch to the left of the knot is slightly smaller than the stitch to the right of the knot.
Tying a knot is simple, fast, and secure. You need not fear slippery tails wiggling free. But a knot will impair the ability of your yarn to slide easily from one stitch to the other. Yarn moves a bit during the normal course of knitting, as each stitch expands to accept the entry of a second needle tip, then relaxes as it is dropped from the needle. If the yarn can’t slip easily through the stitches in the row below, you may end up with uneven stitches on each side of the knot. You may need to adjust the position of the knot, or even untie it, to avoid a distortion of the knitted fabric.
If you choose to join yarn by tying a knot, do yourself a favor and use a weaver’s knot (also known as a sheet bend). This knot creates very little bulk yet won’t come apart unless you untie it.
 Illustration by Missy Shepler.
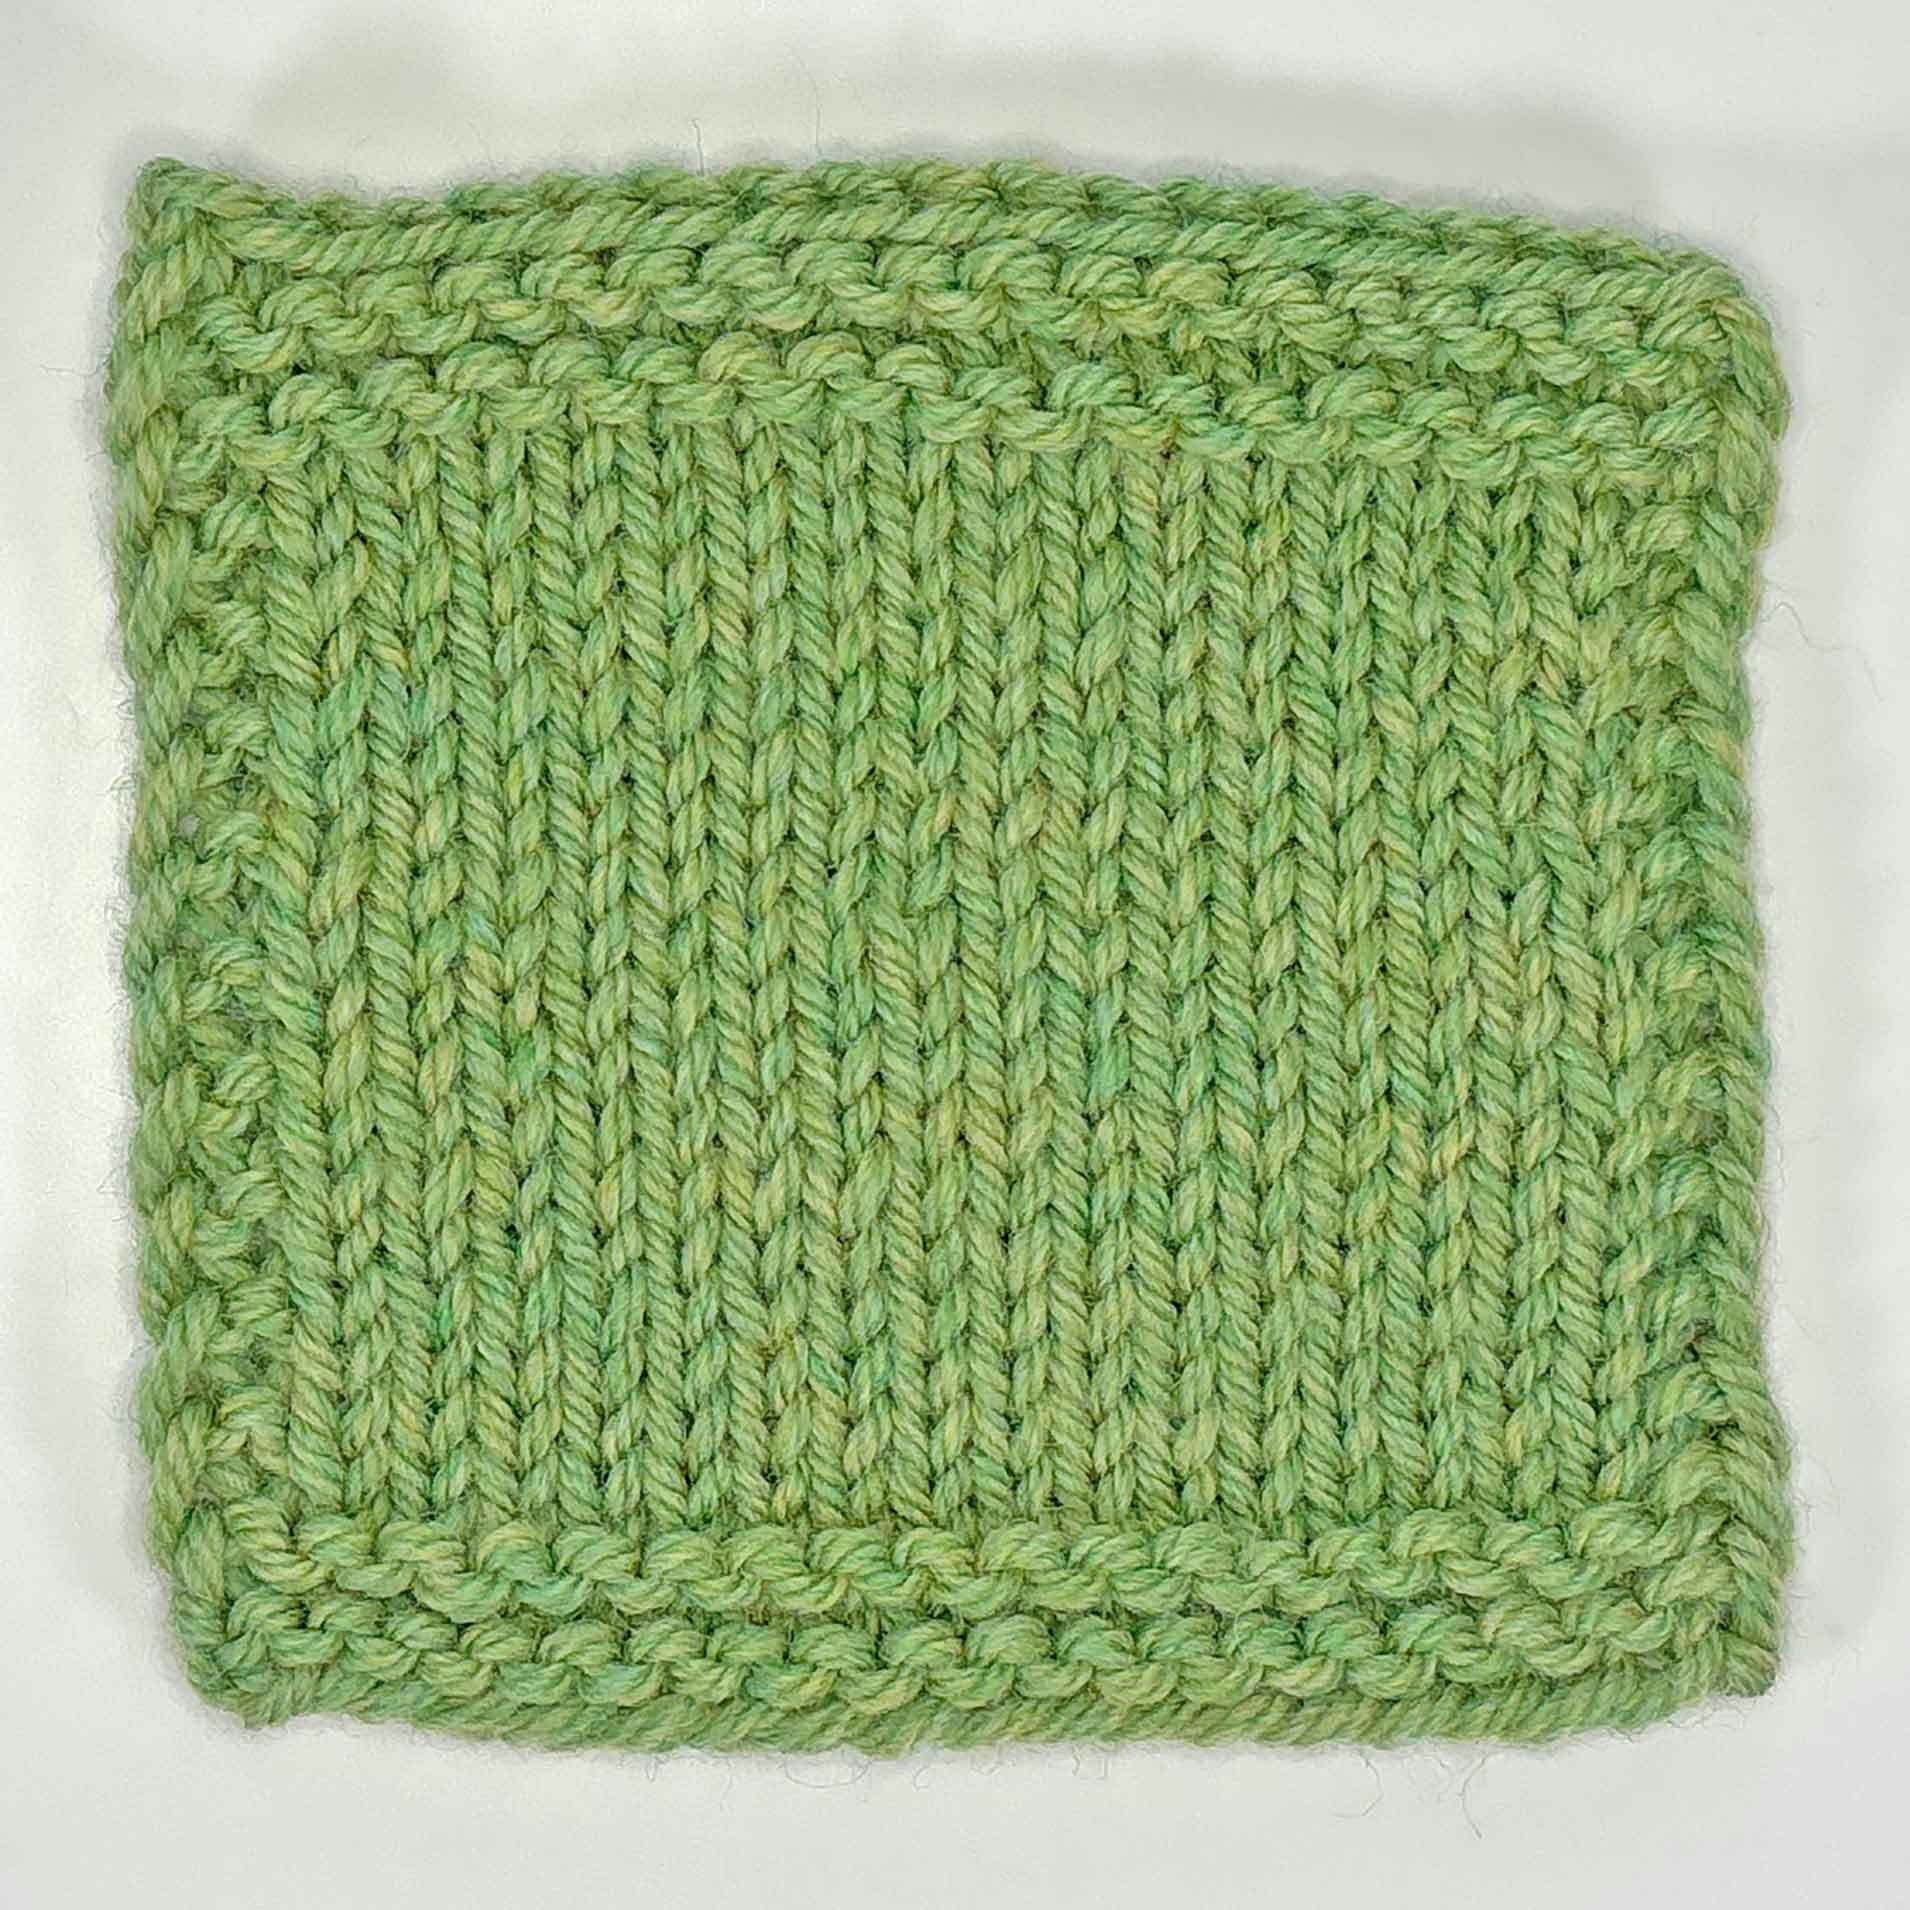
Method 3: Work One or More Stitches With Both Yarns Held Together
You can knit a stitch or two with both old and new yarns held together, then drop the old yarn and continue knitting with the new.
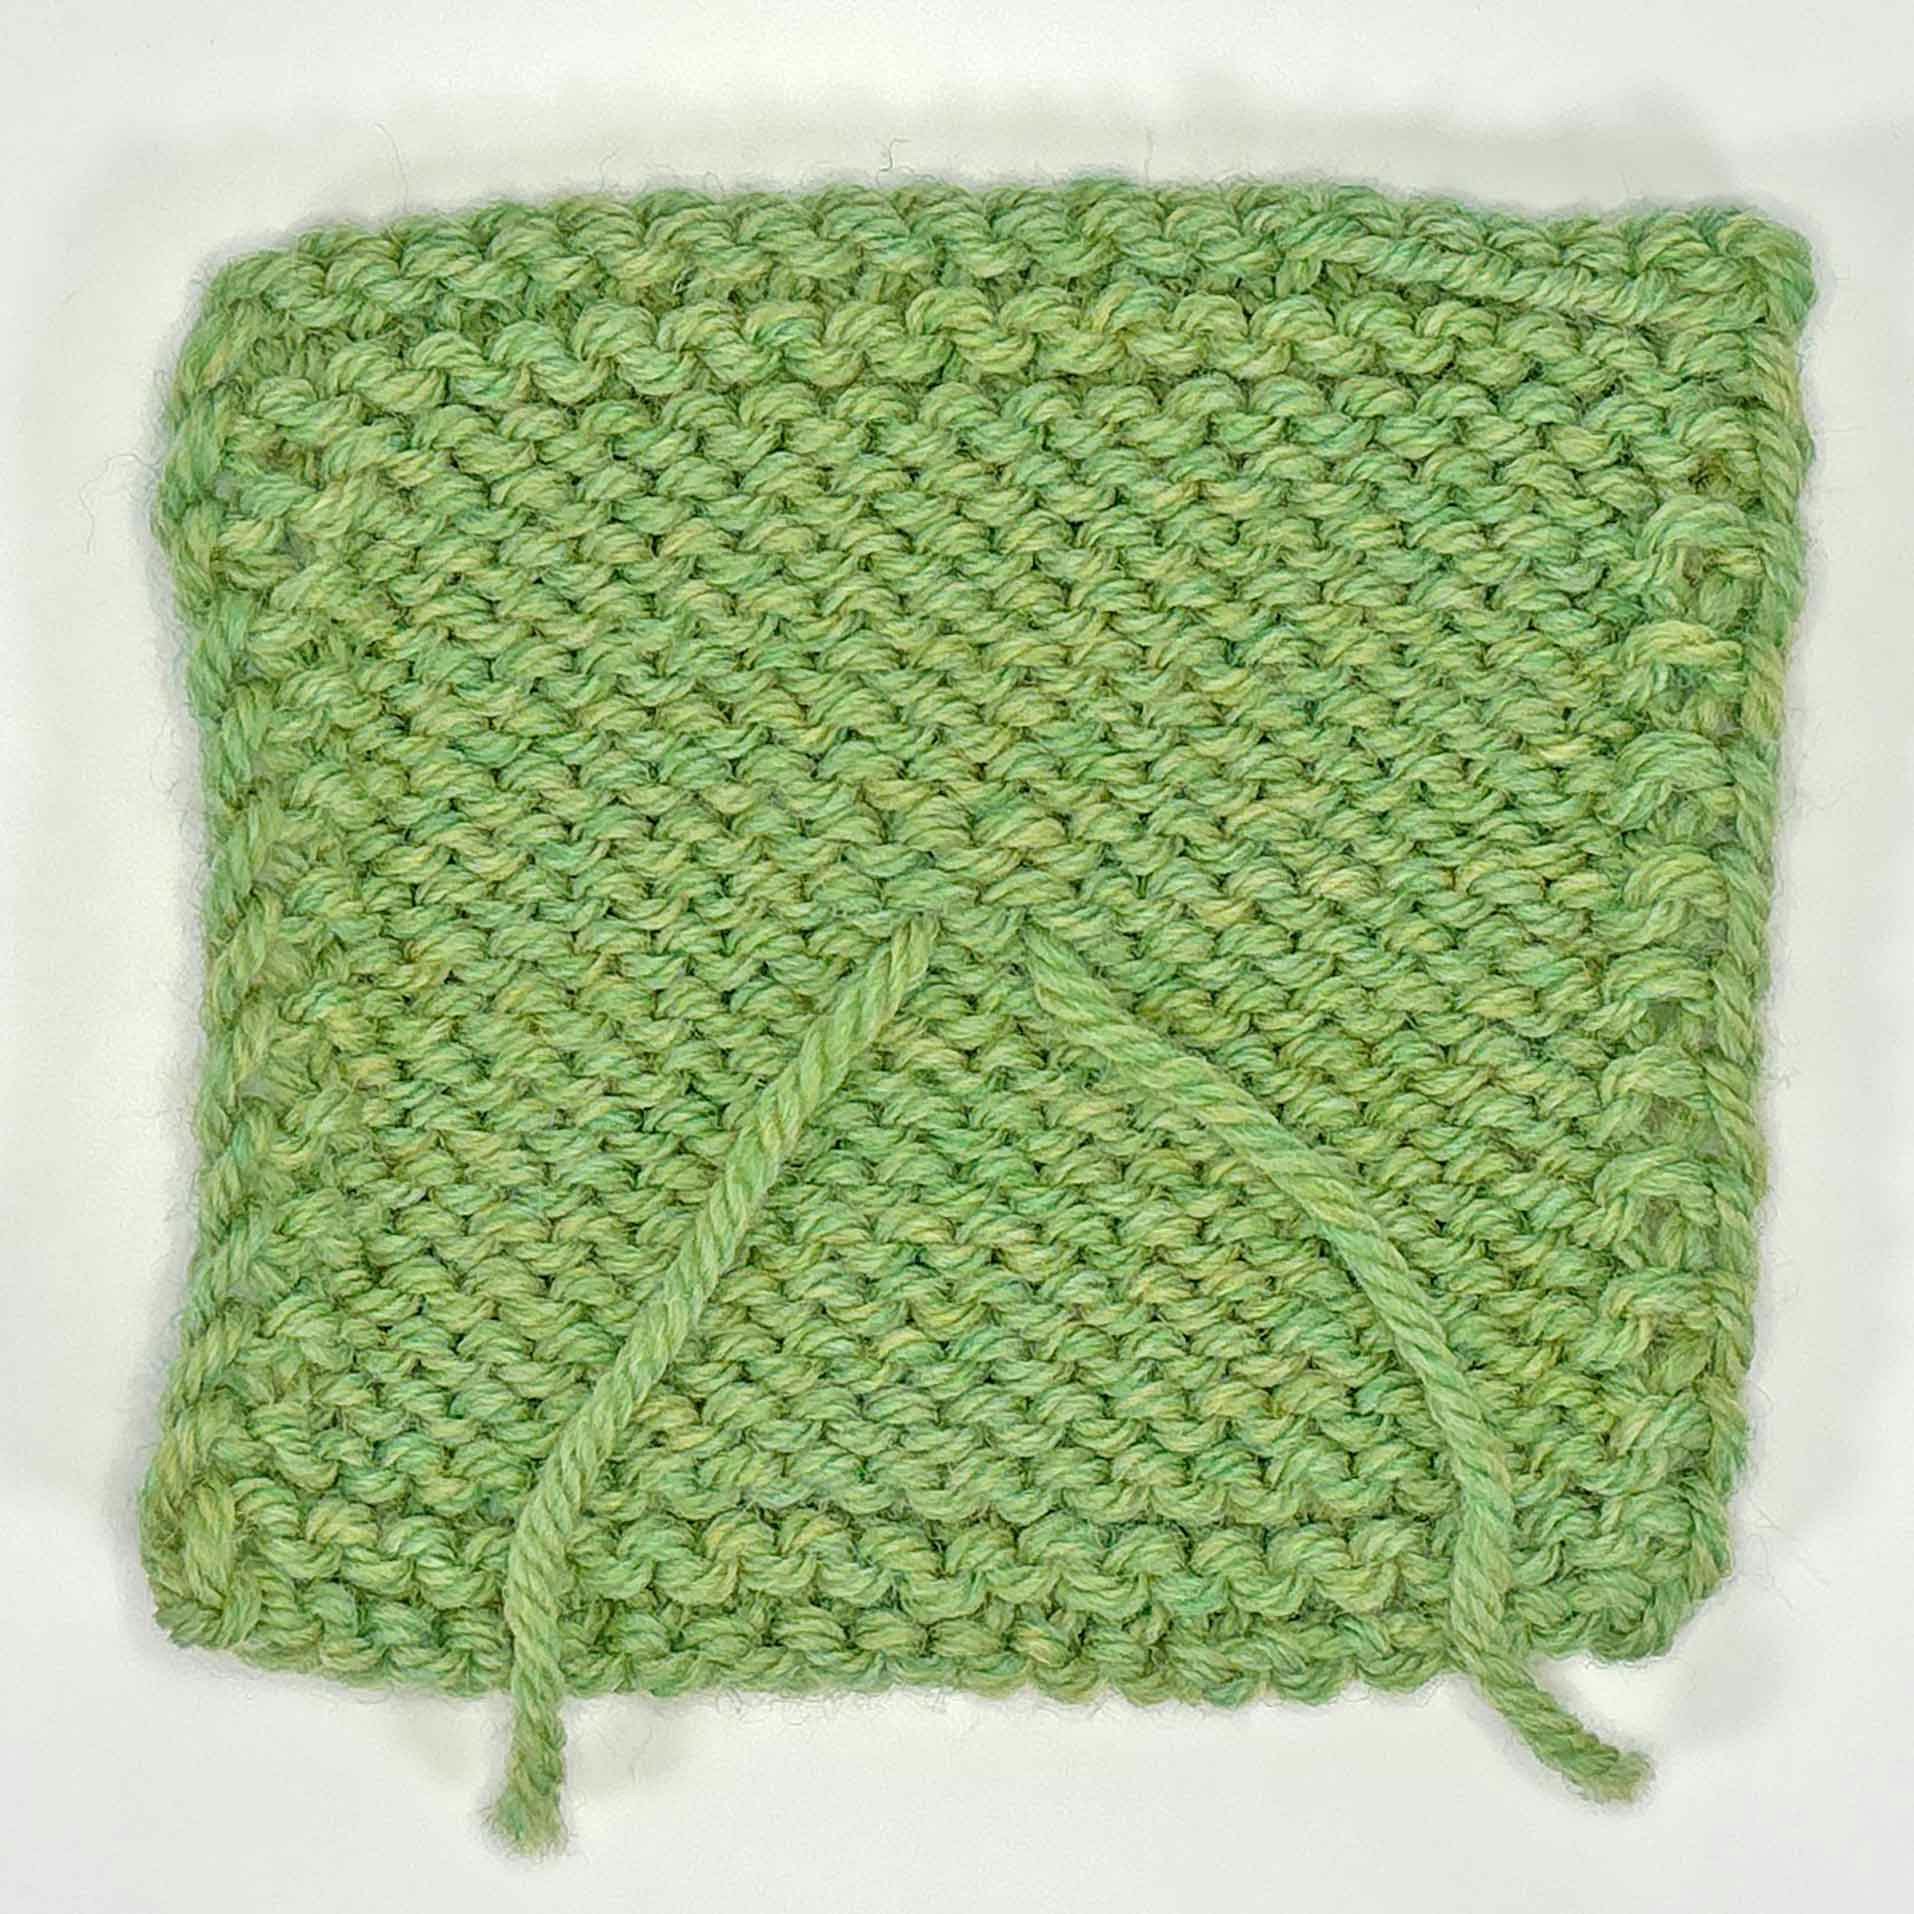
In the swatch, two stitches were knit with both strands of yarn held together. The extra bulk is nearly invisible when viewed from the right side.
This is another quick and easy method of joining yarns. The slight crowding caused by doubling the yarn as it passes through a stitch holds both strands in place, while still letting them move a bit. There is no hole, and you can easily tighten up anything that looks loose with a gentle tug. But doubling the yarn does make that stitch a bit bulkier than its neighbors. The extra bulk is especially apparent with chunky yarns.
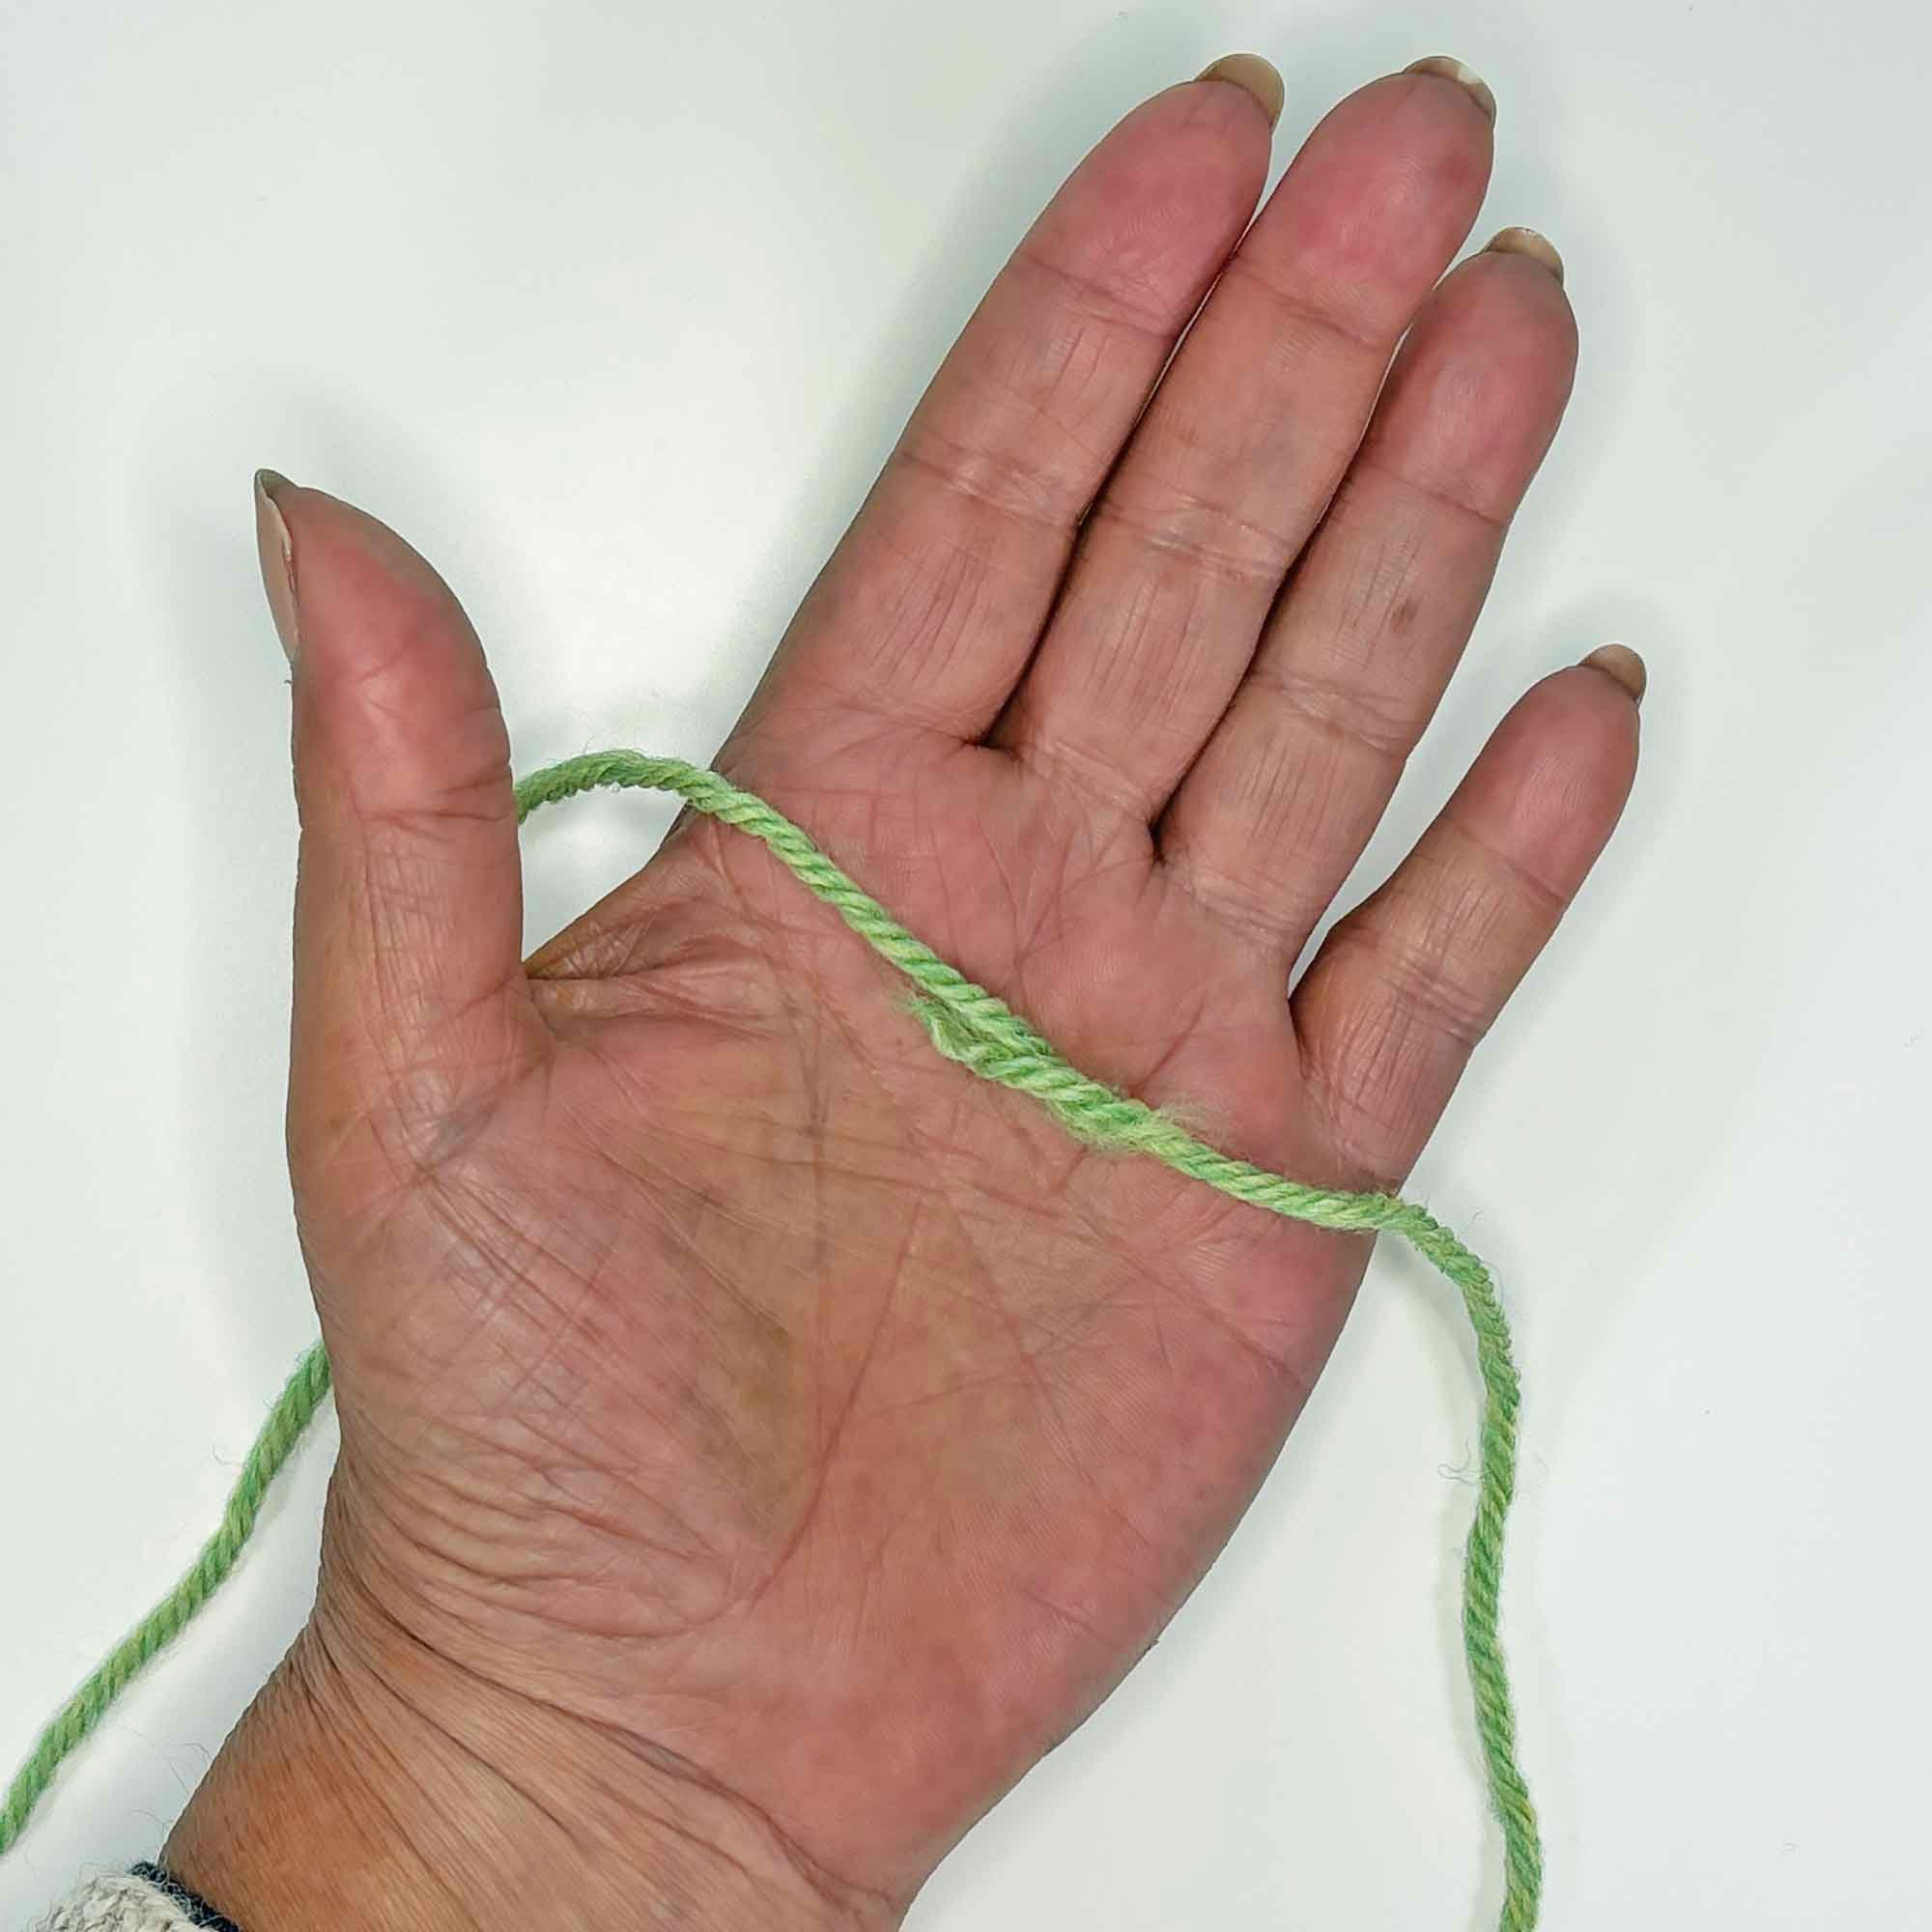
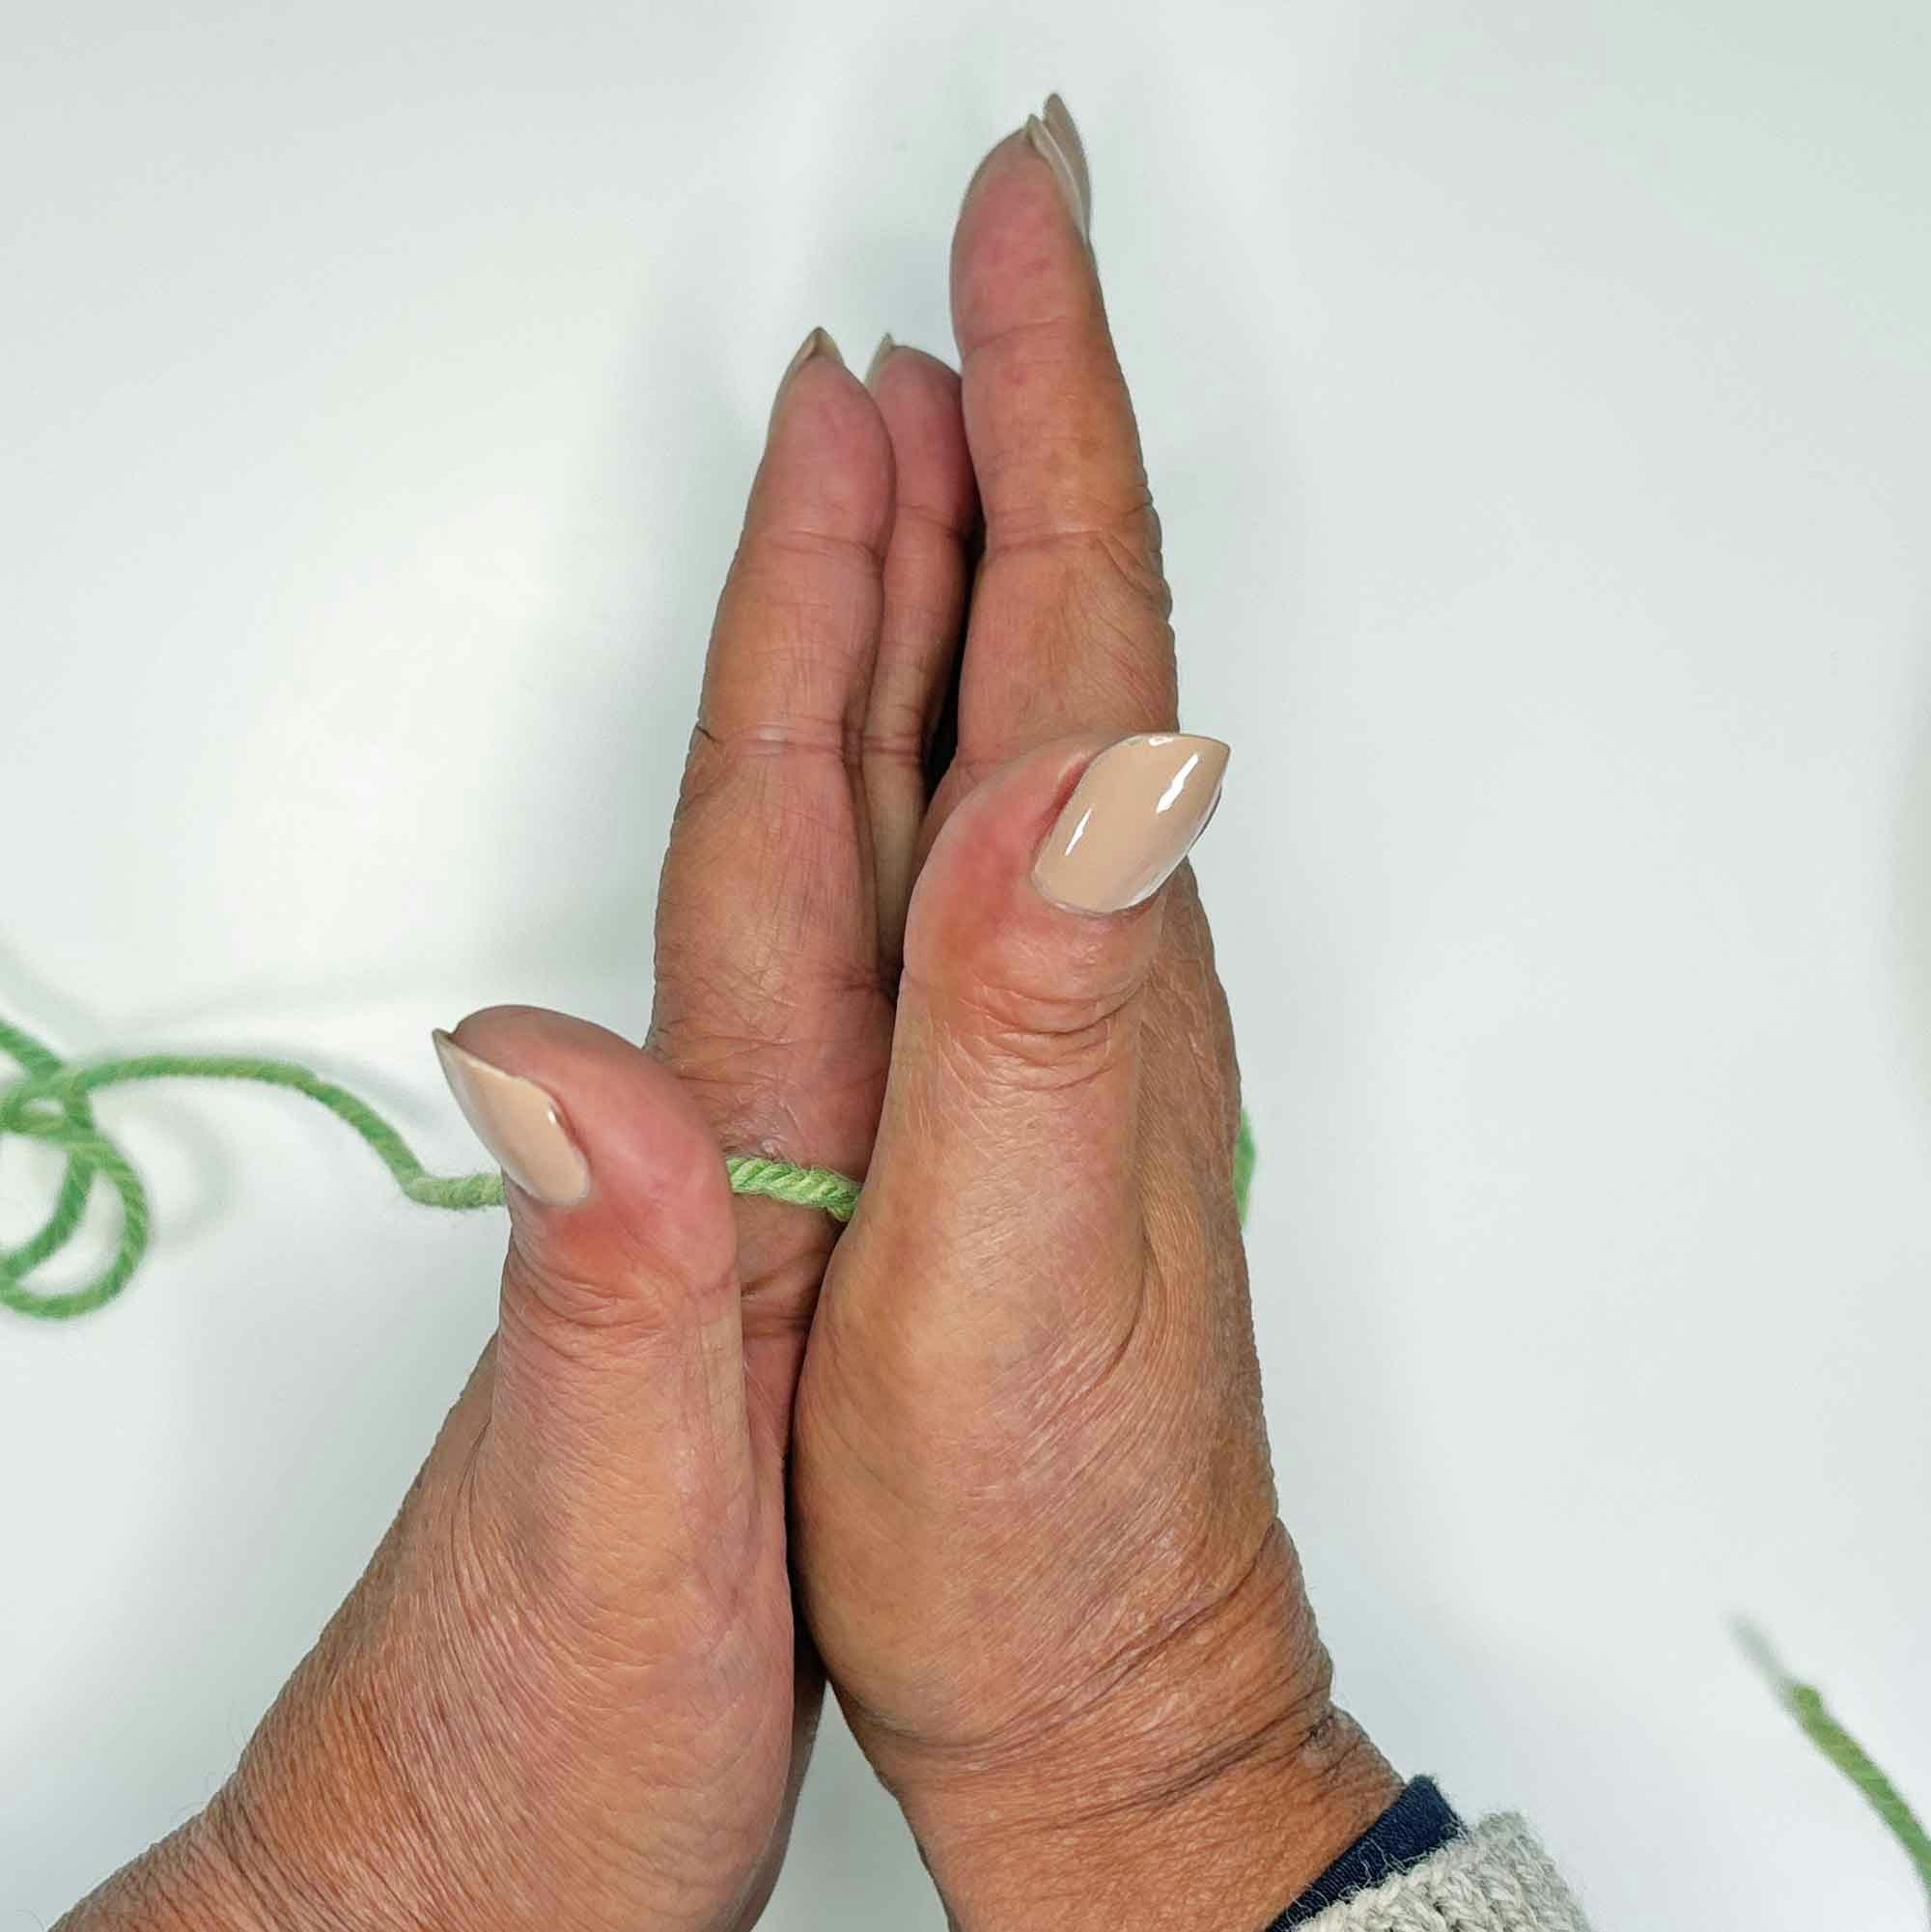
Method 4: Felt the Ends Together (otherwise known as a Spit Splice)
To splice the yarns, overlap the ends for an inch or two across the palm of one hand, moisten the palm of the other hand, and rub your hands briskly together until the yarn is felted.
Click on each image below for full step-by-step directions.
The felted join can be nearly invisible; no one will ever know that you didn’t have a continuous strand of yarn. While not as quick as some of the other methods, the felted join has one big advantage: having no ends to weave means less time spent on your finishing tasks. But the felted join only works with yarn that will felt. Wool, alpaca, and cashmere are all good candidates for a felted join. Superwash wool, cotton, silk, viscose, and synthetic fibers will not felt. If your yarn is a blend of felting and non-felting fibers, test to see if it will securely felt before using this join in your project.
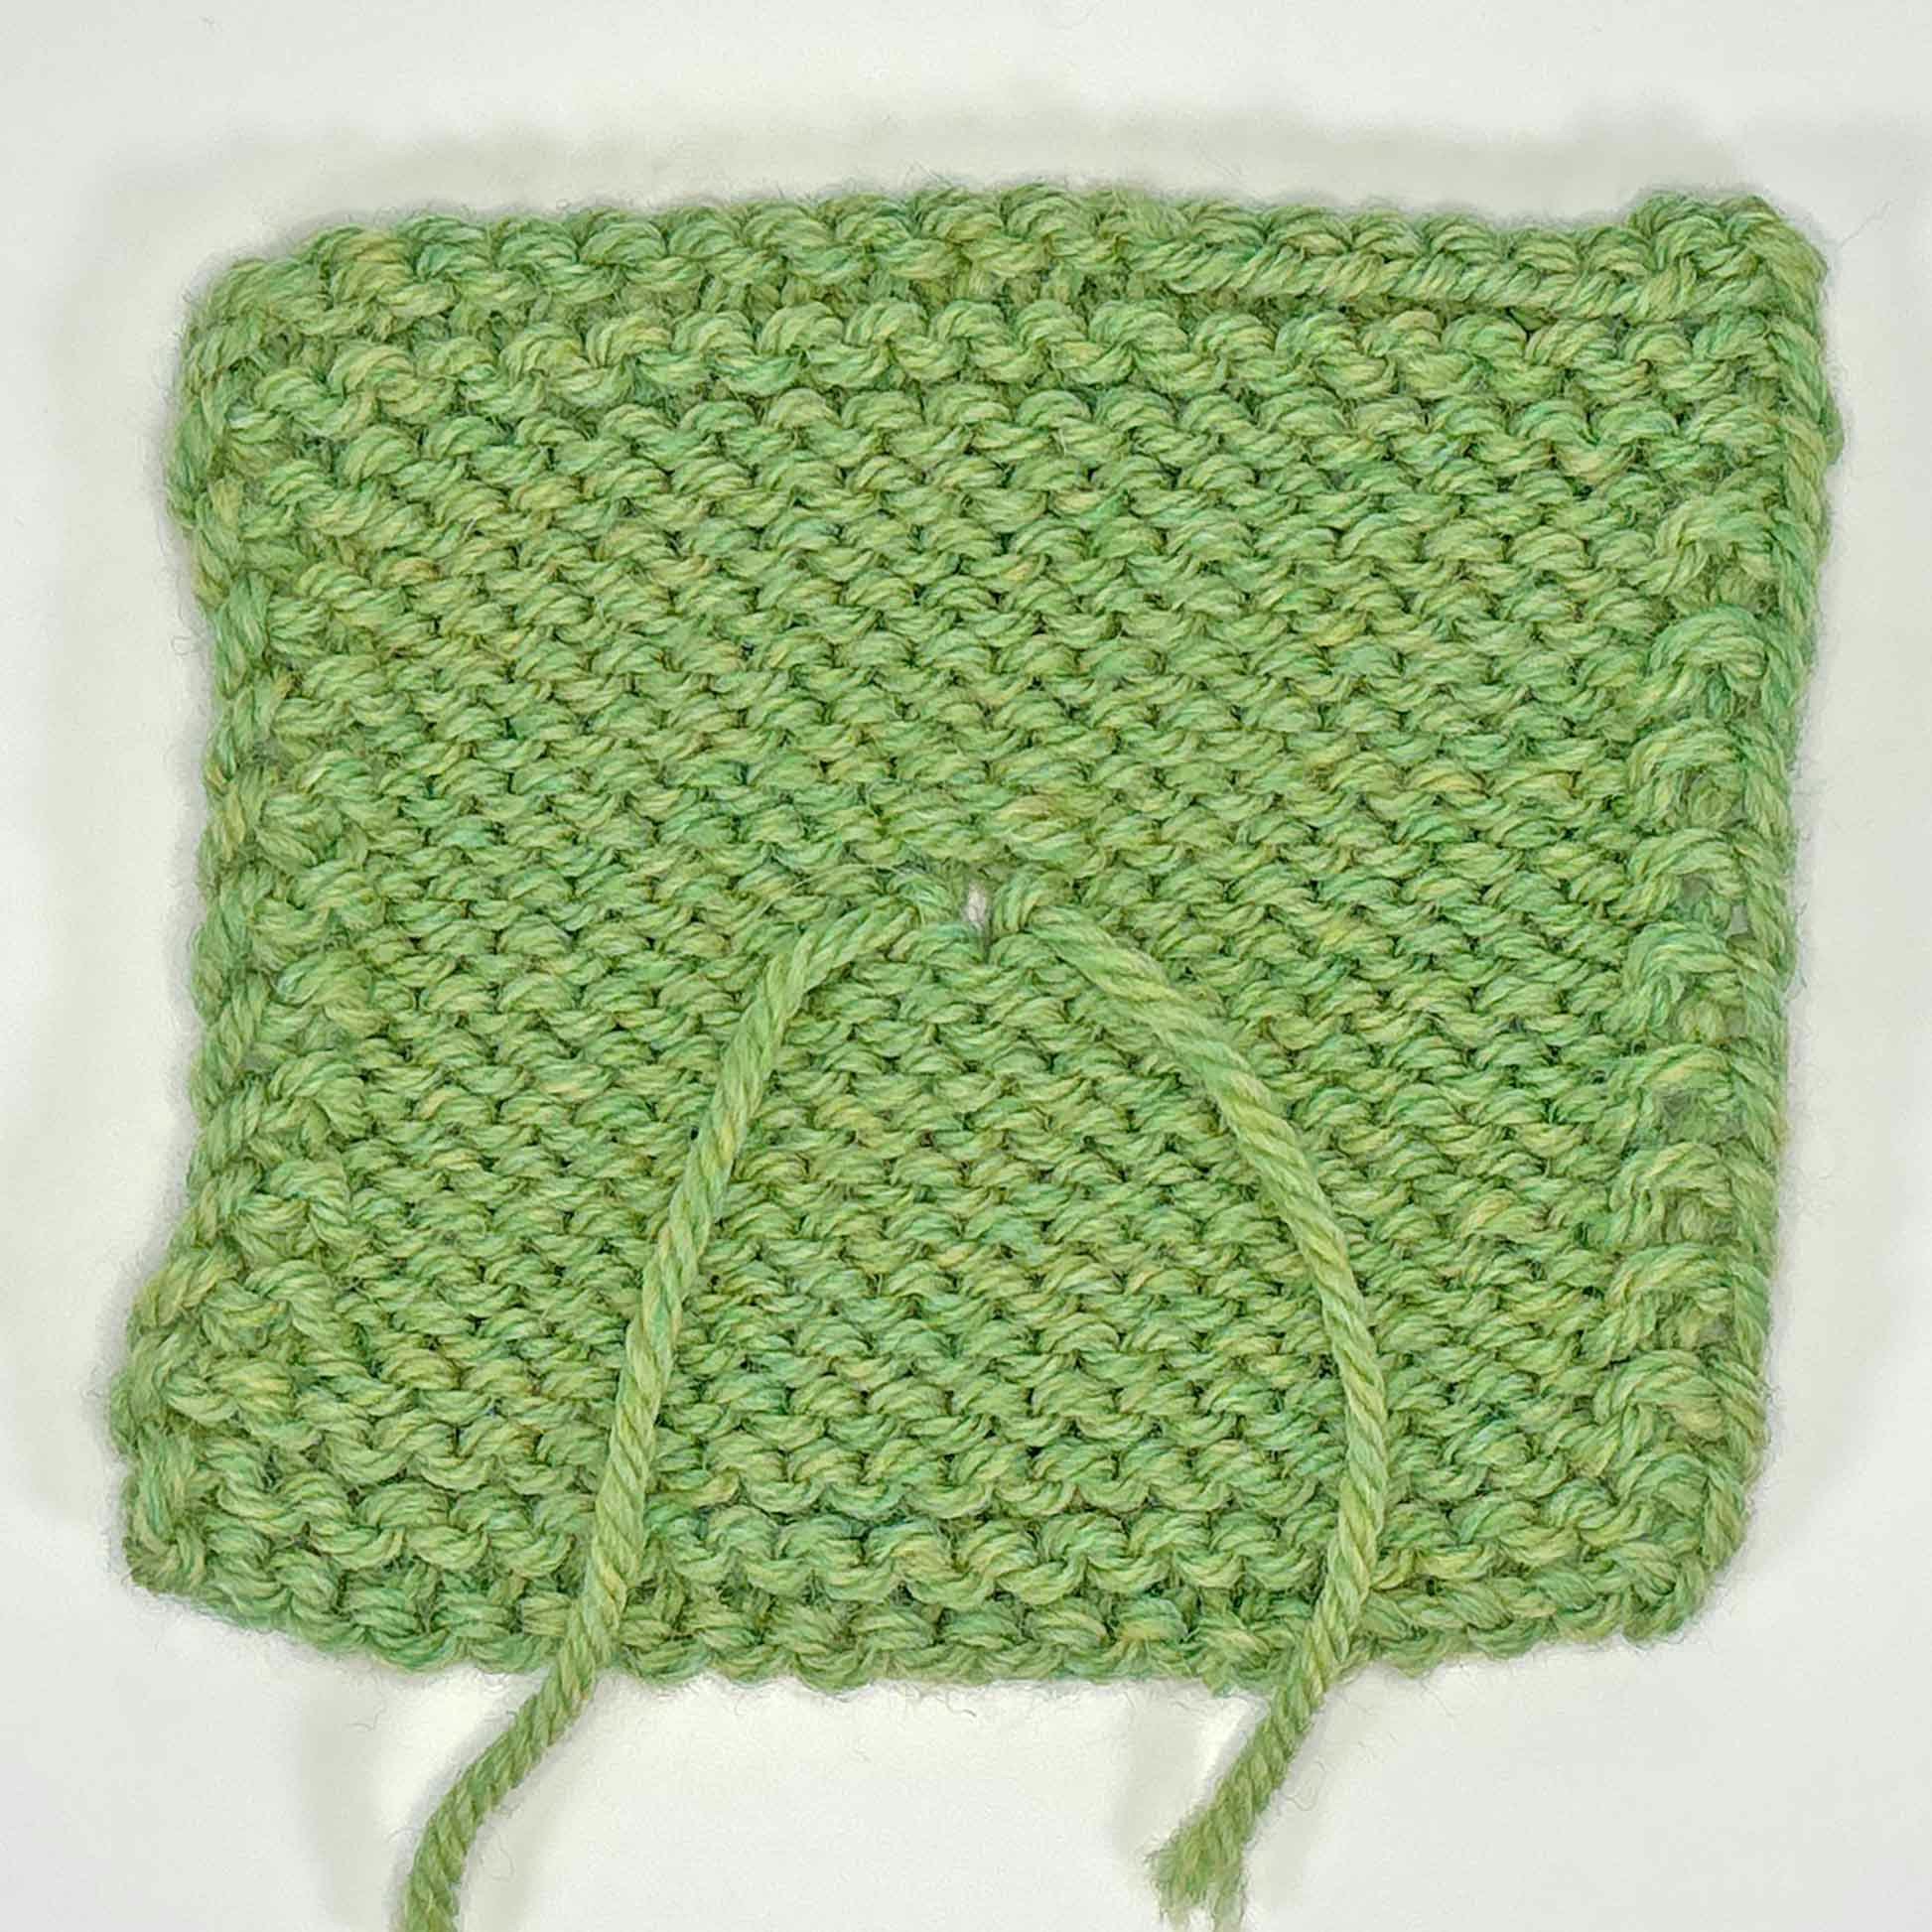
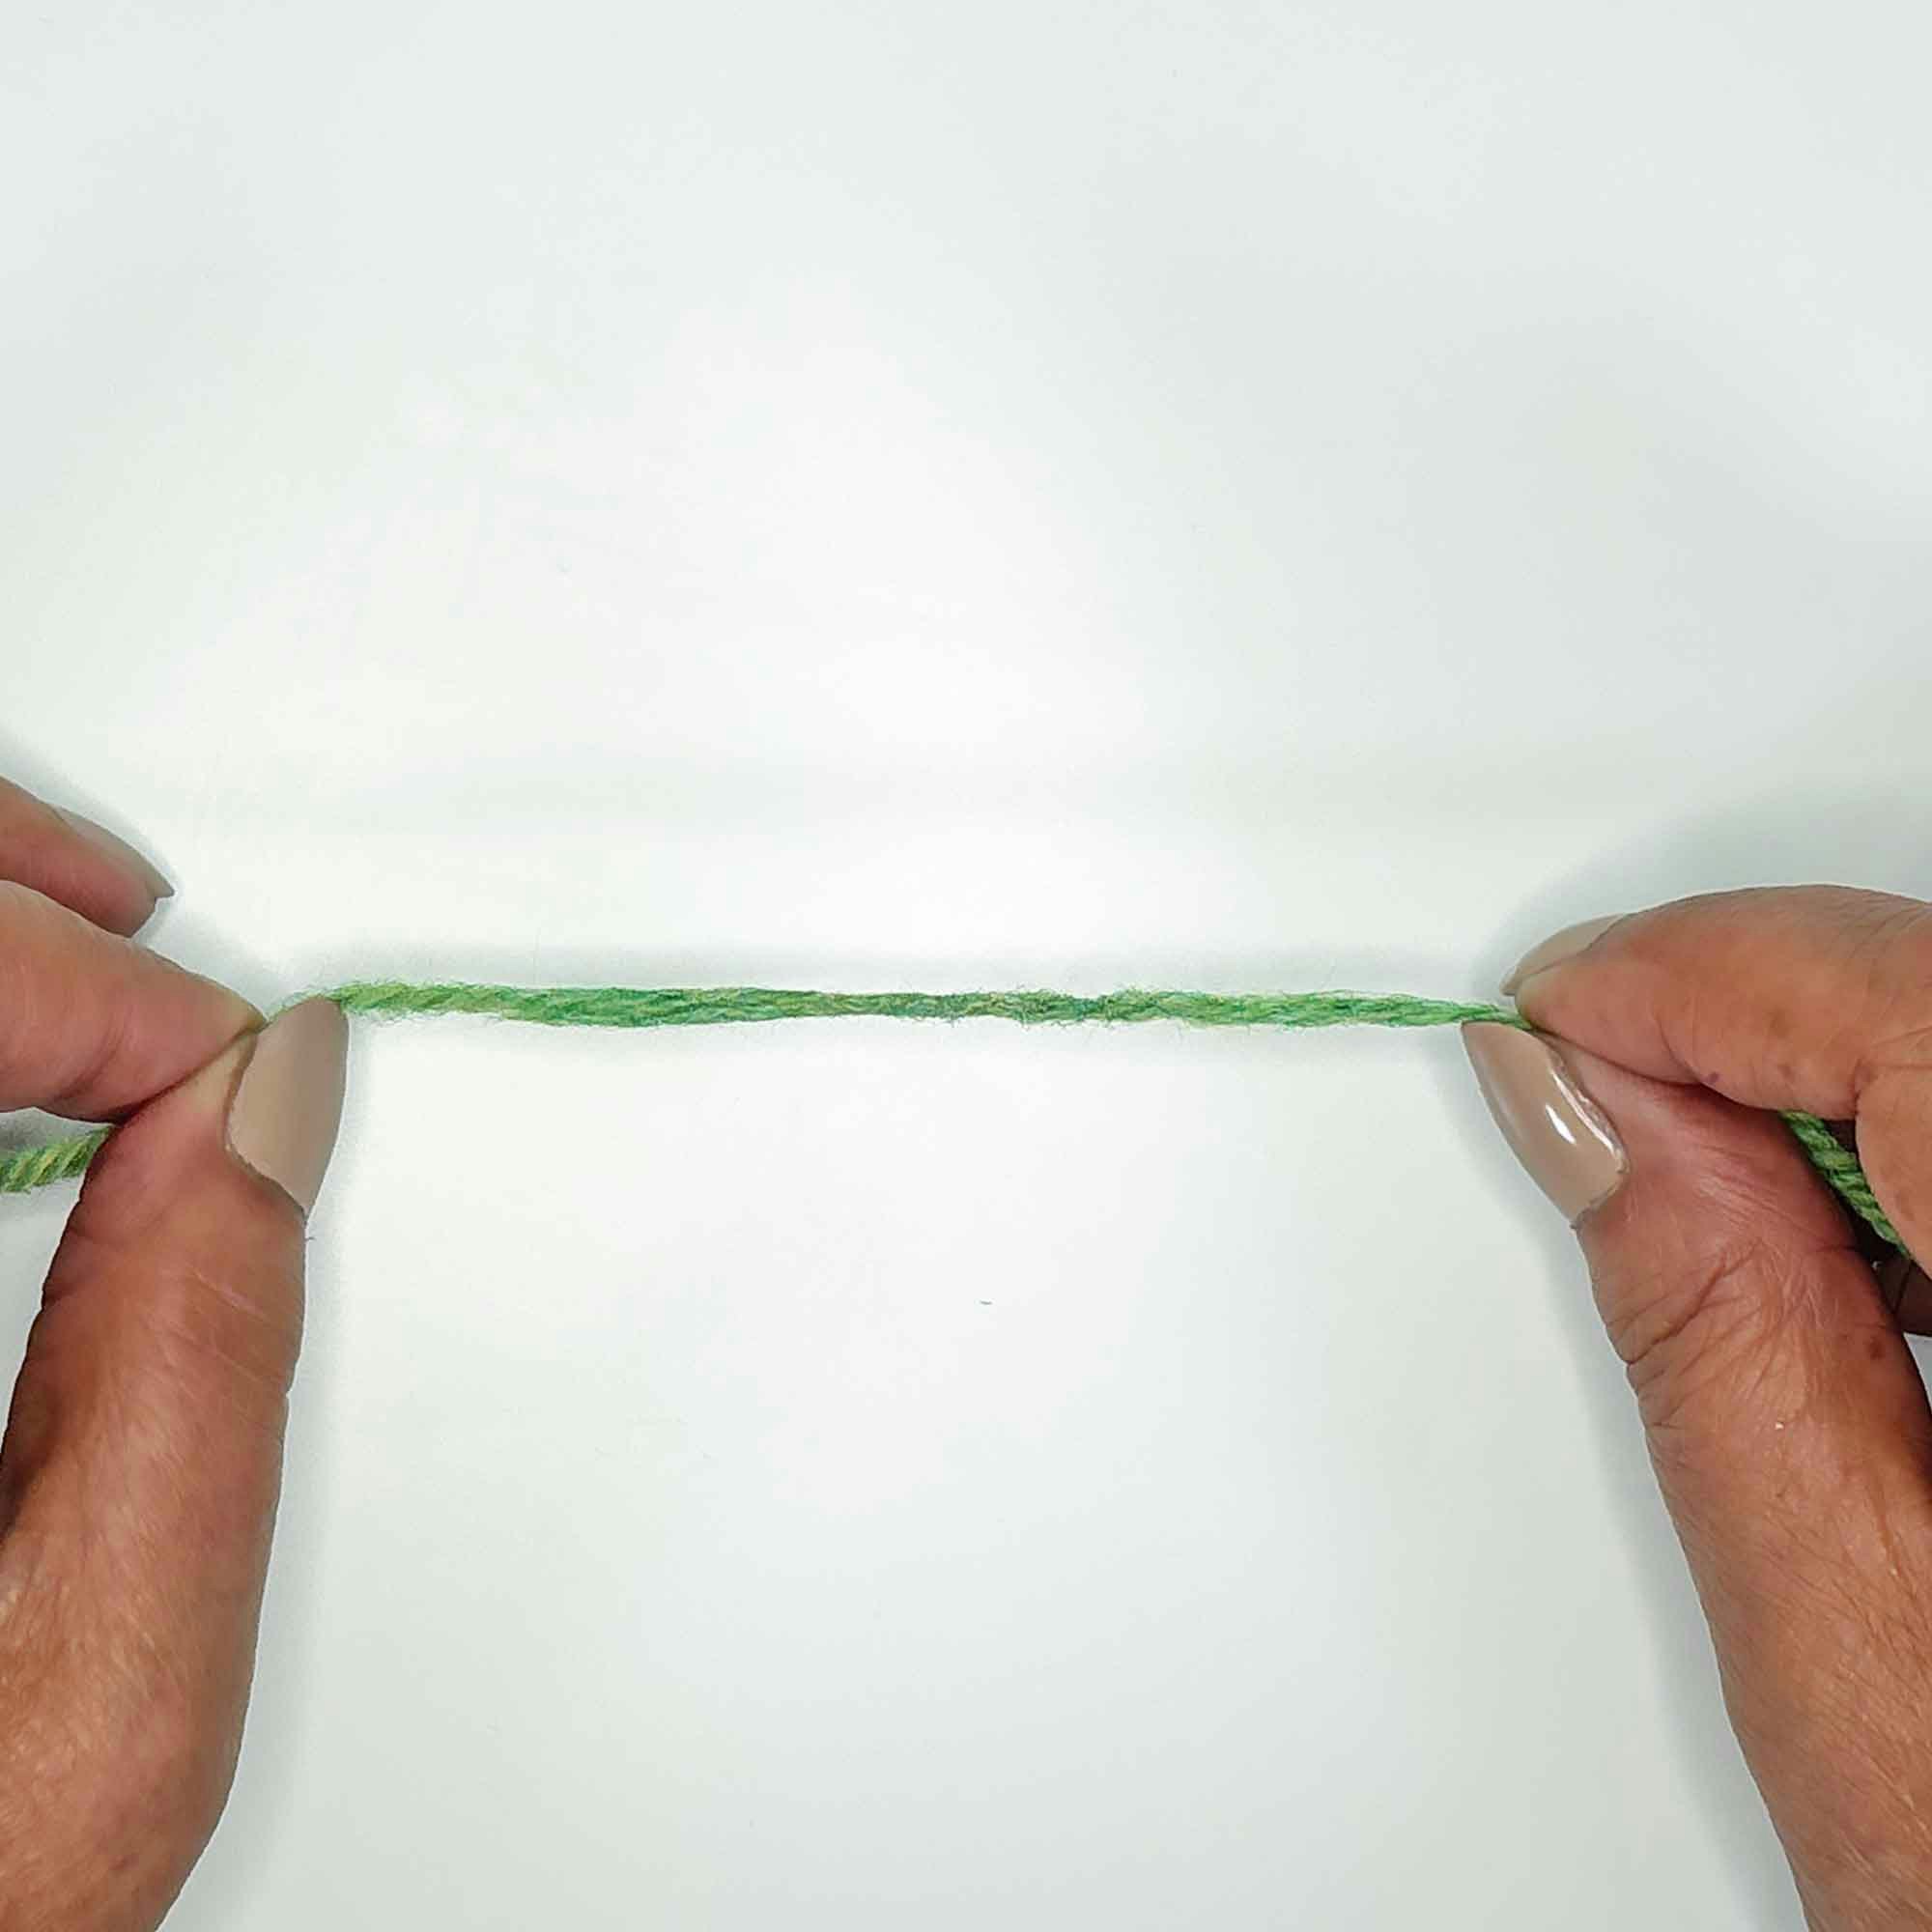
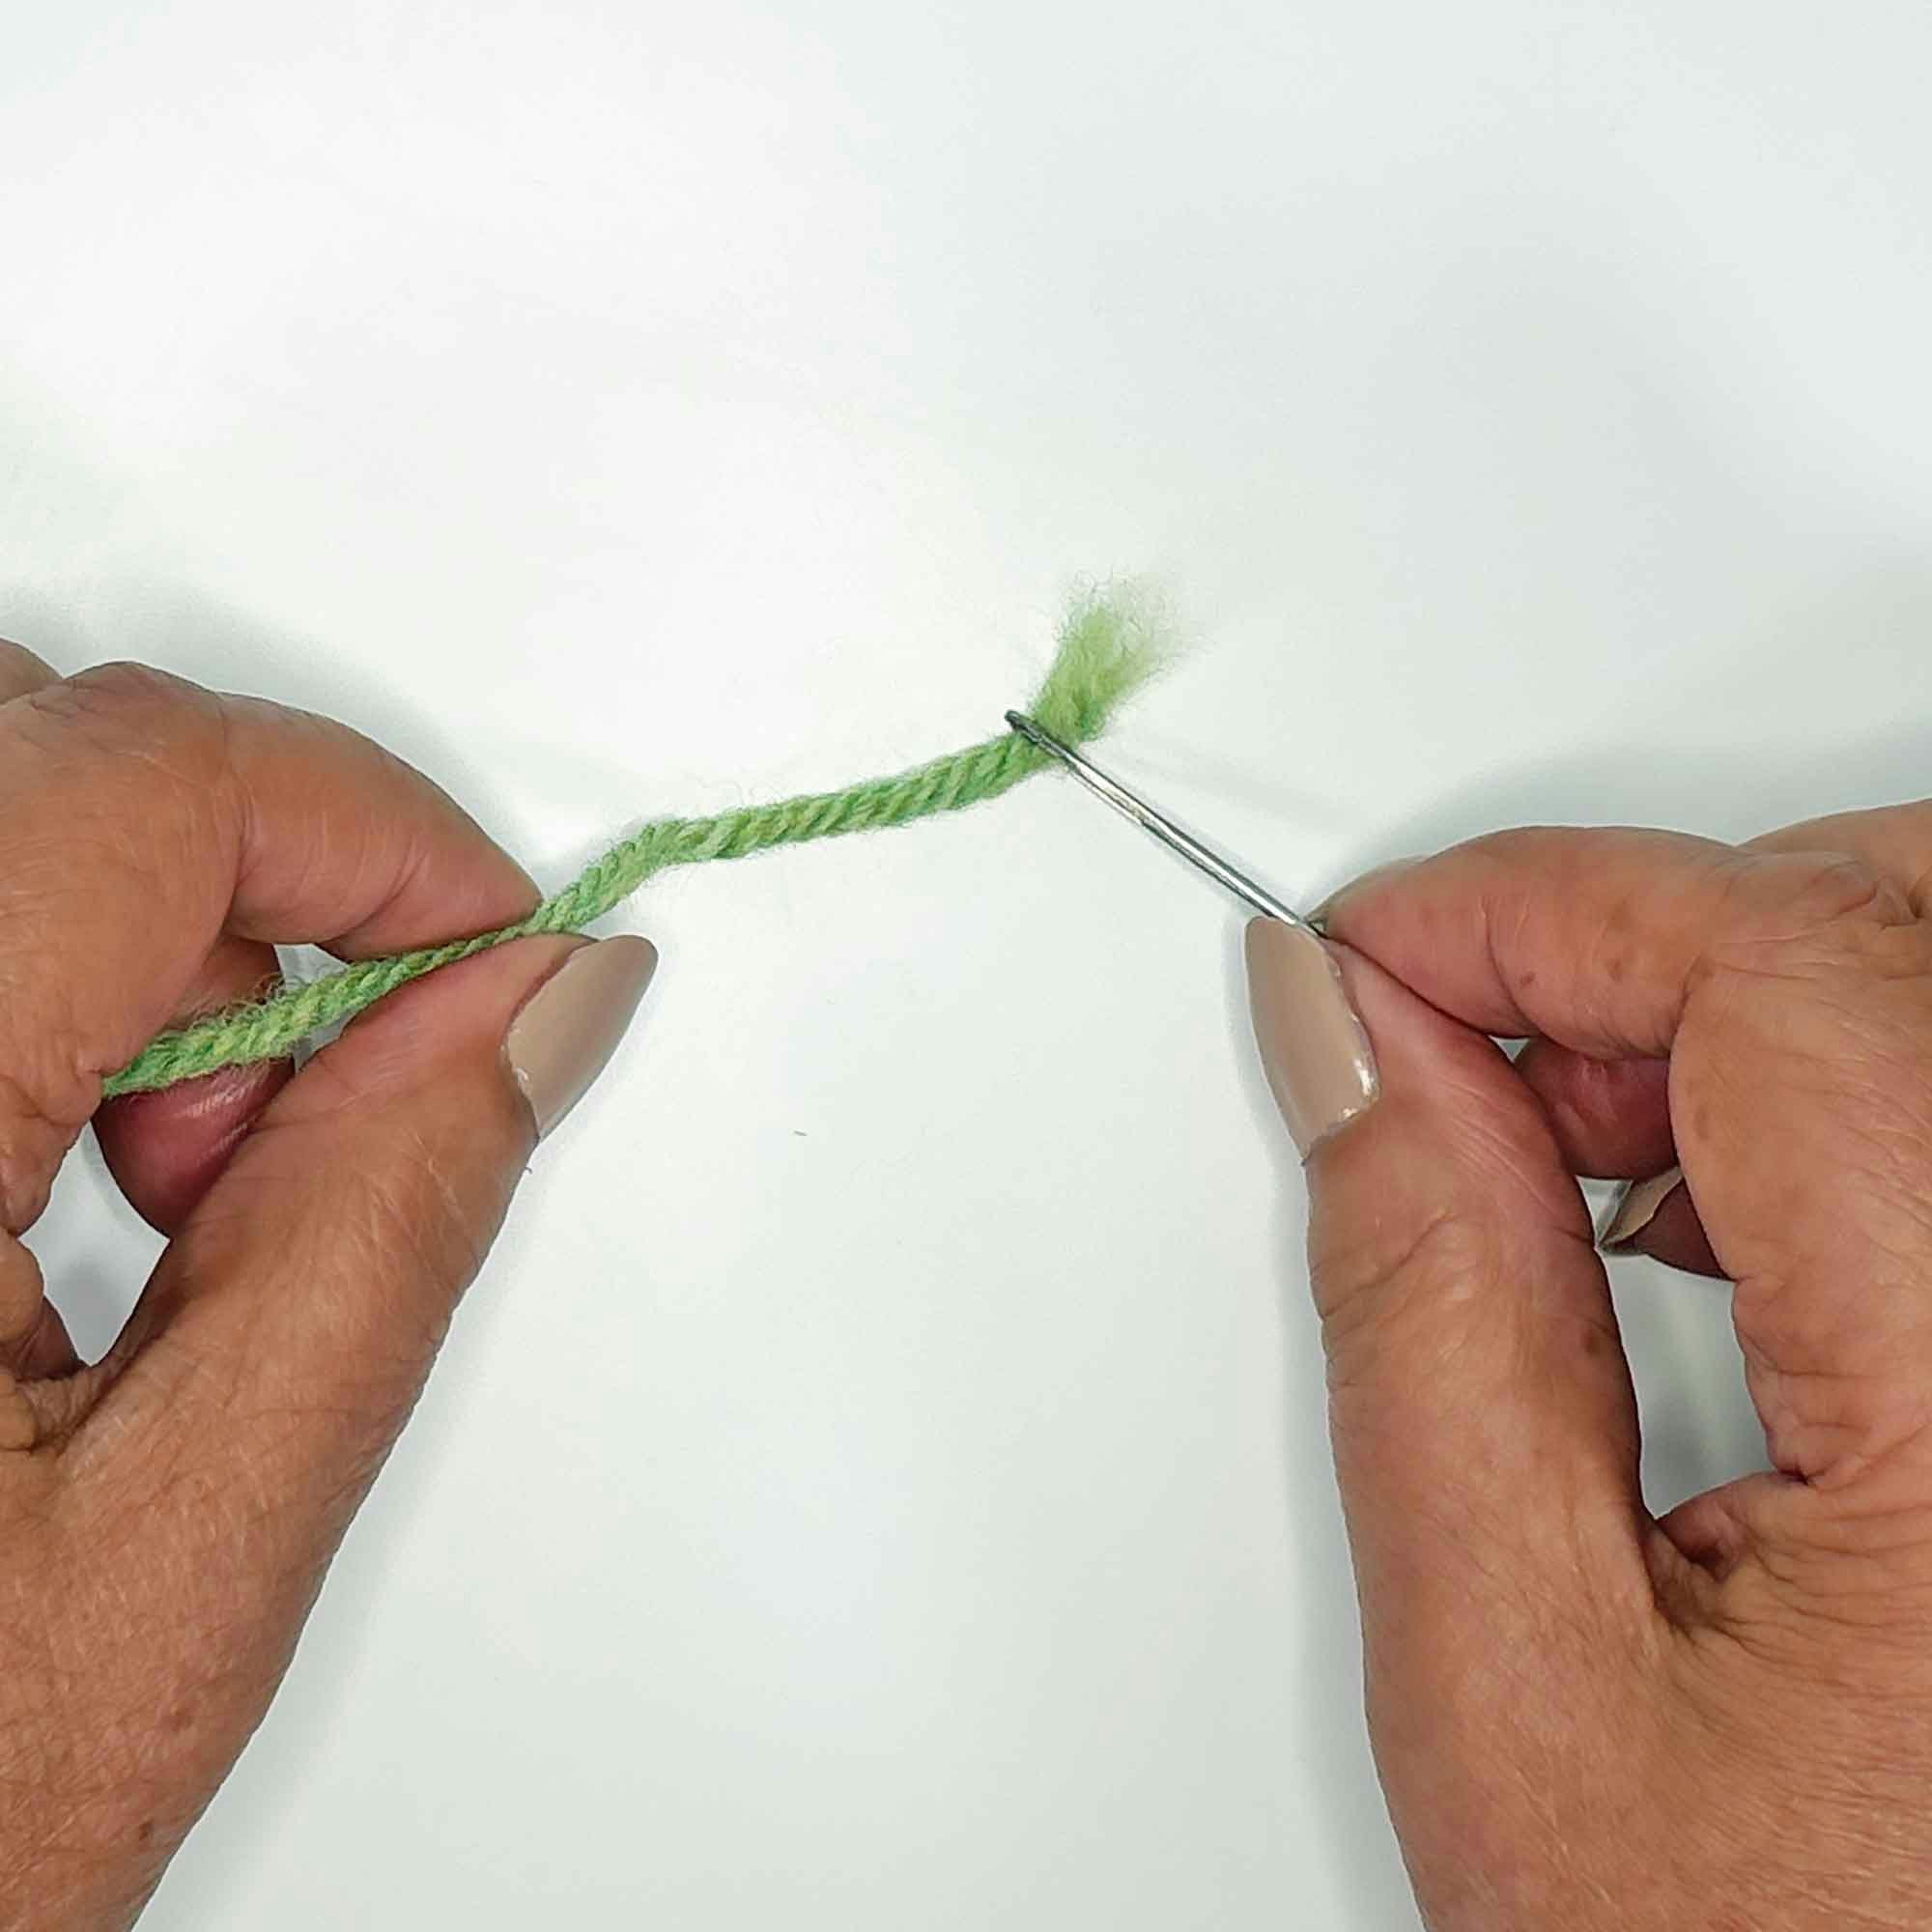
Method 5: Try the Russian Join
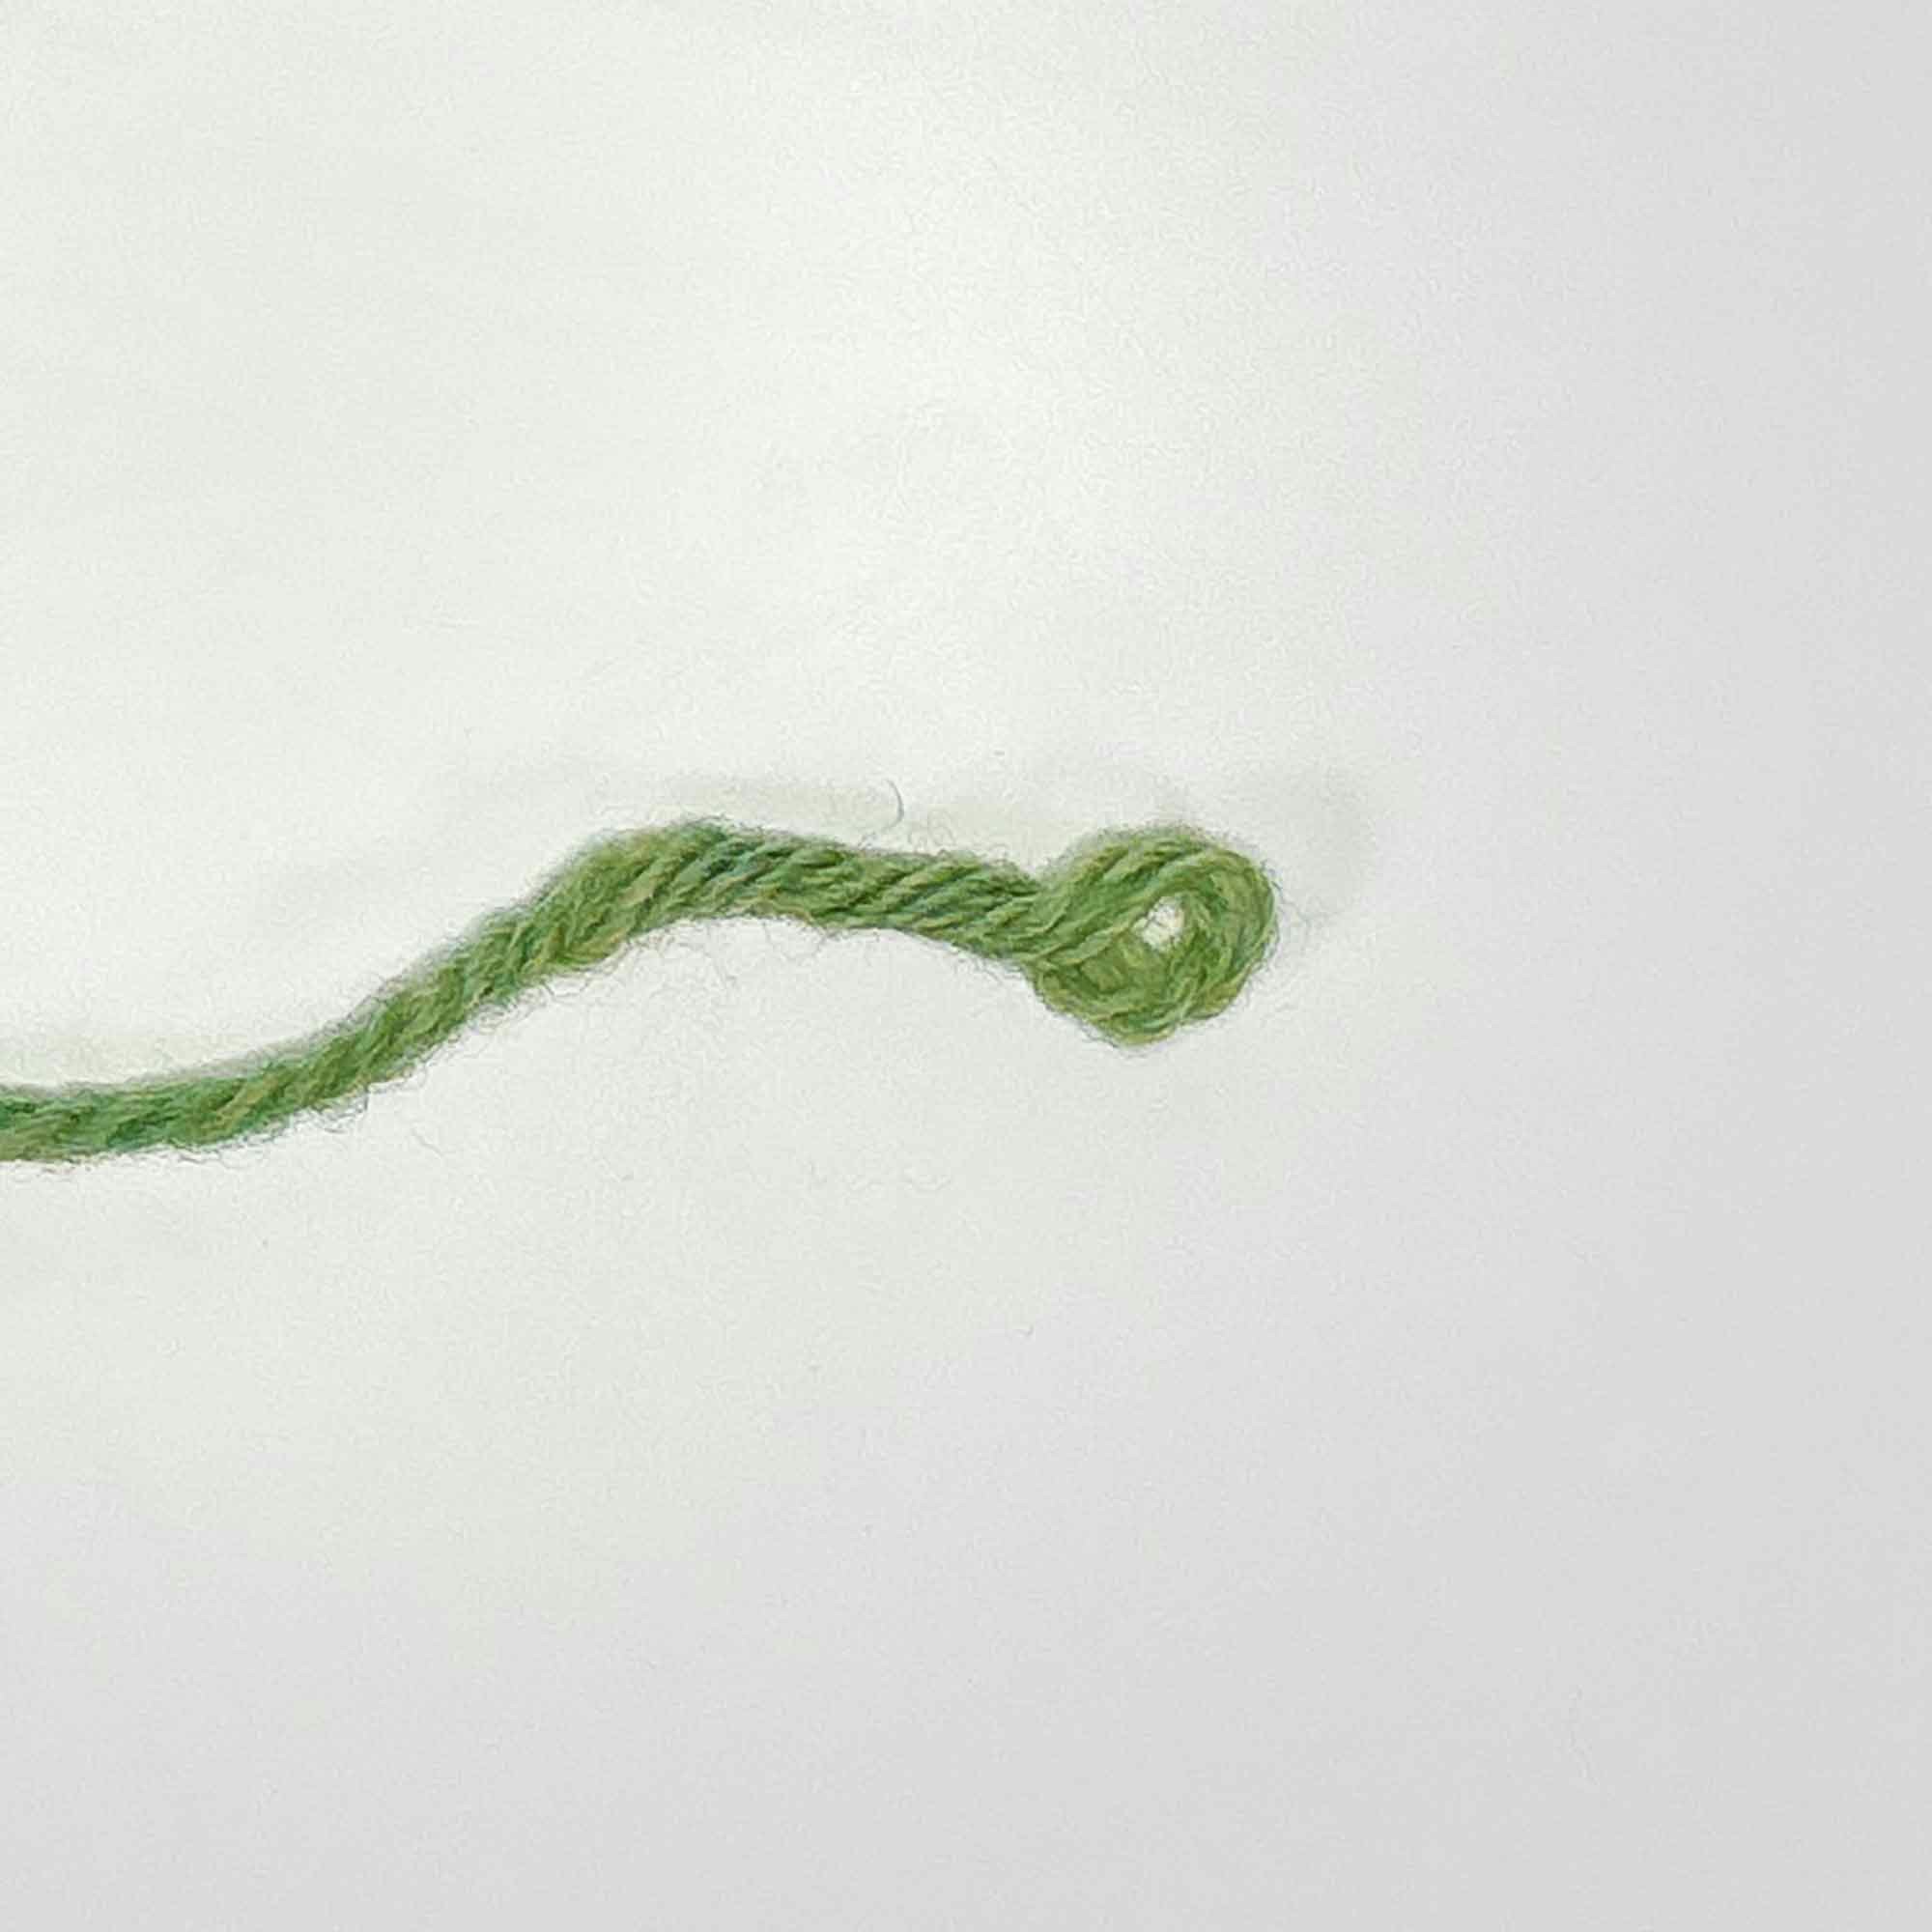
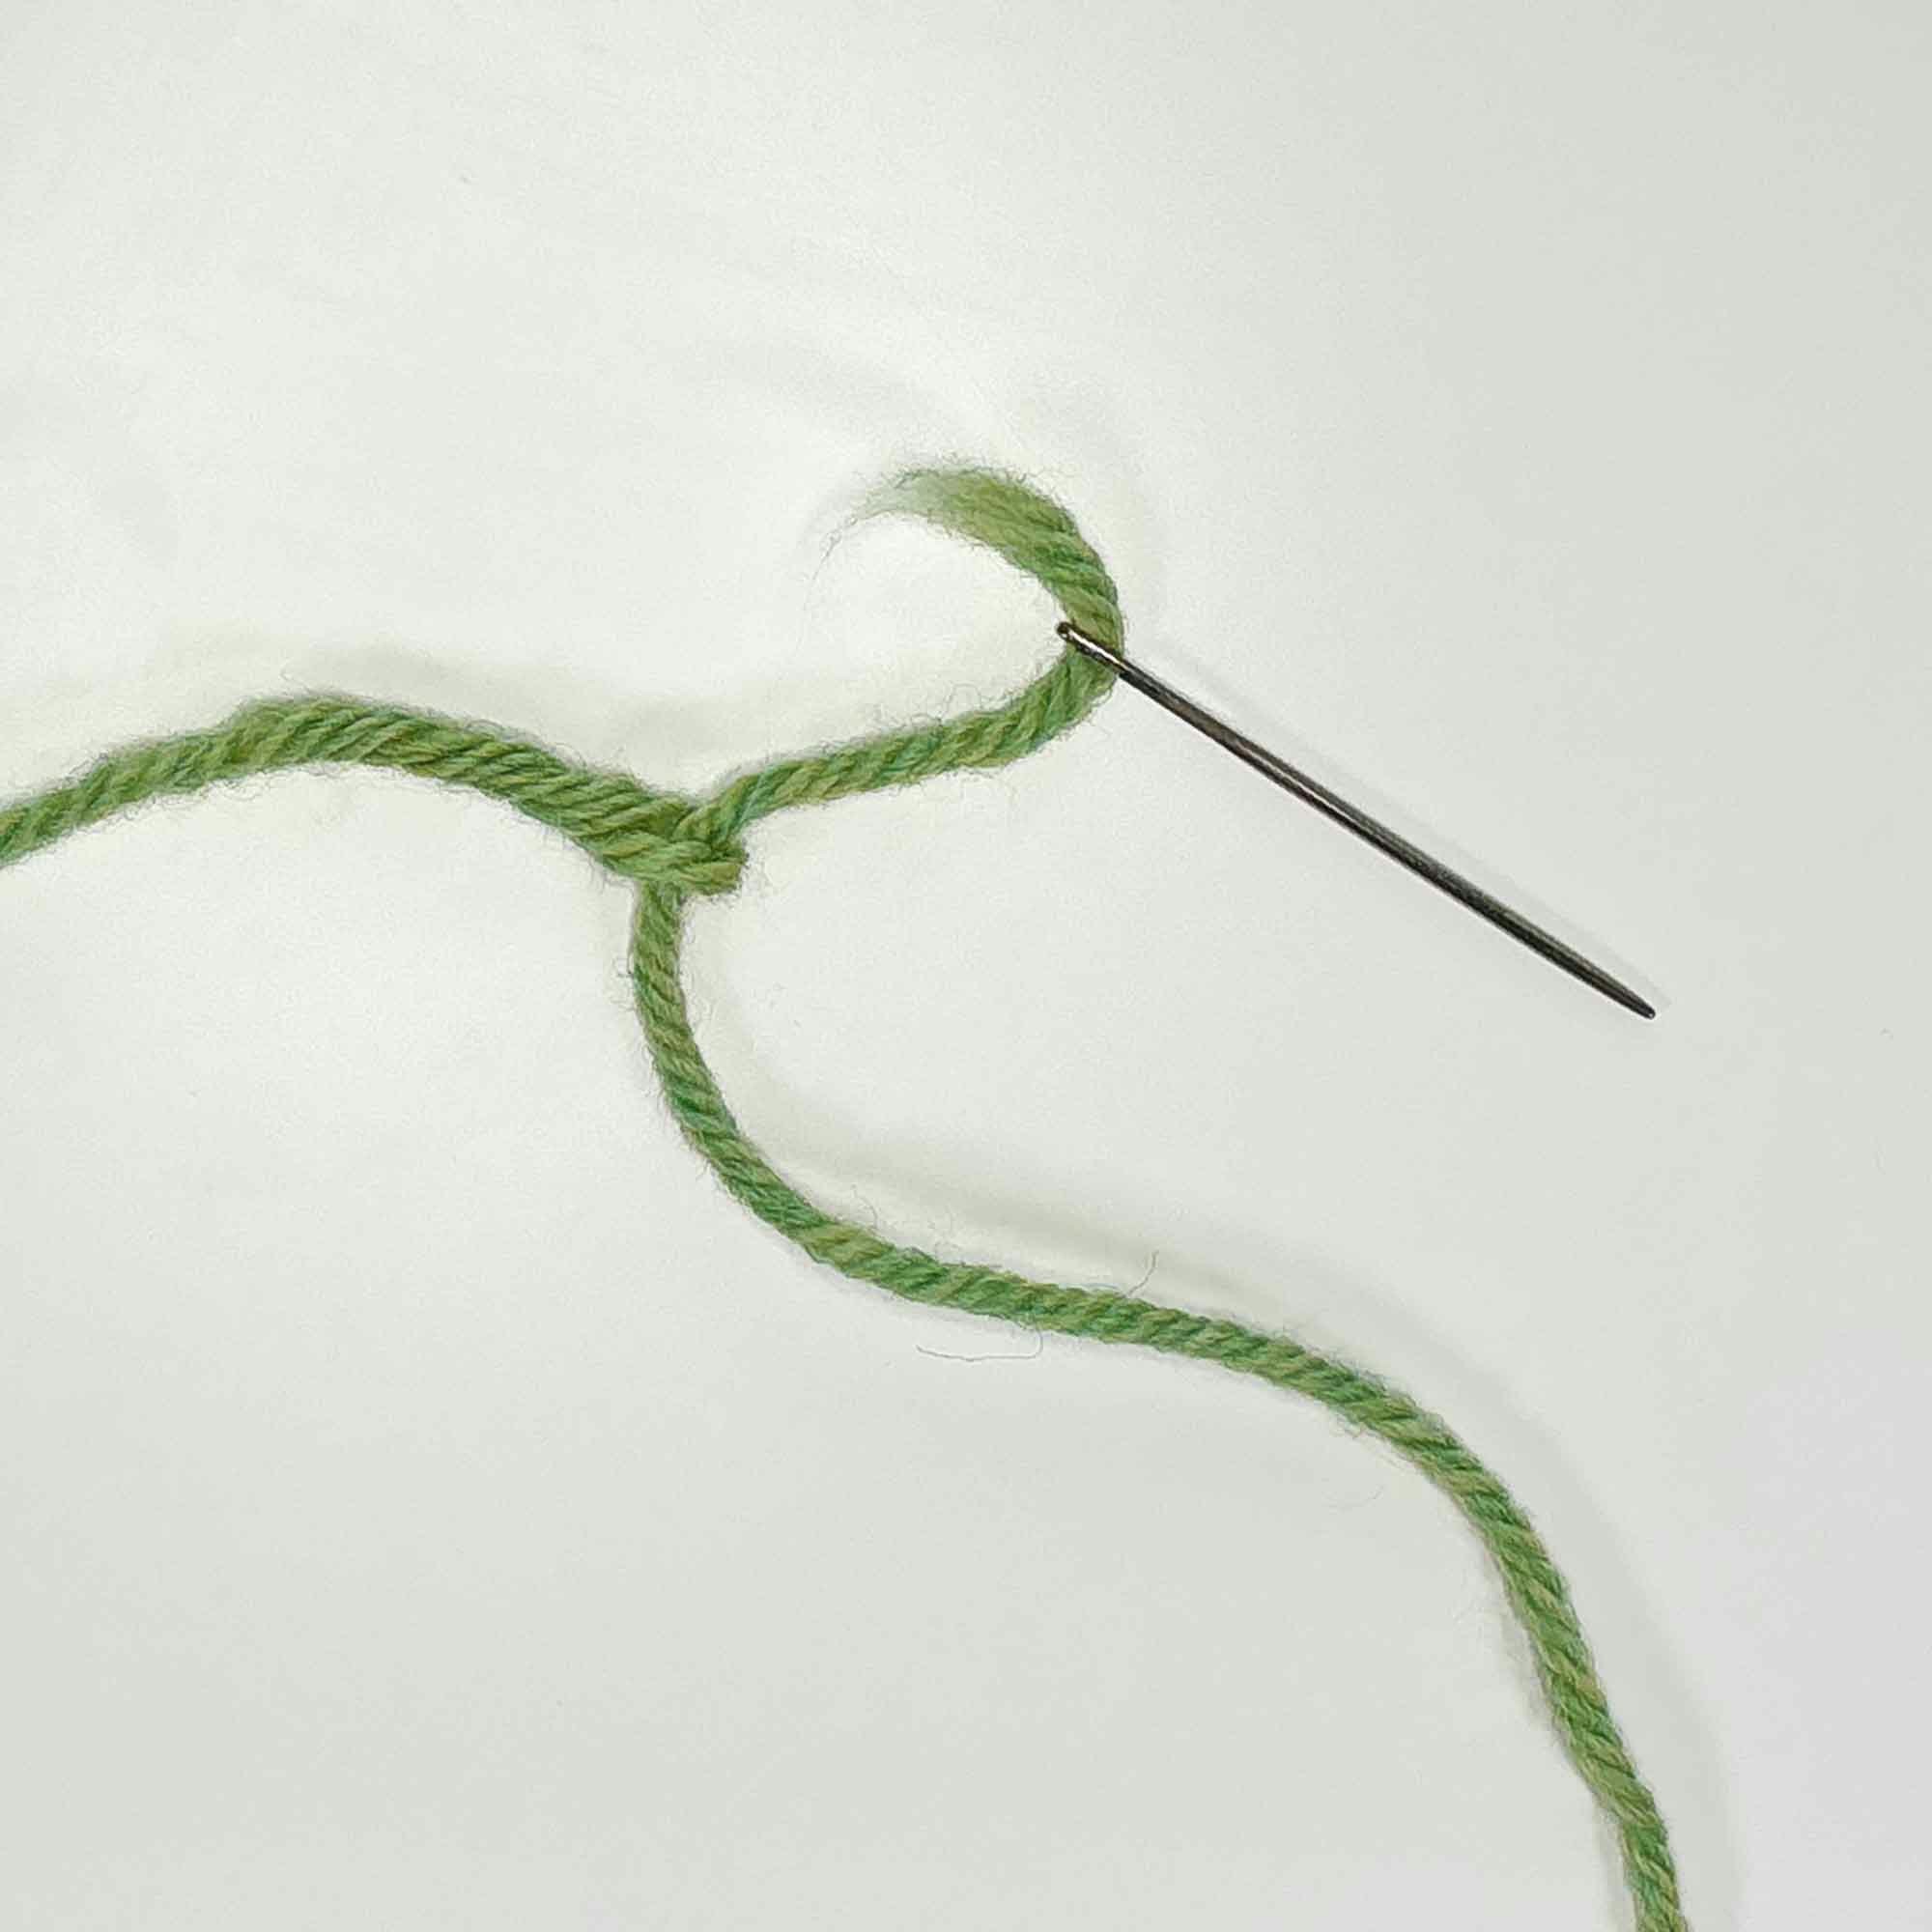
To create a Russian join, link the two strands together, then use a tapestry needle to weave each tail back into itself.
Click on each image below for full step-by-step directions.
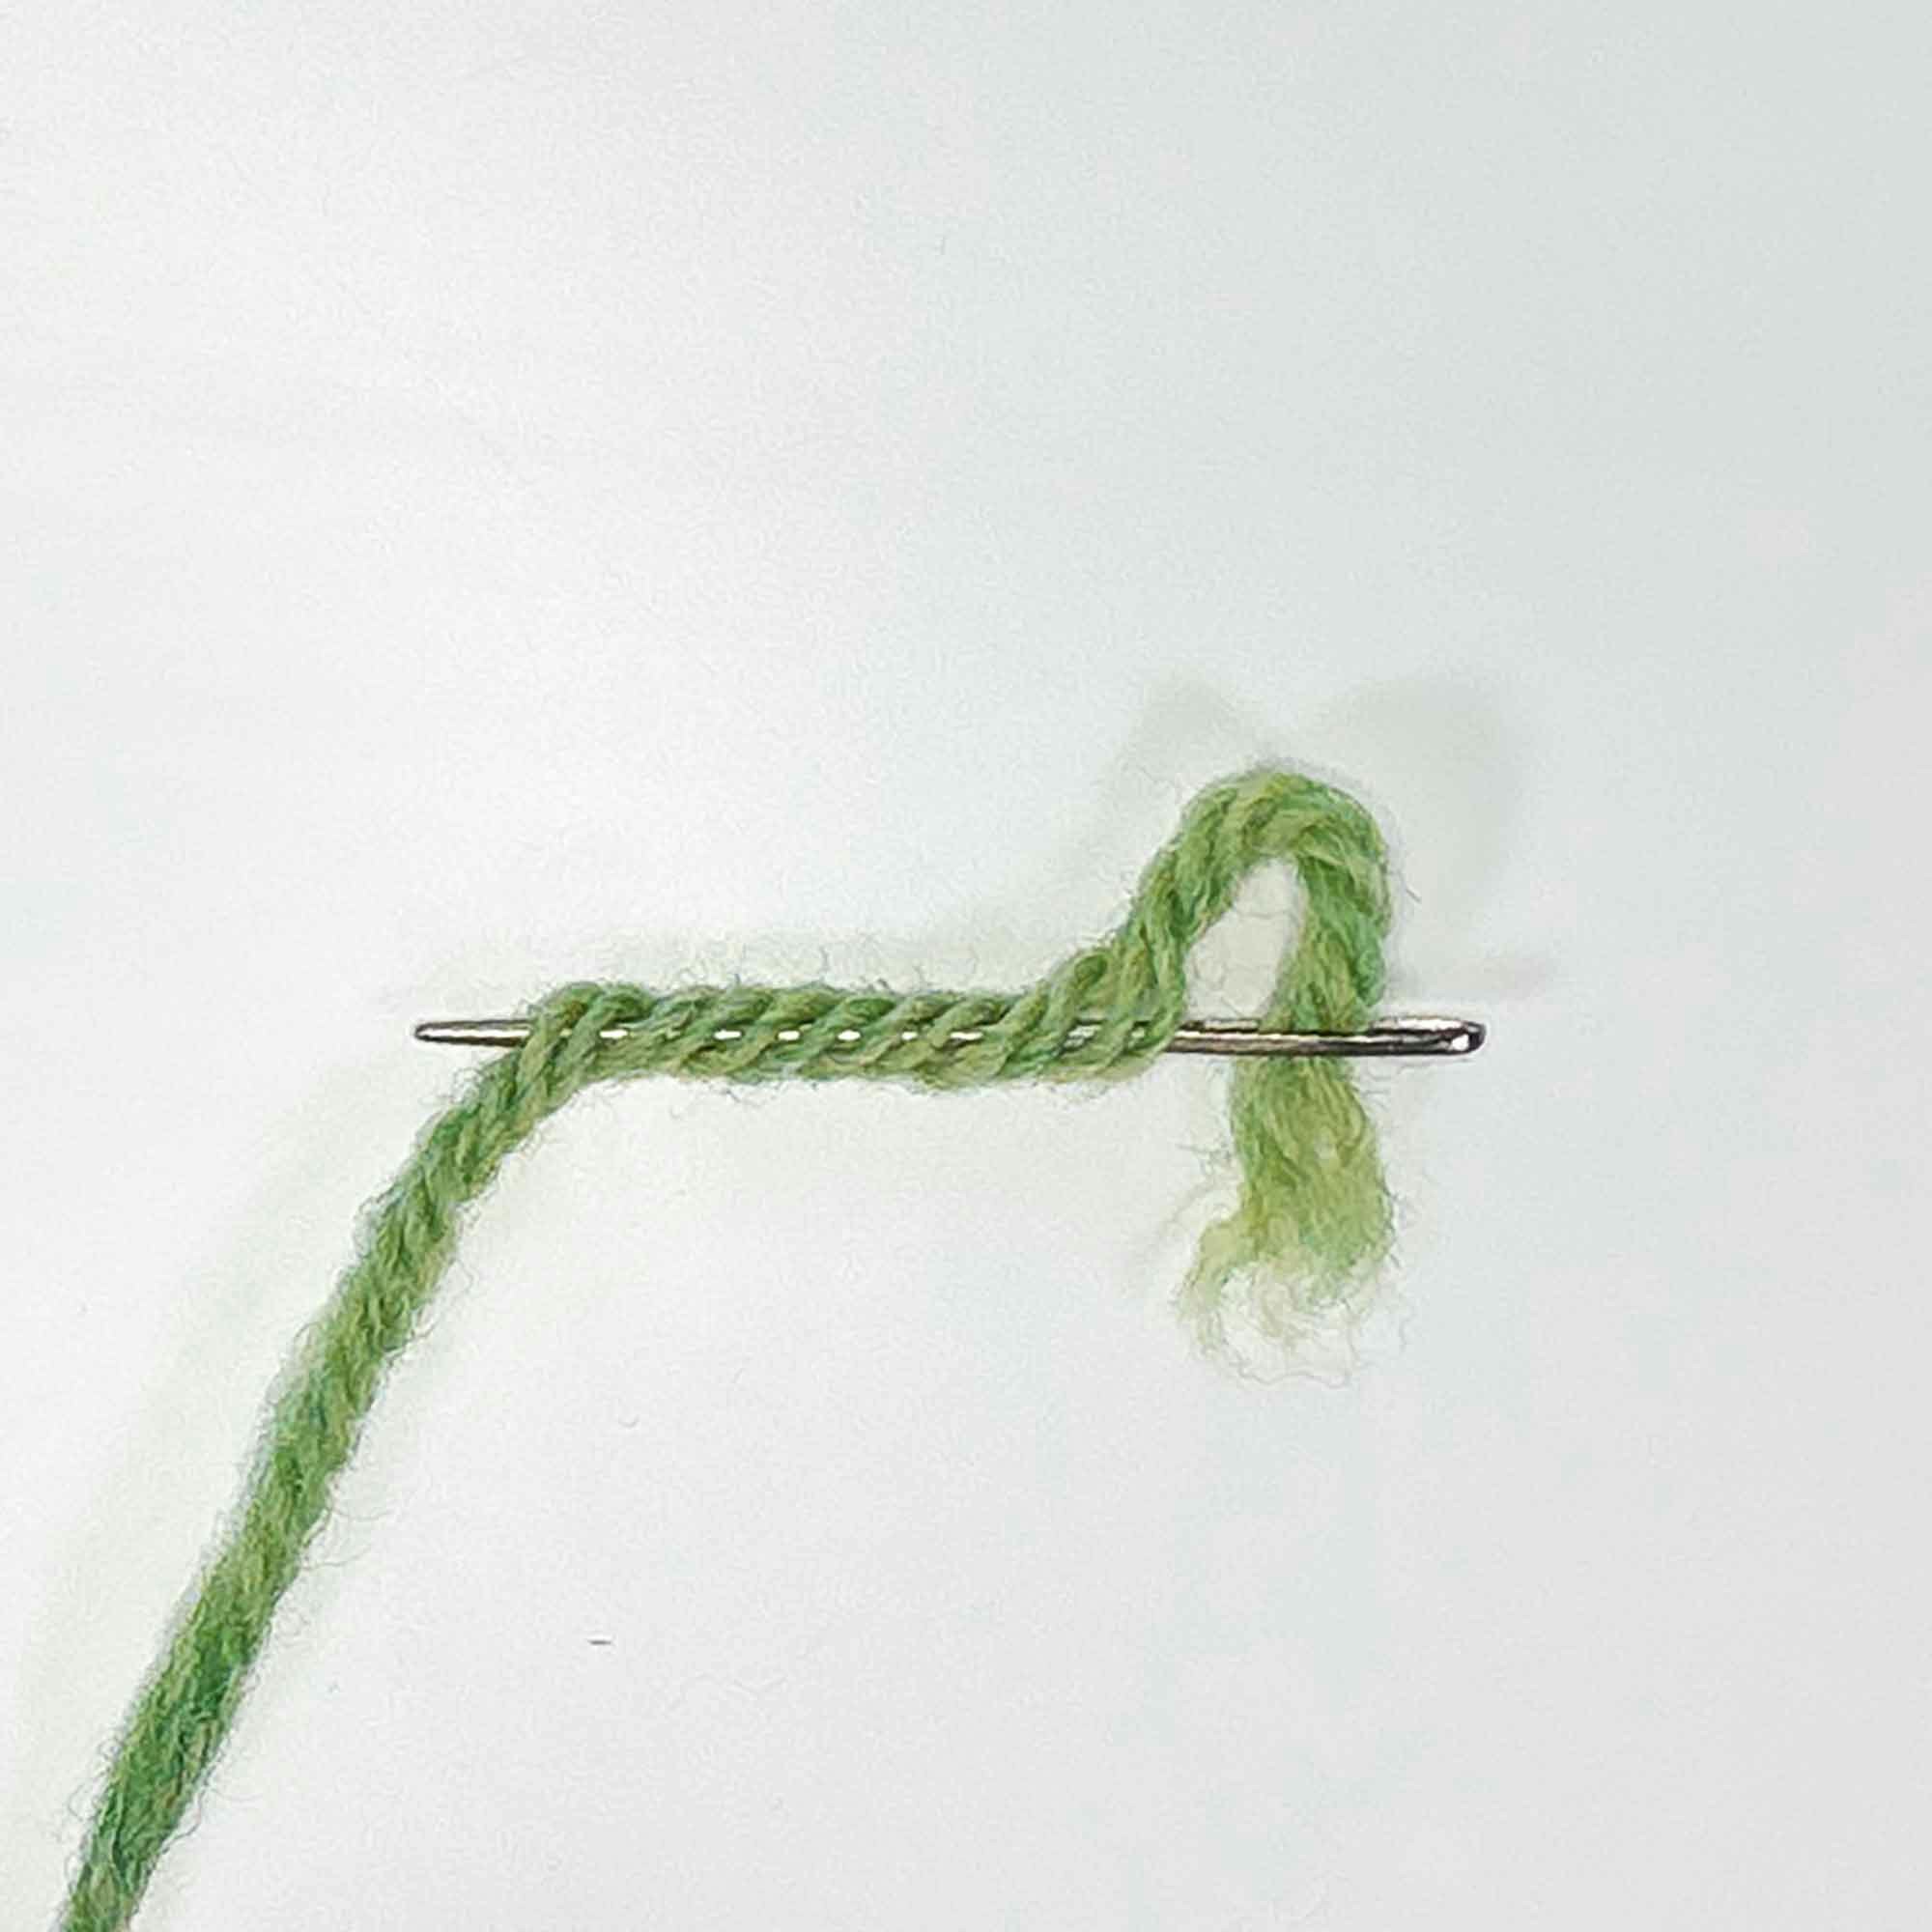
 The completed Russian join. The two strands are linked and the ends are neatly hidden.
Like the felted join, the Russian join is quite secure and eliminates the task of weaving in ends. The Russian join is appropriate for yarn with any fiber content—even slippery silks. It’s a particularly good choice for lacy projects knit in non-felting yarns. But the Russian join creates extra thickness in the yarn, adding bulk for several consecutive stitches. It can be fiddly and time-consuming to execute. Unlike the other methods, which can be accomplished without additional tools, the Russian join requires the use of a tapestry needle appropriately sized for your yarn.
Consider Where to Join
Regardless of which joining method you choose, it’s smart to join yarn at the beginning of a row whenever possible. If the edge will be seamed or given an edging, the join will be hidden. And seams are the least conspicuous place to weave in your tails. If you can’t join new yarn at the beginning of a row (perhaps you’re knitting in the round or trying to conserve every inch of a precious yarn), be aware of where the join will fall on the garment. Sometimes your join will cause a slight distortion of the fabric, no matter how careful you are. Best to avoid placing that distortion front and center where it’s likely to catch your eye every time you look in the mirror.
As with most things in knitting, there is no single “best way” to join yarn. Become familiar with them all so you can choose the method that works best for your project and your knitting style.