Subscriber Exclusive
V-Neck Shaping Tricks
Whether you’re working from the top down or bottom up, Corrina makes shaping a V-neck easy.
Whether you’re working from the top down or bottom up, Corrina makes shaping a V-neck easy. <a href="https://farmfiberknits.com/v-neck-shaping-tricks/">Continue reading.</a>
https://farmfiberknits.com/cdn-cgi/image/format=auto/https://www.datocms-assets.com/101500/1709764818-19733_zucker20231026_header-2-retouched.jpg?auto=format&w=900
A vest is such a relaxing thing to knit—no sleeves and enough fun detail at the neck and armholes to keep it interesting. Corrina Ferguson lets us in on some of her tried and true techniques to help you learn how to make shaping a V-neck a breeze!
There is basically only one important question to ask when it comes to V-necks in knitting: Will it be worked bottom-up or top-down? Whether the garment is being worked in pieces or in one piece, when it comes to shaping the V-neck, only the direction matters.
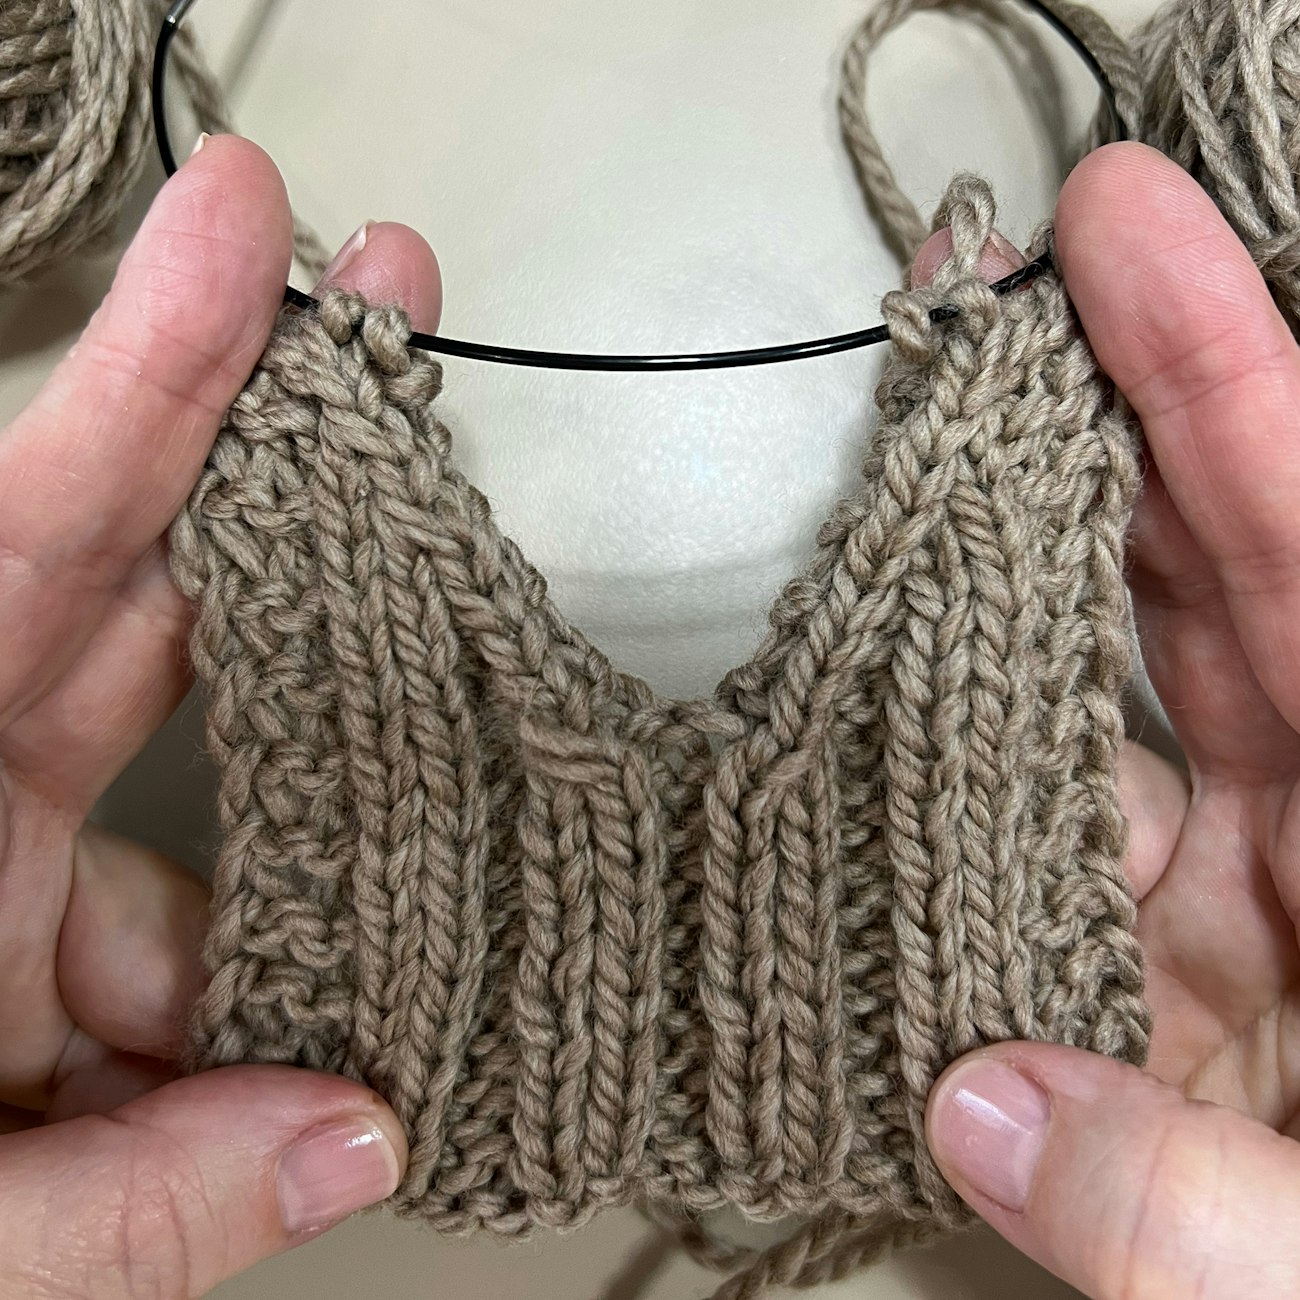
Juggling two balls of yarn can actually make it easier to knit some V-neck sweaters, and there’s even a simple fix when you pick up the wrong number of stitches.
Top or Bottom?
V-neck shaping worked from the top down requires increases to shape the neck and to reach the full width needed for the chest. When V-necks are worked from the bottom up, you begin with enough stitches to accommodate the full width needed for the chest, then decrease away stitches to achieve the V-neck shape and to reach the stitch count needed for the shoulders.
Top-Down V-Necks
The majority of V-necks I’ve come across that are worked top-down include raglan shaping for the sleeves and armholes. That is helpful because you can incorporate the V-neck increases into the raglan shaping.
Bottom-Up V-Necks
Working V-neck shaping from the bottom up is easier and more traditional. You begin with the full width for the chest, divide those stitches in half, and decrease them away as directed until you have the right number of stitches for the shoulder.
One of my favorite tips for working bottom-up V-neck shaping is to work the two halves of the neck at the same time. To do this, you will need an additional ball of yarn, and I highly suggest using circular needles (if you’re not already) even though we are working the fronts flat. Using circular needles allows you to use the cord as sort of a stitch holder, and you don’t have to worry about things getting too crowded.
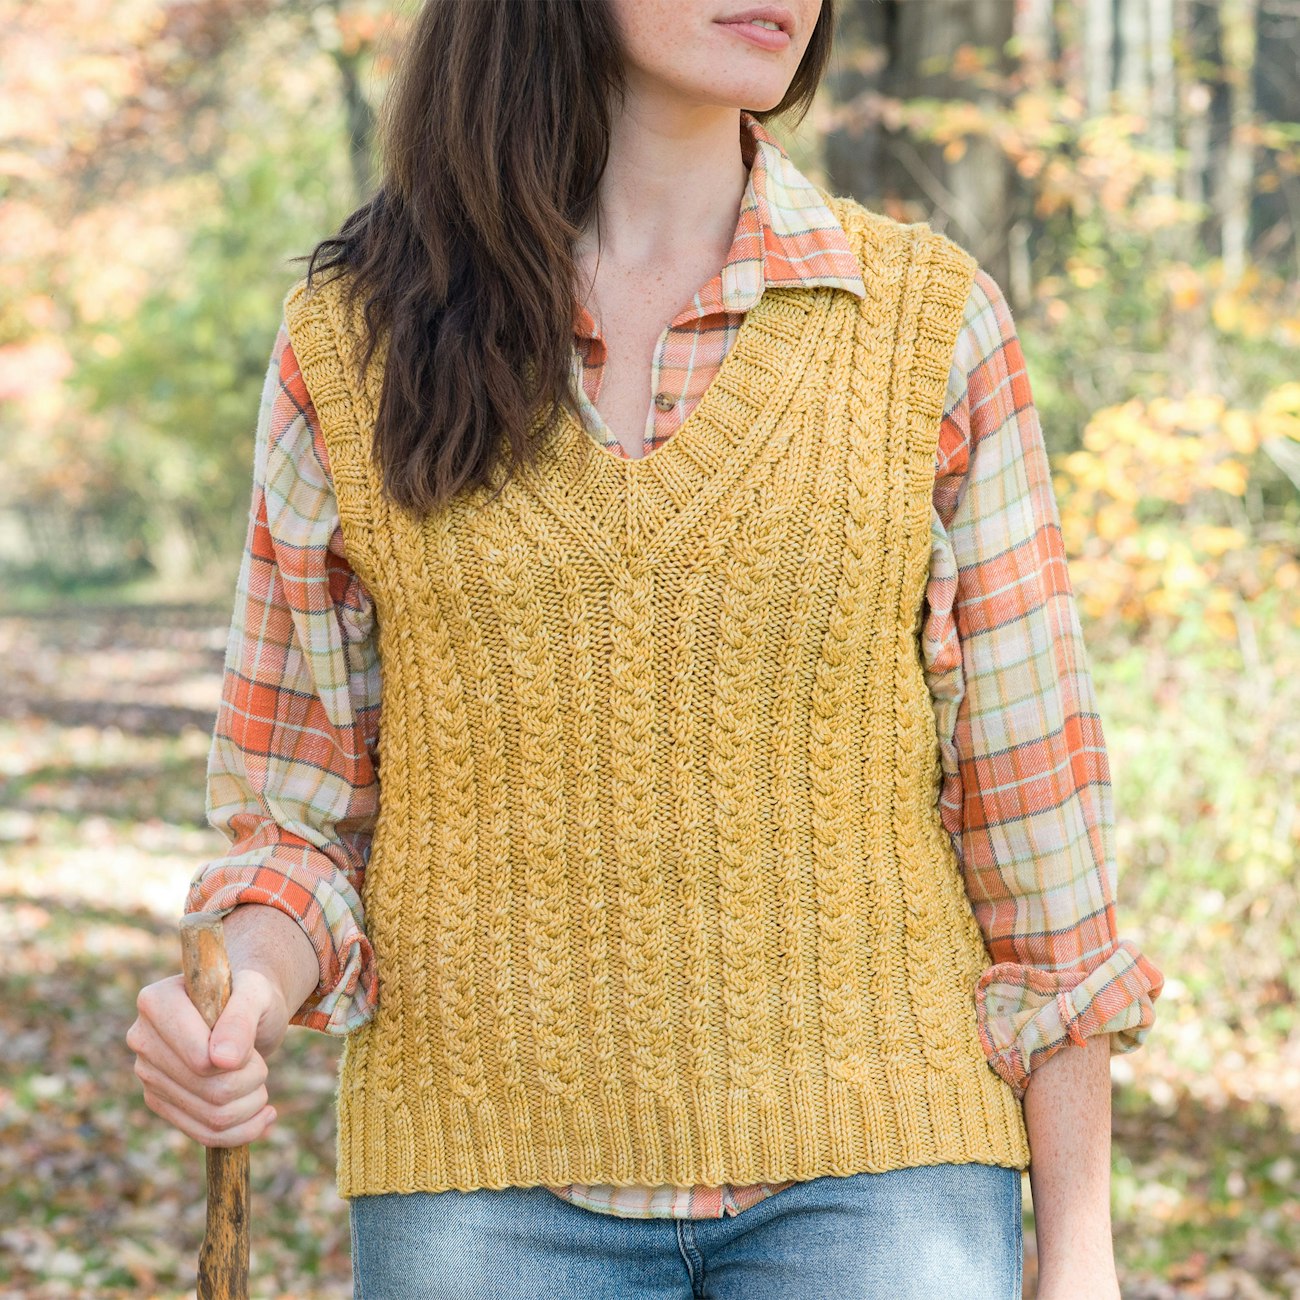
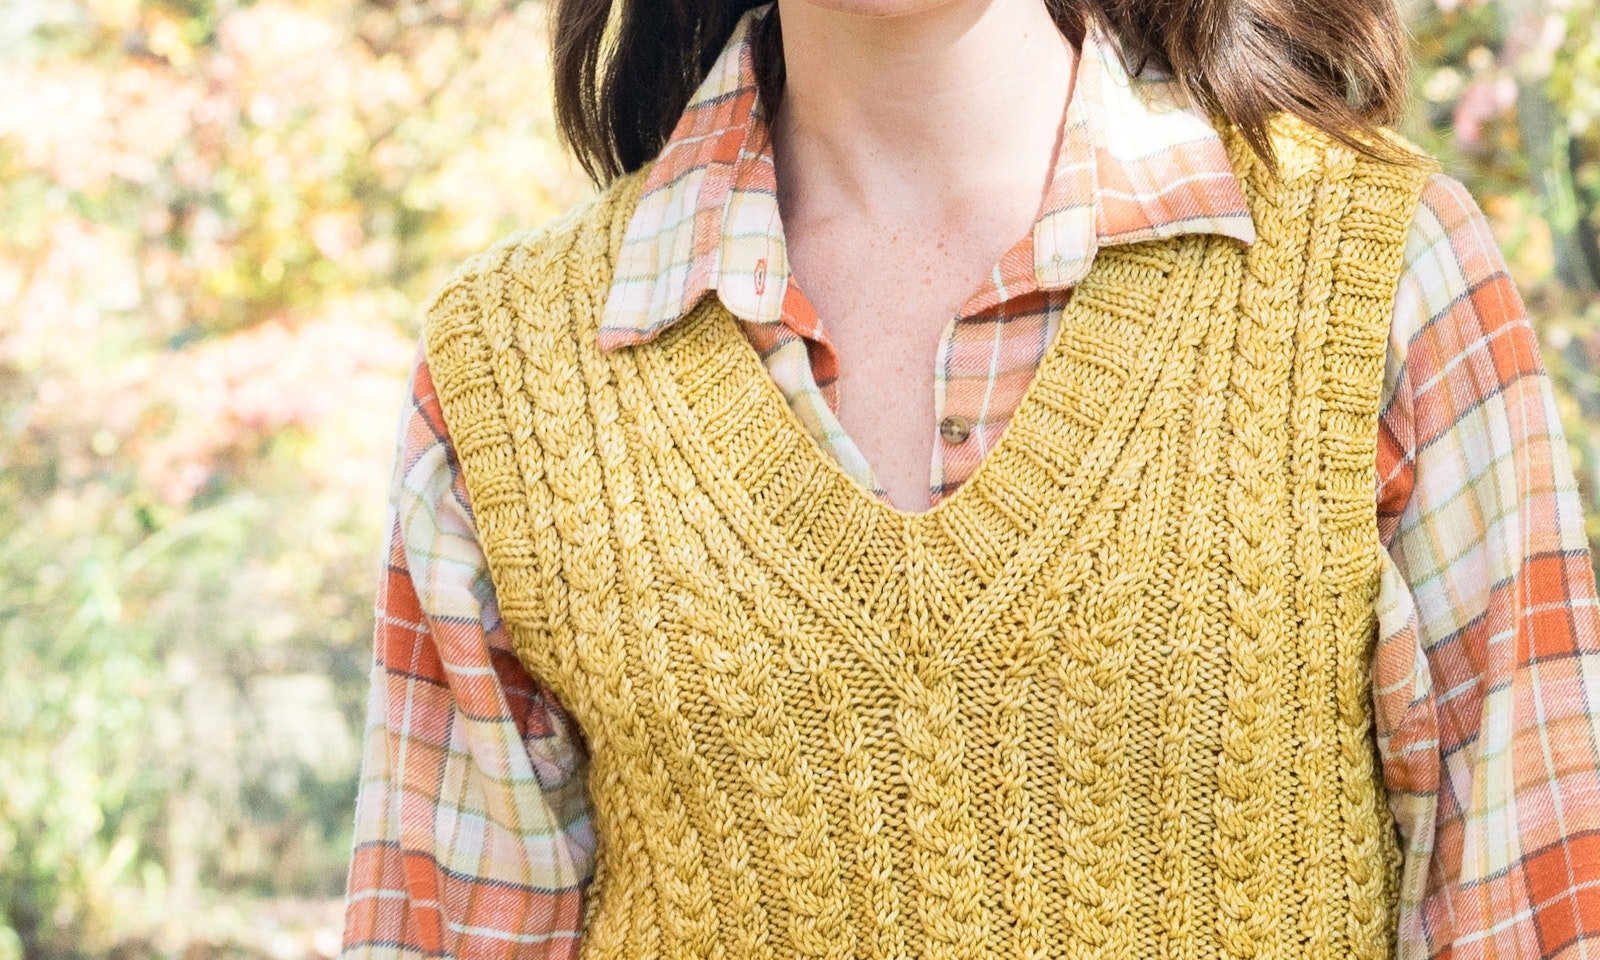
The Vest for the Cricket Match is knit from the bottom up and has a clever rib that runs along the edges of the neckband. Photo by Gale Zucker
Working with two separate balls of yarn can help you achieve a perfect row count when you are working on a garment with bottom-up V-neck shaping, such as The Vest for the Cricket Match, shown above.
Working the left and right front section of the yoke in this manner allows you to make sure your decreases are always worked on the same row, and it keeps both halves perfectly even. It is especially useful if you are working armhole shaping from a pattern that has those somewhat confusing “at the same time” sorts of directions. Another reason to work both fronts at the same time is that it simplifies things when maintaining a stitch pattern, lace, or colorwork. By working both halves at the same time, you can make sure you can adjust the patterning (due to the decreased stitch count) on both halves at the exact same point.
Twice As Easy
Here are some step-by-step instructions so that you can see how simple it is to add in an extra ball of yarn when you are knitting both sides of a yoke. Center-pull balls of yarn are better to use, if possible, as they will not tangle up as much when you are knitting with two balls of yarn.
1) Work the first right side row of your V-neck shaping. If armhole shaping has already begun, continue to work the armhole shaping as directed.
SUBSCRIBER EXCLUSIVE
A vest is such a relaxing thing to knit—no sleeves and enough fun detail at the neck and armholes to keep it interesting. Corrina Ferguson lets us in on some of her tried and true techniques to help you learn how to make shaping a V-neck a breeze!
There is basically only one important question to ask when it comes to V-necks in knitting: Will it be worked bottom-up or top-down? Whether the garment is being worked in pieces or in one piece, when it comes to shaping the V-neck, only the direction matters.
Juggling two balls of yarn can actually make it easier to knit some V-neck sweaters, and there’s even a simple fix when you pick up the wrong number of stitches.
Top or Bottom?
V-neck shaping worked from the top down requires increases to shape the neck and to reach the full width needed for the chest. When V-necks are worked from the bottom up, you begin with enough stitches to accommodate the full width needed for the chest, then decrease away stitches to achieve the V-neck shape and to reach the stitch count needed for the shoulders.
Top-Down V-Necks
The majority of V-necks I’ve come across that are worked top-down include raglan shaping for the sleeves and armholes. That is helpful because you can incorporate the V-neck increases into the raglan shaping.
Bottom-Up V-Necks
Working V-neck shaping from the bottom up is easier and more traditional. You begin with the full width for the chest, divide those stitches in half, and decrease them away as directed until you have the right number of stitches for the shoulder.
One of my favorite tips for working bottom-up V-neck shaping is to work the two halves of the neck at the same time. To do this, you will need an additional ball of yarn, and I highly suggest using circular needles (if you’re not already) even though we are working the fronts flat. Using circular needles allows you to use the cord as sort of a stitch holder, and you don’t have to worry about things getting too crowded.
The Vest for the Cricket Match is knit from the bottom up and has a clever rib that runs along the edges of the neckband. Photo by Gale Zucker
Working with two separate balls of yarn can help you achieve a perfect row count when you are working on a garment with bottom-up V-neck shaping, such as The Vest for the Cricket Match, shown above.
Working the left and right front section of the yoke in this manner allows you to make sure your decreases are always worked on the same row, and it keeps both halves perfectly even. It is especially useful if you are working armhole shaping from a pattern that has those somewhat confusing “at the same time” sorts of directions. Another reason to work both fronts at the same time is that it simplifies things when maintaining a stitch pattern, lace, or colorwork. By working both halves at the same time, you can make sure you can adjust the patterning (due to the decreased stitch count) on both halves at the exact same point.
Twice As Easy
Here are some step-by-step instructions so that you can see how simple it is to add in an extra ball of yarn when you are knitting both sides of a yoke. Center-pull balls of yarn are better to use, if possible, as they will not tangle up as much when you are knitting with two balls of yarn.
1) Work the first right side row of your V-neck shaping. If armhole shaping has already begun, continue to work the armhole shaping as directed. [PAYWALL]

2) Turn your work and work the wrong side of the right front. (When I say “right front,” I mean the wearer’s right.) Drop your working yarn without breaking or cutting it.
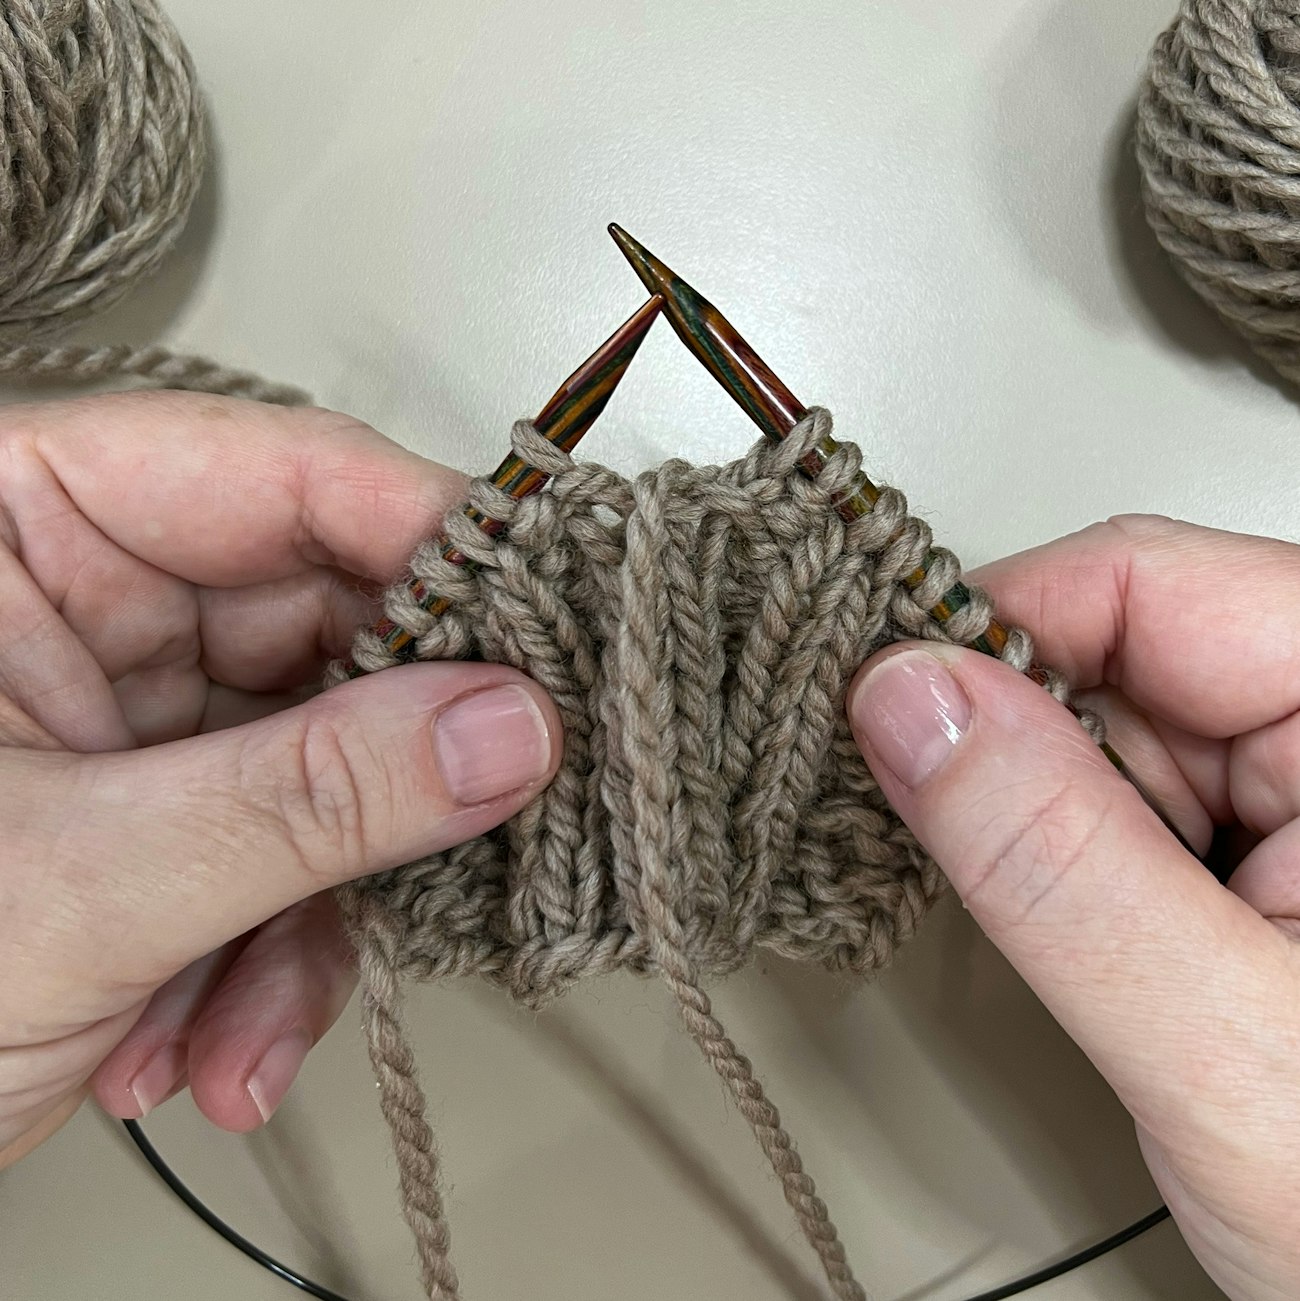
3) Join a second ball of yarn and work the wrong side of the left front. You now have two halves that can be worked back and forth with separate balls of yarn.
4) Work the right side of the left front. Drop your left front yarn without breaking or cutting it. Pick up the right front yarn (still hanging out just waiting for you to use it) and work the right side of the right front.
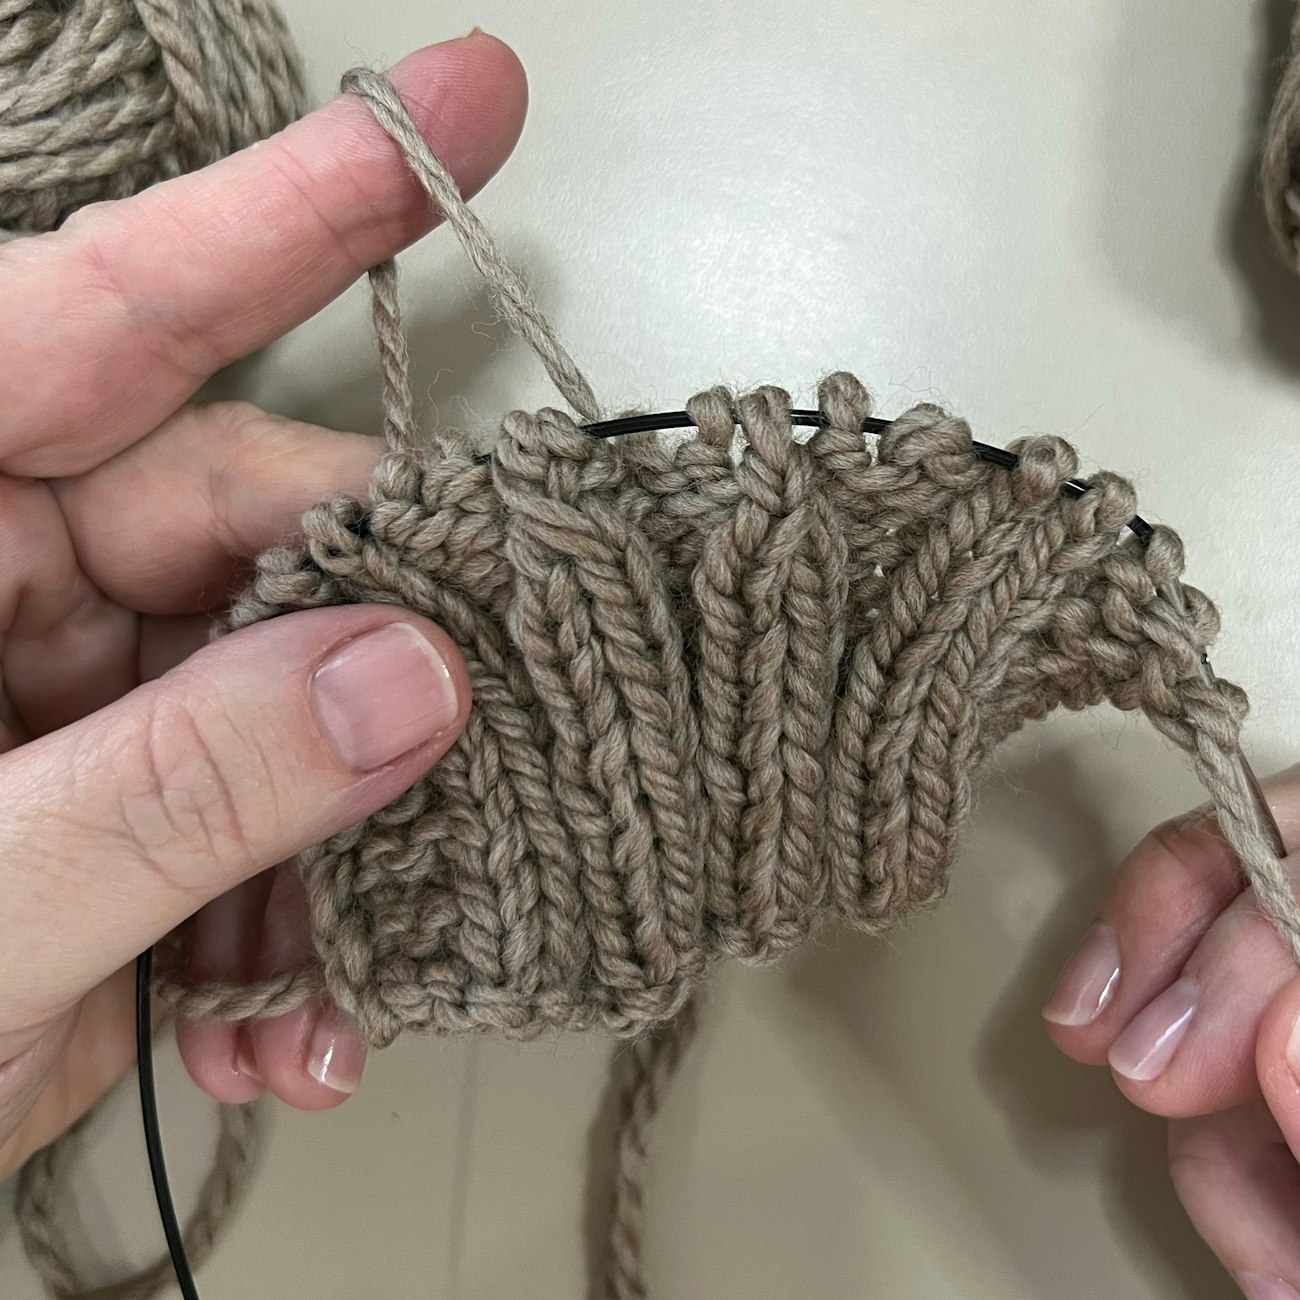
5) Work the wrong side of the right front. Drop your right front yarn without breaking or cutting it. Pick up the left front yarn and work the wrong side of the left front.
Continue working steps 4 and 5 until all the shaping for the V-neck and armhole have been completed.
Neckline Edgings
When planning a classic tennis-style vest such as the Vest for the Cricket Match, ribbed edging is a popular choice. This pattern (and most patterns) will give you a specific number of stitches to pick up, which is wonderful and very helpful, but sometimes picking up stitches evenly doesn’t give you the final number the pattern directs. Don’t panic! There are a couple of things you can easily do to fix this problem.
- If you’ve picked up too many stitches, just evenly decrease them away on the first edging round.
- If you’ve picked up too few stitches, work some invisible increases to get yourself up to the correct stitch count.
But frequently, if you’ve picked up your stitches evenly and it’s not distorting the fabric at all, you can make small adjustments to make your stitch count work with the edging or ribbing. The Vest for the Cricket Match uses a knit 2, purl 2 ribbing, with a few extra stitches for the bottom center of the V-neck. The actual count will always start with a multiple of 4 stitches (for the knit 2, purl 2), plus 3 stitches to keep the pattern balanced and have a center stitch for the V-neck. If you can add or subtract stitches to make your stitch count work with that, you’re all set.
For example, let’s say you picked up 145 stitches around the neckline, but the size you are working on calls for 147 stitches. You could increase 2 stitches to get to that count, but you could also decrease 2 stitches and come up with a count of 143 stitches. This totally works for the ribbing, as you would have 140 stitches (multiple of 4) and then 3 more stitches for the center of the V-neck.
I firmly believe that making sure the stitches are picked up evenly is more important than picking up the exact count on the very first round. Ribbing is also very forgiving, so that will give you some leeway as well.
Pro Tip: Want to avoid that part of the ribbing with the color from the previous round is peeking through on the purls? Don’t purl on the color change round, just knit that round even. You won’t even be able to tell when the ribbing is completed, and the transitions will look perfect.
The Vest for the Cricket Match is one of those classic pieces that you can wear forever, because it just doesn’t ever go out of style. The straightforward shaping that you need to work for a V-neck is a great introduction to garment knitting, and not having to work sleeves makes it a quick knit. Plus, when you work the two fronts at the same time, it makes it that much easier to keep track of the shaping and the patterning, so you end up with a picture-perfect piece that you will love to wear and to show off.
Corrina Ferguson is a Florida-based knitting designer, technical editor, and productivity specialist for entrepreneurs. A lifelong crafter who also boasts an unreasonable love of math and spreadsheets, is the author of two knitting books and the former editor of Creative Knitting Magazine. When she's not toiling away in Excel, Corrina spends her time trying to figure out how to move to a climate where her main hobbies of baking and knitting sweaters might actually make sense. Find Corrina online at corrinaferguson.com and craftststarstudios.com.