Meg Swansen’s new cap pattern gives you two options for a two-color cast-on. One is easy peasy, while the second is just a bit spicy!
Meg Swansen’s new cap pattern gives you two options for a two-color cast-on. One is easy peasy, while the second is just a bit spicy! <a href="https://farmfiberknits.com/try-2-two-color-cast-ons/">Continue reading.</a>
Sometimes a plain, solid-colored cast-on will just not do. Whether you are working on a basic beanie that could use a dash of color in the cast-on edge or an intricate color motif that needs some alternating color in the cast-on to break up the solid edge, we've got a couple of cast-ons for you to try!
In the new Fall issue of Farm & Fiber Knits, knitting mentor Meg Swansen shares two ways to tackle Swedish two-end knitting. She designed two gorgeous cap patterns so we could practice making beautiful texture and color designs.
Meg Swansen designed two different caps that use the Swedish two-end knitting technique. Photo by Gale Zucker
For the cast-on edge of Meg’s two-color cap, there are two technique options—one is easy, while the other is a bit more challenging. I’ll show you how to do both two-color cast-ons here. If you learn best from text and still images, read on. If you prefer learning from a video, you can hop over to our YouTube channel for the easy two-color cast-on, and then watch the video for the spicy three-strand alternating cast-on.
If we take a close look at Meg’s cap, you’ll see that the two colors alternate in each stitch of the cast-on edge—pretty cool.
Meg used an alternating color cast-on to create a great edge. Photo by Gale Zucker
While these two methods have very different results, they are related.
Cast-On Cousins
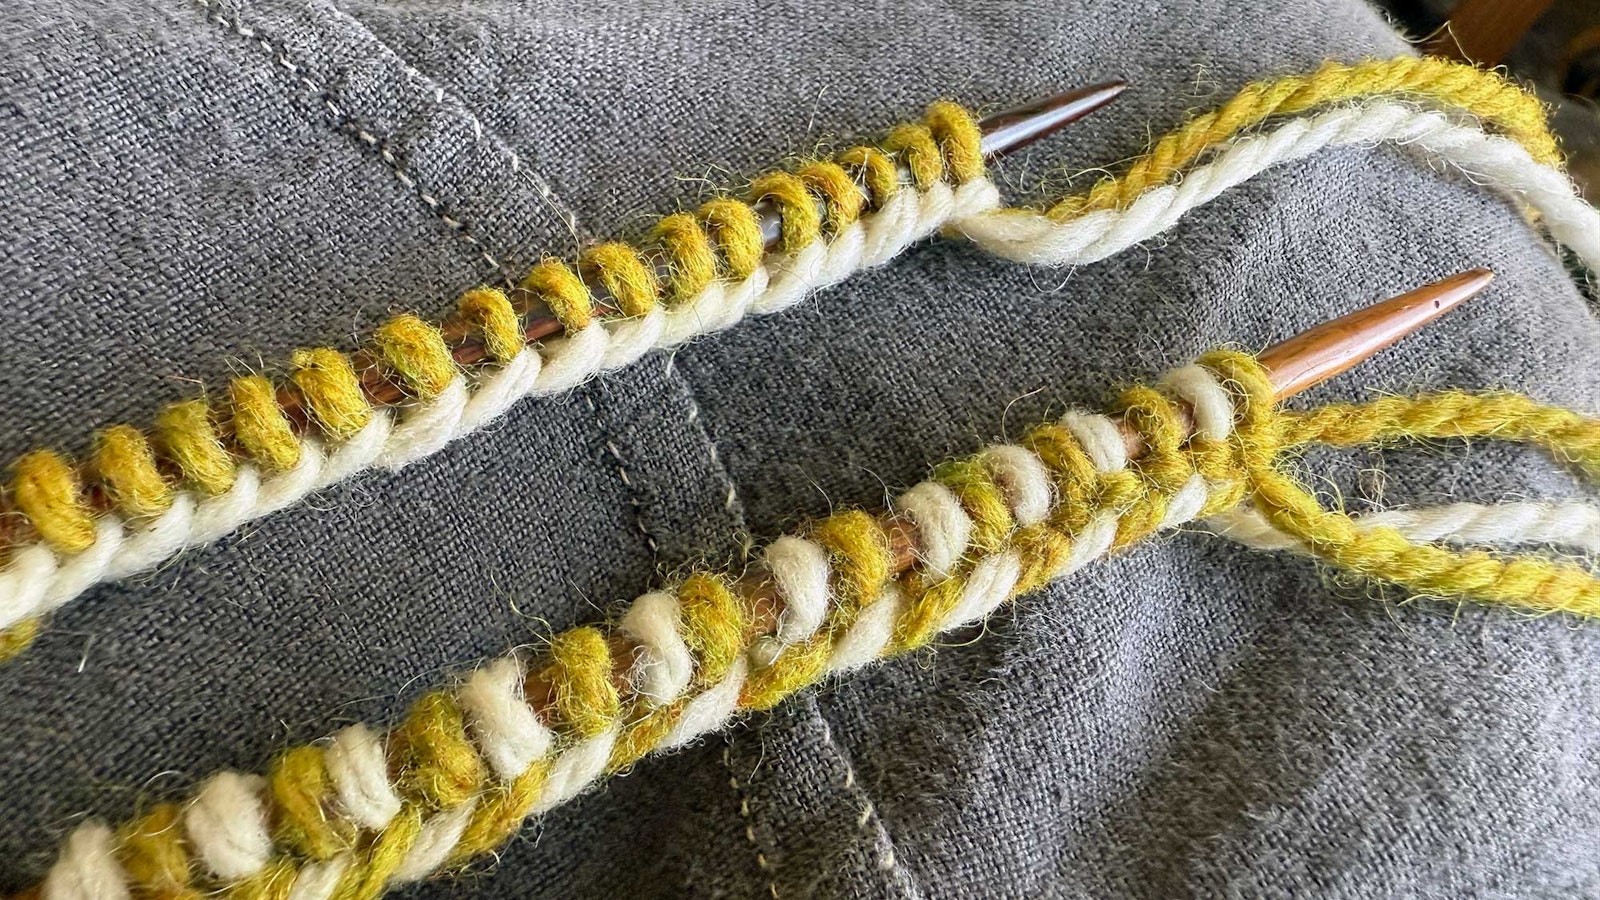
If you look again at the image at the top of the page, you'll see that the top cast-on with a white edge under yellow stitches is worked with two yarns. The alternating color cast-on below it is worked with three yarns. While the number of elements is different, and the yarns are manipulated differently, these two methods form the same kind of foundation row. See which you like best!
Easy: Long-Tail Cast-On with Two Colors
SUBSCRIBER EXCLUSIVE
Unlock the Full Article with a Farm & Fiber Knits Subscription
Get instant access to this article and the entire Farm & Fiber Knits library of projects, inspiration, and expert instruction. With your subscription, you'll receive:
Connect more deeply with your yarn—learn the stories of farmers, shepherds, and dyers
Knit patterns that celebrate natural fibers and slow, intentional making
Support a community of small farms, women makers, and independent yarn companies
Includes print and digital issues of Farm & Fiber Knits, delivered directly to you
With must-knit projects and unforgettable stories, Farm & Fiber Knits invites you to see the craft world through fresh eyes.
Plans start at just $5.83/month (paid annually). Cancel anytime.
Sometimes a plain, solid-colored cast-on will just not do. Whether you are working on a basic beanie that could use a dash of color in the cast-on edge or an intricate color motif that needs some alternating color in the cast-on to break up the solid edge, we've got a couple of cast-ons for you to try!
In the new Fall issue of Farm & Fiber Knits, knitting mentor Meg Swansen shares two ways to tackle Swedish two-end knitting. She designed two gorgeous cap patterns so we could practice making beautiful texture and color designs.
Meg Swansen designed two different caps that use the Swedish two-end knitting technique. Photo by Gale Zucker
For the cast-on edge of Meg’s two-color cap, there are two technique options—one is easy, while the other is a bit more challenging. I’ll show you how to do both two-color cast-ons here. If you learn best from text and still images, read on. If you prefer learning from a video, you can hop over to our YouTube channel for the easy two-color cast-on, and then watch the video for the spicy three-strand alternating cast-on.
If we take a close look at Meg’s cap, you’ll see that the two colors alternate in each stitch of the cast-on edge—pretty cool.
Meg used an alternating color cast-on to create a great edge. Photo by Gale Zucker
While these two methods have very different results, they are related.
Cast-On Cousins
If you look again at the image at the top of the page, you'll see that the top cast-on with a white edge under yellow stitches is worked with two yarns. The alternating color cast-on below it is worked with three yarns. While the number of elements is different, and the yarns are manipulated differently, these two methods form the same kind of foundation row. See which you like best!
Easy: Long-Tail Cast-On with Two Colors
[PAYWALL]Long-Tail Cast-On worked in two colors.
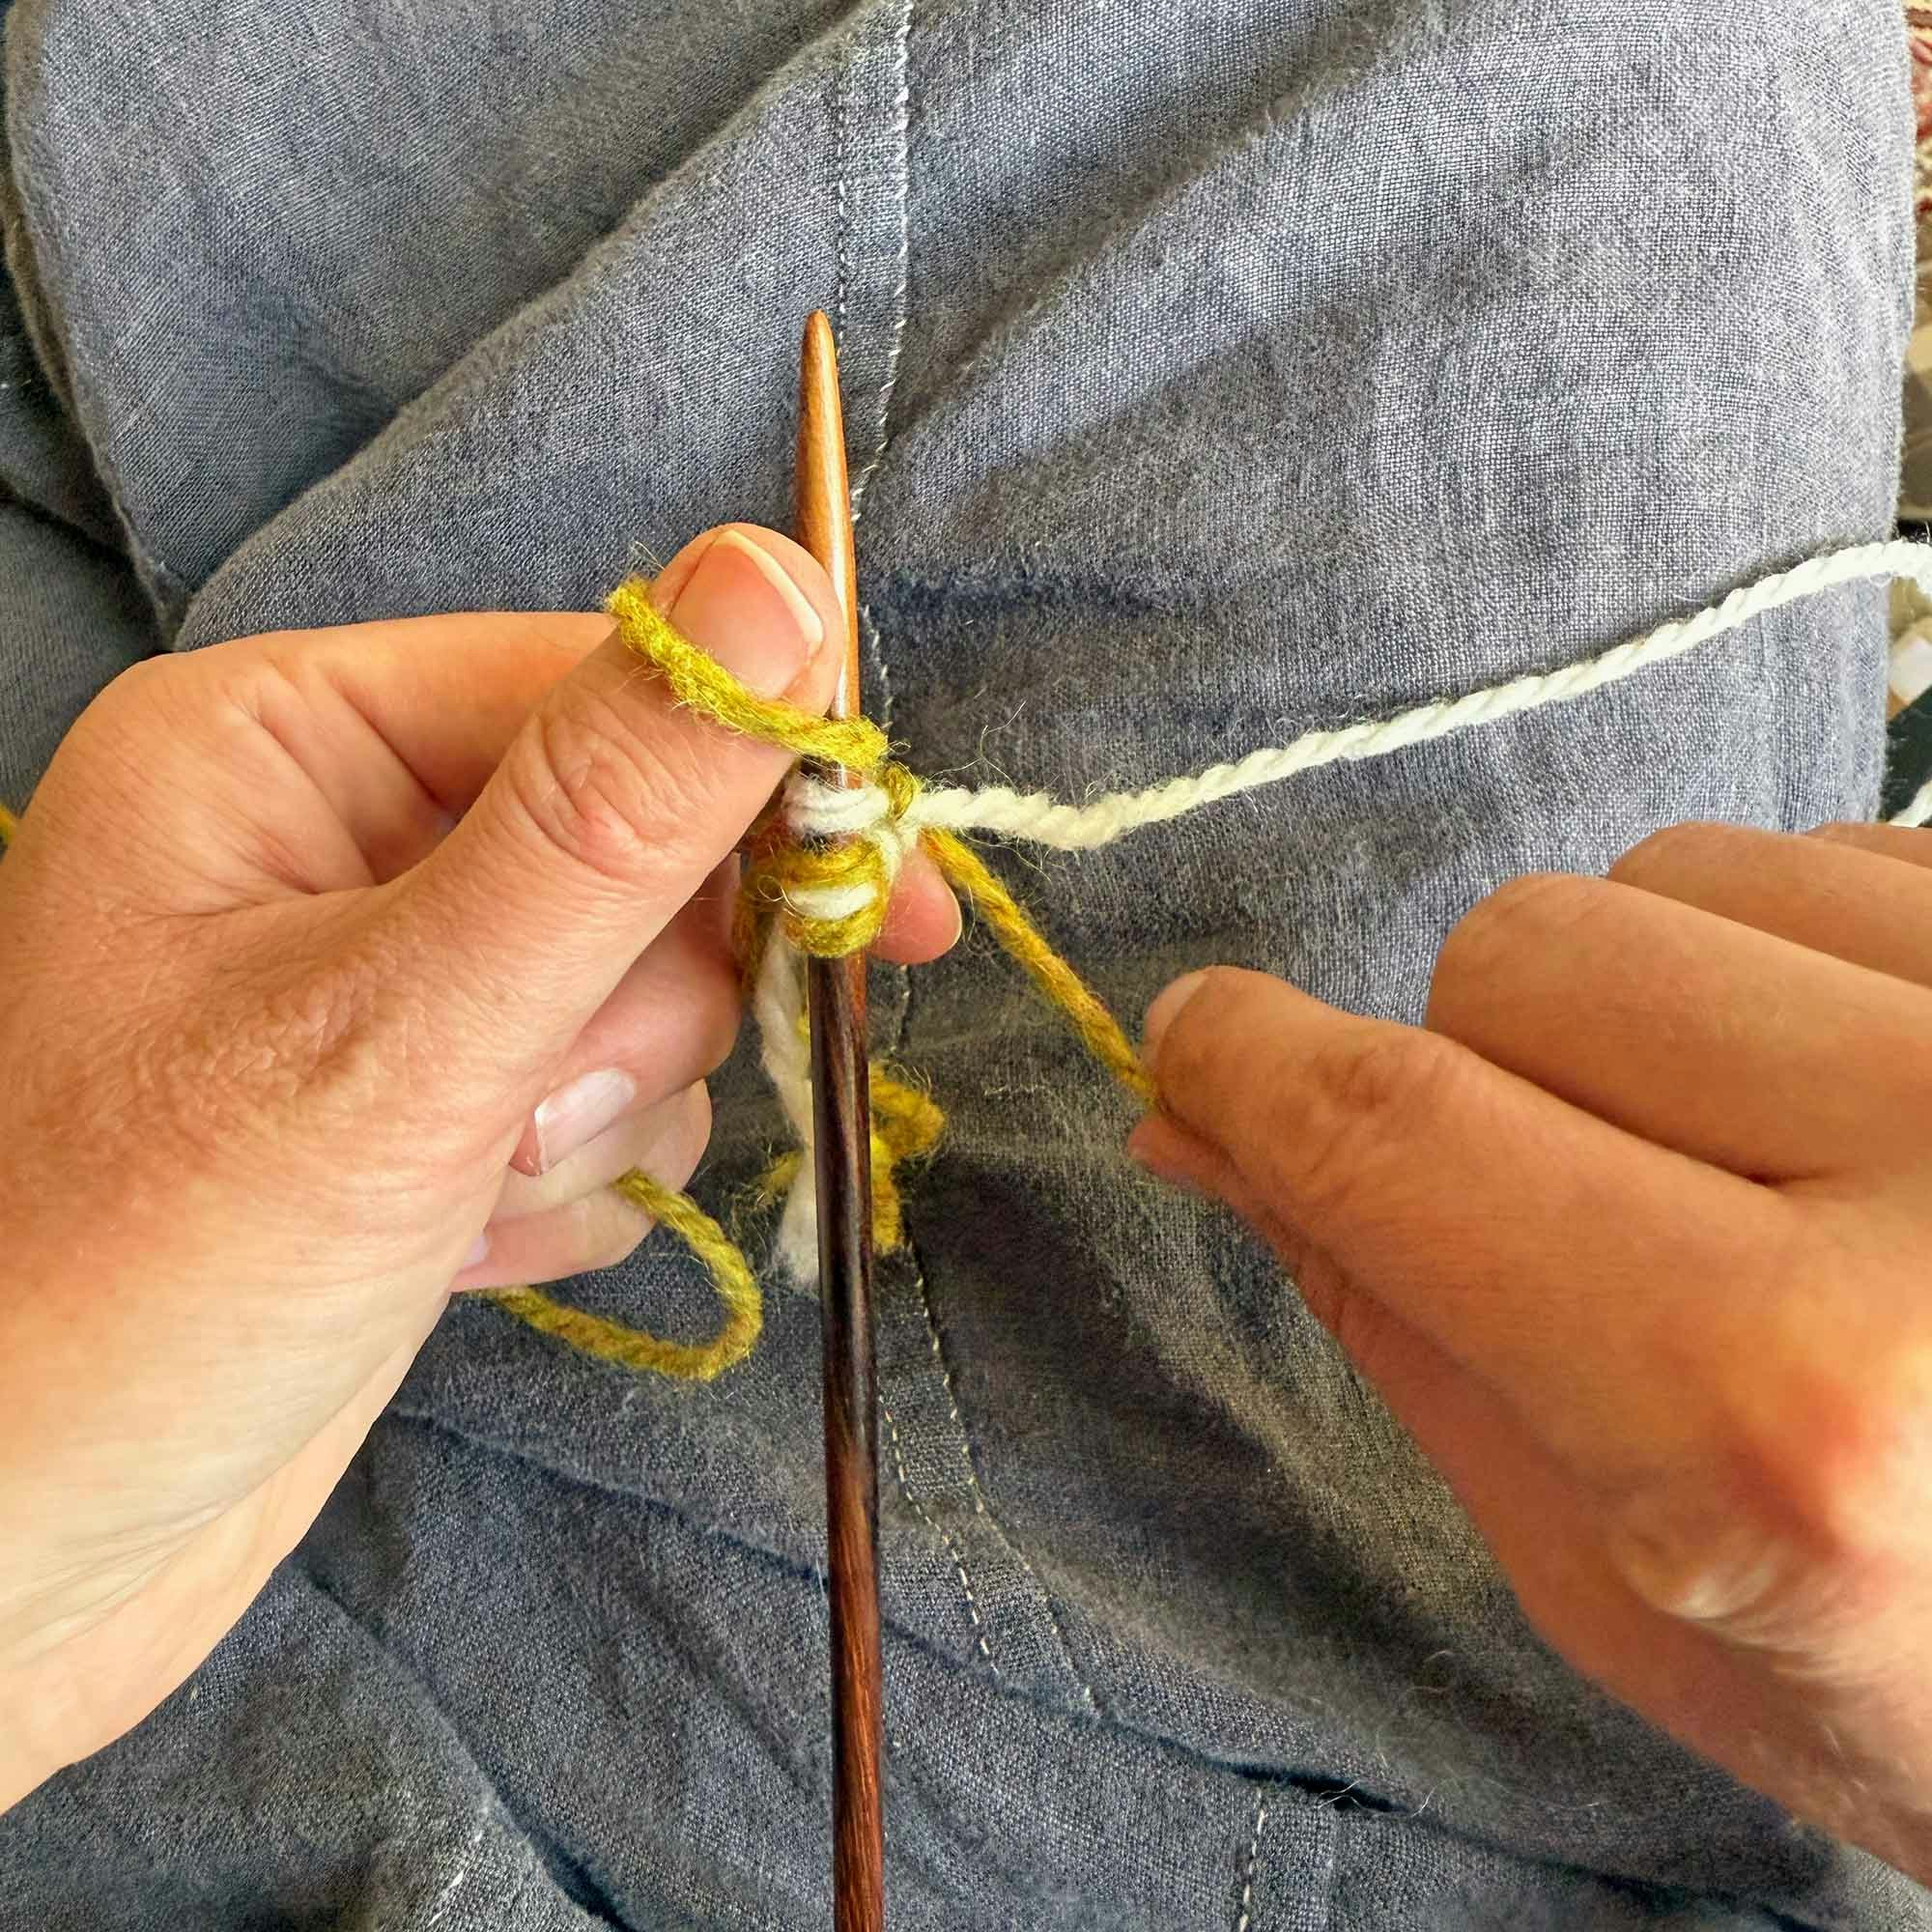
If you’ve used a long-tail cast-on before, you are in luck! The only thing that makes a two-color long-tail different from the typical long-tail is using two colors. Whatever color you hold over the thumb (or to the left) will form the bottom edge of the cast-on, while the yarn that travels over your index finger (or held to the right) will form the stitches.
Click any image in the gallery below to open it in full-screen mode.
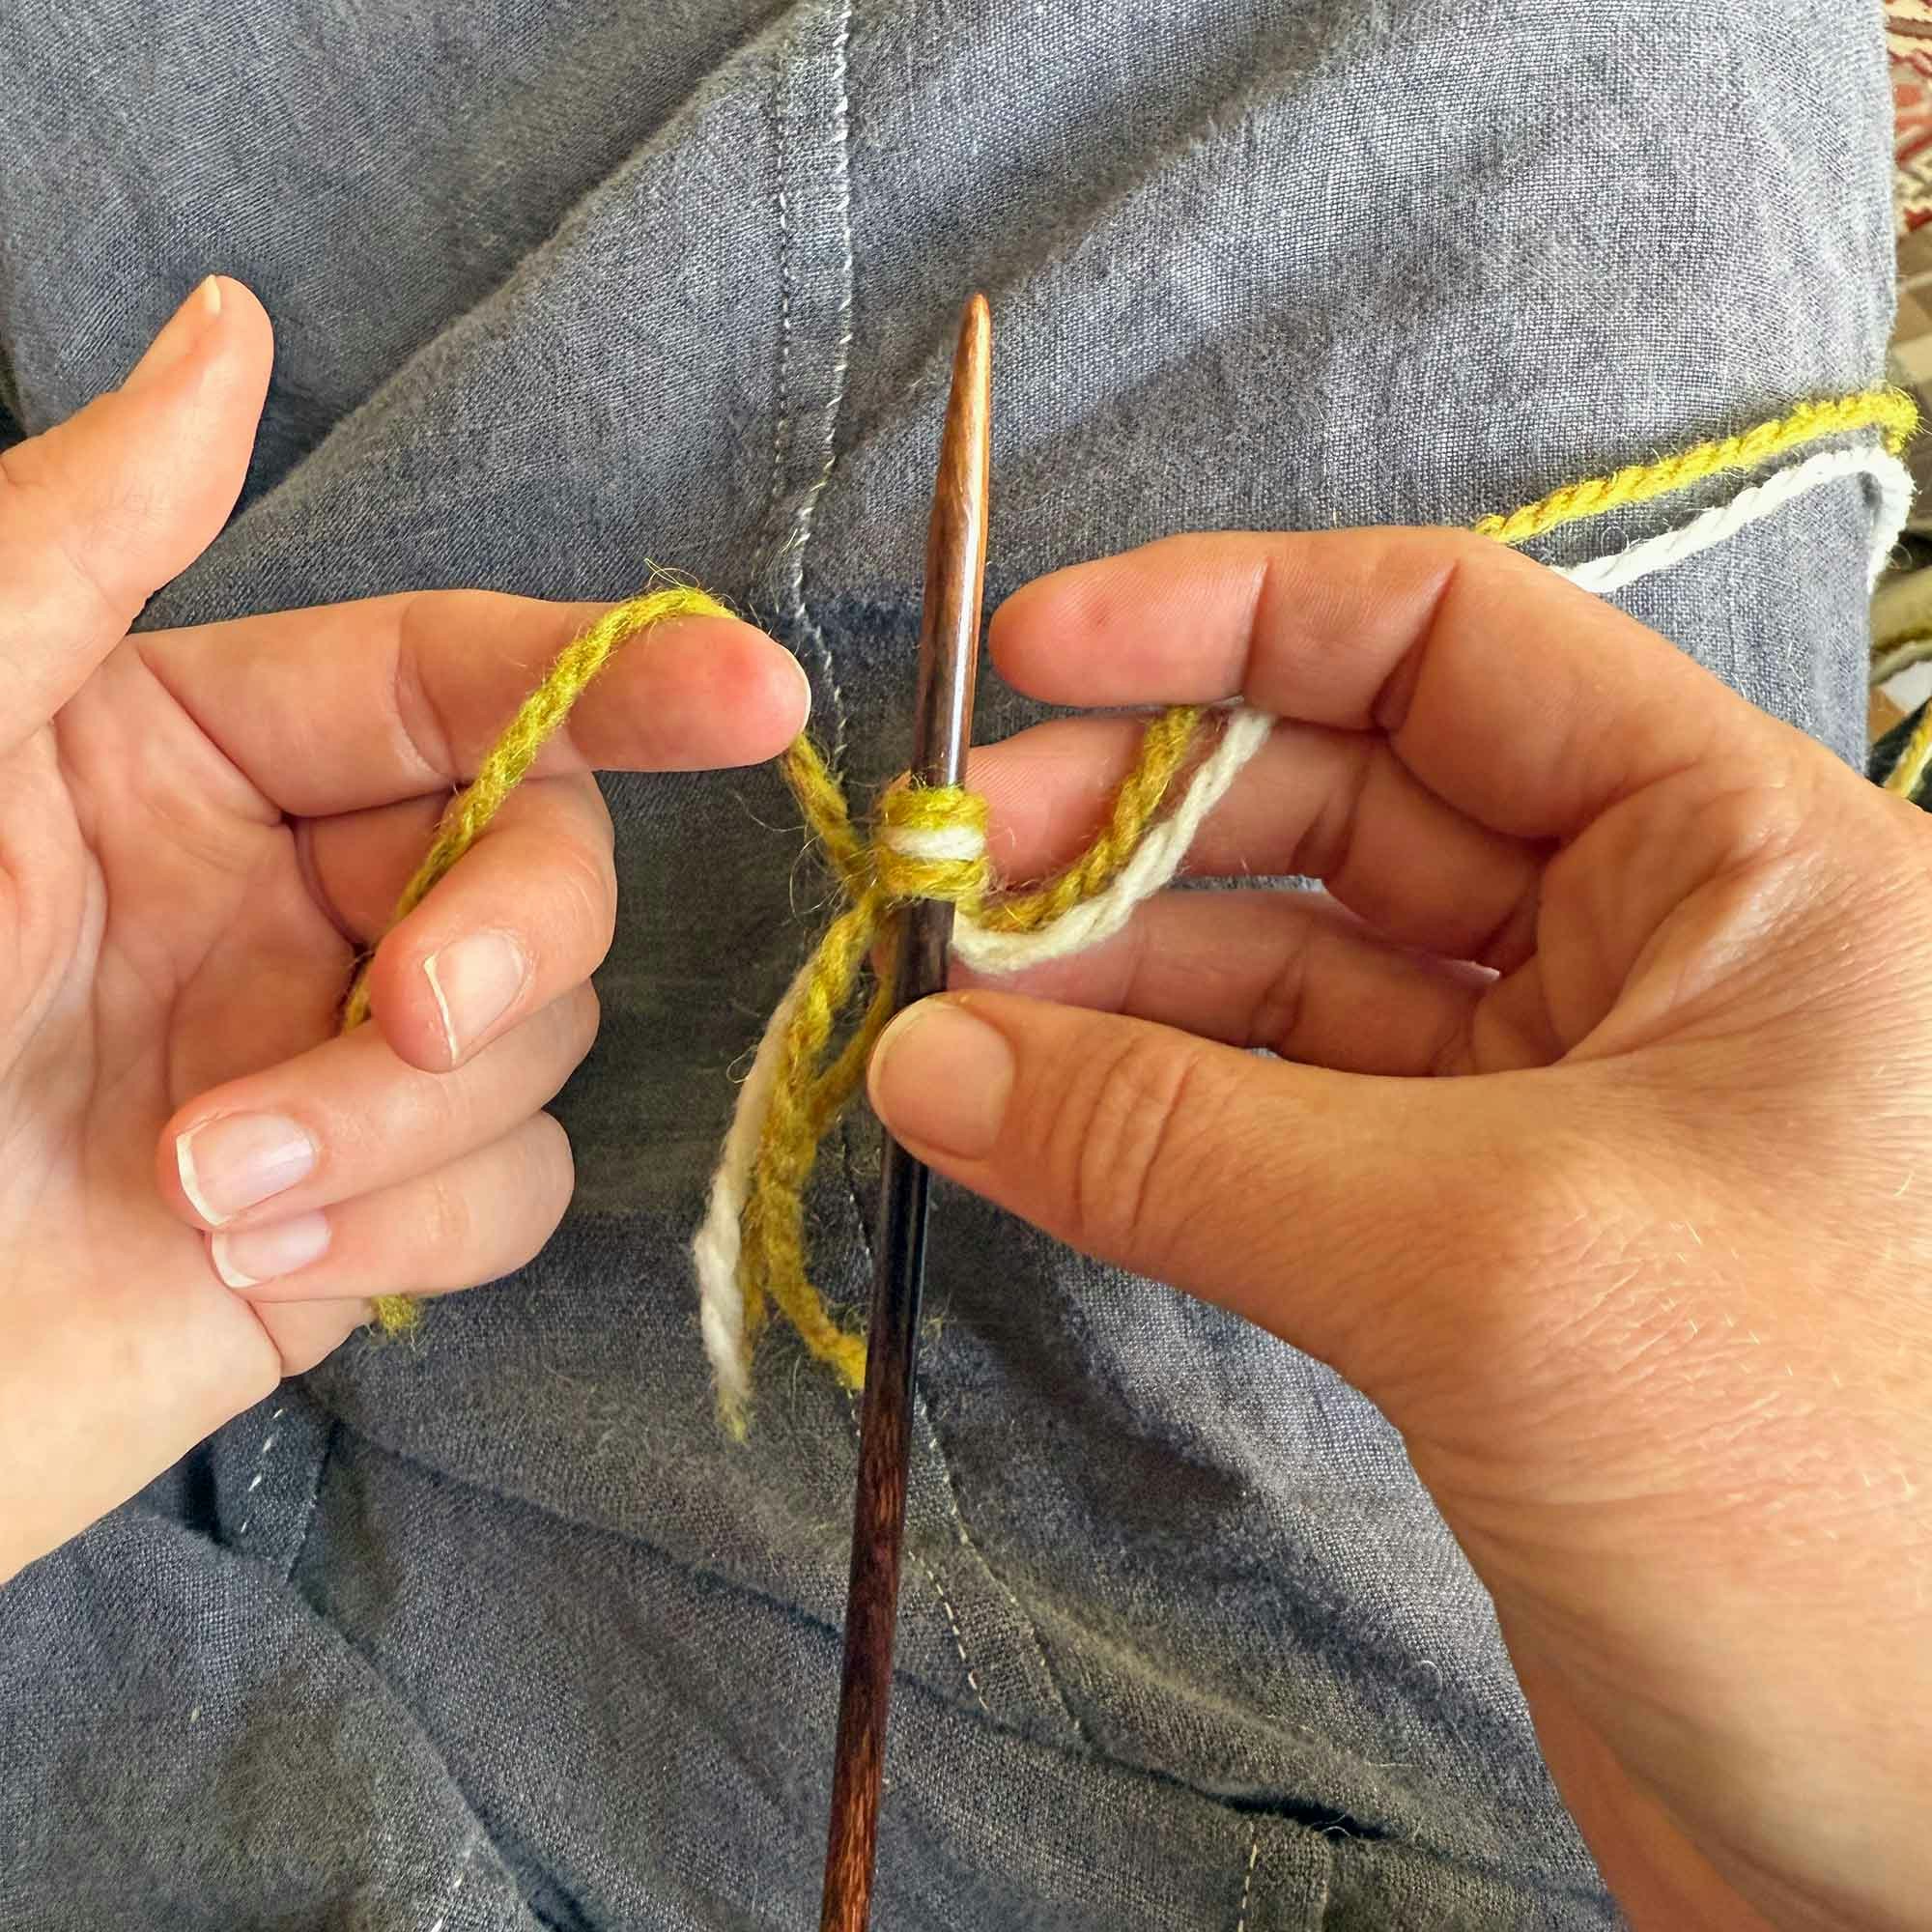
Step 1 Start with a slipknot with both yarns held together. Hold the working yarns in your left hand like a slingshot—one yarn travels over the thumb and one yarn travels over the index finger, and both of those yarns are tensioned in the palm.
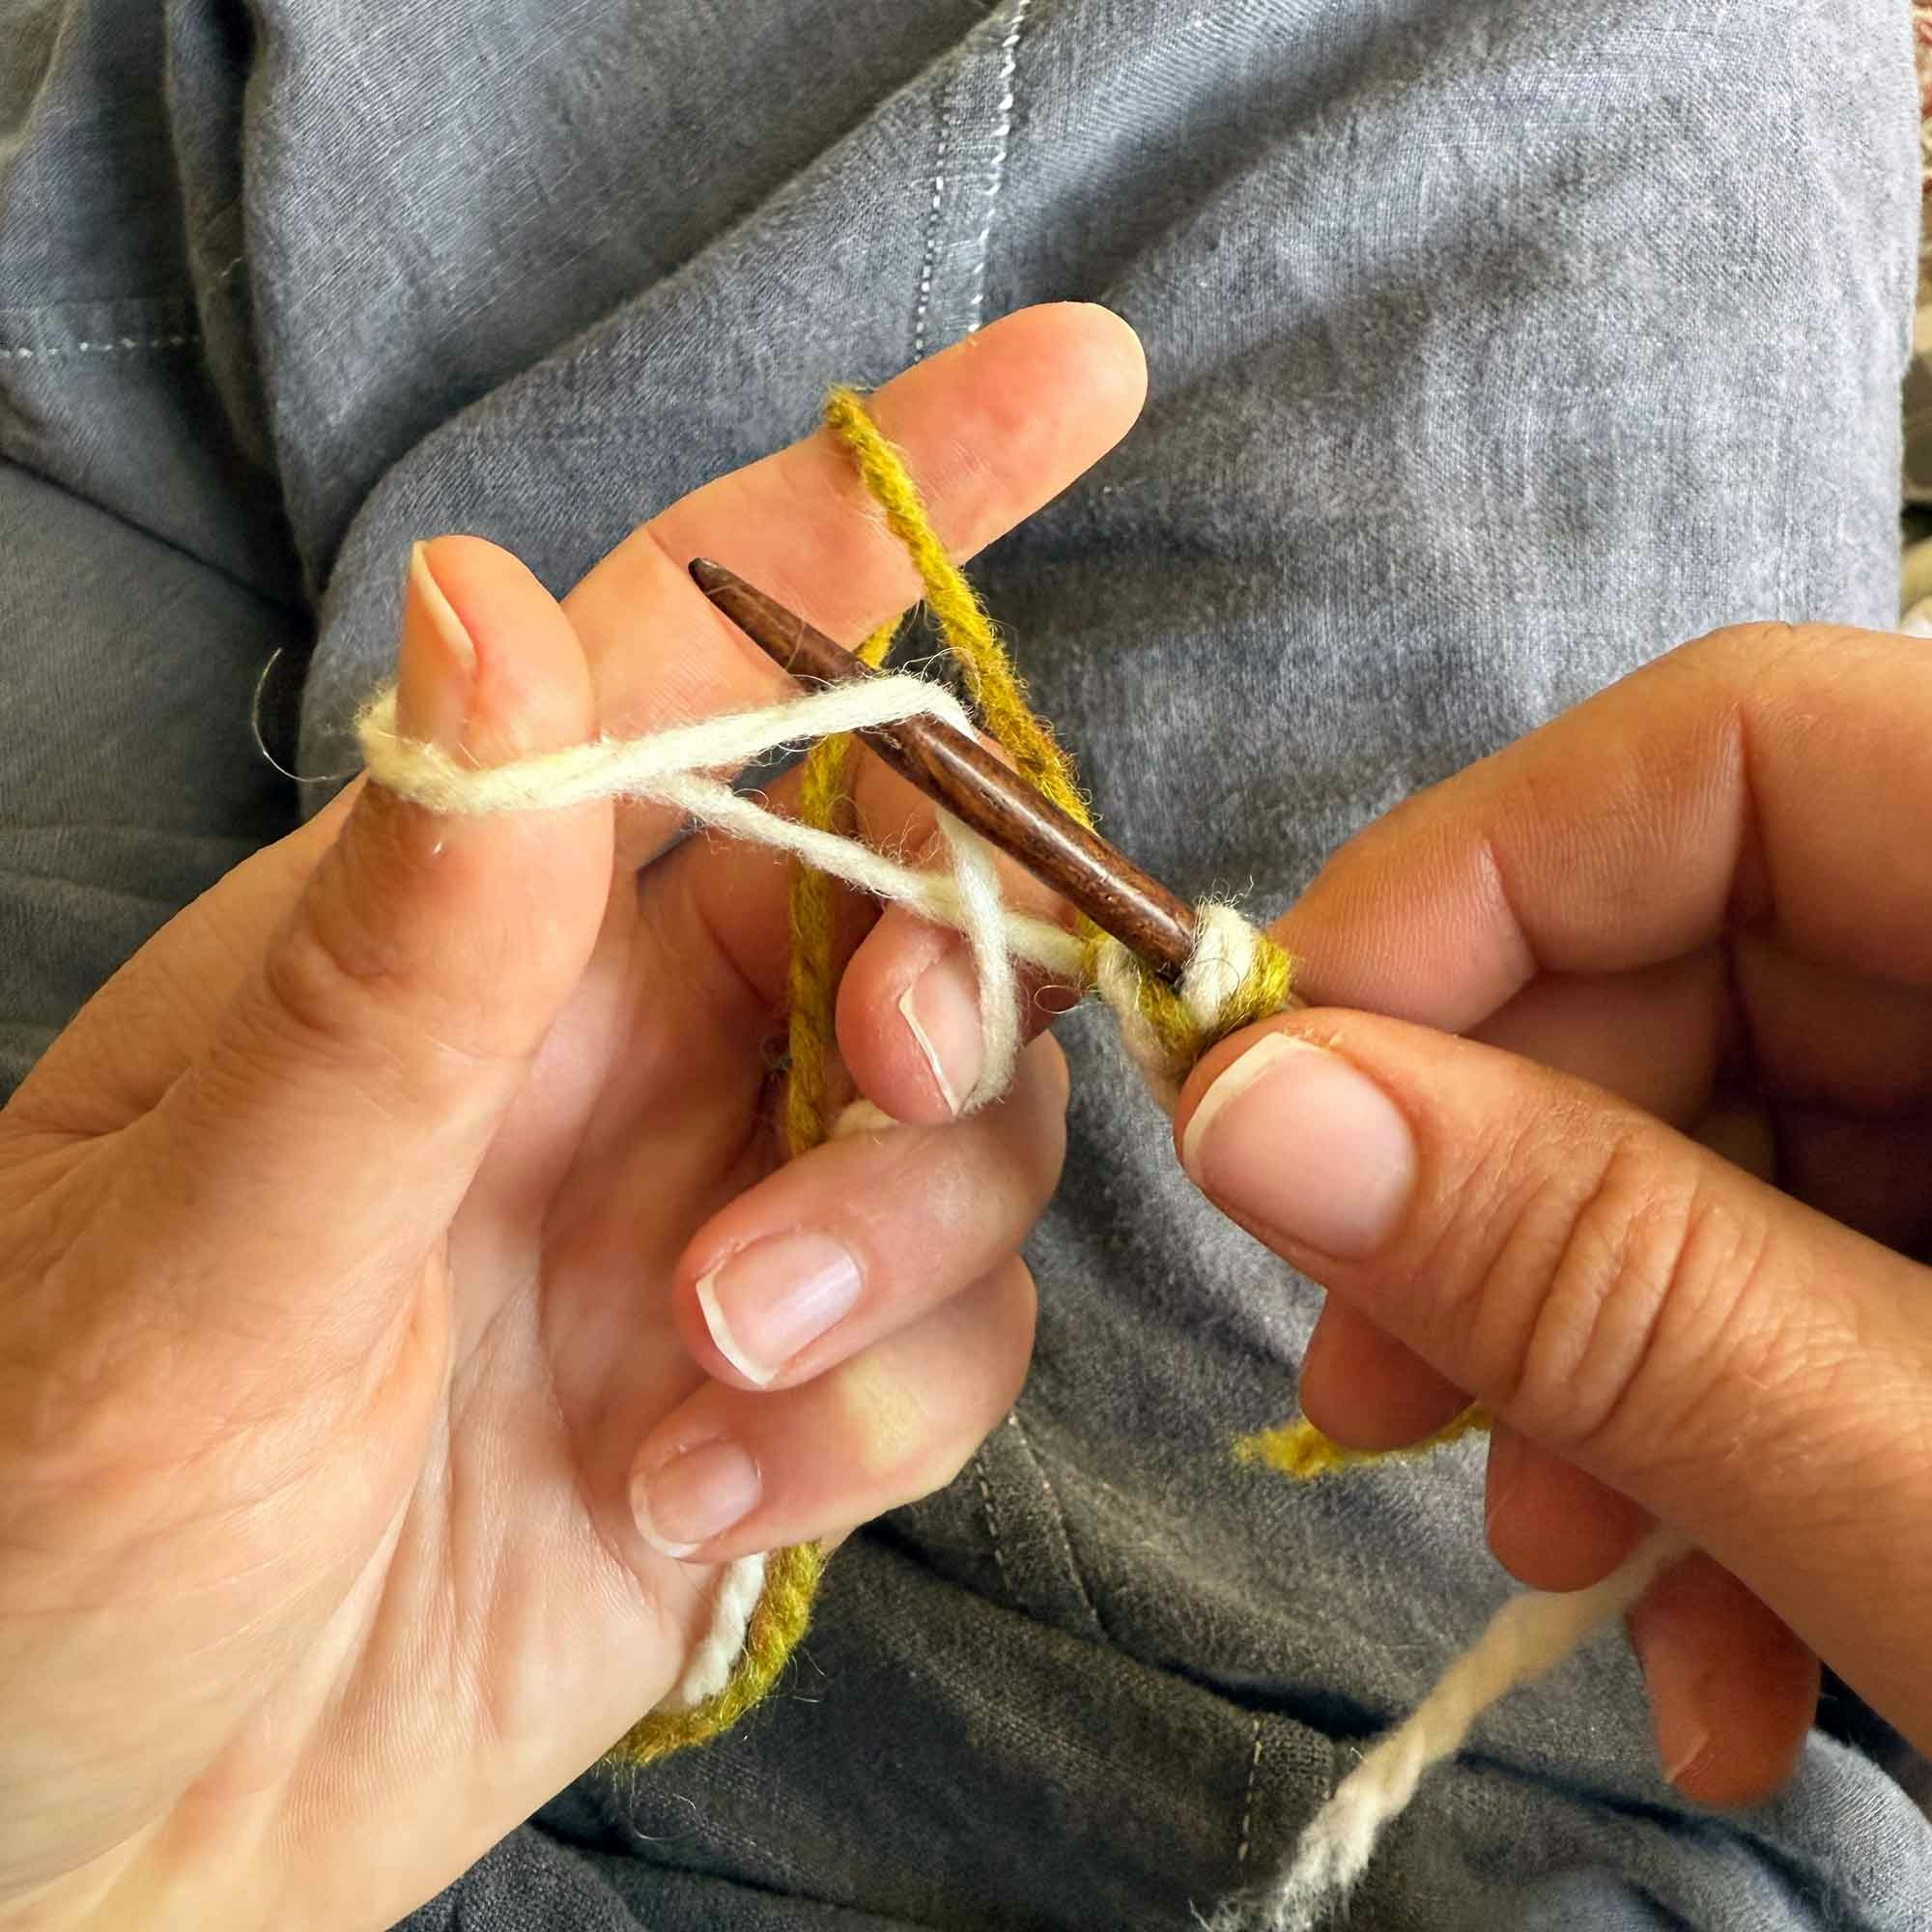
Step 2 The needle tip goes up the thumb, creating a loop (white yarn).
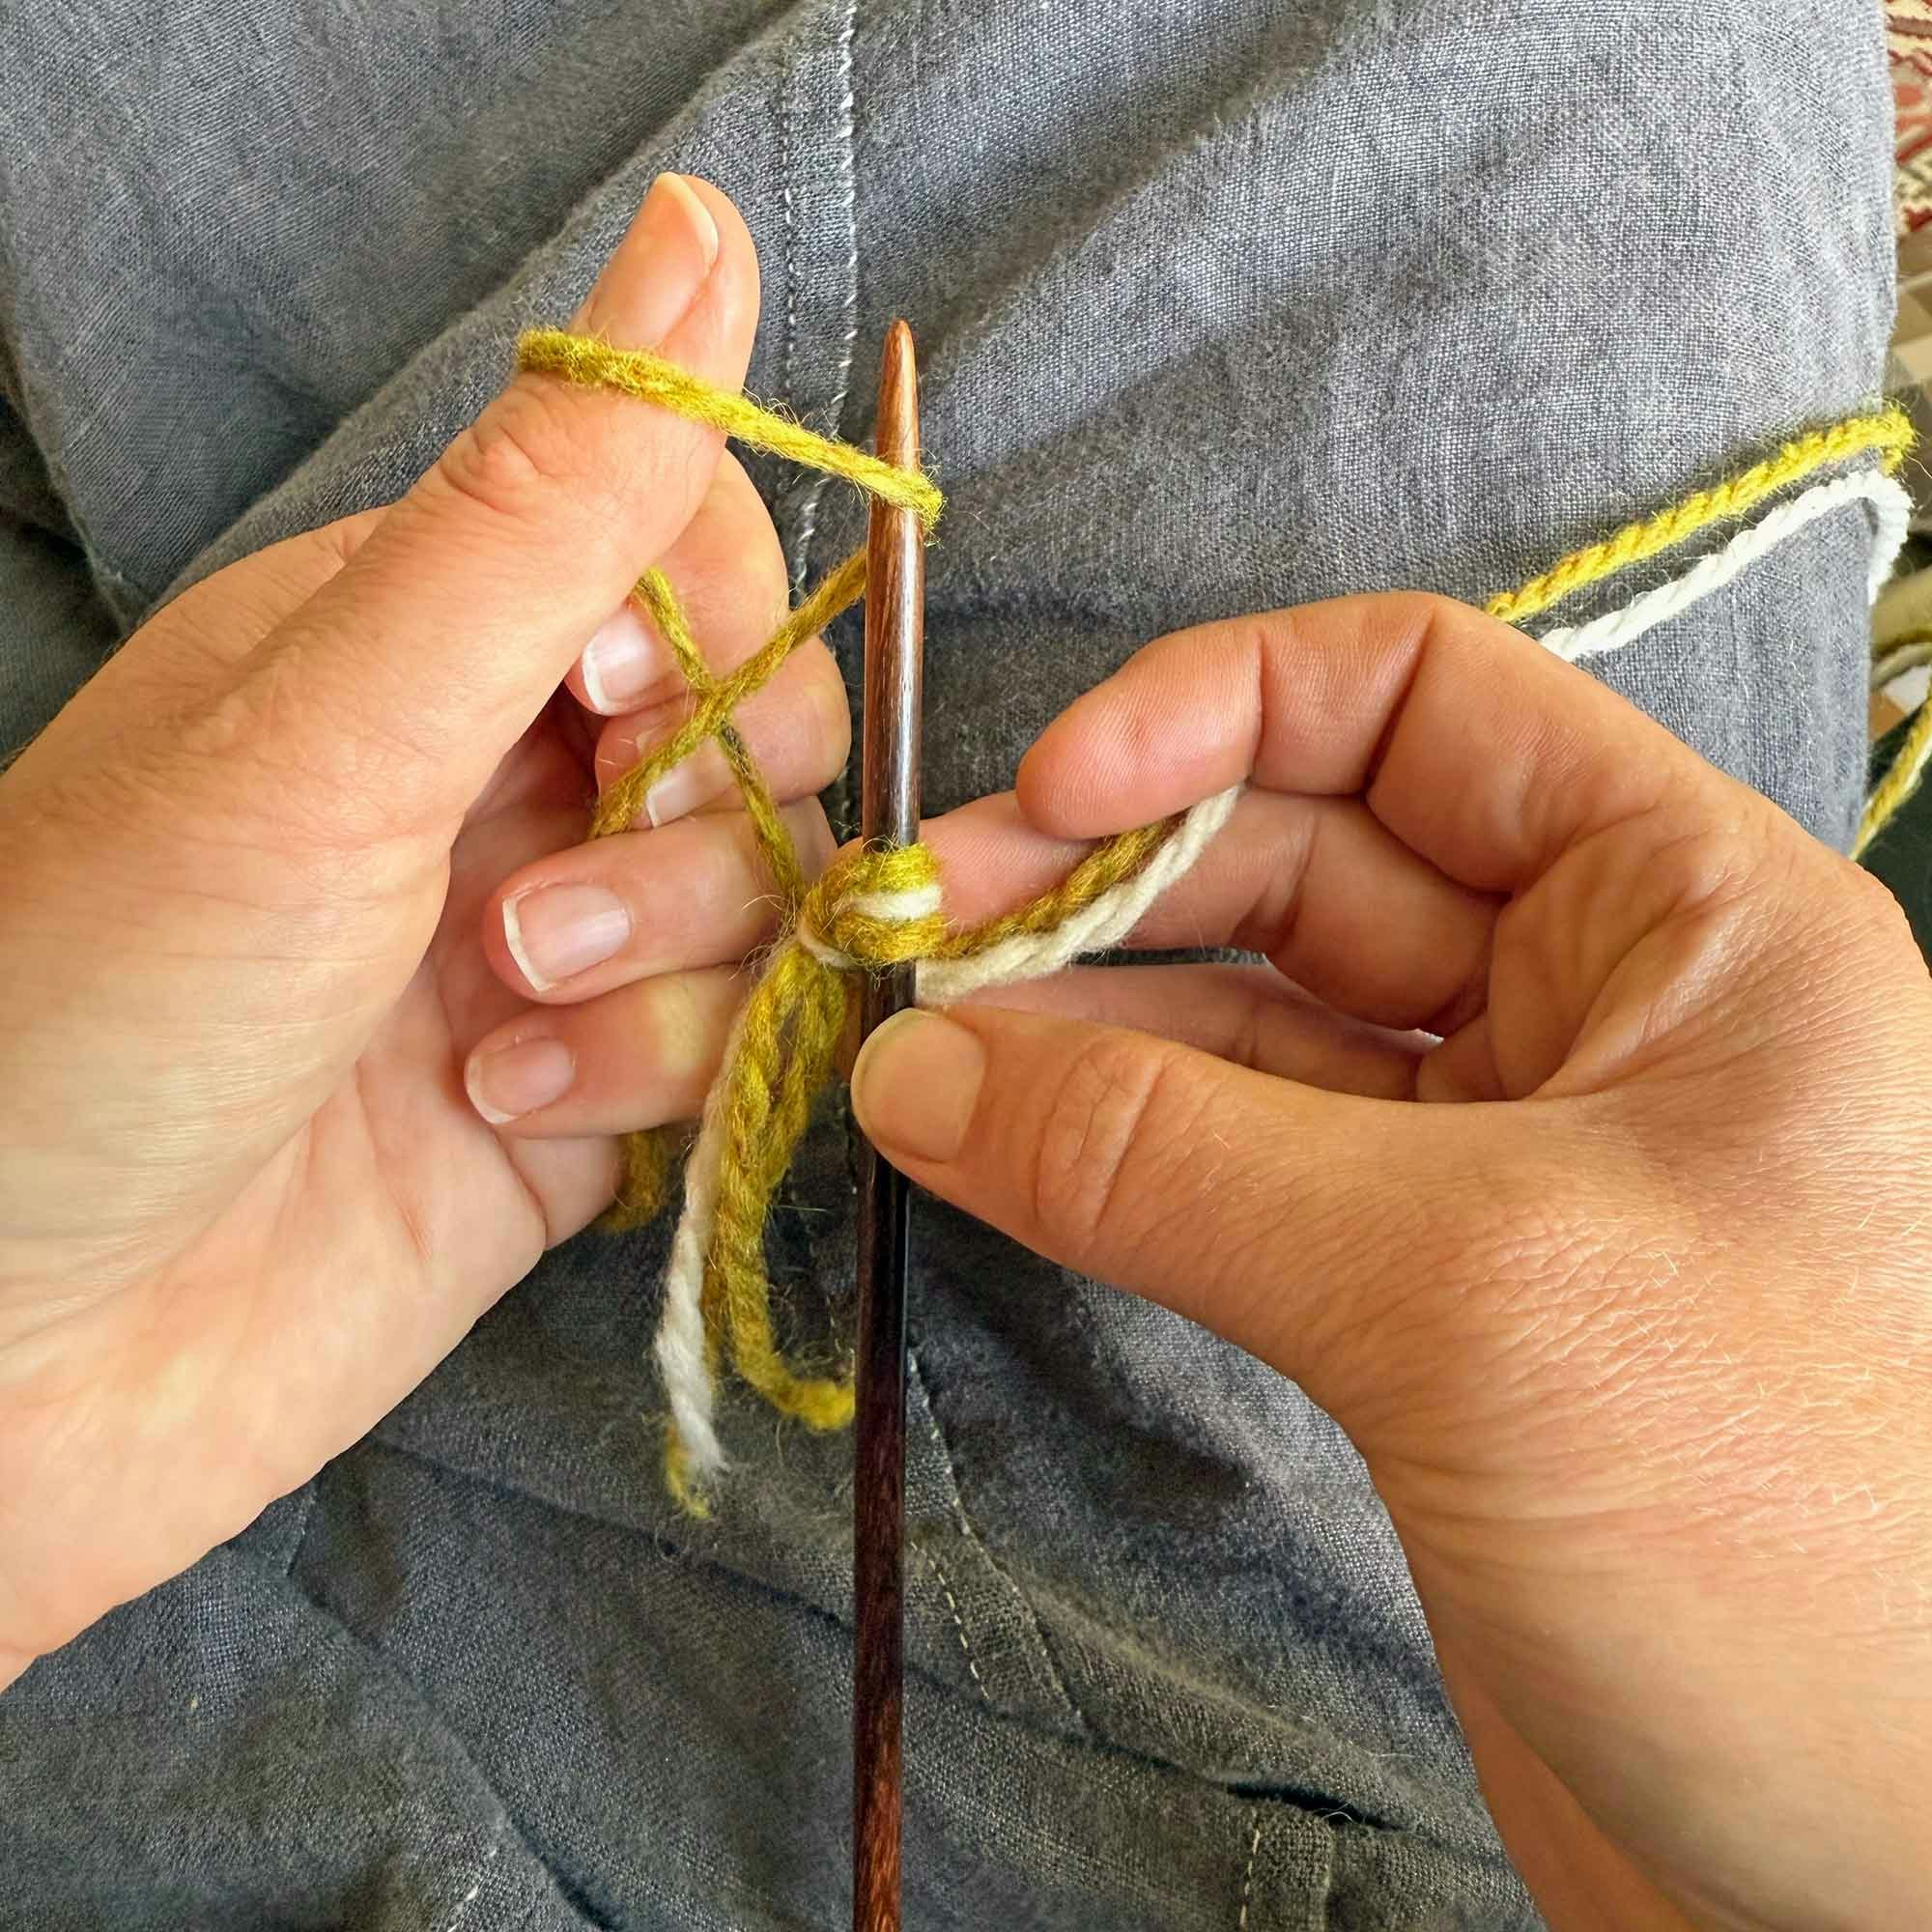
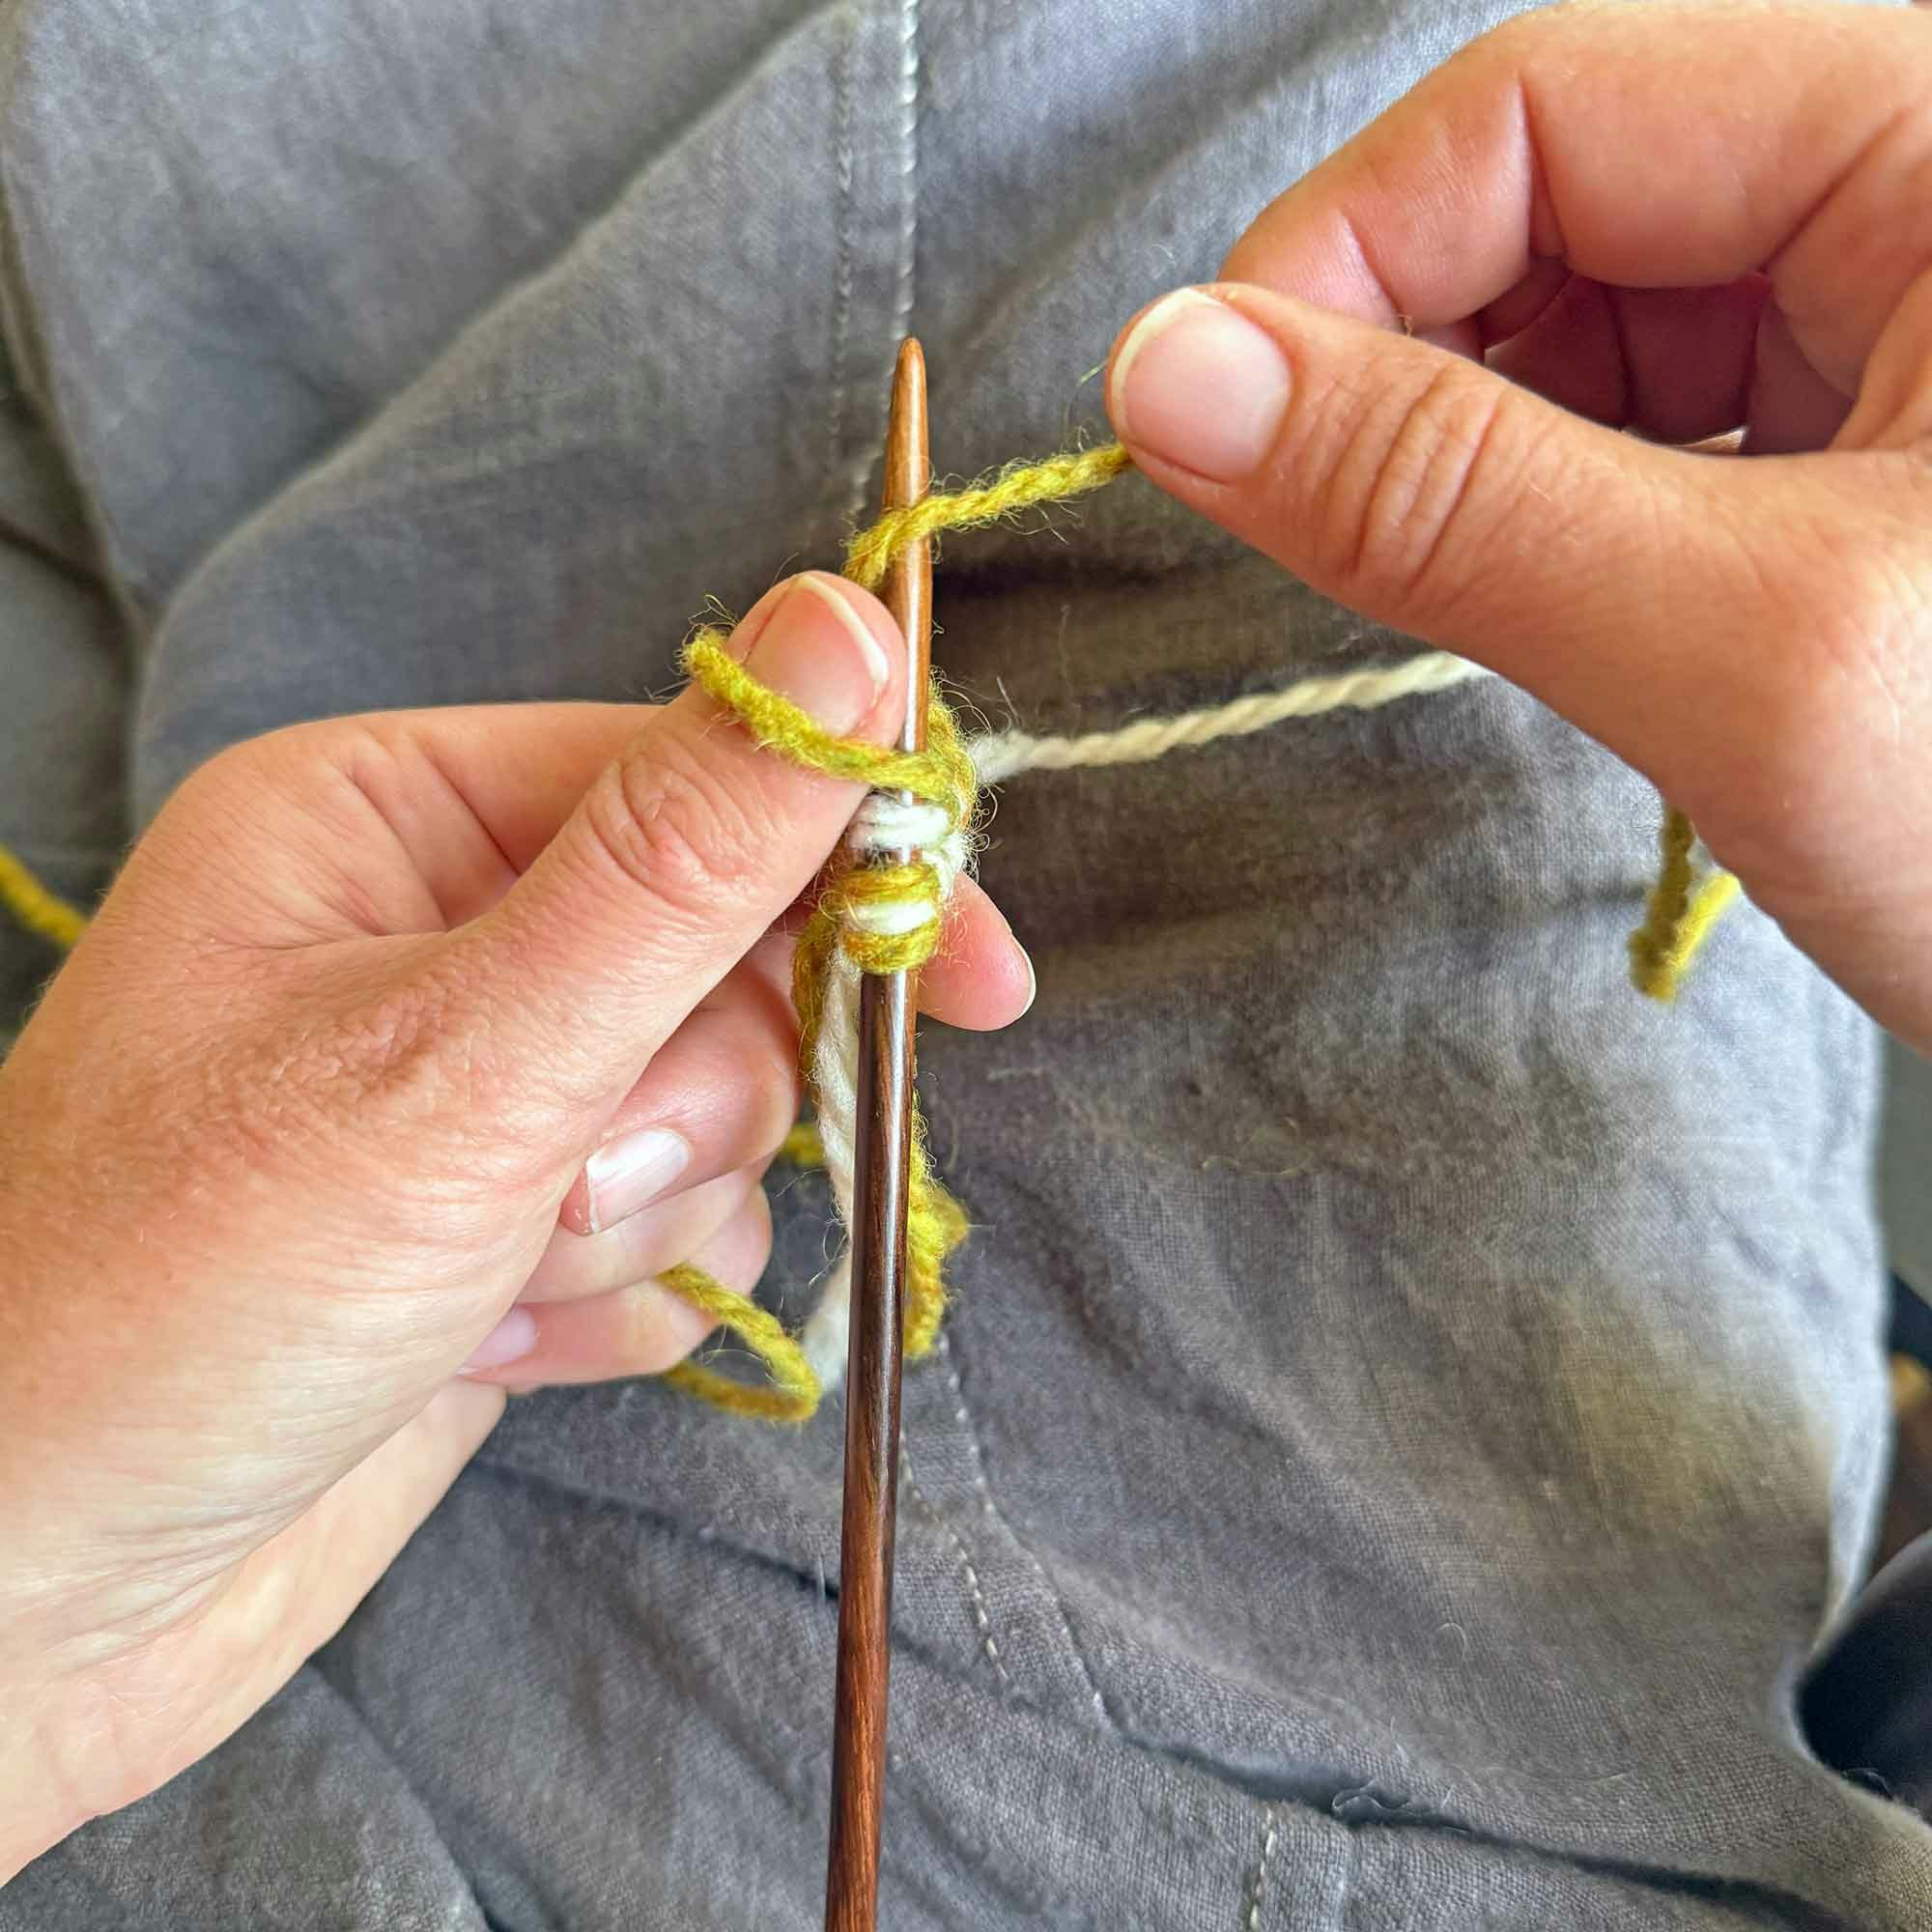
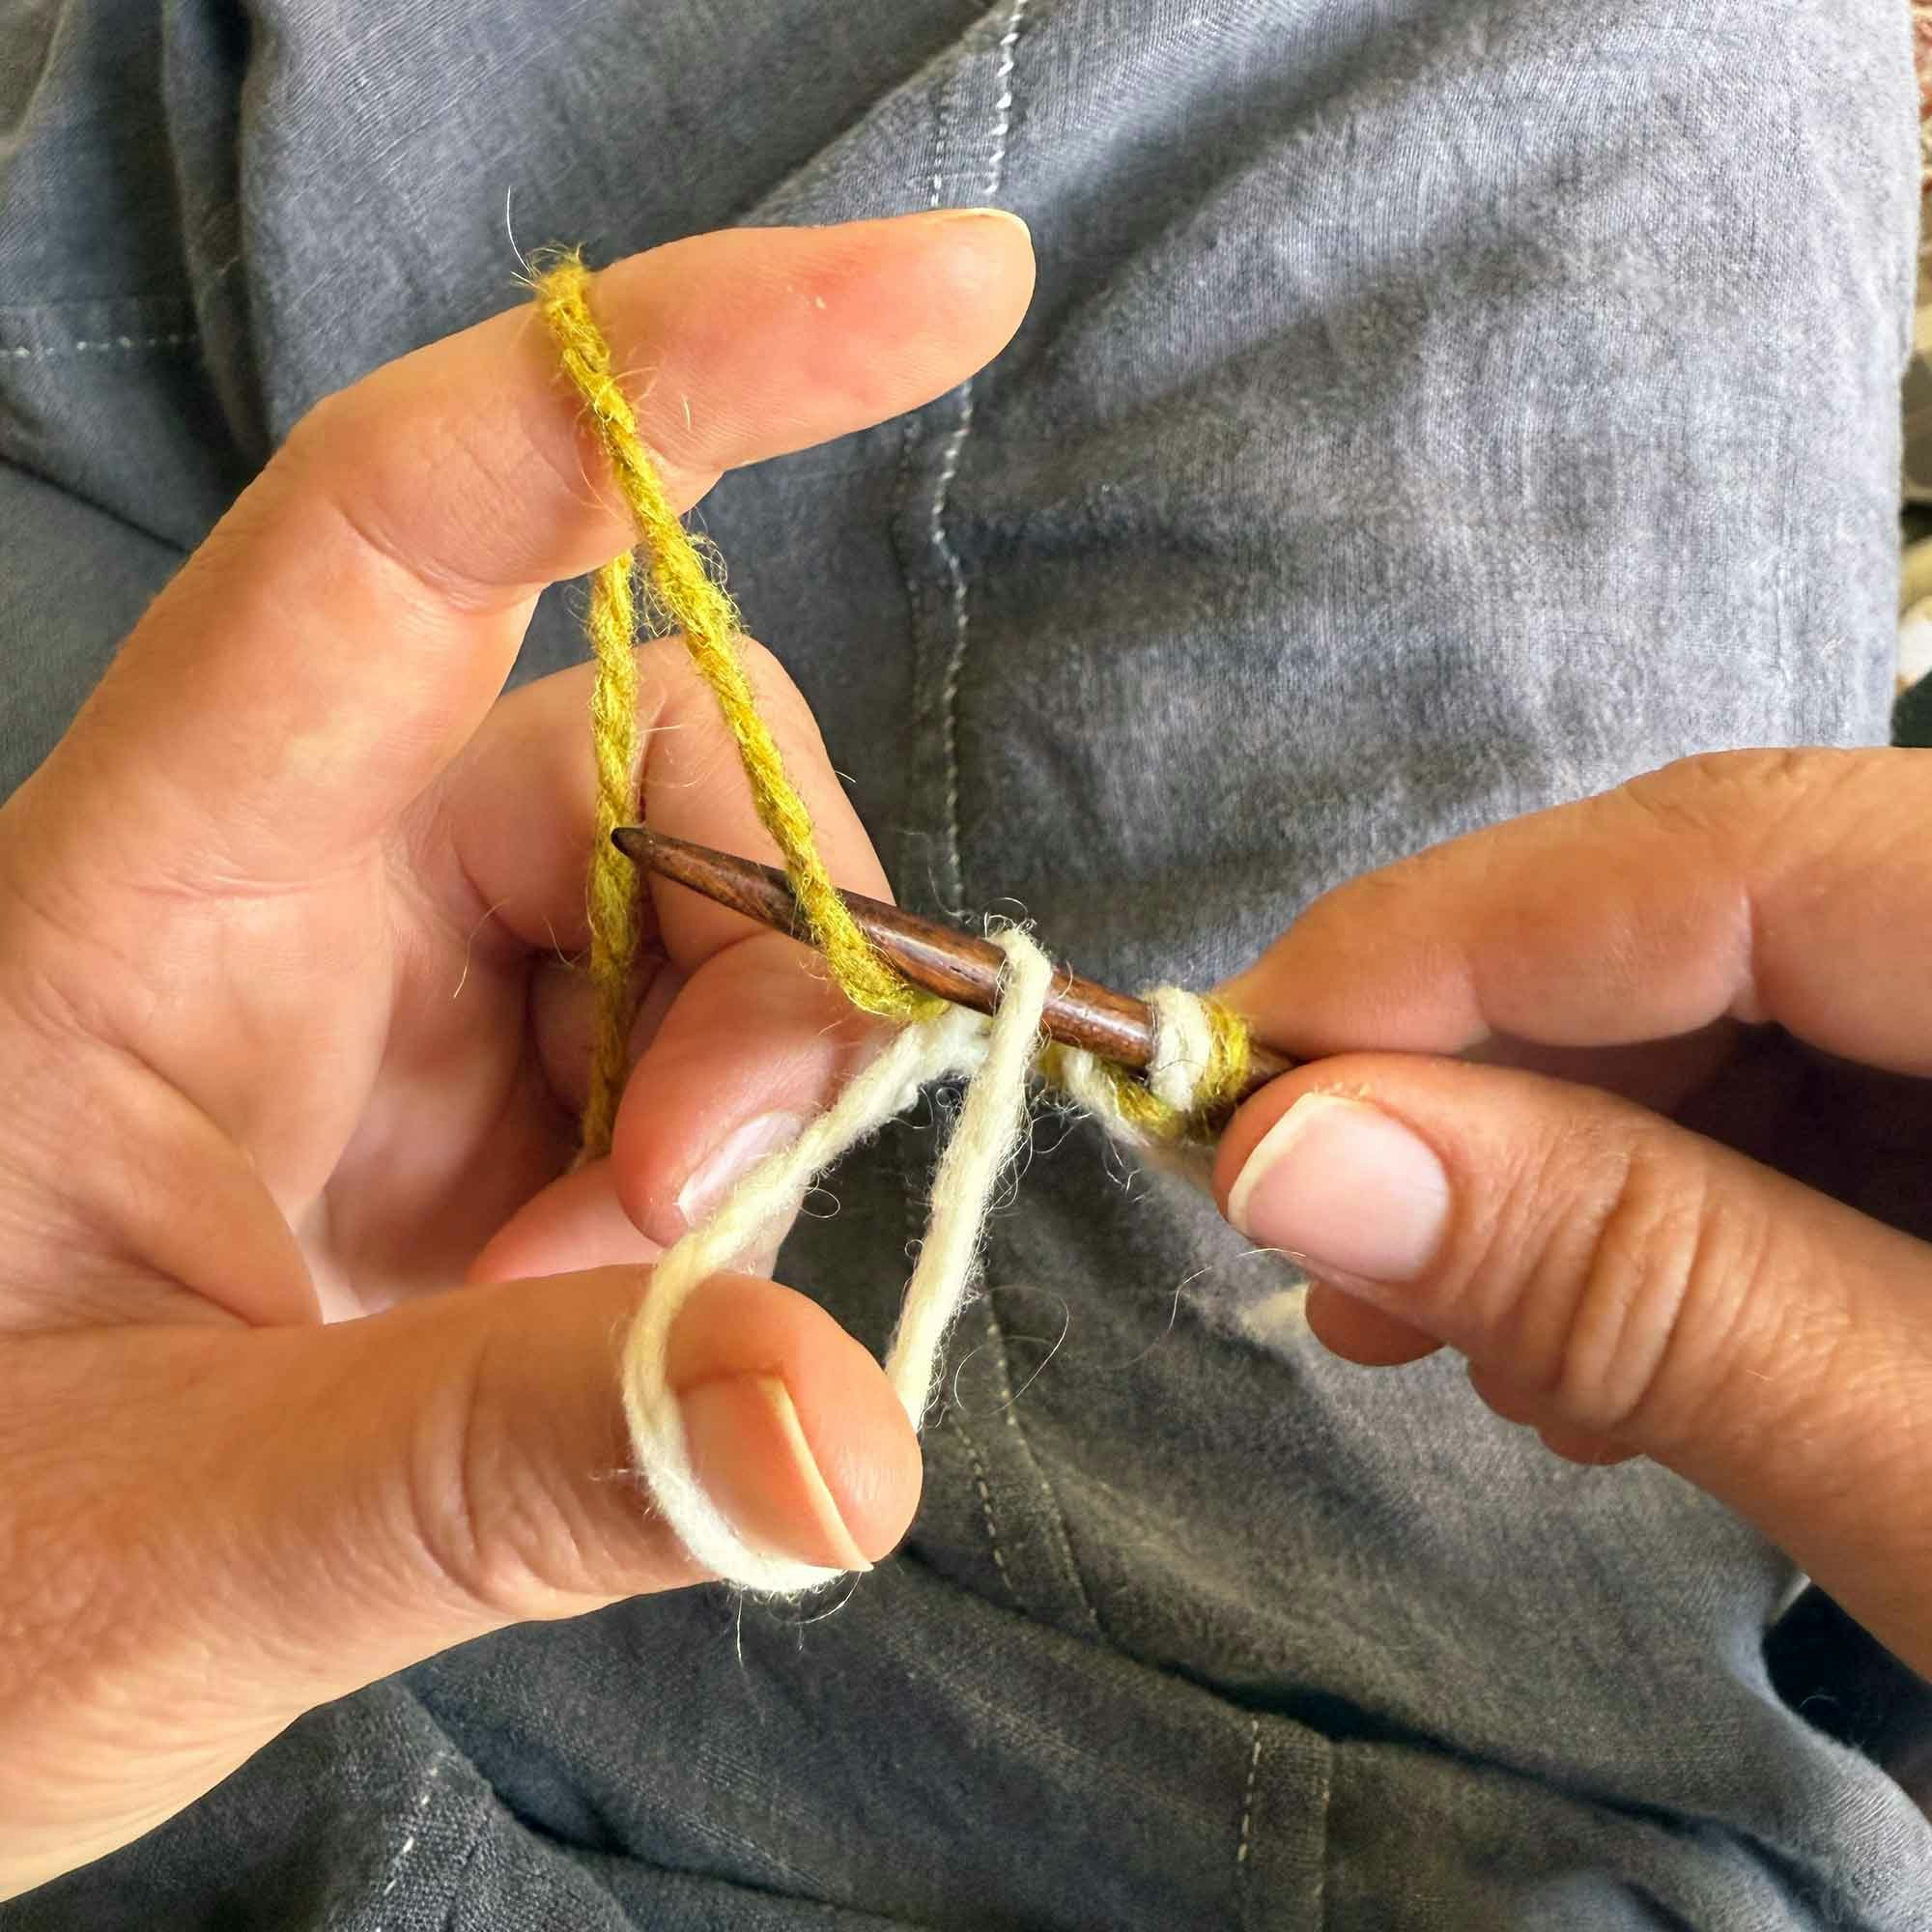
Step 3 The needle tip goes down the index finger to pull the back yarn (yellow) through the thumb loop.
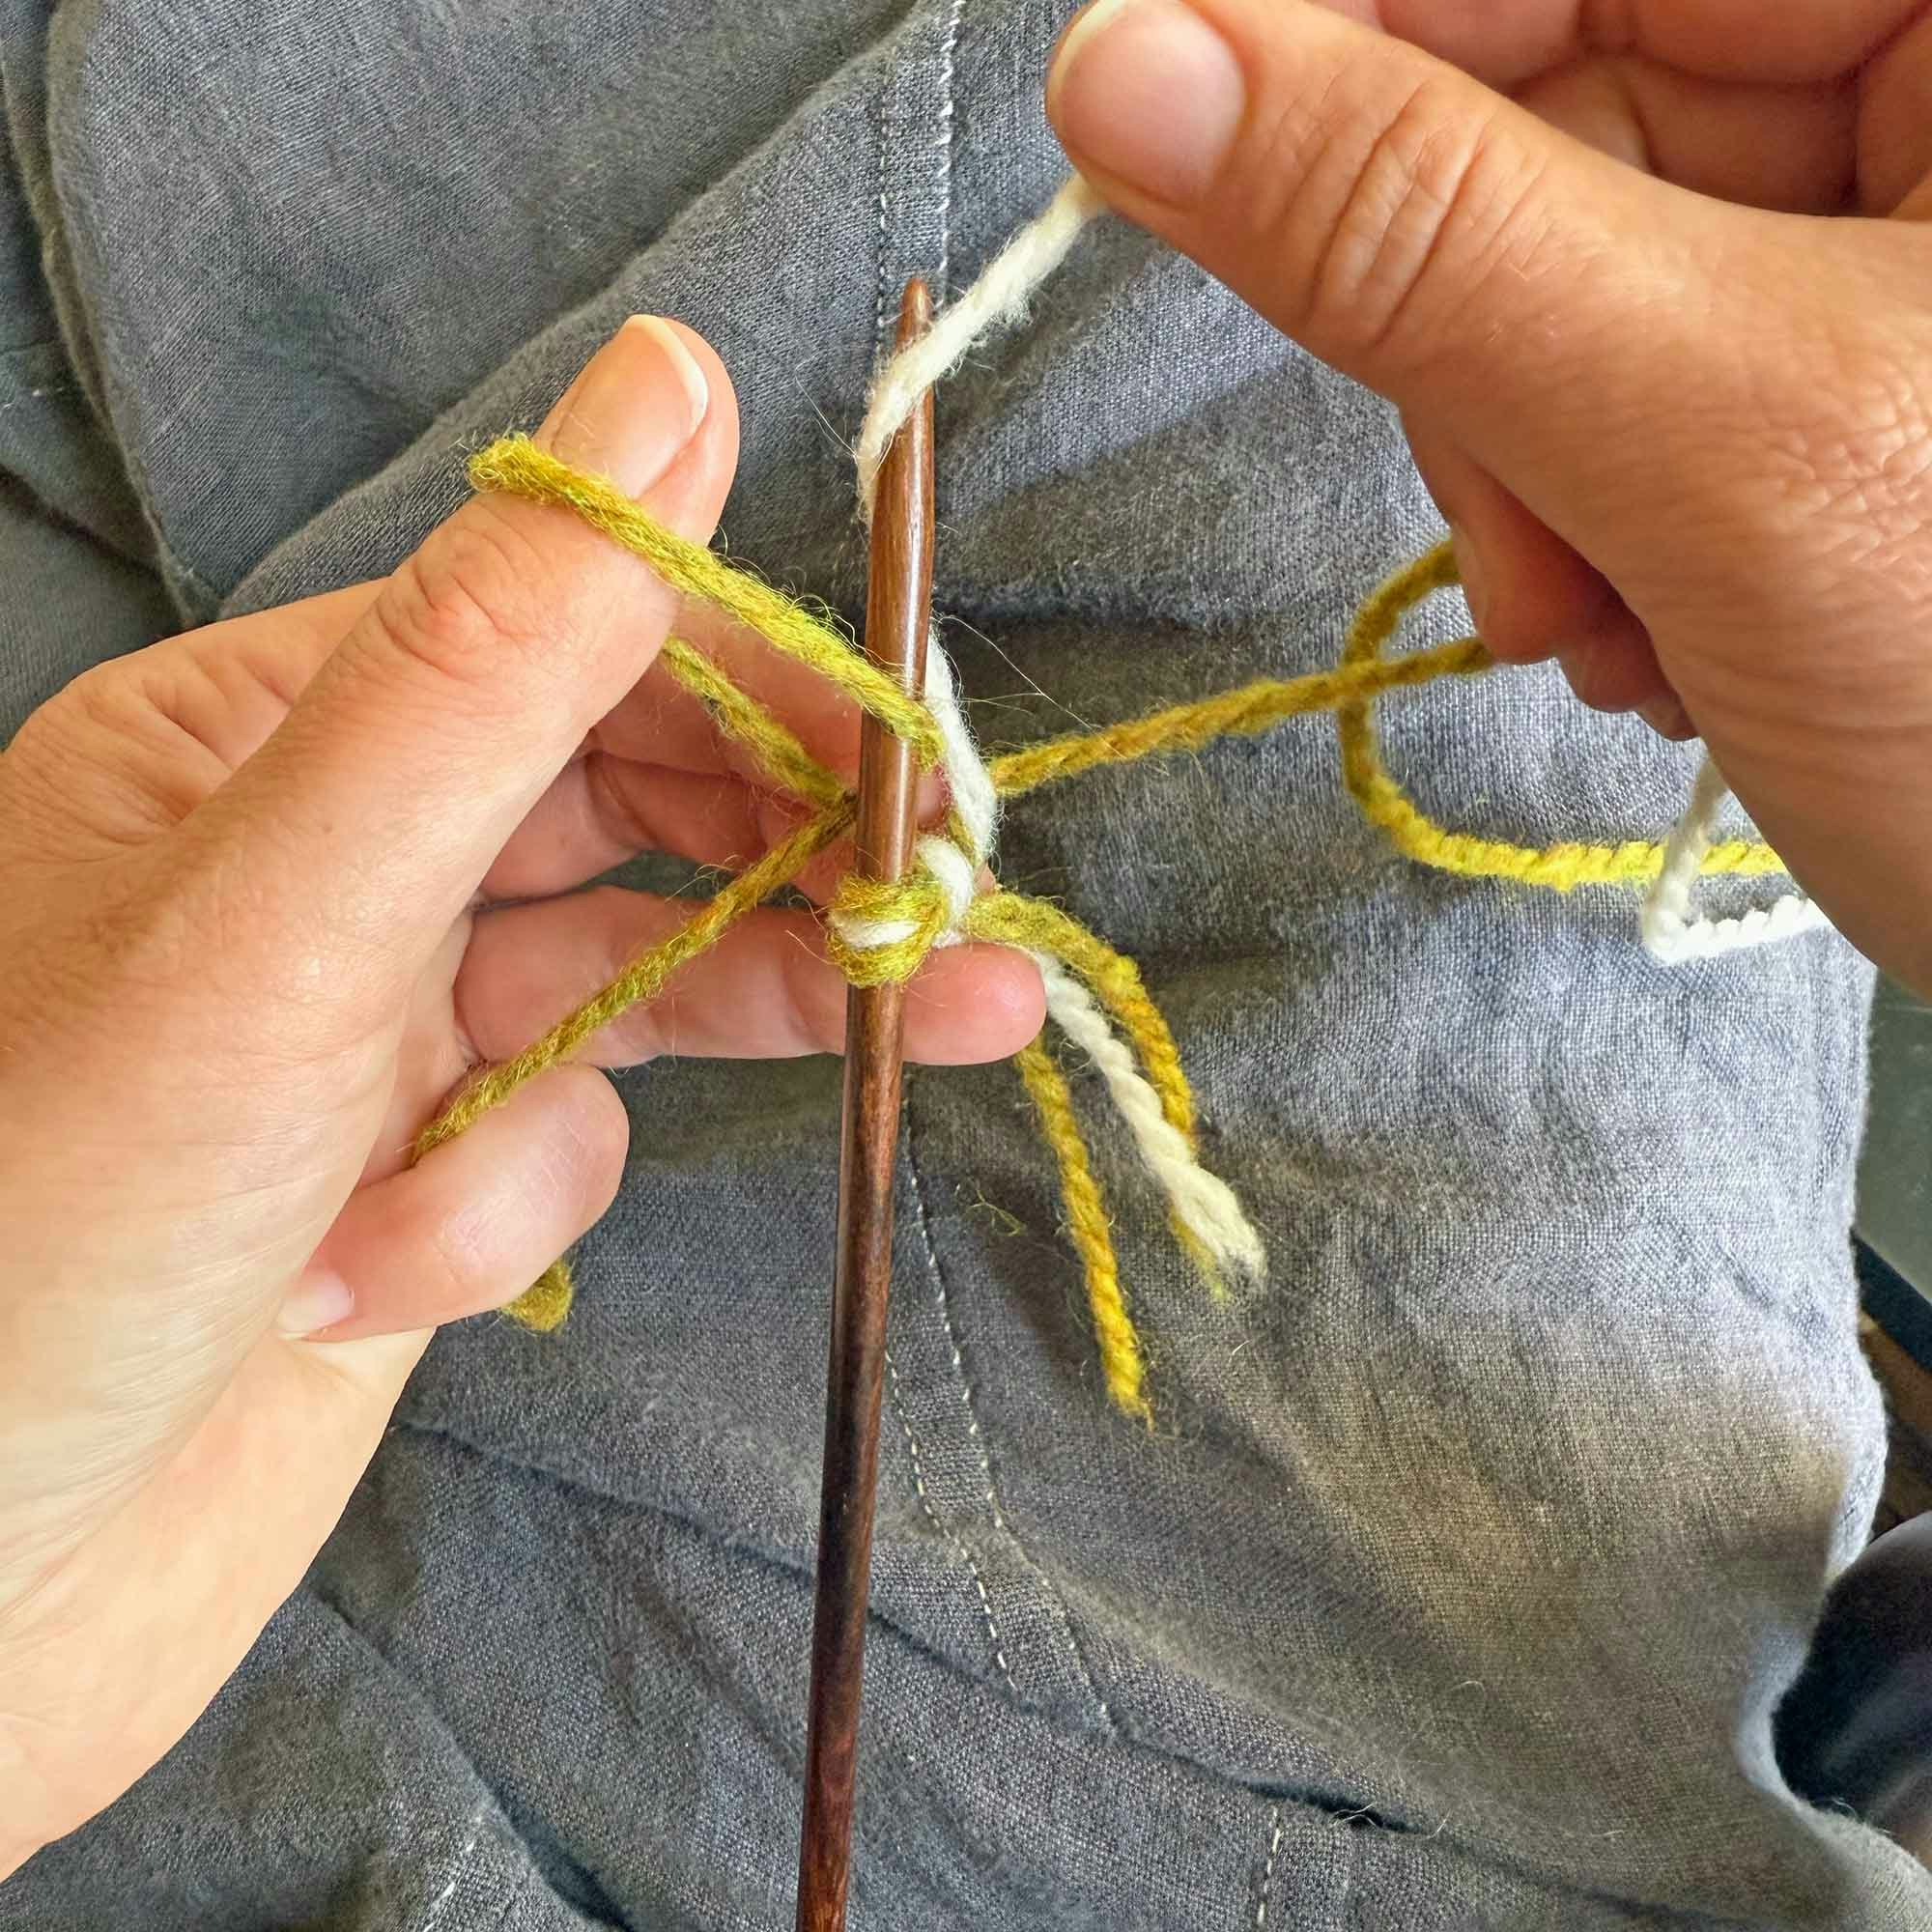
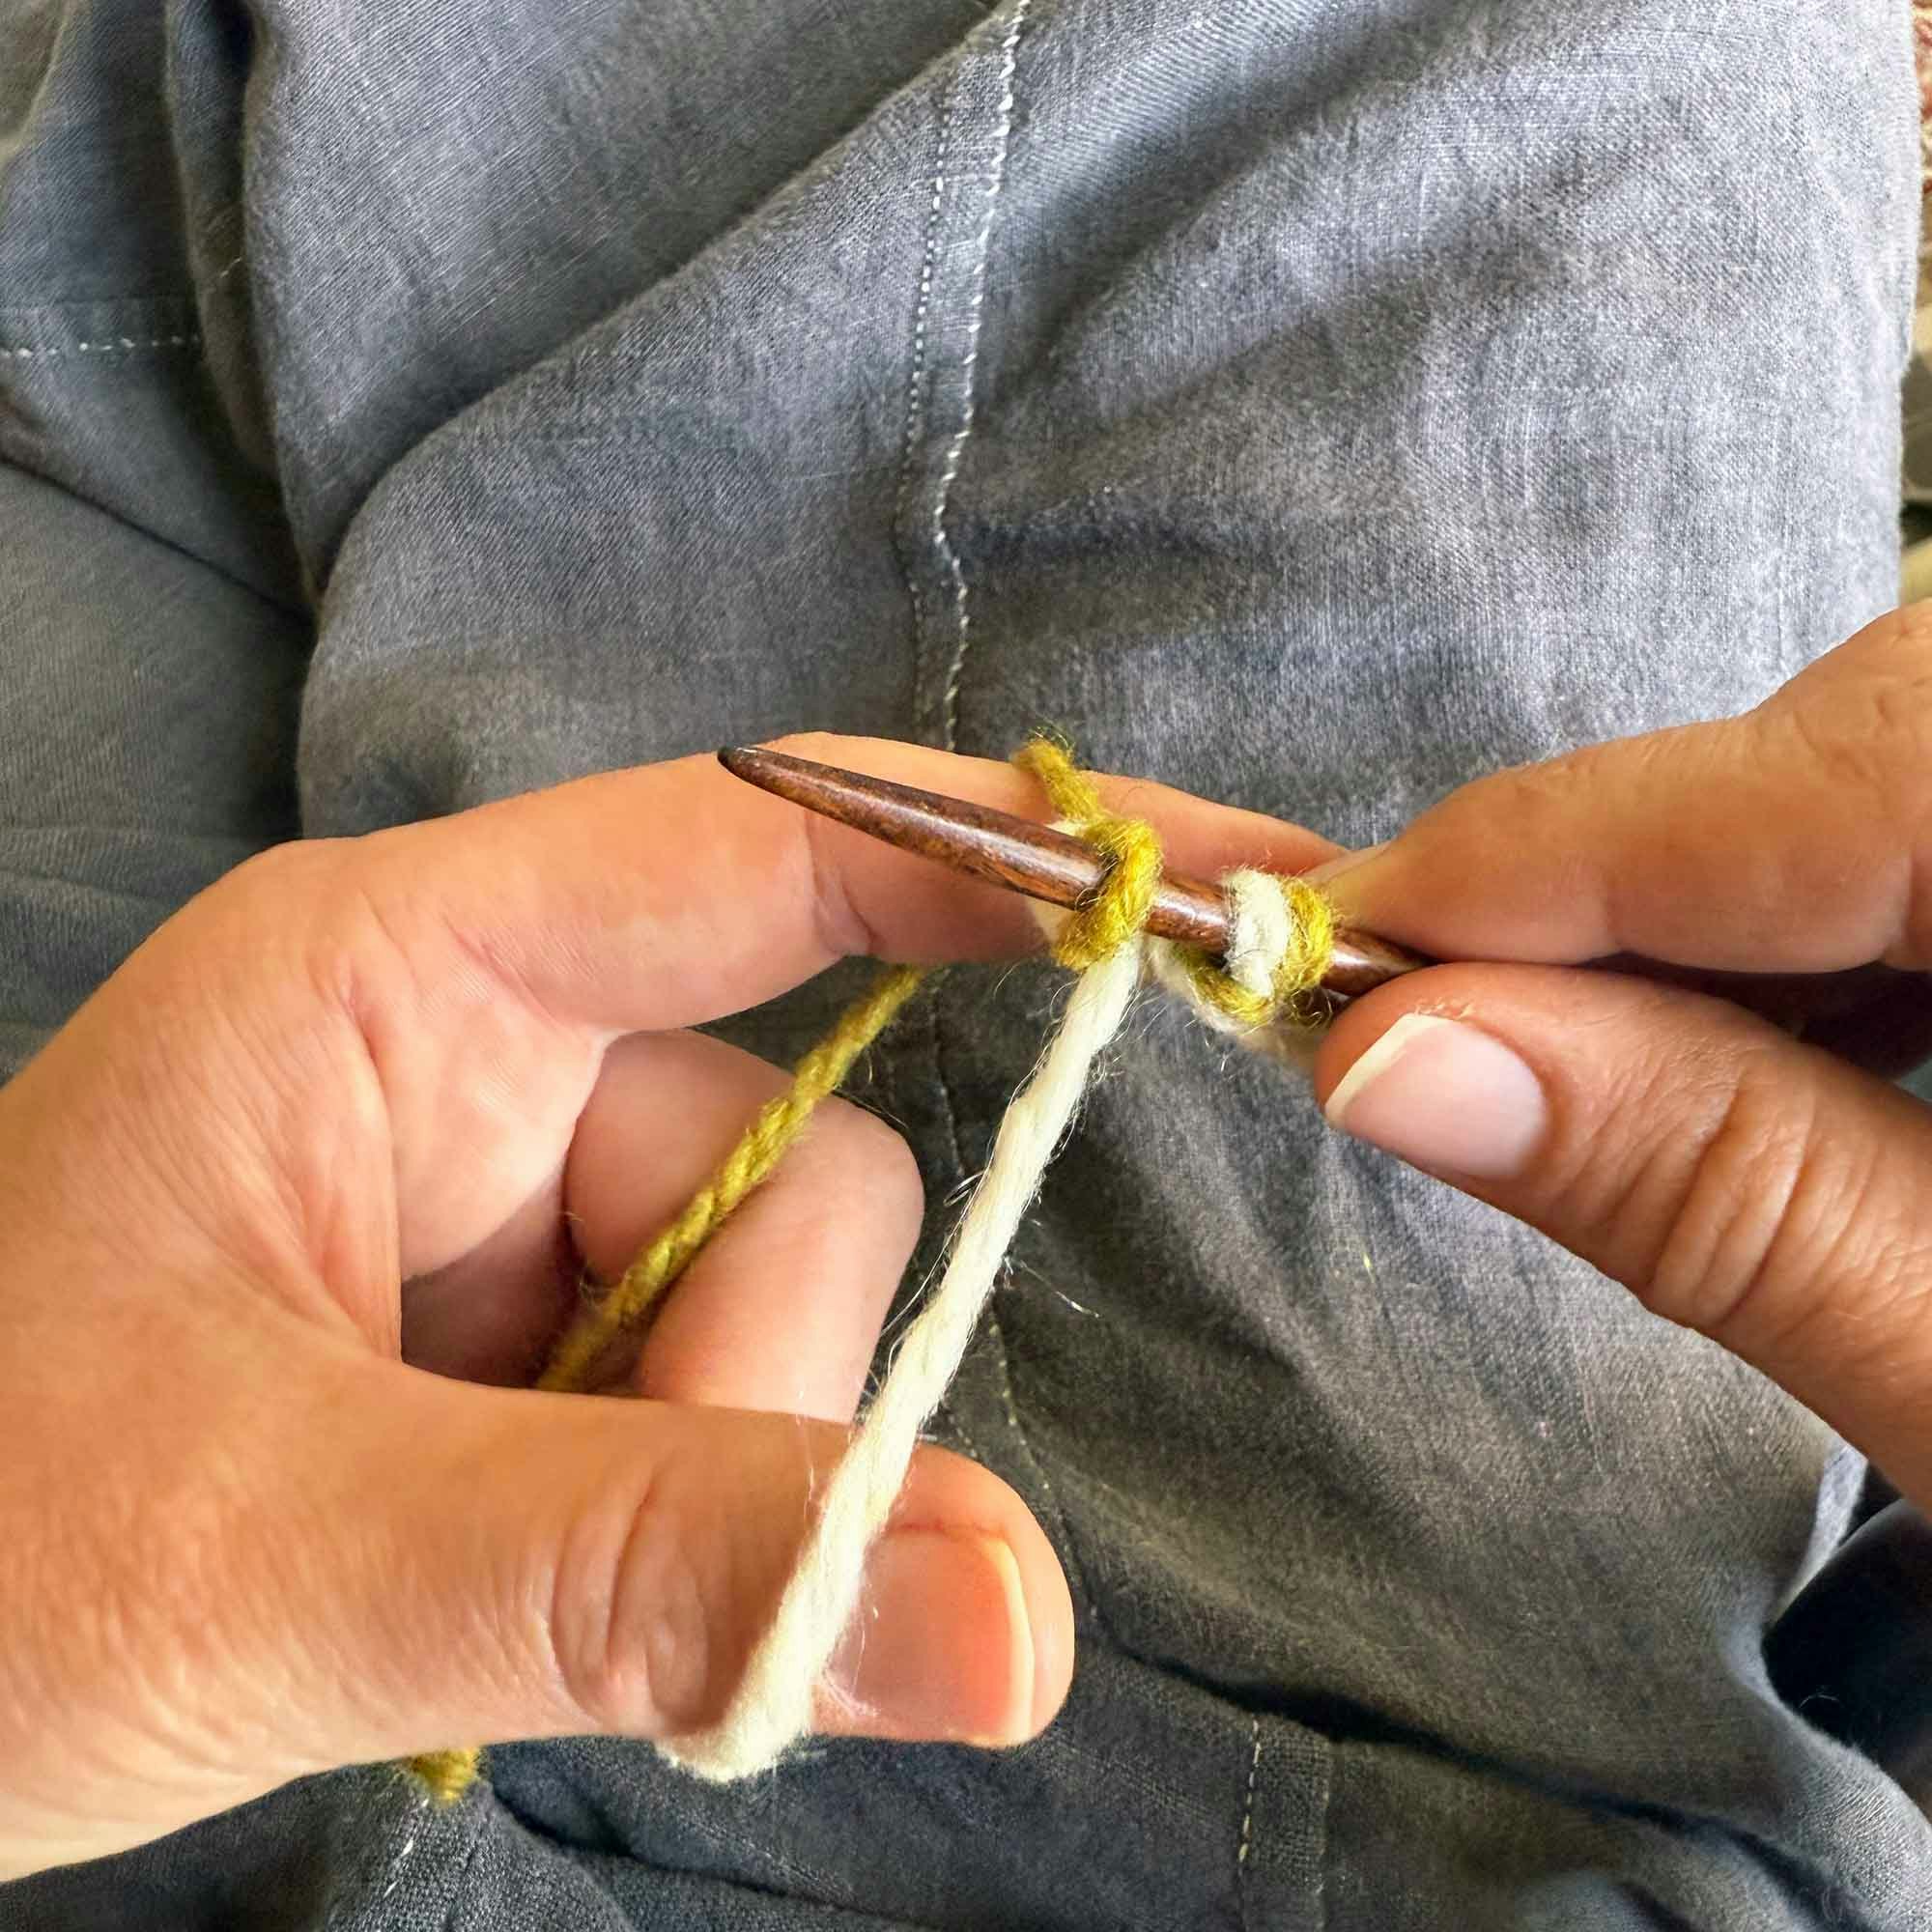
Step 4 Pass the thumb loop over the needle tip and tighten to create a stitch.
Repeat Steps 2–4 until you have the number of cast-on stitches you need, not including the slipknot. Slide the slipknot off the end of the needle and tug to unknot.
Spicy: Three-Strand Alternating Cast-On
Three-Strand Alternating Cast-On
The version of the long-tail cast-on shown above is how I see most people holding their yarns, but the exact same cast-on edge can be created by holding one yarn in each hand rather than both in the left. We will use that approach for the next cast-on technique, because we are going to throw in a third working yarn!
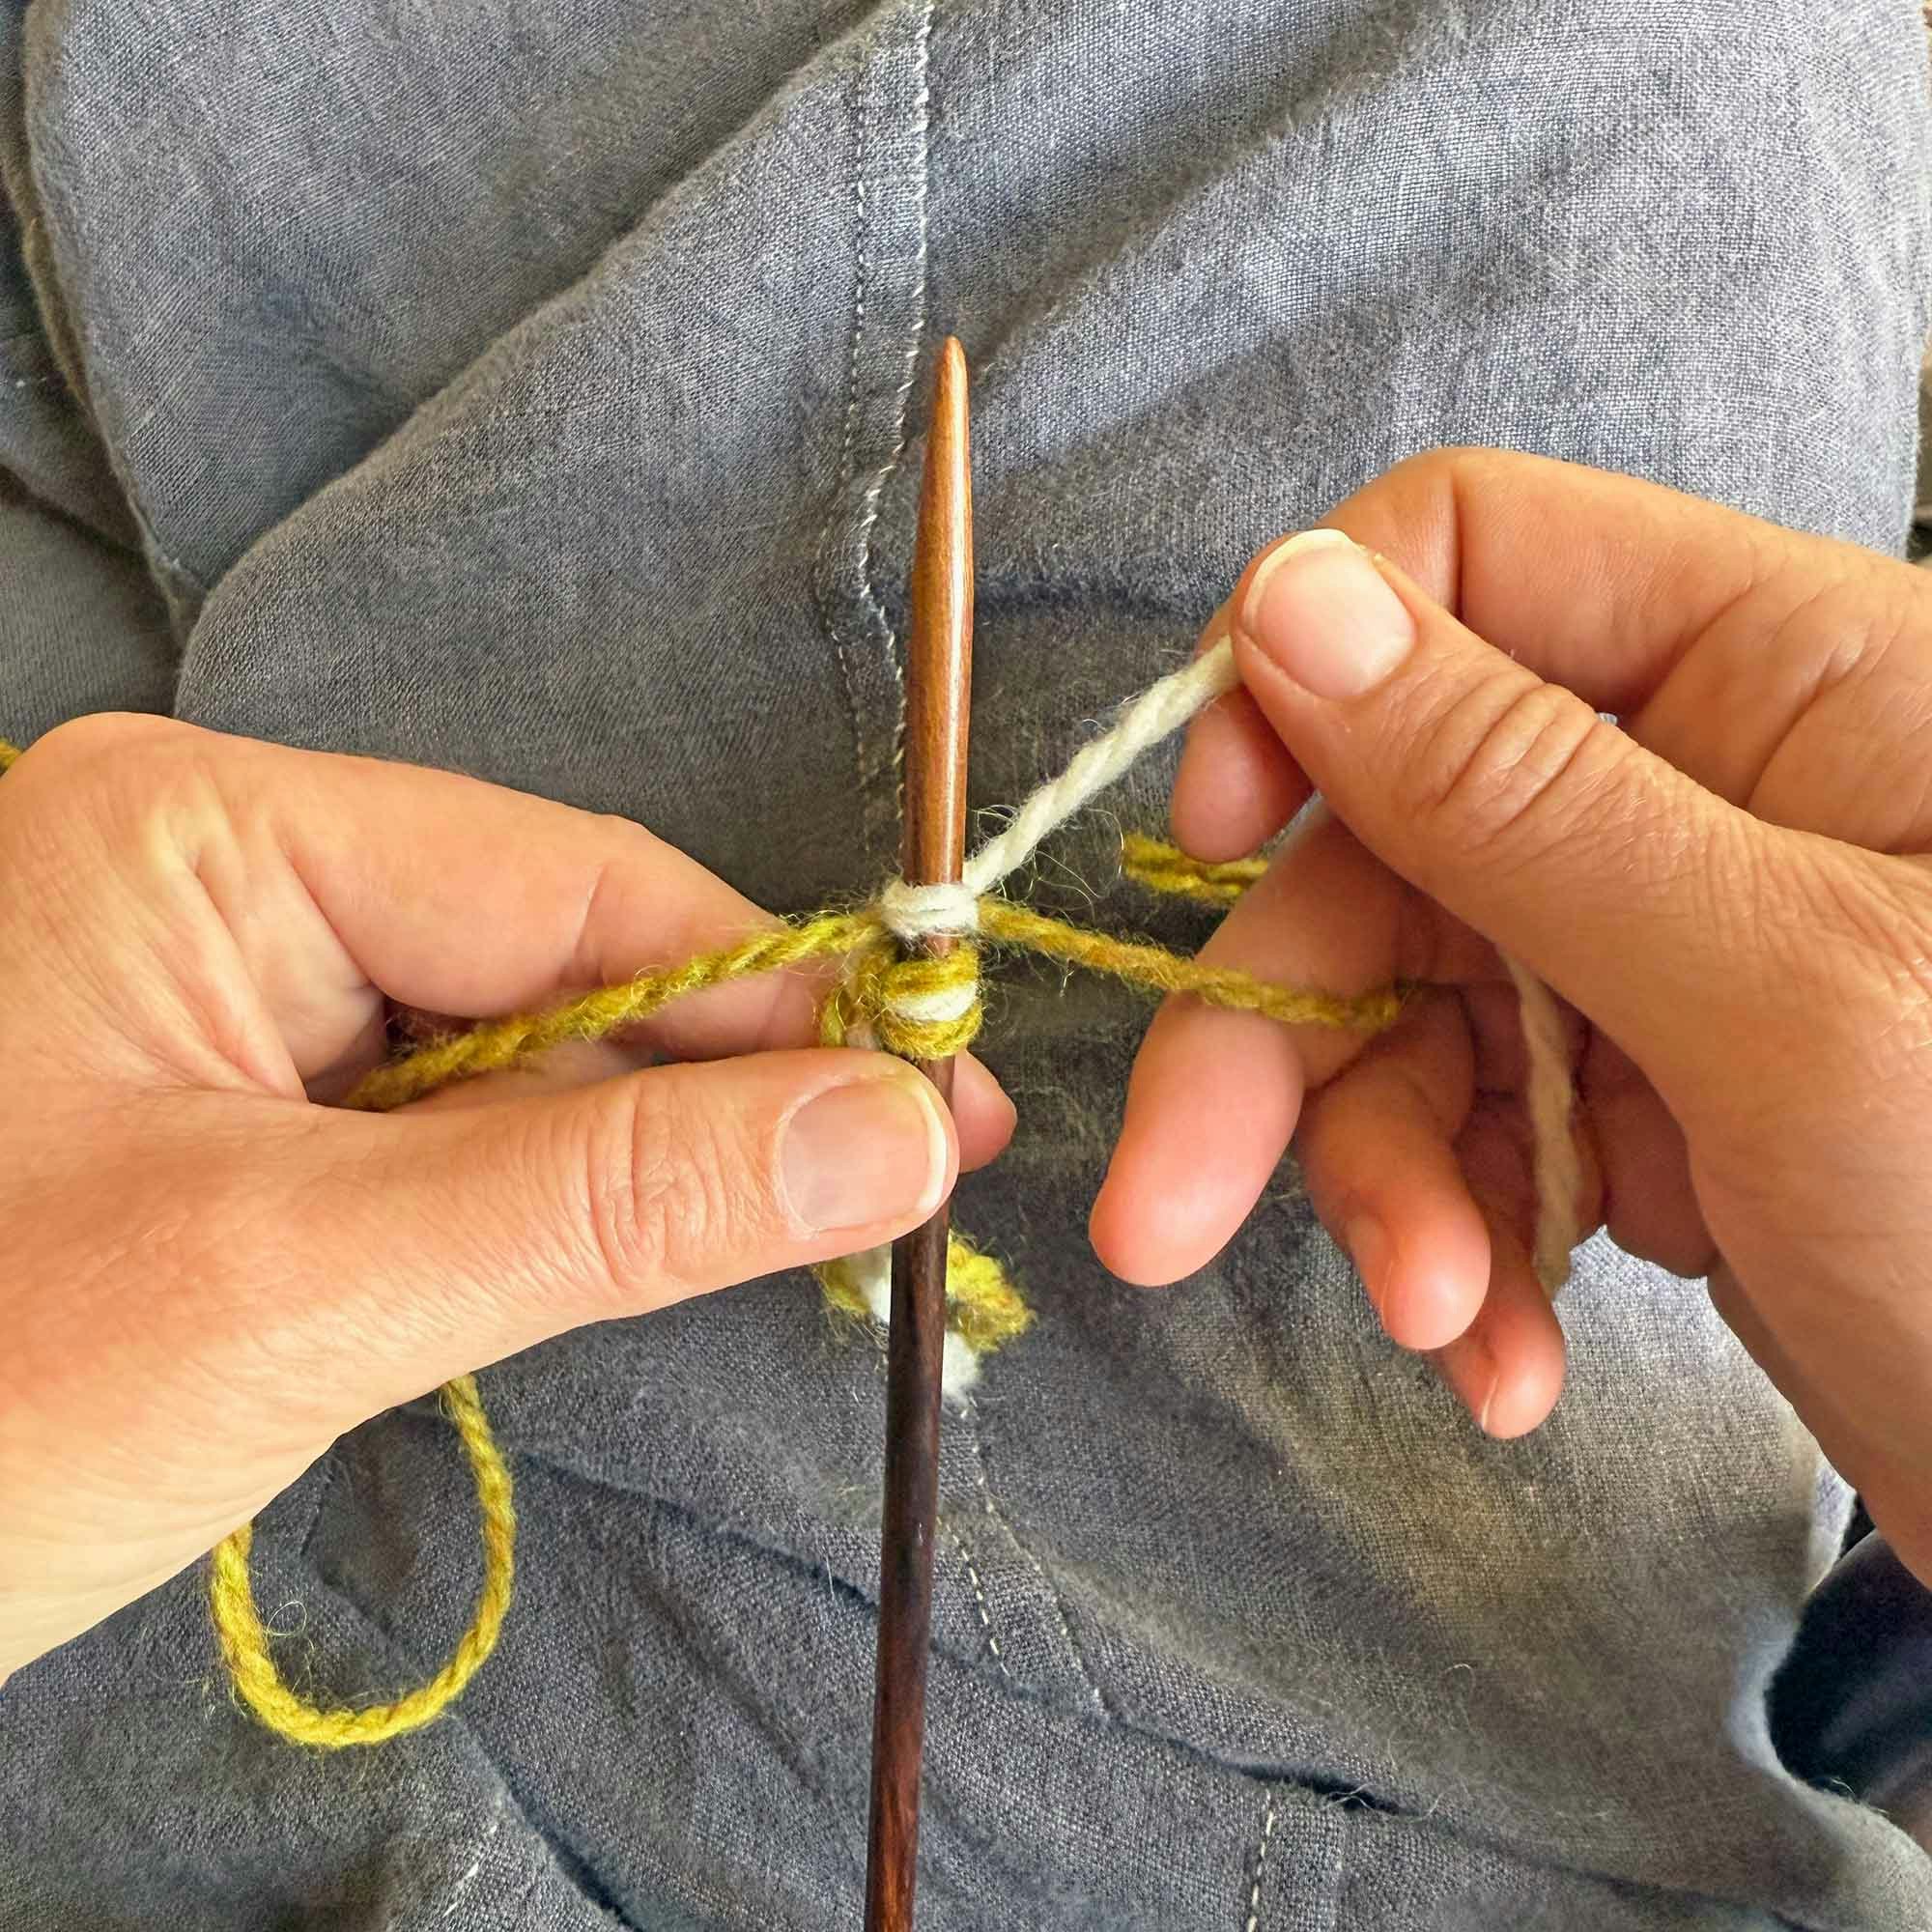
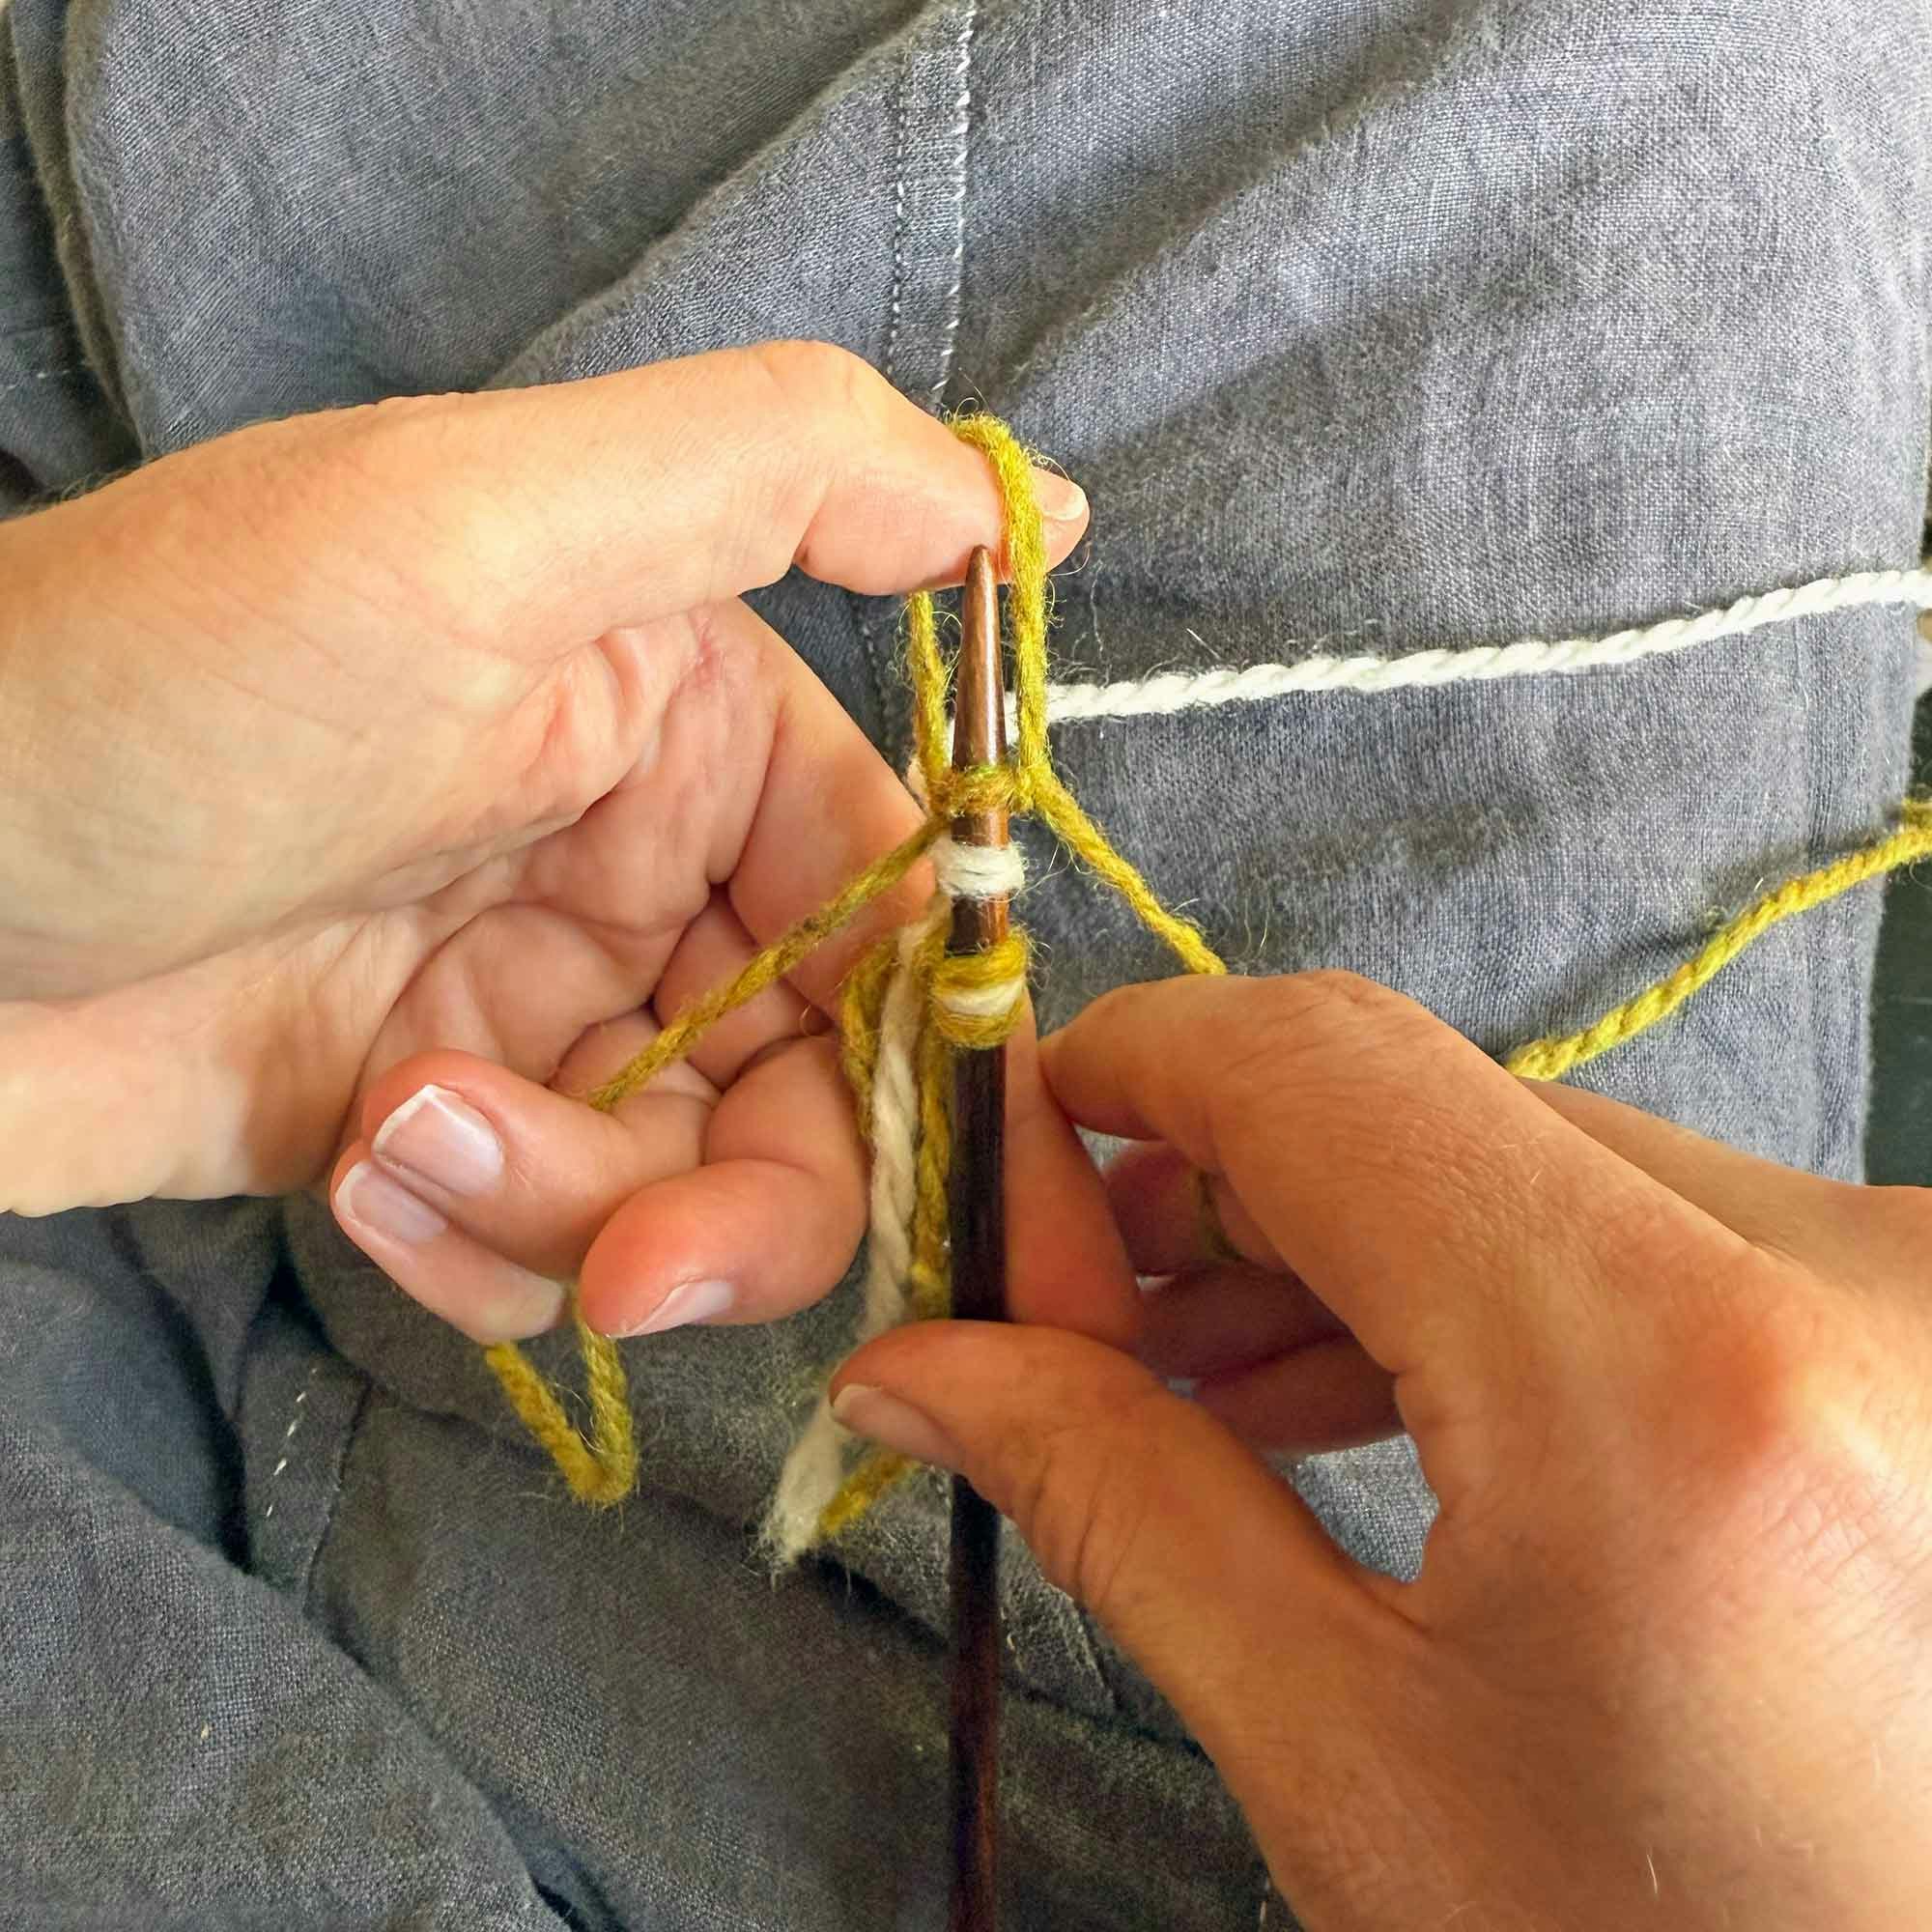
Step 1 Start with three ends: cut one piece of each color, and use a third end that is still attached to the ball. Create a slipknot with all three working yarns held together. Place the yarn connected to the ball—yellow here—to the left and the two cut yarns—yellow and white—to the right.
Step 2 Using the yarn on the left, create a backward loop on the needle tip.
Step 3 Look at the cut yarns on the right and, choosing the yarn that is sitting closest to your body (yellow), take it over its neighbor yarn, then under the needle tip, and over the top of the needle.
Step 4 Drop the loop from your left thumb over the needle tip.
Step 5 Tighten the left thumb loop to secure the stitch. Note that the yarns on the right have switched places.
Step 6 Create a loop with your left thumb as before, then choose the right yarn that is now closest to your body—it should be the alternate color as before.
Step 7 Take it over its neighbor and around the needle tip as before.
Step 8 Drop the thumb loop over the needle tip and tighten to create a new stitch in the opposite color as before.
Repeat Steps 2–7 until you have the correct number of stitches, not including the slipknot. Slide the slipknot off the needle and tug to unknot.
I hope you’ll give these cast-on methods a try. It’s an easy way to add a little color to a basic sweater cuff or hat!
— Kate
Find Meg Swansen's new Practice Caps in Farm & Fiber Knits Fall 2025!
Read Meg's great article, where she gets real about the ins and outs of Swedish tvåändsstickning, or two-end knitting. You'll find other great articles and 10 original patterns that will take you from pasture to pullover. Subscribe now or find the full issue in our online library.
Kate Larson (she/her) is Editor of Spin Off and Senior Editor of Farm & Fiber Knits. She teaches handspinning and knitting around the country, has published articles and patterns in books and magazines, and spends as many hours as life allows in the barn with her beloved flock of Border Leicester sheep.

 Meg Swansen designed two different caps that use the Swedish two-end knitting technique. Photo by Gale Zucker
  Meg used an alternating color cast-on to create a great edge. Photo by Gale Zucker
  Long-Tail Cast-On worked in two colors.
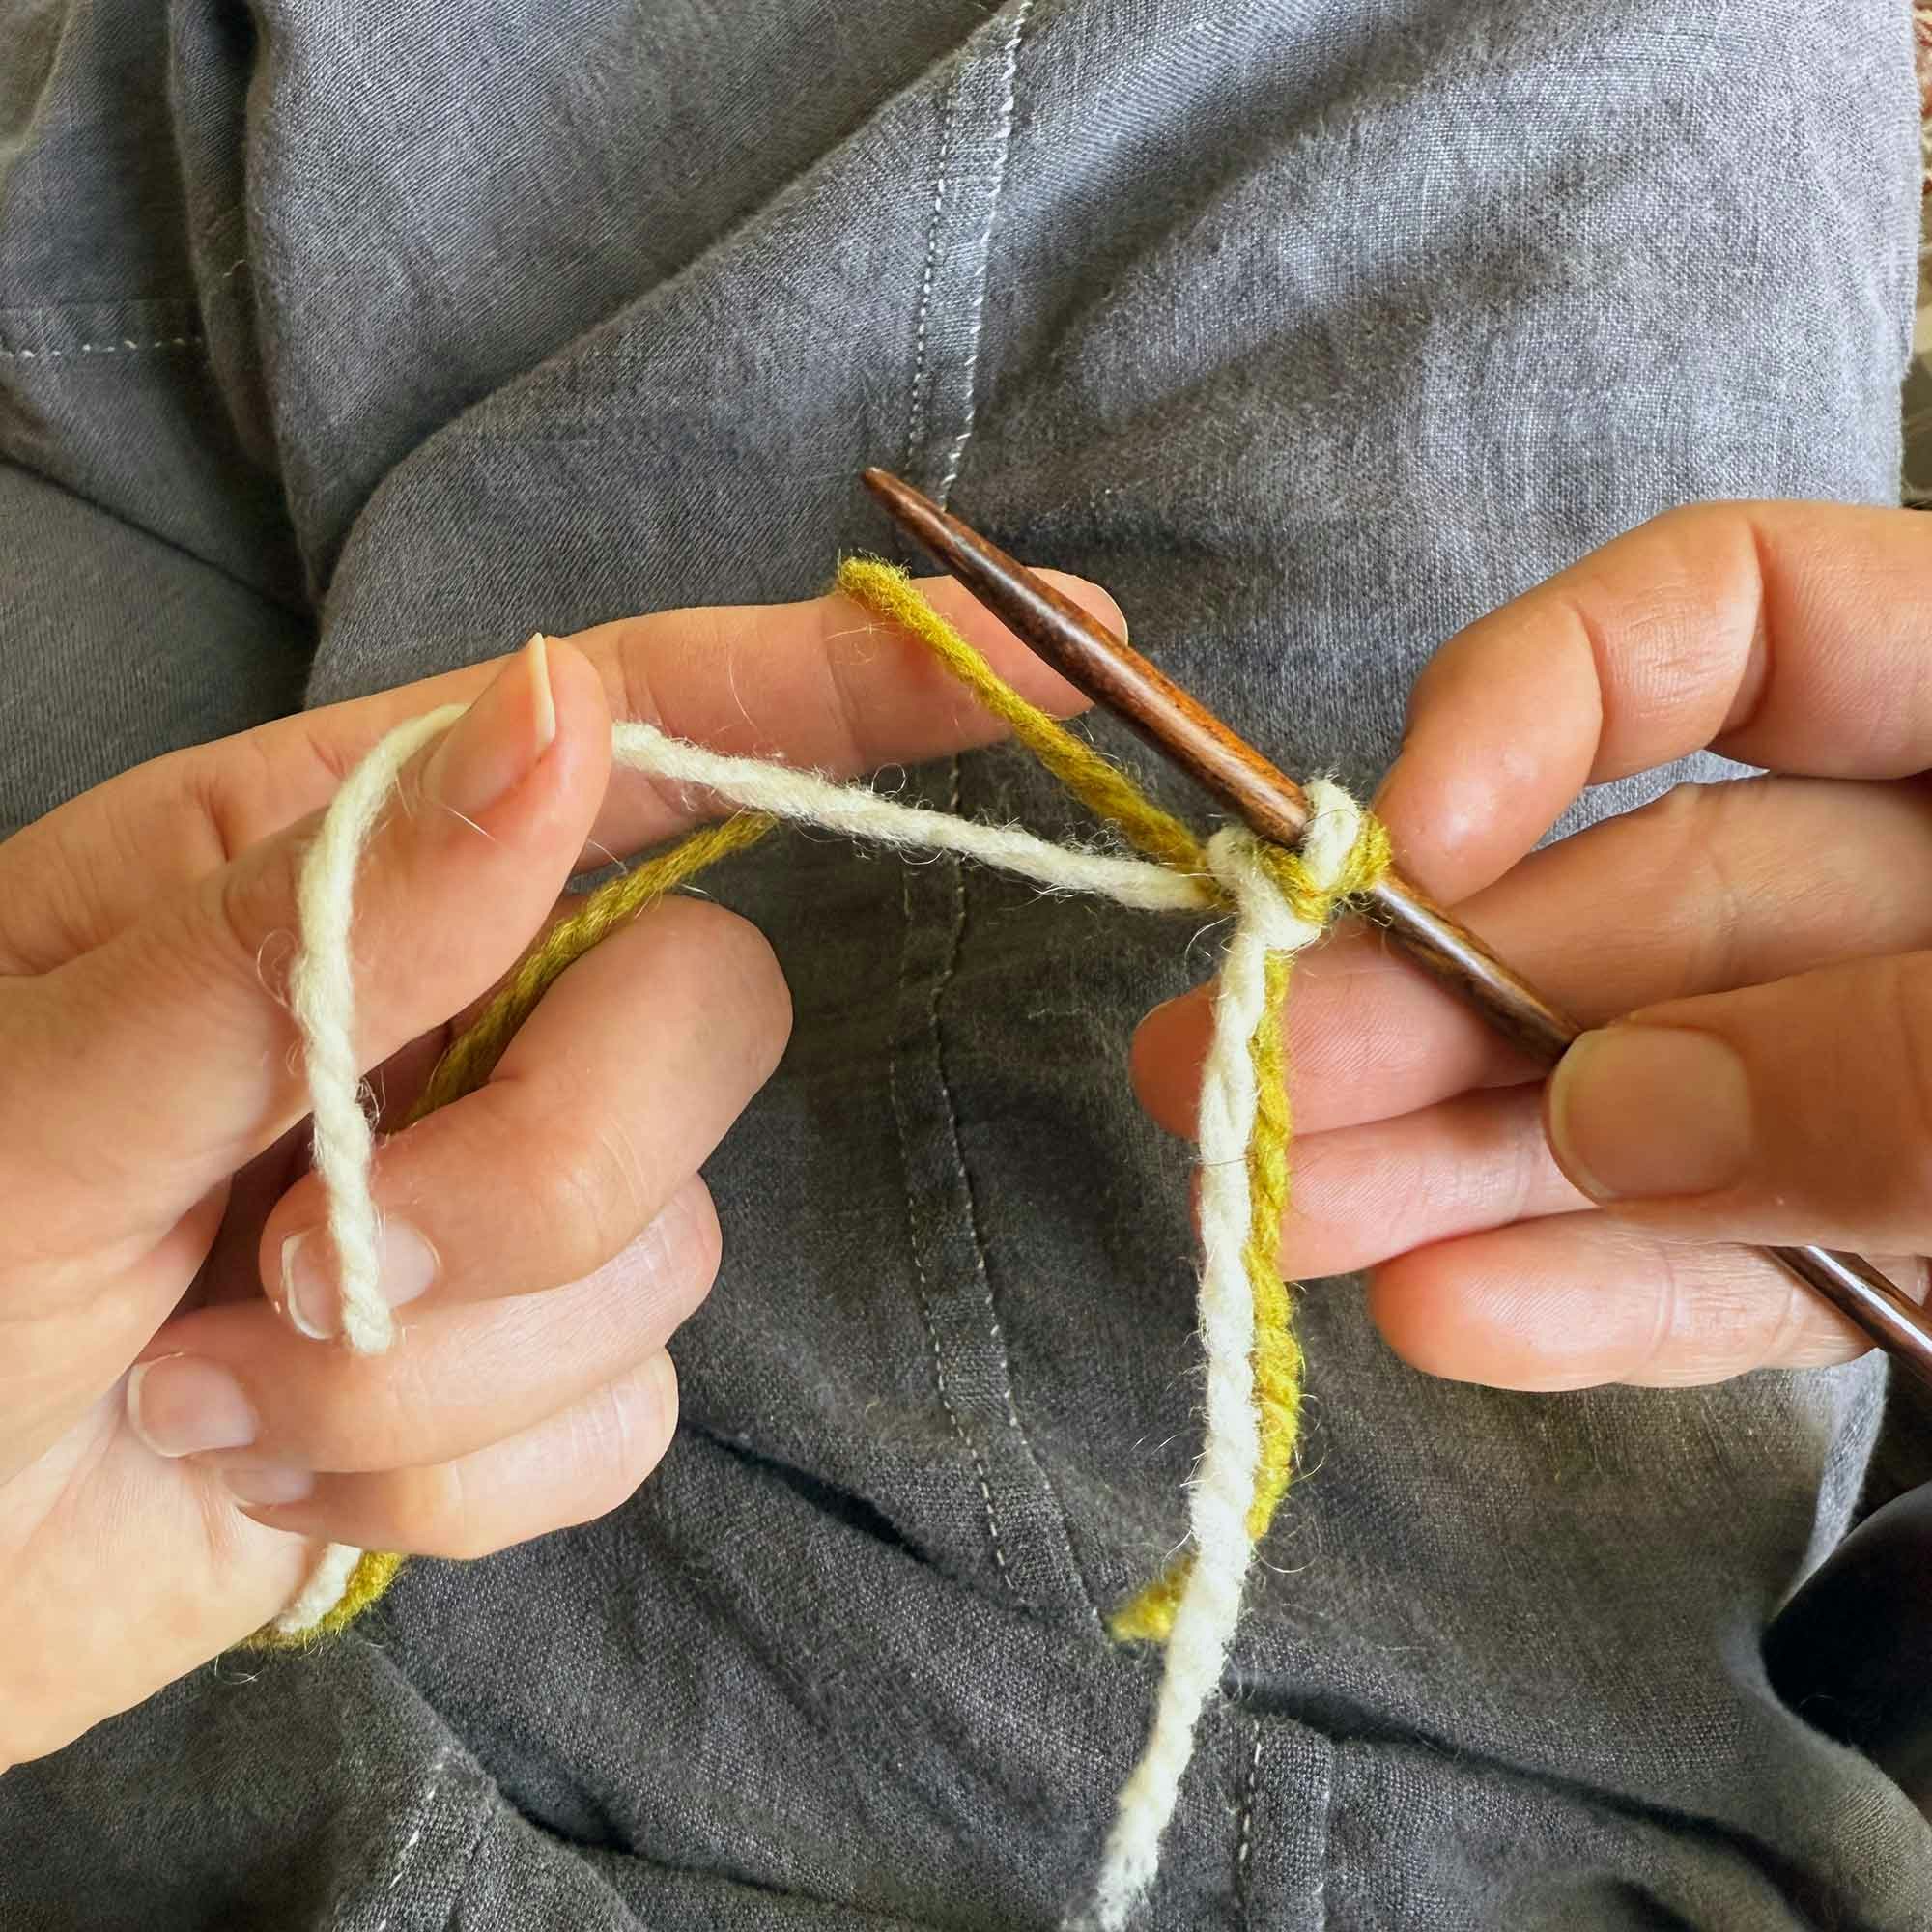
 Three-Strand Alternating Cast-On