Subscriber Exclusive
Sagging Shoulders? Ways to Reinforce a Neckline | Part 2
Are your sweater sleeves too long? It might actually be a stretched neckline to blame! Learn how to diagnose this common fitting issue, and get Kate’s 10-minute neckline fix that could save your handknit with a nearly invisible finish.
Are your sweater sleeves too long? It might actually be a stretched neckline to blame! Learn how to diagnose this common fitting issue, and get Kate’s 10-minute neckline fix that could save your handknit with a nearly invisible finish. <a href="https://farmfiberknits.com/sagging-shoulders-ways-to-reinforce-a-neckline-or-part-2/">Continue reading.</a>
https://farmfiberknits.com/cdn-cgi/image/format=auto/https://www.datocms-assets.com/101500/1775243151-larson-sagging-shoulders-header.jpg?auto=format&w=900
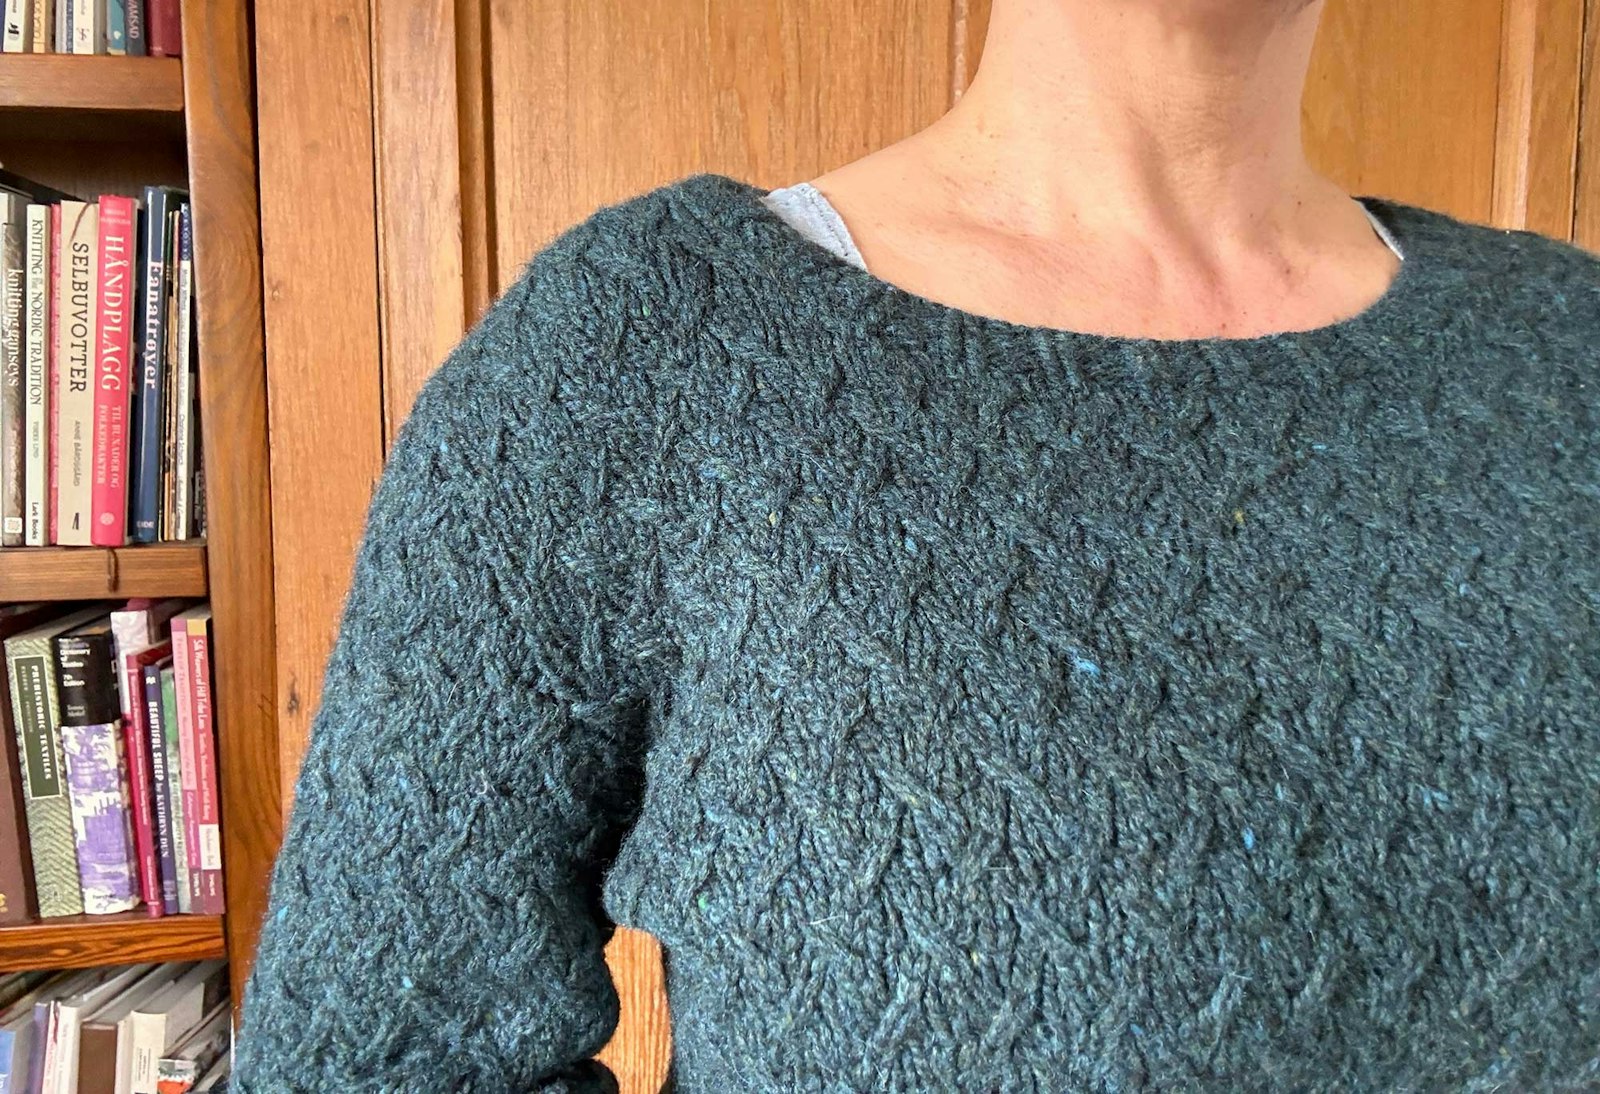
This set-in sleeve shoulder should have a sleeve seam at meets the body at the shoulder, but as you can see here, that seam has slipped several inches lower. As the back neck stretches, the shoulder seam droops and this causes fabric to pool at the bustline, too. Photos by Kate Larson
Contents
Last week, my fellow editor Pamela published a tutorial on securing necklines using tapes and ribbons. This week, I want to share an alternative method for reinforcing the back necklines of your handknits.
In about 2007, early in my knitting life, I was working at a great LYS and surrounded by busy knitters. Top-down, seamless sweaters were all the rage . . . and sagging shoulders abounded. As I spent time putting shop sample sweaters back on the hangers they slipped off of, I had a chance to look at how different sweater styles knitted in different types of yarns stretched. Seams add structure, but so does fabric density (more stitches per inch) and crimpy wools with memory. I noticed that even seamed sweaters sometimes needed a little help in the neckline where you can imagine the weight of a sweater resting on a hanger. (I’ll show you this in a minute.)
I started reinforcing the back necklines of my handknits, and it continues to be one of my top tips for improving the fit of sweaters.
To show you how easily this extra support can be added, I pulled a sweater from my collection that didn’t have a reinforced neckline (yet) to demo step by step. My go-to technique is a simple crochet chain that can be a nearly invisible addition when worked in the same yarn as the sweater, or it can be a way to add a fun pop of color.
Whether you try securing necklines using tapes and ribbons or using my method, I hope you’ll give one of these techniques a try!
Case Study: Sagging Set-In Shoulders
Set-in shoulders typically have a scooped armhole that allows the sleeve cap to be sewn into a tailored, smooth shoulder line. The sweater shown above has seams on the tops of the shoulders as well as the armhole. Nice and secure, right? Those areas are, but when I wear the sweater, the back neck stretches. When this happens, the nicely curved back neck becomes shallow and flattens, adding several inches of length to the sleeves and creating bulges above the bust. I can see the armhole seam creeping down my arm so it no longer sits at the top of my shoulder, and it looks more like a drop shoulder.
 The back of Kate's sweater on a hanger: (Left) As originally designed, this sweater has a high neck with a nice back-neck curve. (Right) As the back neck stretches, the back-neck curve becomes long and shallow, allowing the shoulders to slip lower on the arms. This changes the fit in both sleeves and bust.
This is such an easy fix! All you need is:
- 10 minutes
- A few feet of yarn
- Crochet hook
SUBSCRIBER EXCLUSIVE
Unlock the Full Article with a Farm & Fiber Knits Subscription
Get instant access to this article and the entire Farm & Fiber Knits library of projects, inspiration, and expert instruction. With your subscription, you'll receive:
Connect more deeply with your yarn—learn the stories of farmers, shepherds, and dyers
Knit patterns that celebrate natural fibers and slow, intentional making
Support a community of small farms, women makers, and independent yarn companies
Includes print and digital issues of Farm & Fiber Knits, delivered directly to you
With must-knit projects and unforgettable stories, Farm & Fiber Knits invites you to see the craft world through fresh eyes.
Plans start at just $5.83/month (paid annually). Cancel anytime.
Last week, my fellow editor Pamela published a tutorial on securing necklines using tapes and ribbons. This week, I want to share an alternative method for reinforcing the back necklines of your handknits.
In about 2007, early in my knitting life, I was working at a great LYS and surrounded by busy knitters. Top-down, seamless sweaters were all the rage . . . and sagging shoulders abounded. As I spent time putting shop sample sweaters back on the hangers they slipped off of, I had a chance to look at how different sweater styles knitted in different types of yarns stretched. Seams add structure, but so does fabric density (more stitches per inch) and crimpy wools with memory. I noticed that even seamed sweaters sometimes needed a little help in the neckline where you can imagine the weight of a sweater resting on a hanger. (I’ll show you this in a minute.)
I started reinforcing the back necklines of my handknits, and it continues to be one of my top tips for improving the fit of sweaters.
To show you how easily this extra support can be added, I pulled a sweater from my collection that didn’t have a reinforced neckline (yet) to demo step by step. My go-to technique is a simple crochet chain that can be a nearly invisible addition when worked in the same yarn as the sweater, or it can be a way to add a fun pop of color.
Whether you try securing necklines using tapes and ribbons or using my method, I hope you’ll give one of these techniques a try!
Case Study: Sagging Set-In Shoulders
Set-in shoulders typically have a scooped armhole that allows the sleeve cap to be sewn into a tailored, smooth shoulder line. The sweater shown above has seams on the tops of the shoulders as well as the armhole. Nice and secure, right? Those areas are, but when I wear the sweater, the back neck stretches. When this happens, the nicely curved back neck becomes shallow and flattens, adding several inches of length to the sleeves and creating bulges above the bust. I can see the armhole seam creeping down my arm so it no longer sits at the top of my shoulder, and it looks more like a drop shoulder.
The back of Kate's sweater on a hanger: (Left) As originally designed, this sweater has a high neck with a nice back-neck curve. (Right) As the back neck stretches, the back-neck curve becomes long and shallow, allowing the shoulders to slip lower on the arms. This changes the fit in both sleeves and bust.
This is such an easy fix! All you need is:
- 10 minutes
- A few feet of yarn
- Crochet hook
[PAYWALL]
How to Do It
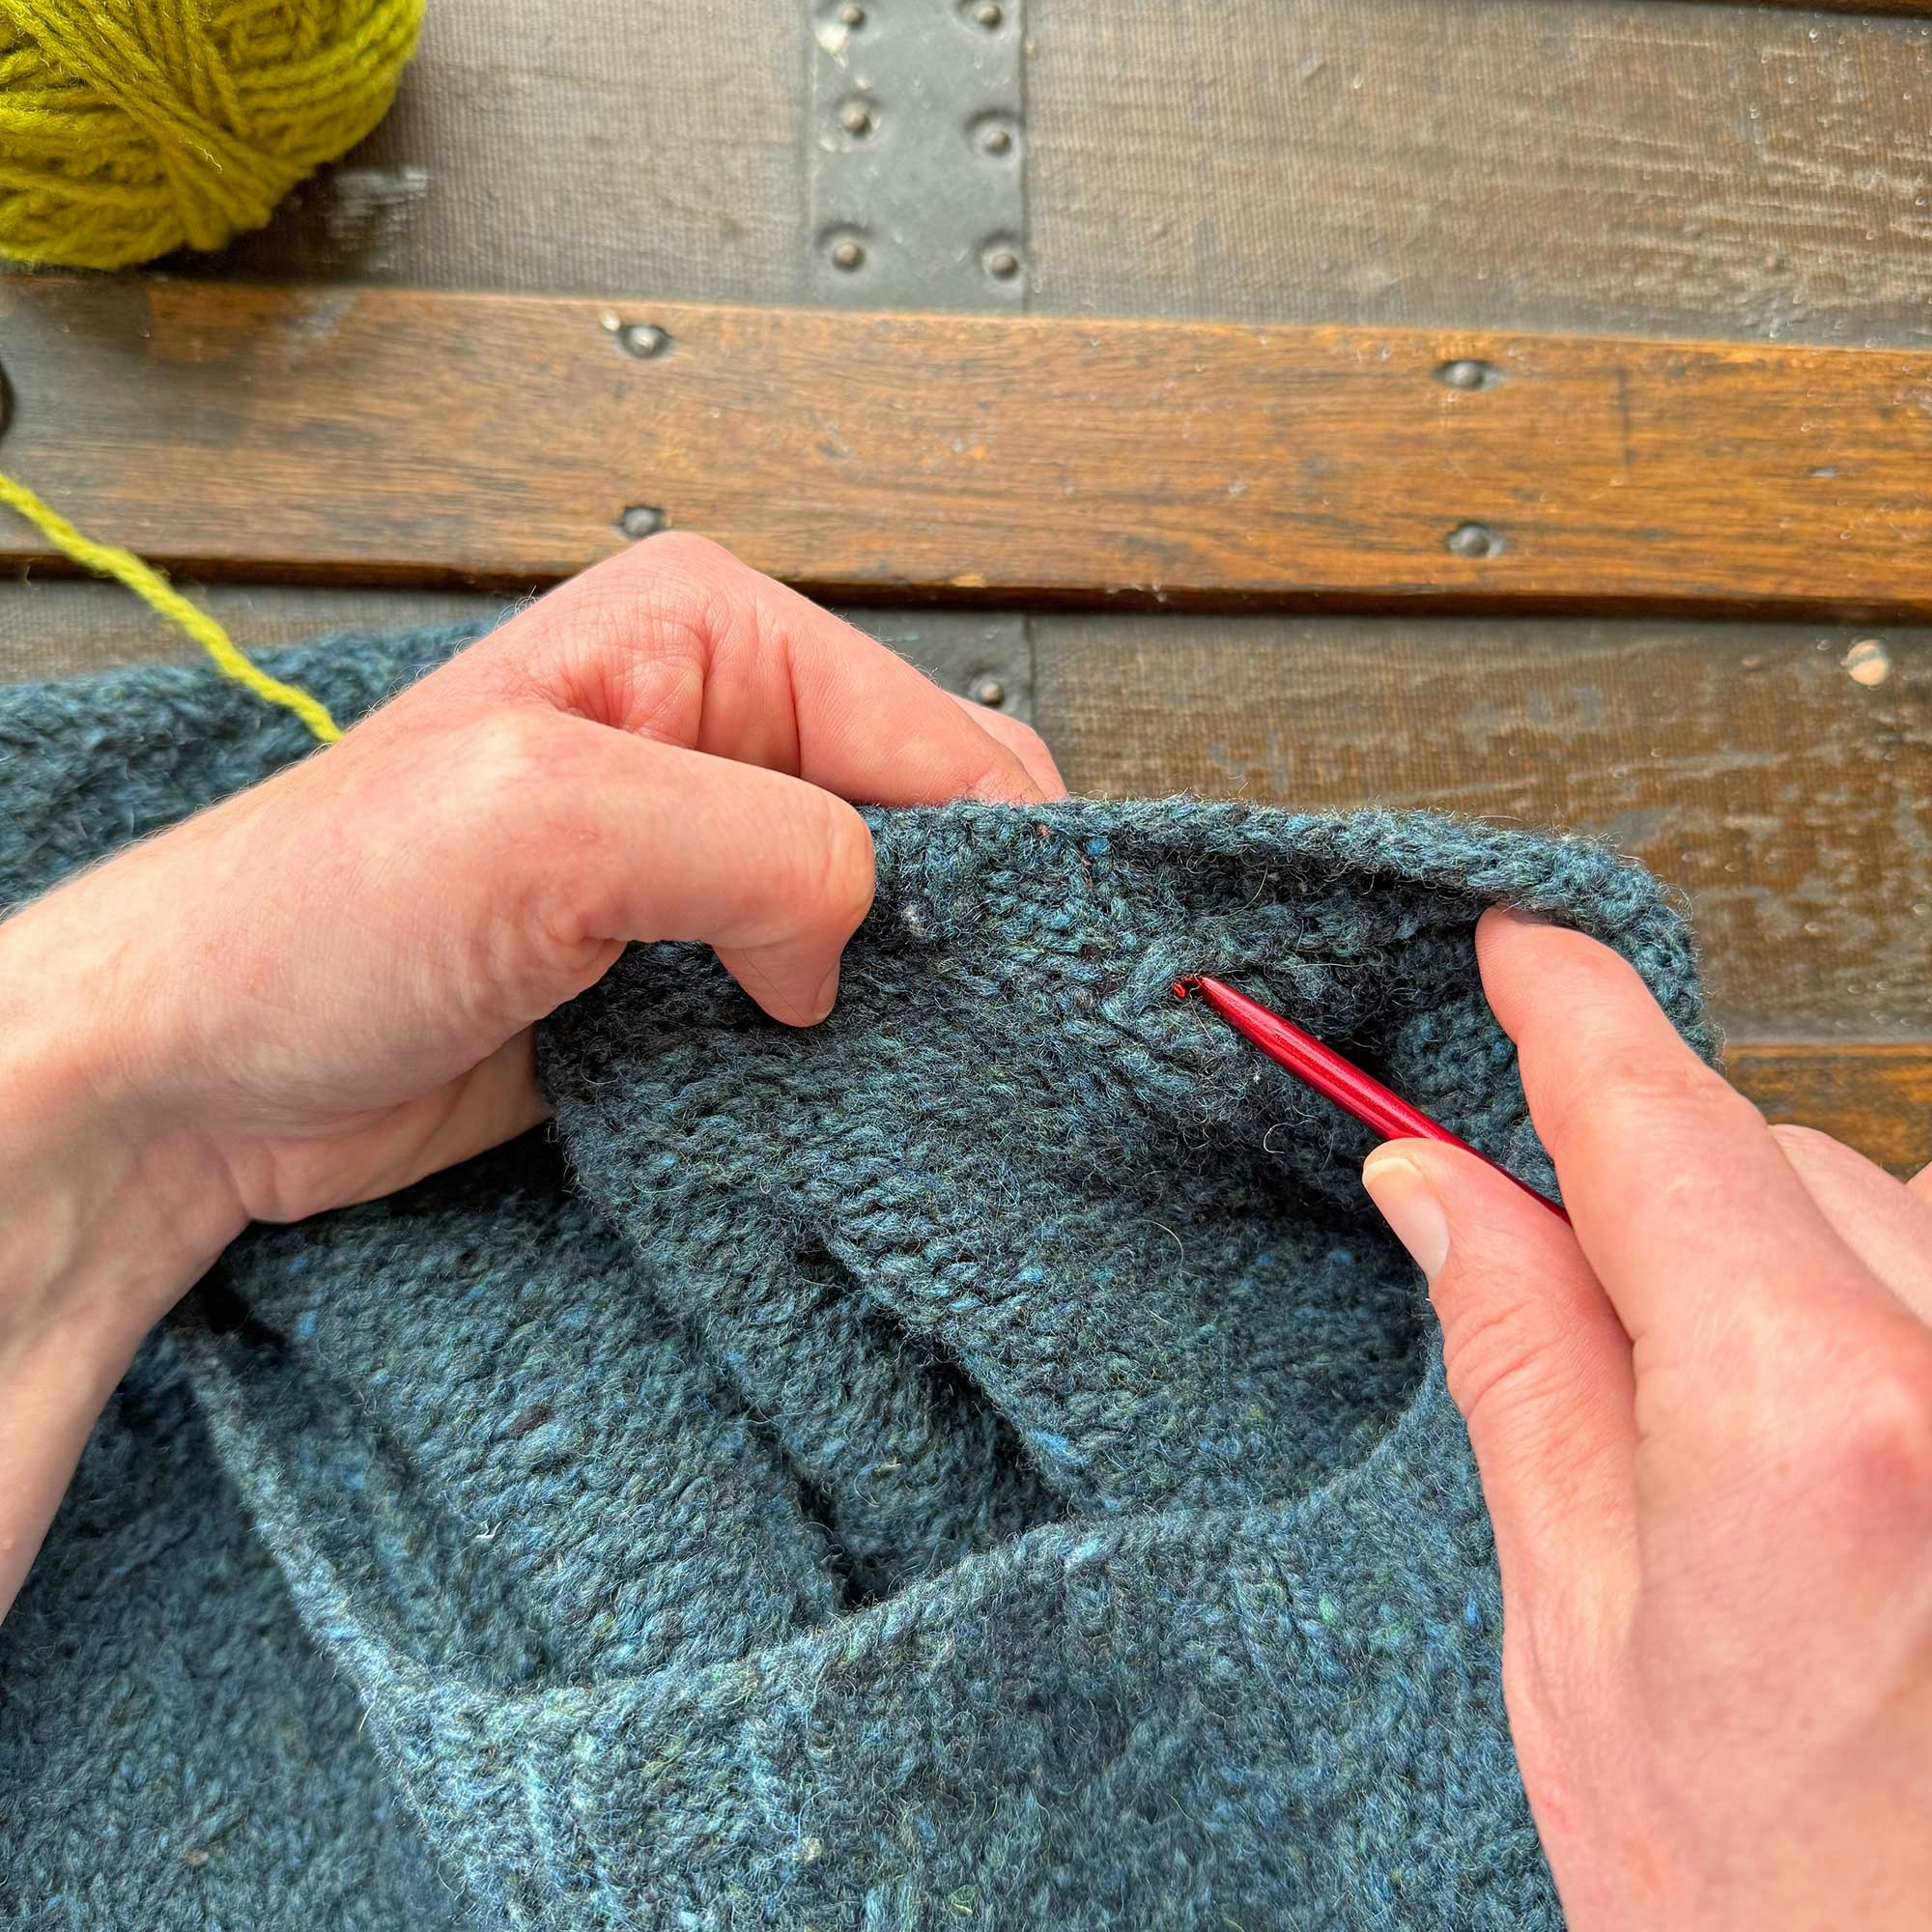
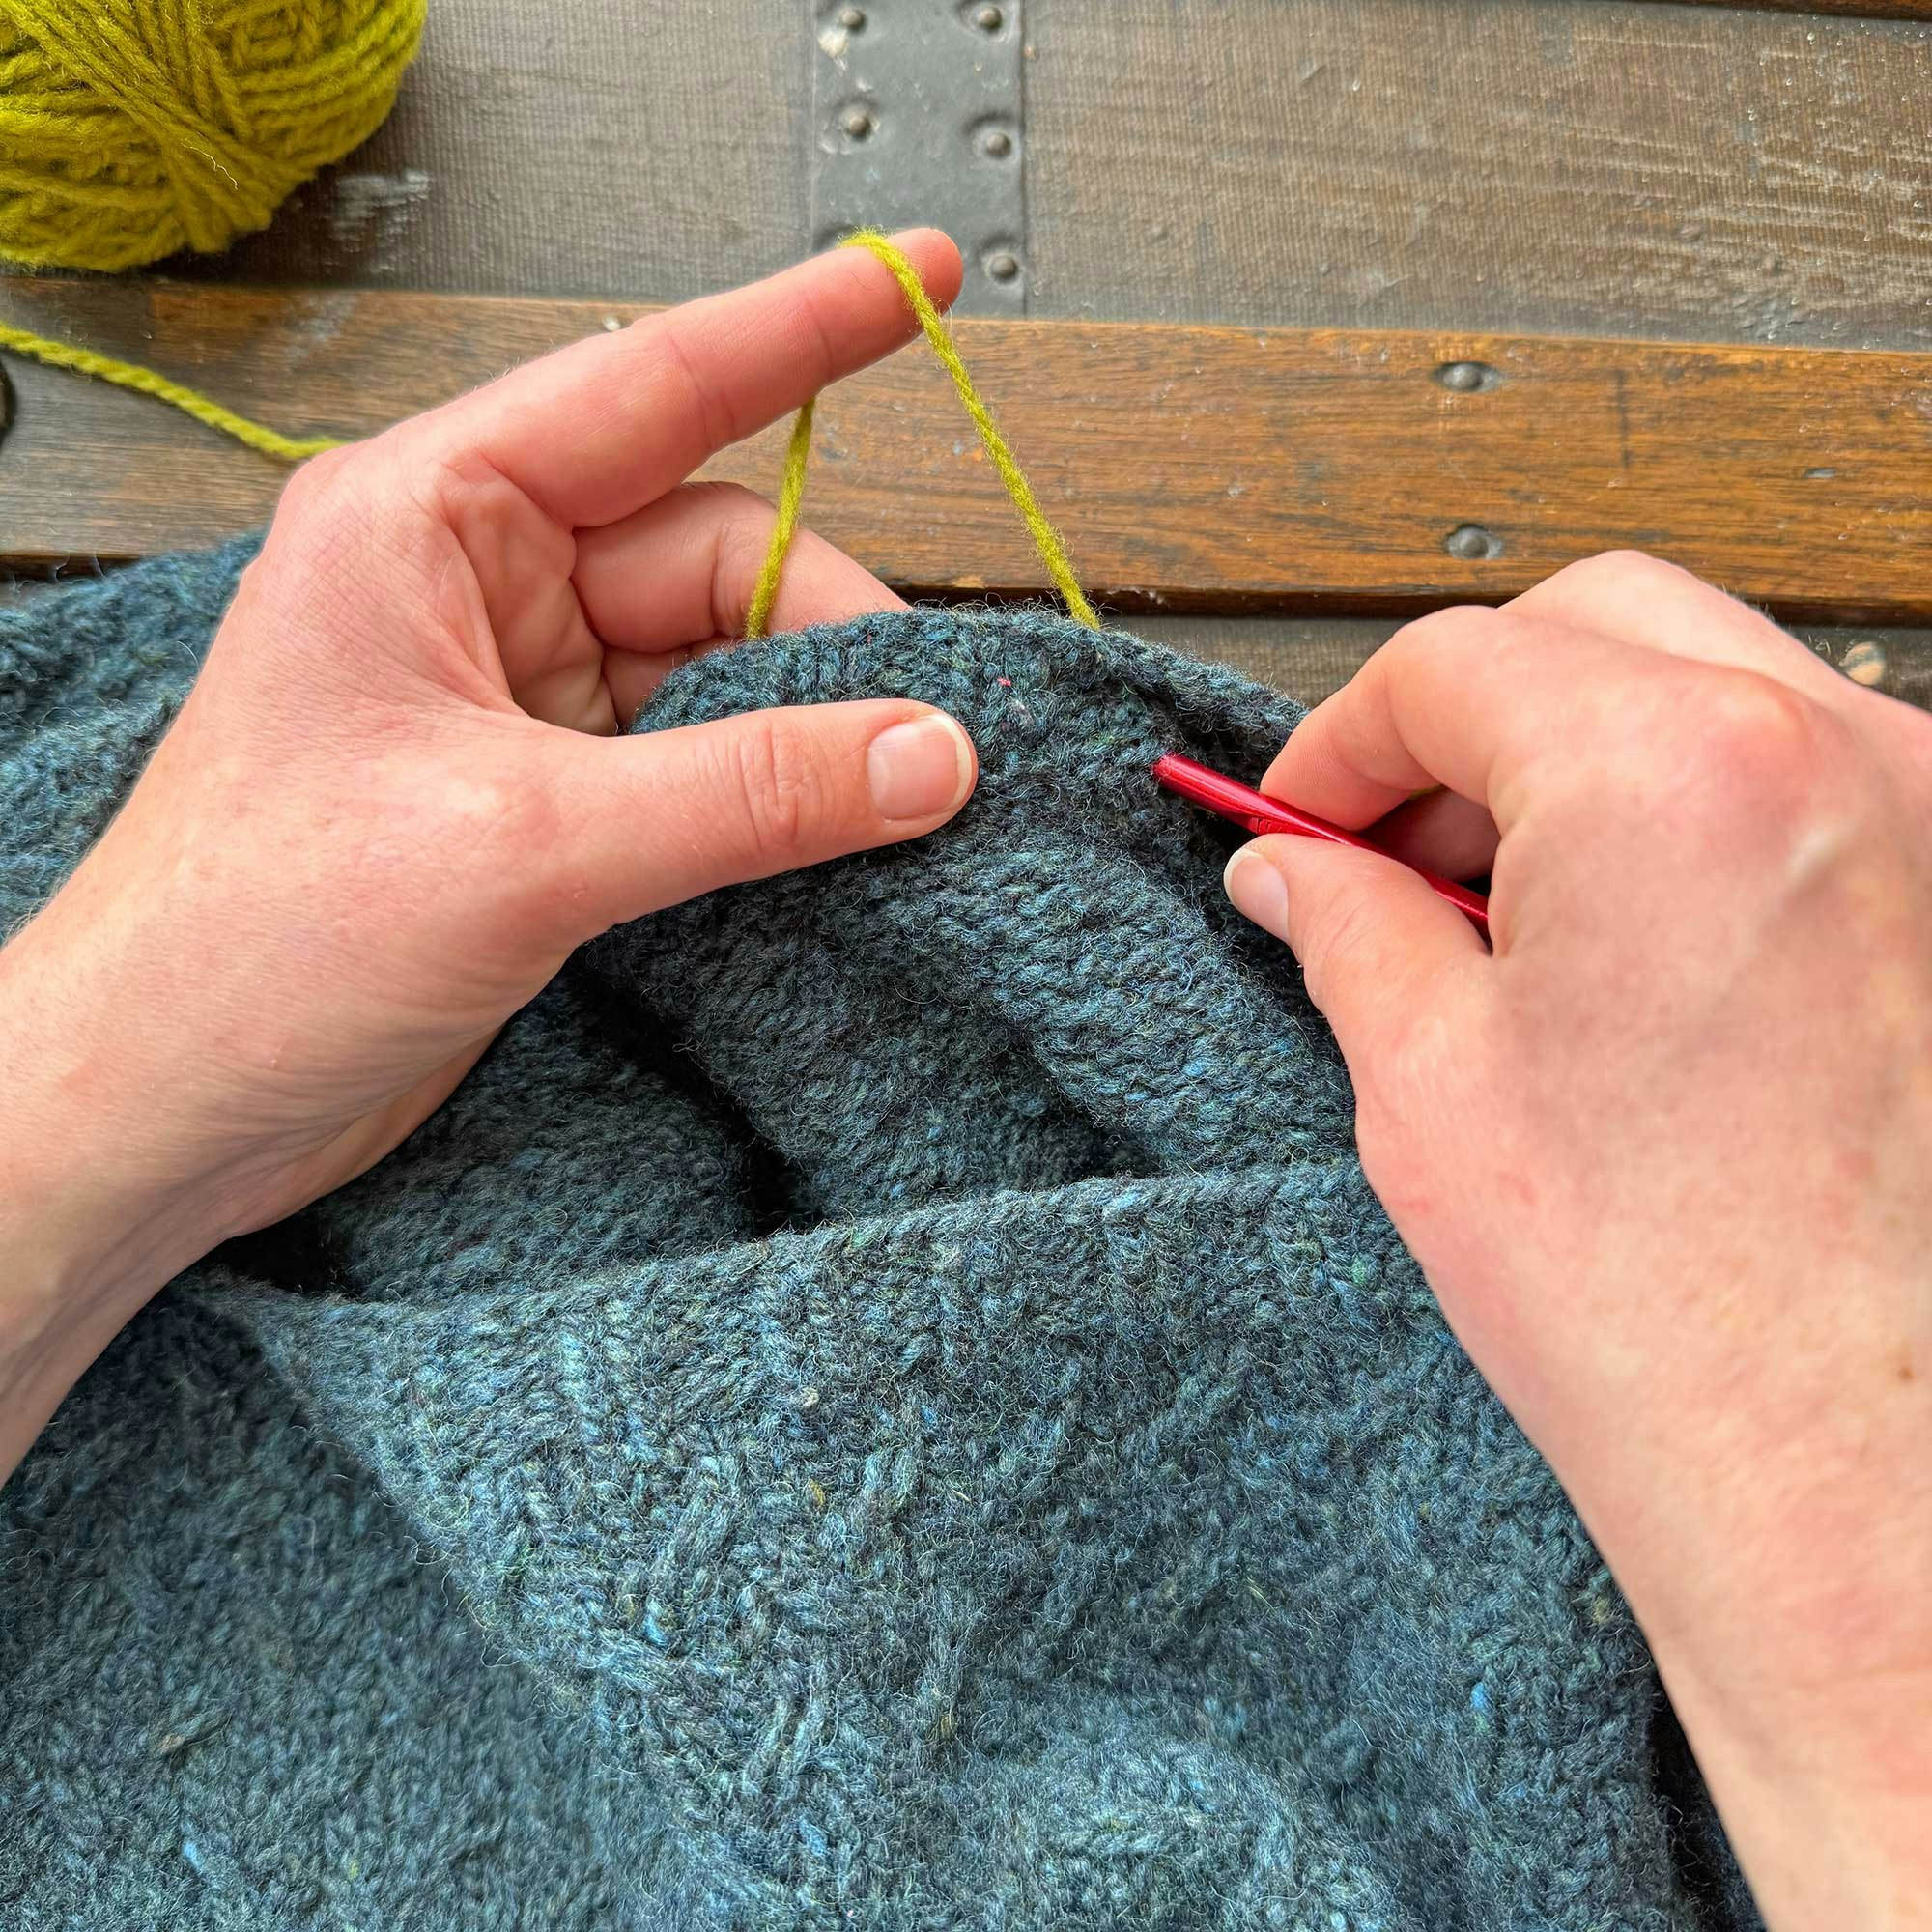
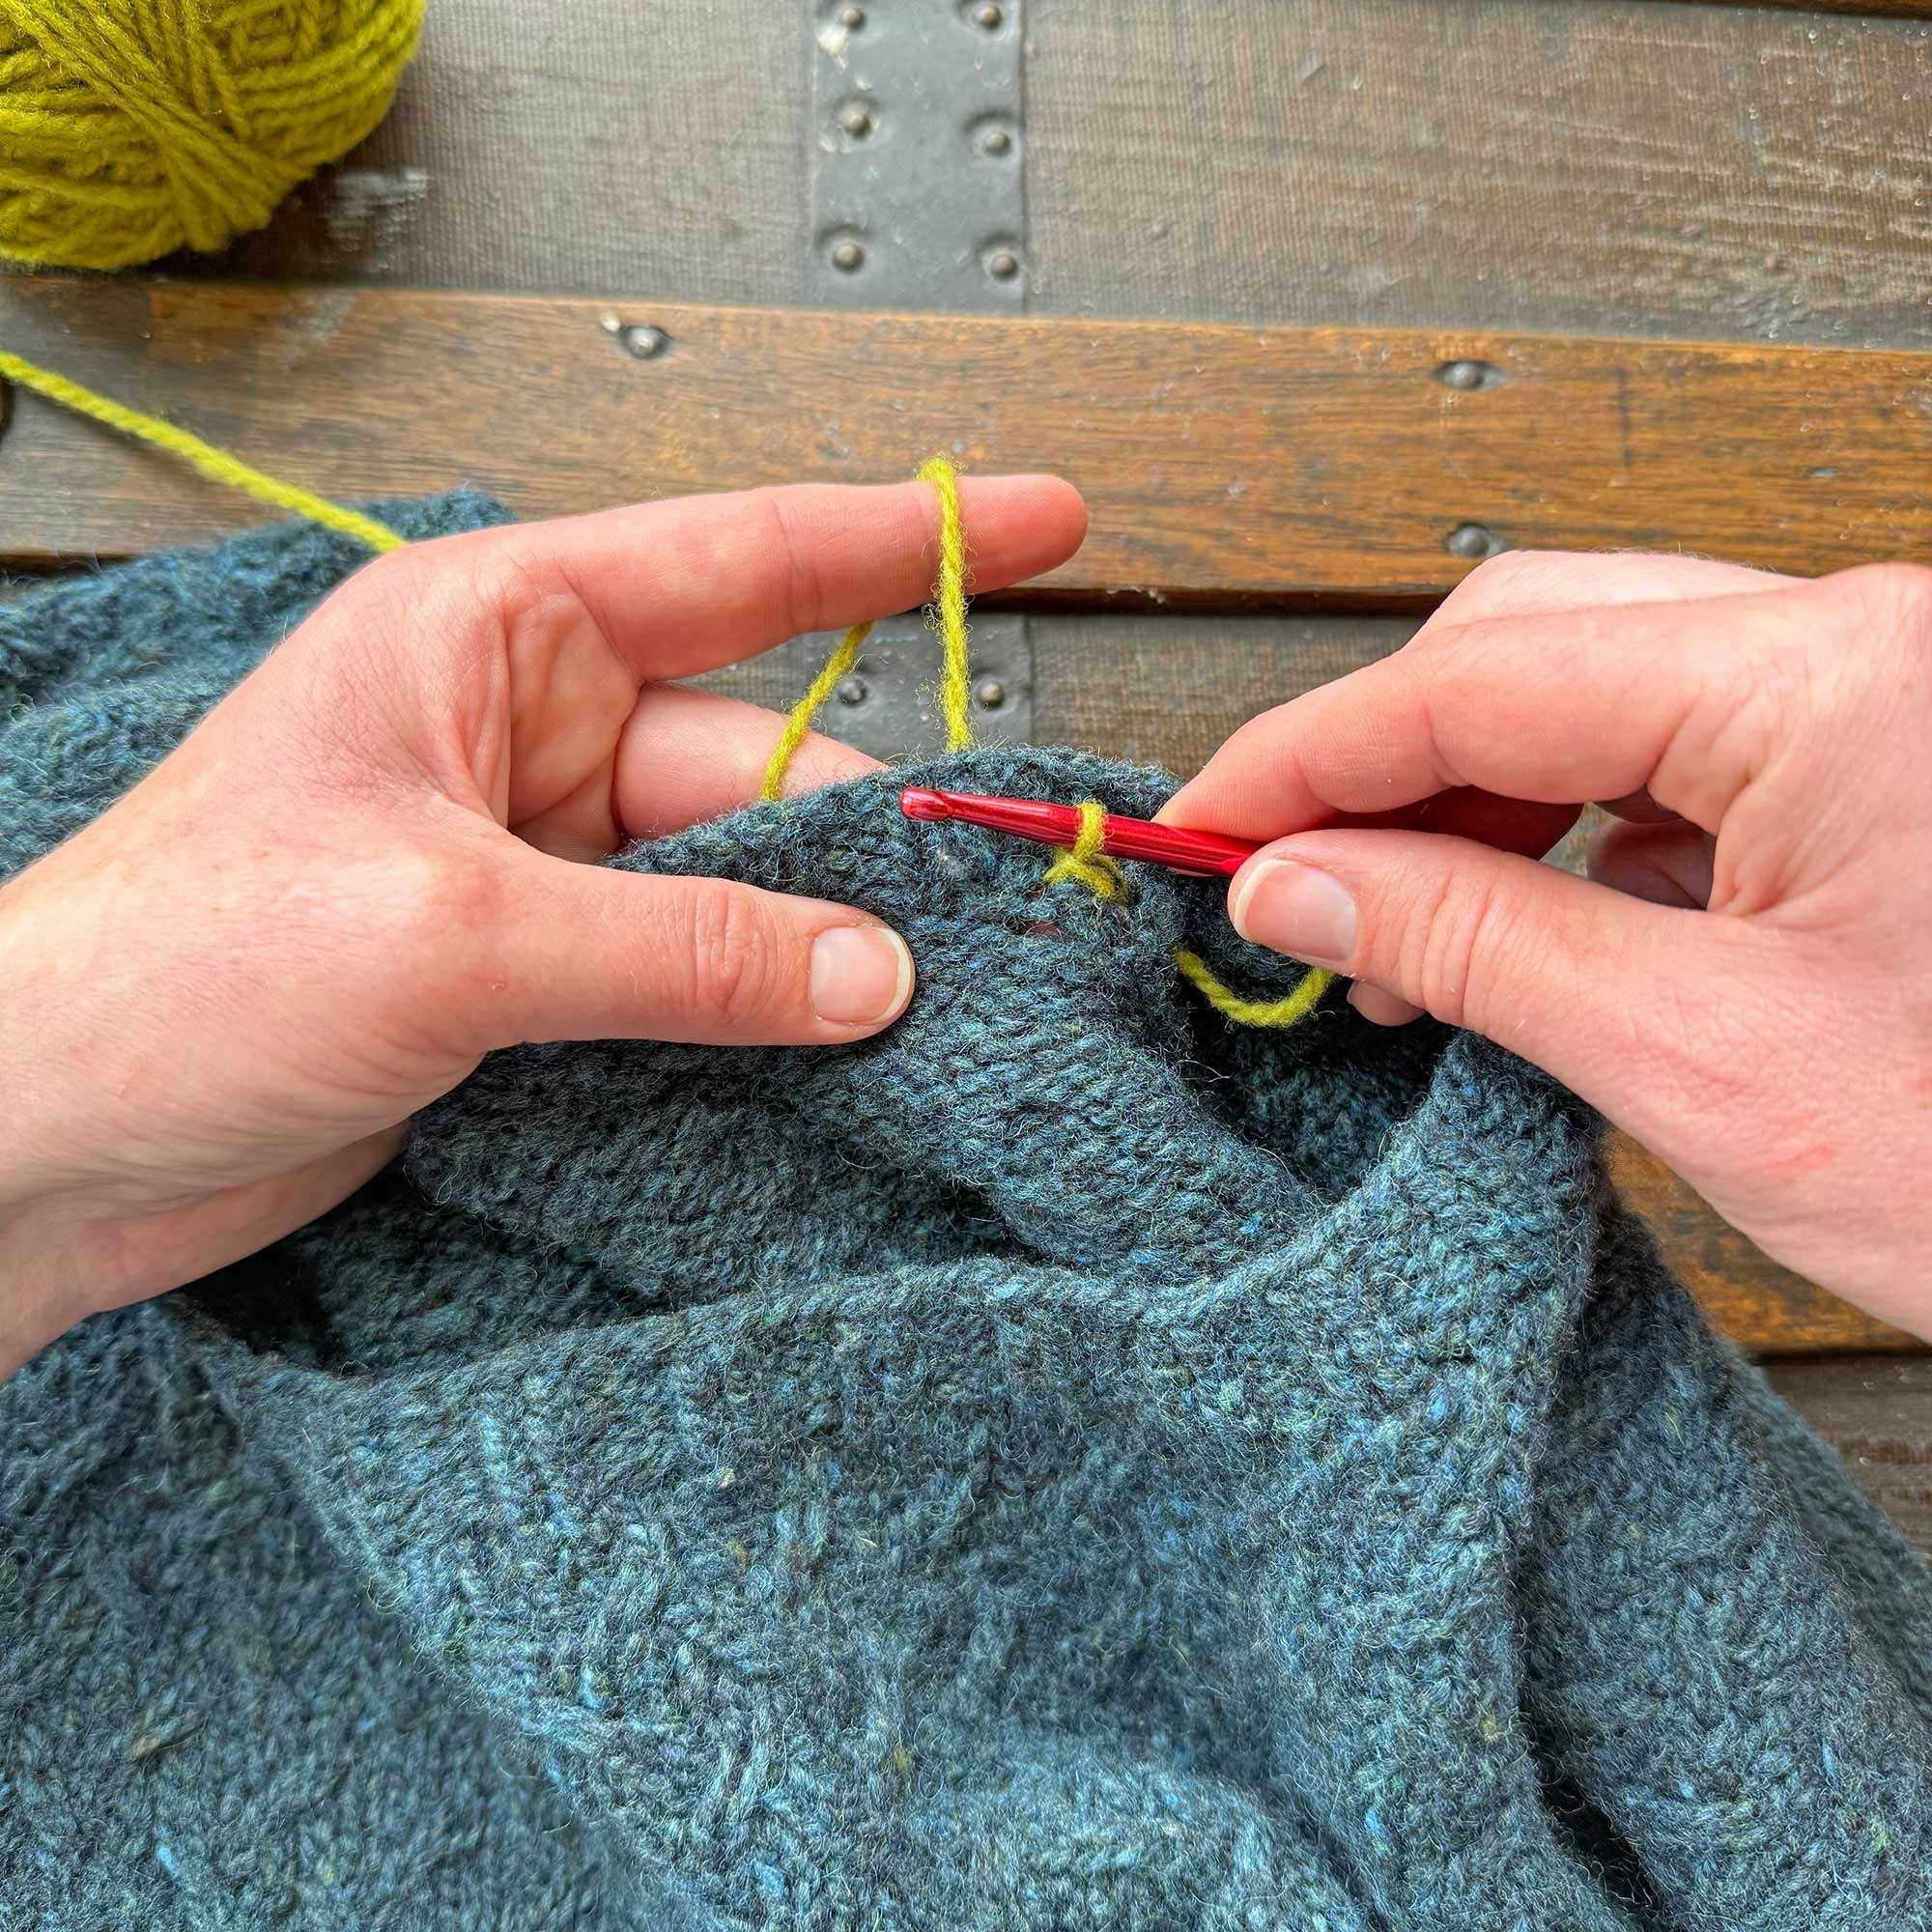
Note: I am right handed, so I am holding the hook in my right hand and working from right to left. Simply reverse these instructions if that feels more comfortable! We will be working on the inside (WS) of the garment. I usually do this as shown with the sweater turned right side out and working the WS of the back neck. You could turn the sweater inside out if if you prefer.
Step 1: On the WS of the garment, insert the hook just below the end of the shoulder seam from front to back.
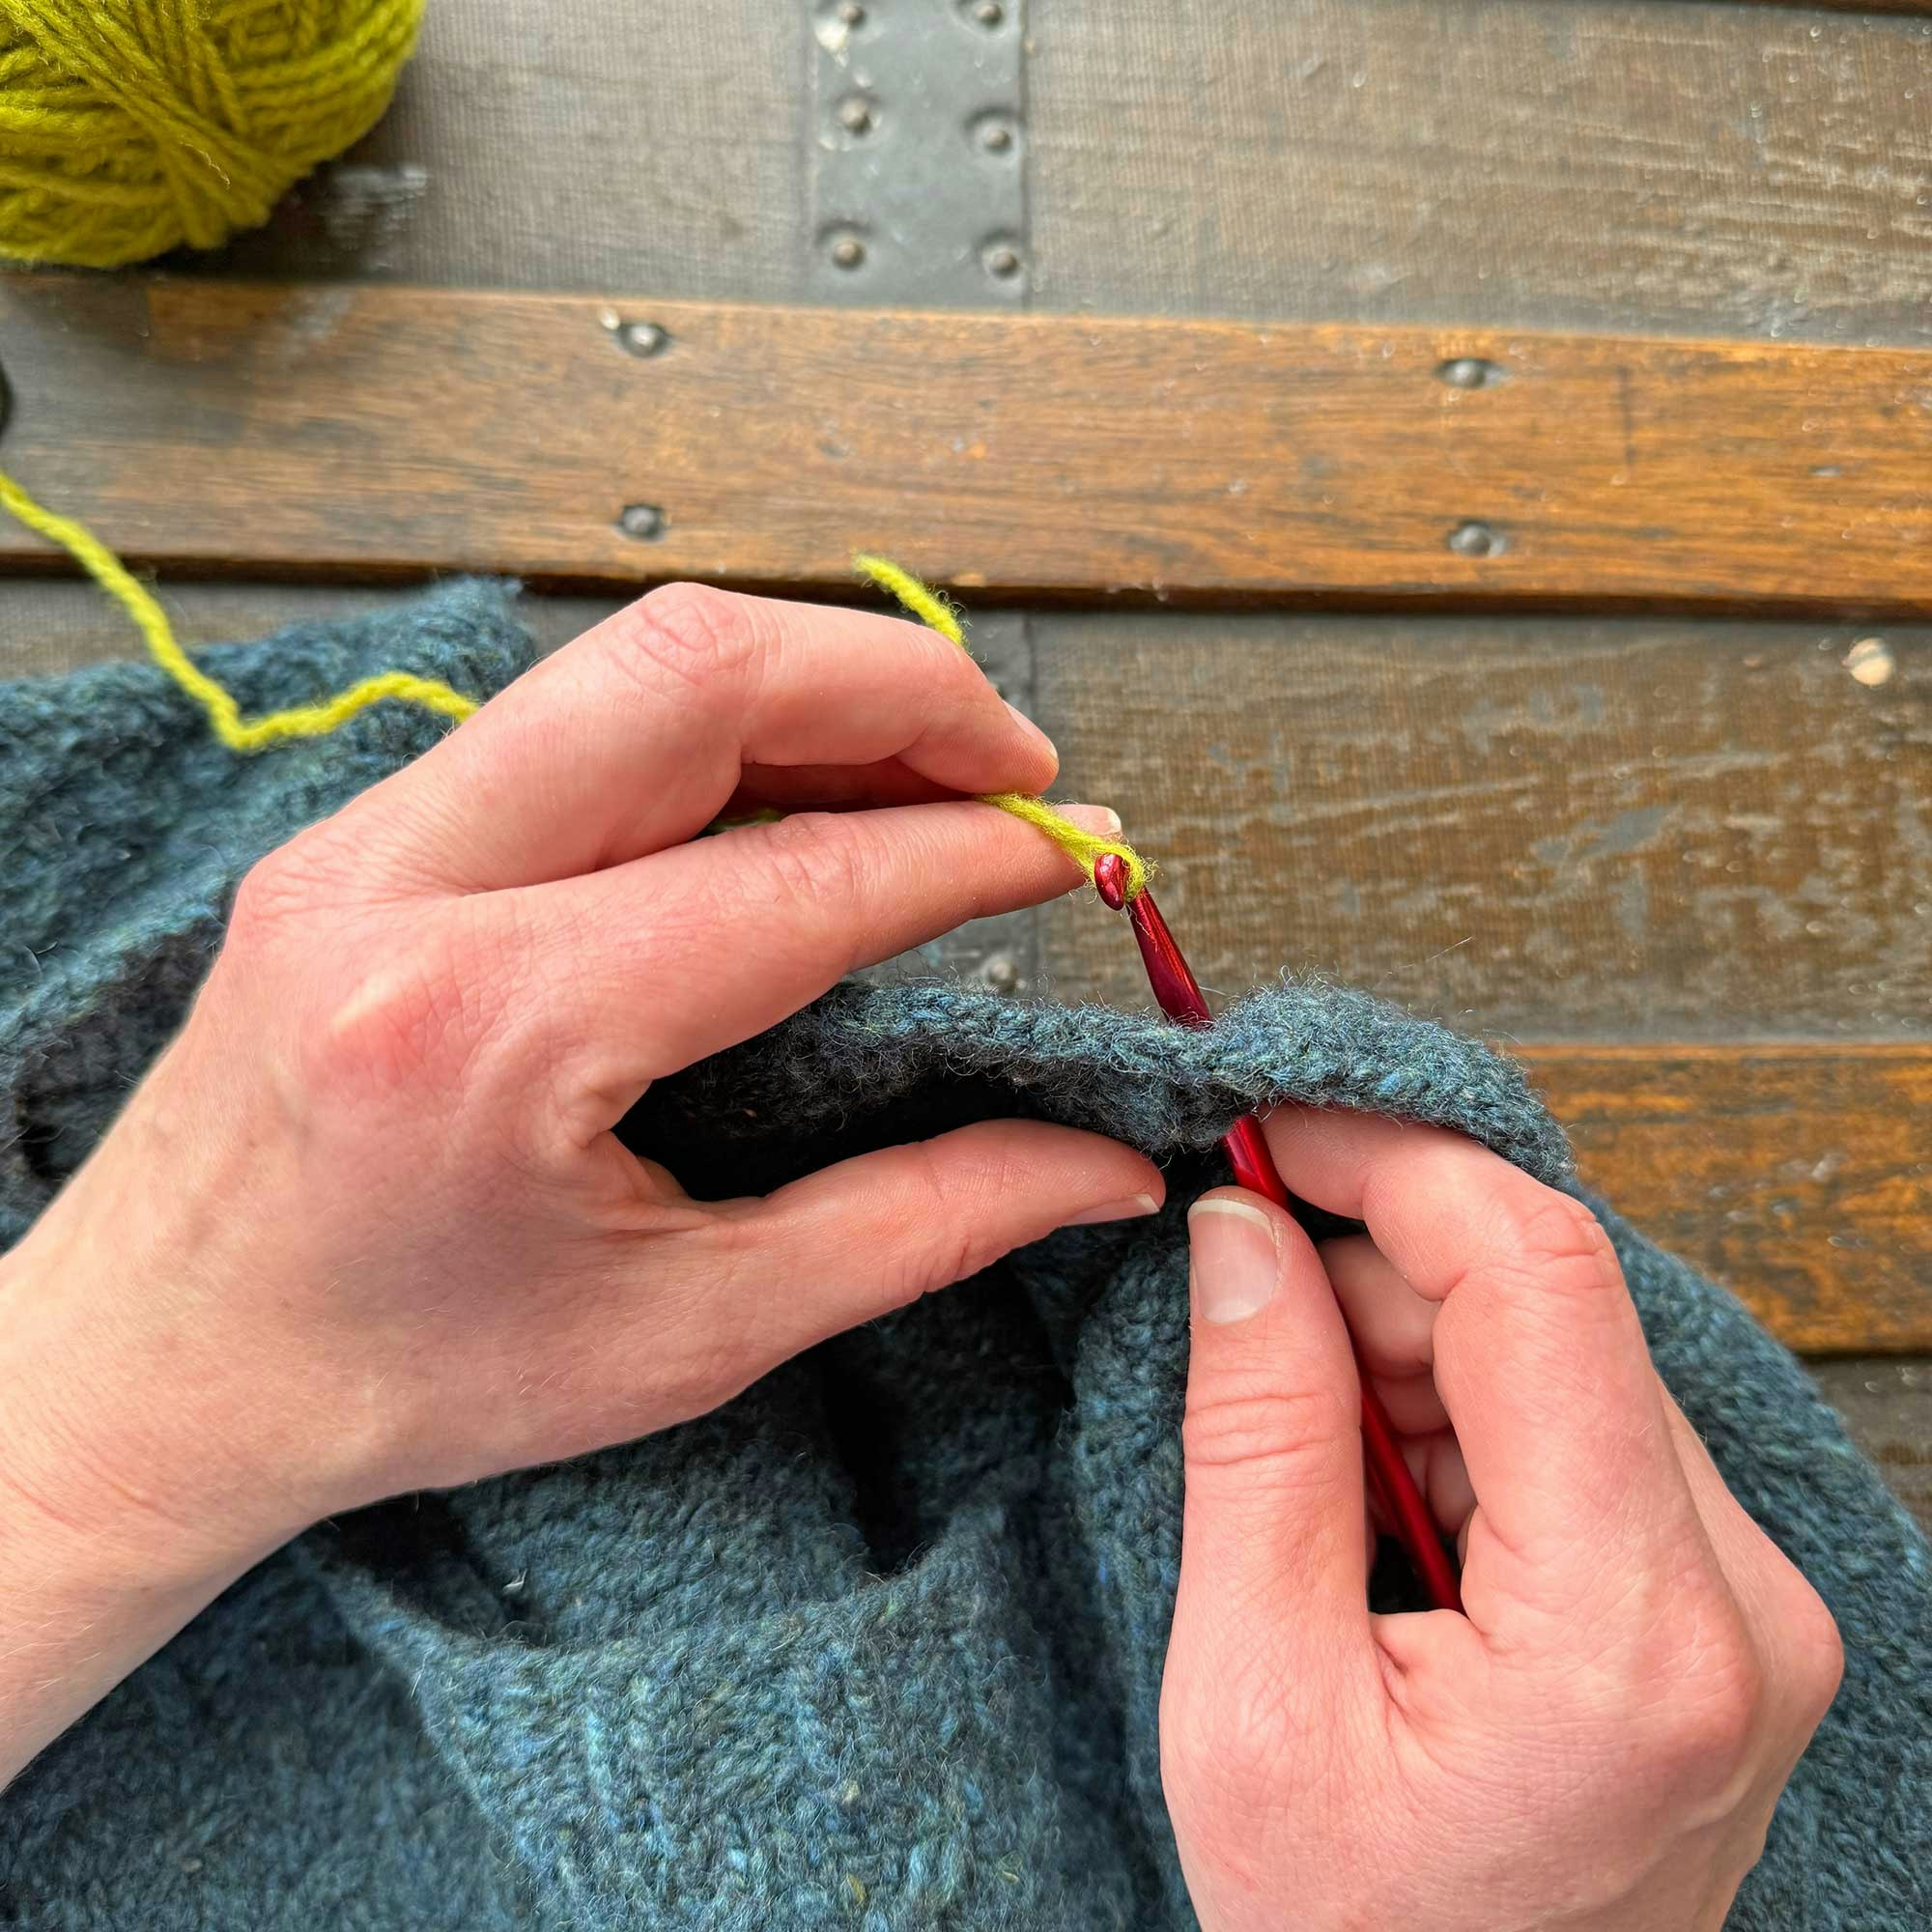
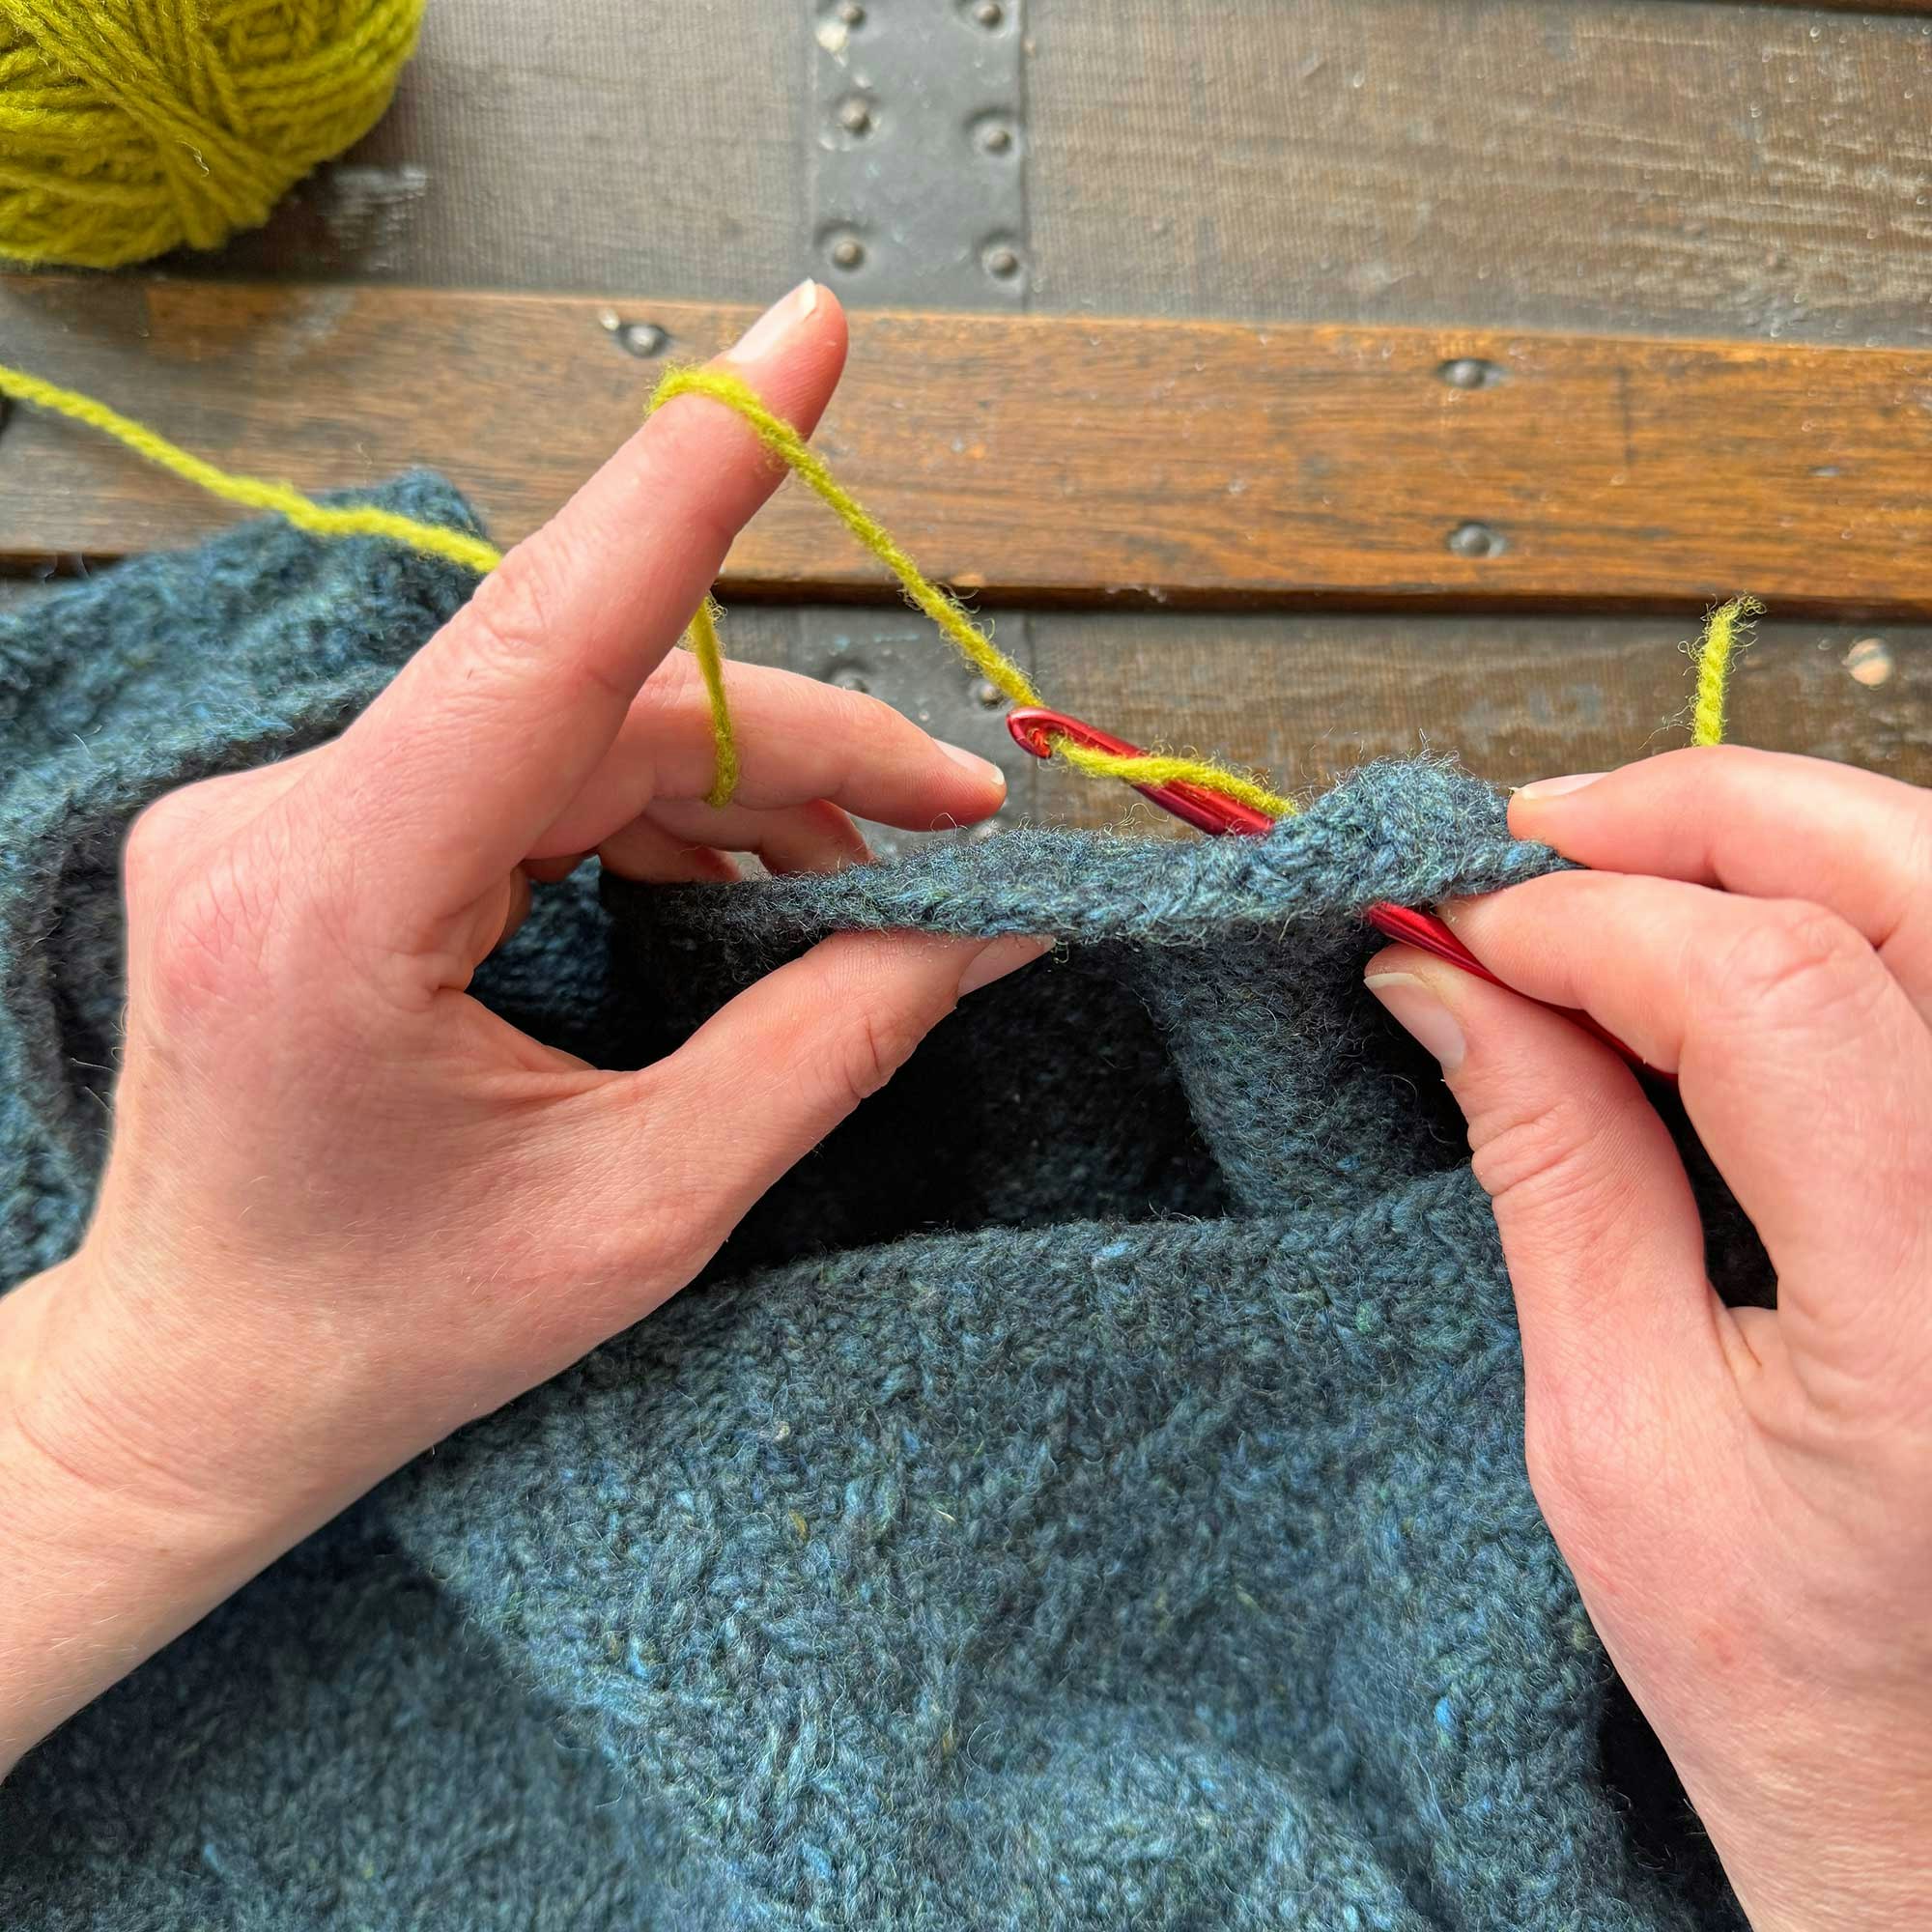
Step 2: Holding the yarn in the back of the work, wrap the yarn around the hook and pull through to the inside of the garment.
Step 3: You now have a tail on the WS of the garment that you can weave in at the end.
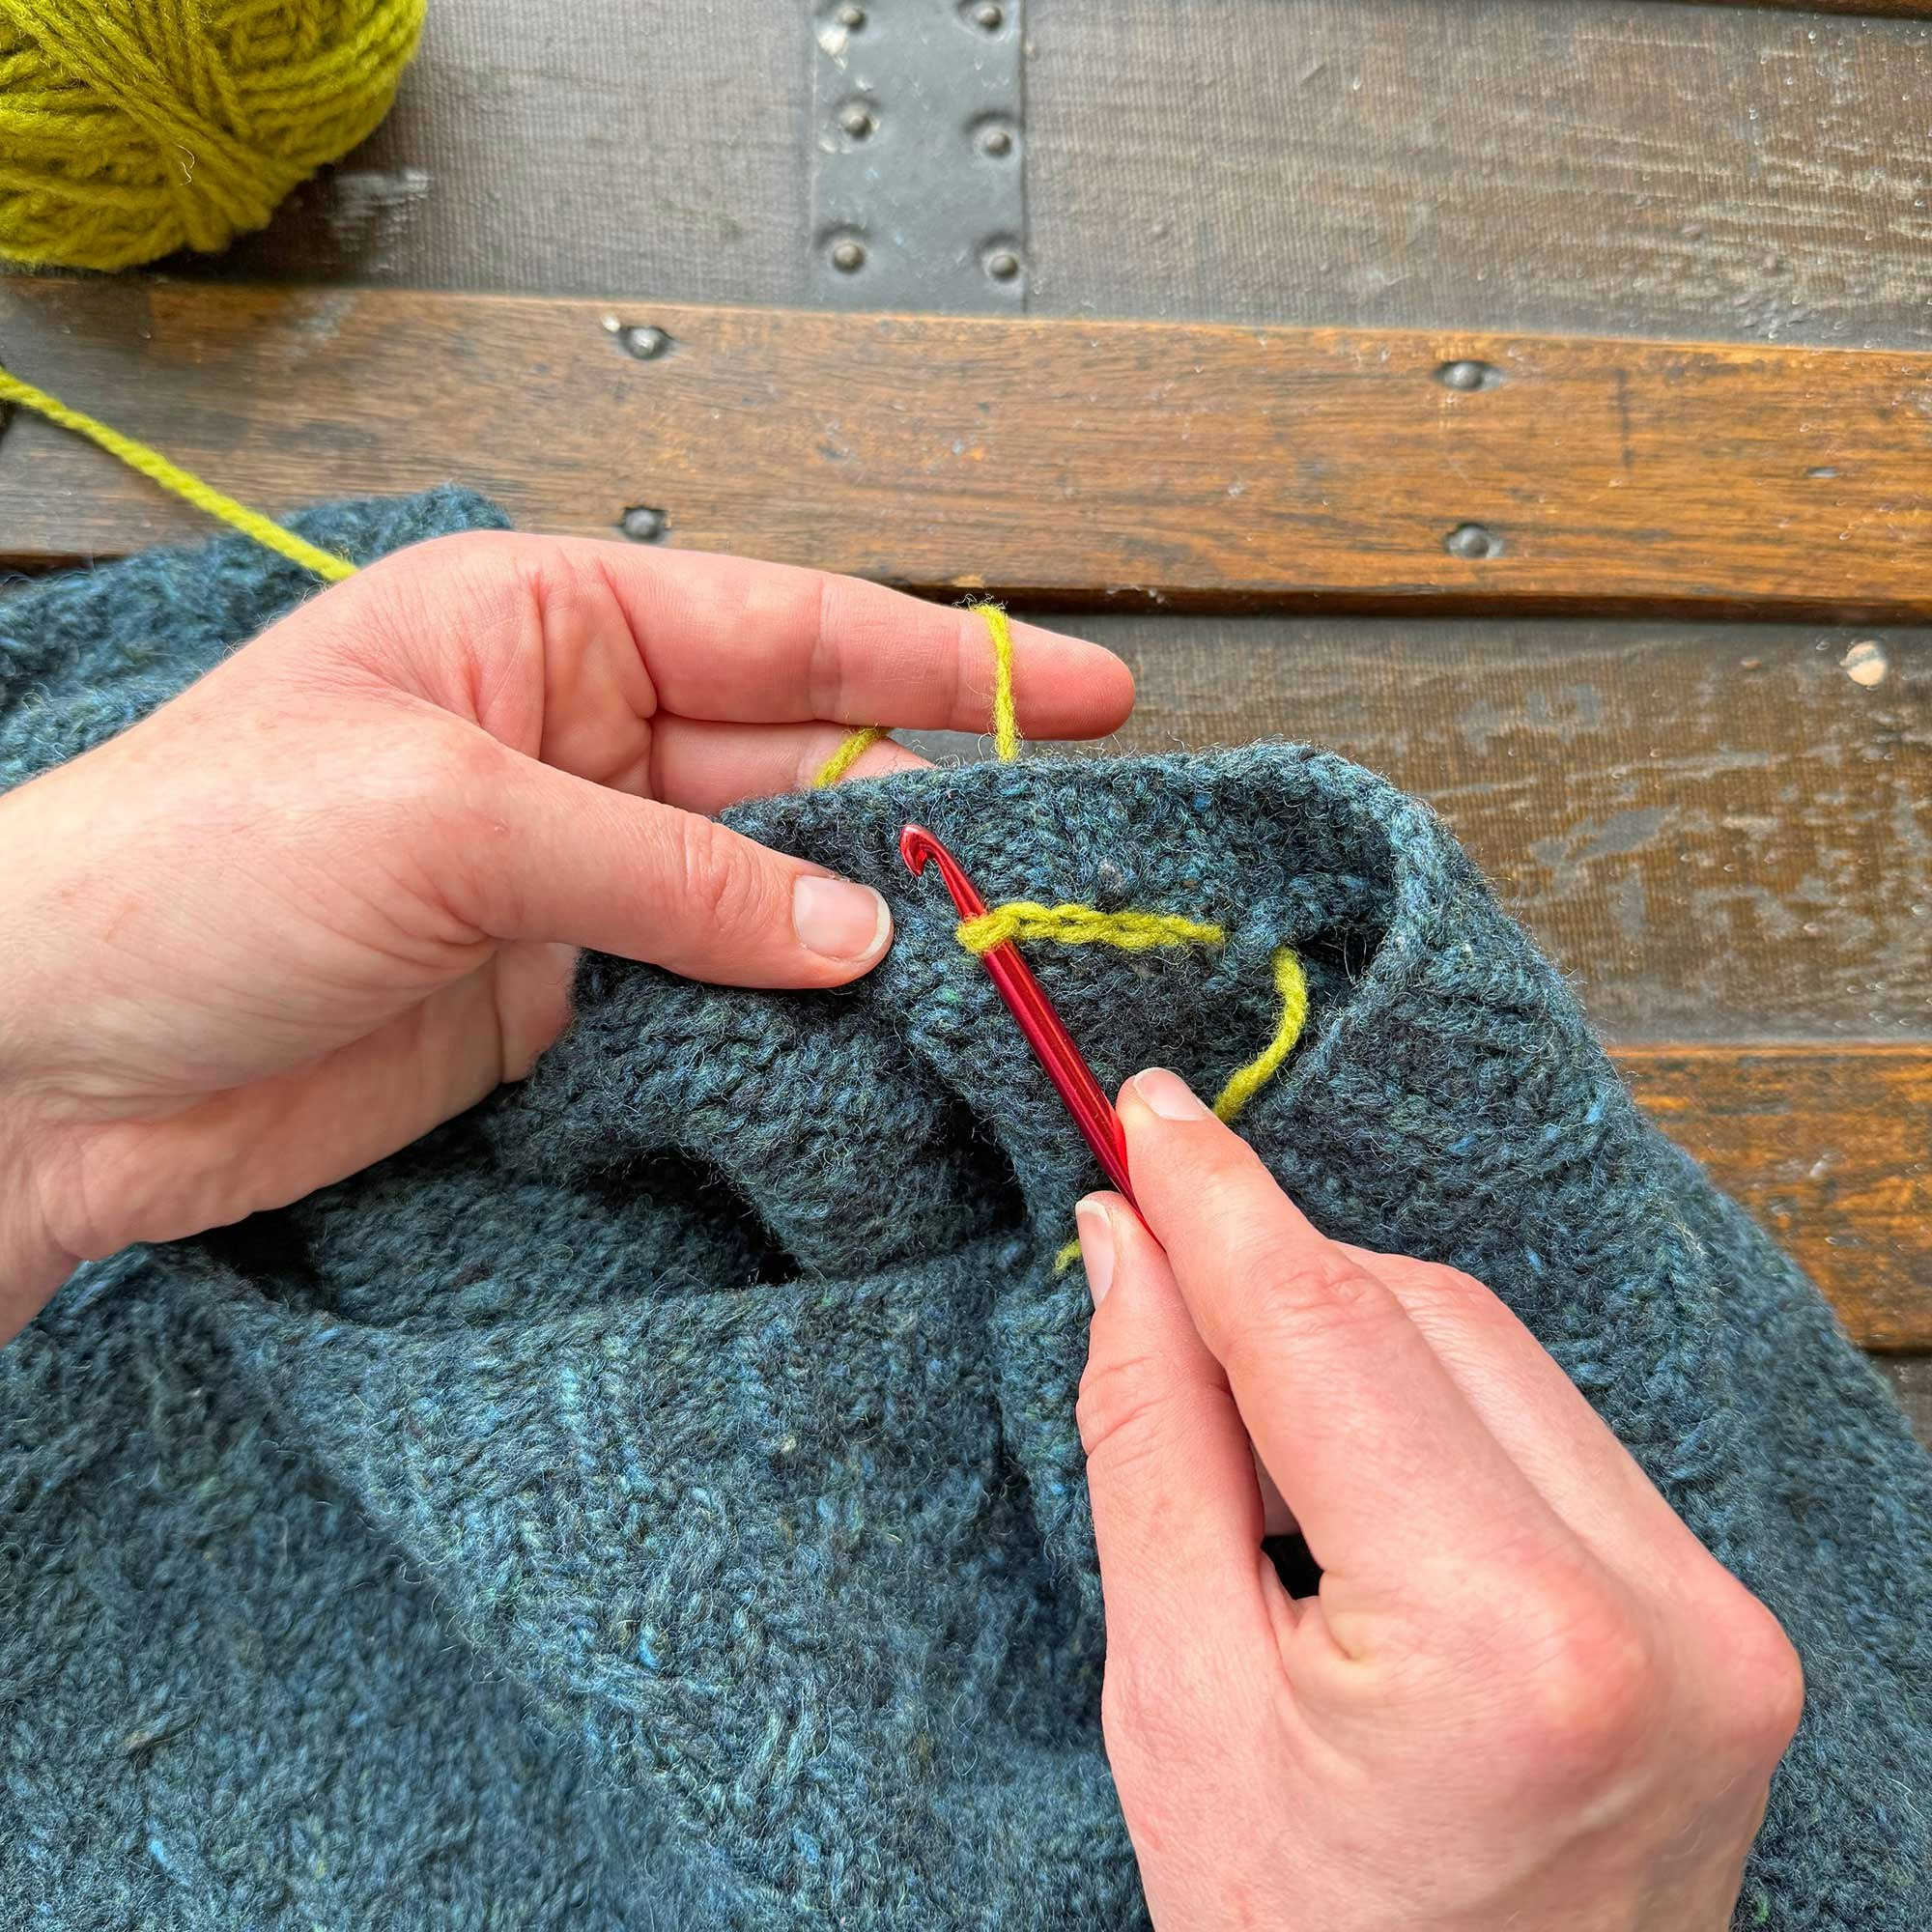
Step 4: Insert the hook again, this time at the bottom of the neck ribbing.
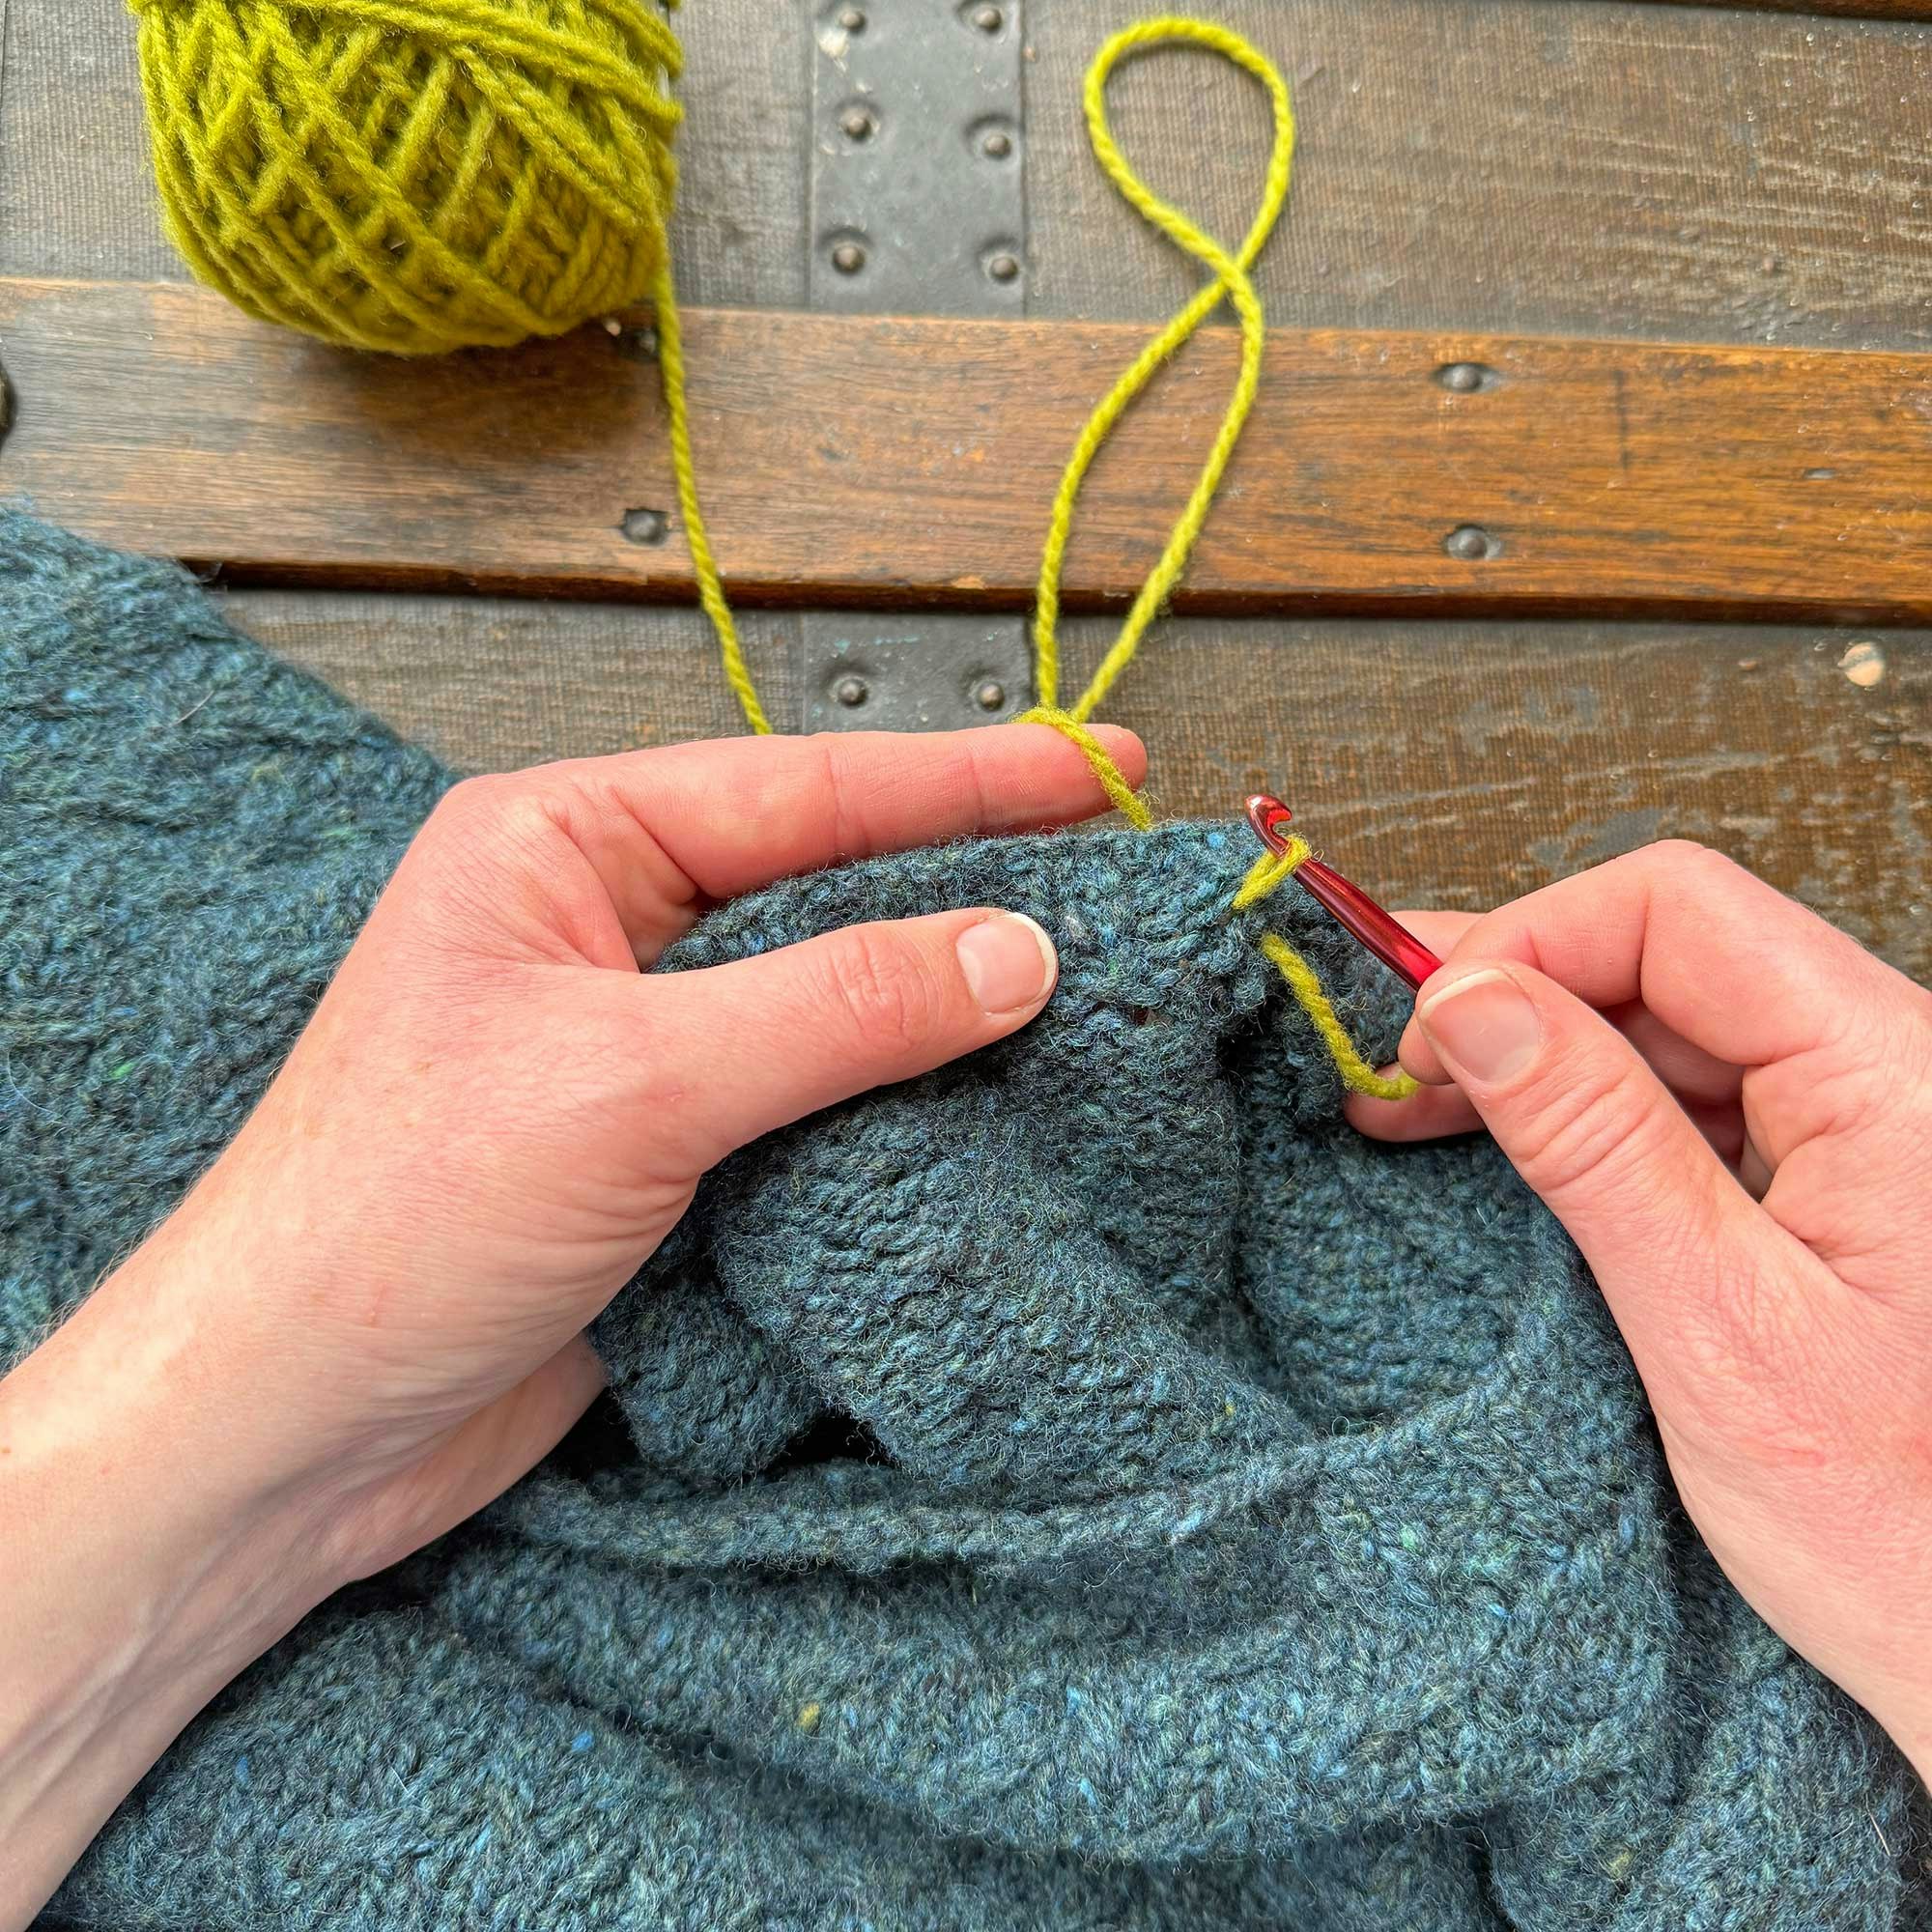
Step 5 Wrap the yarn around the hook again.
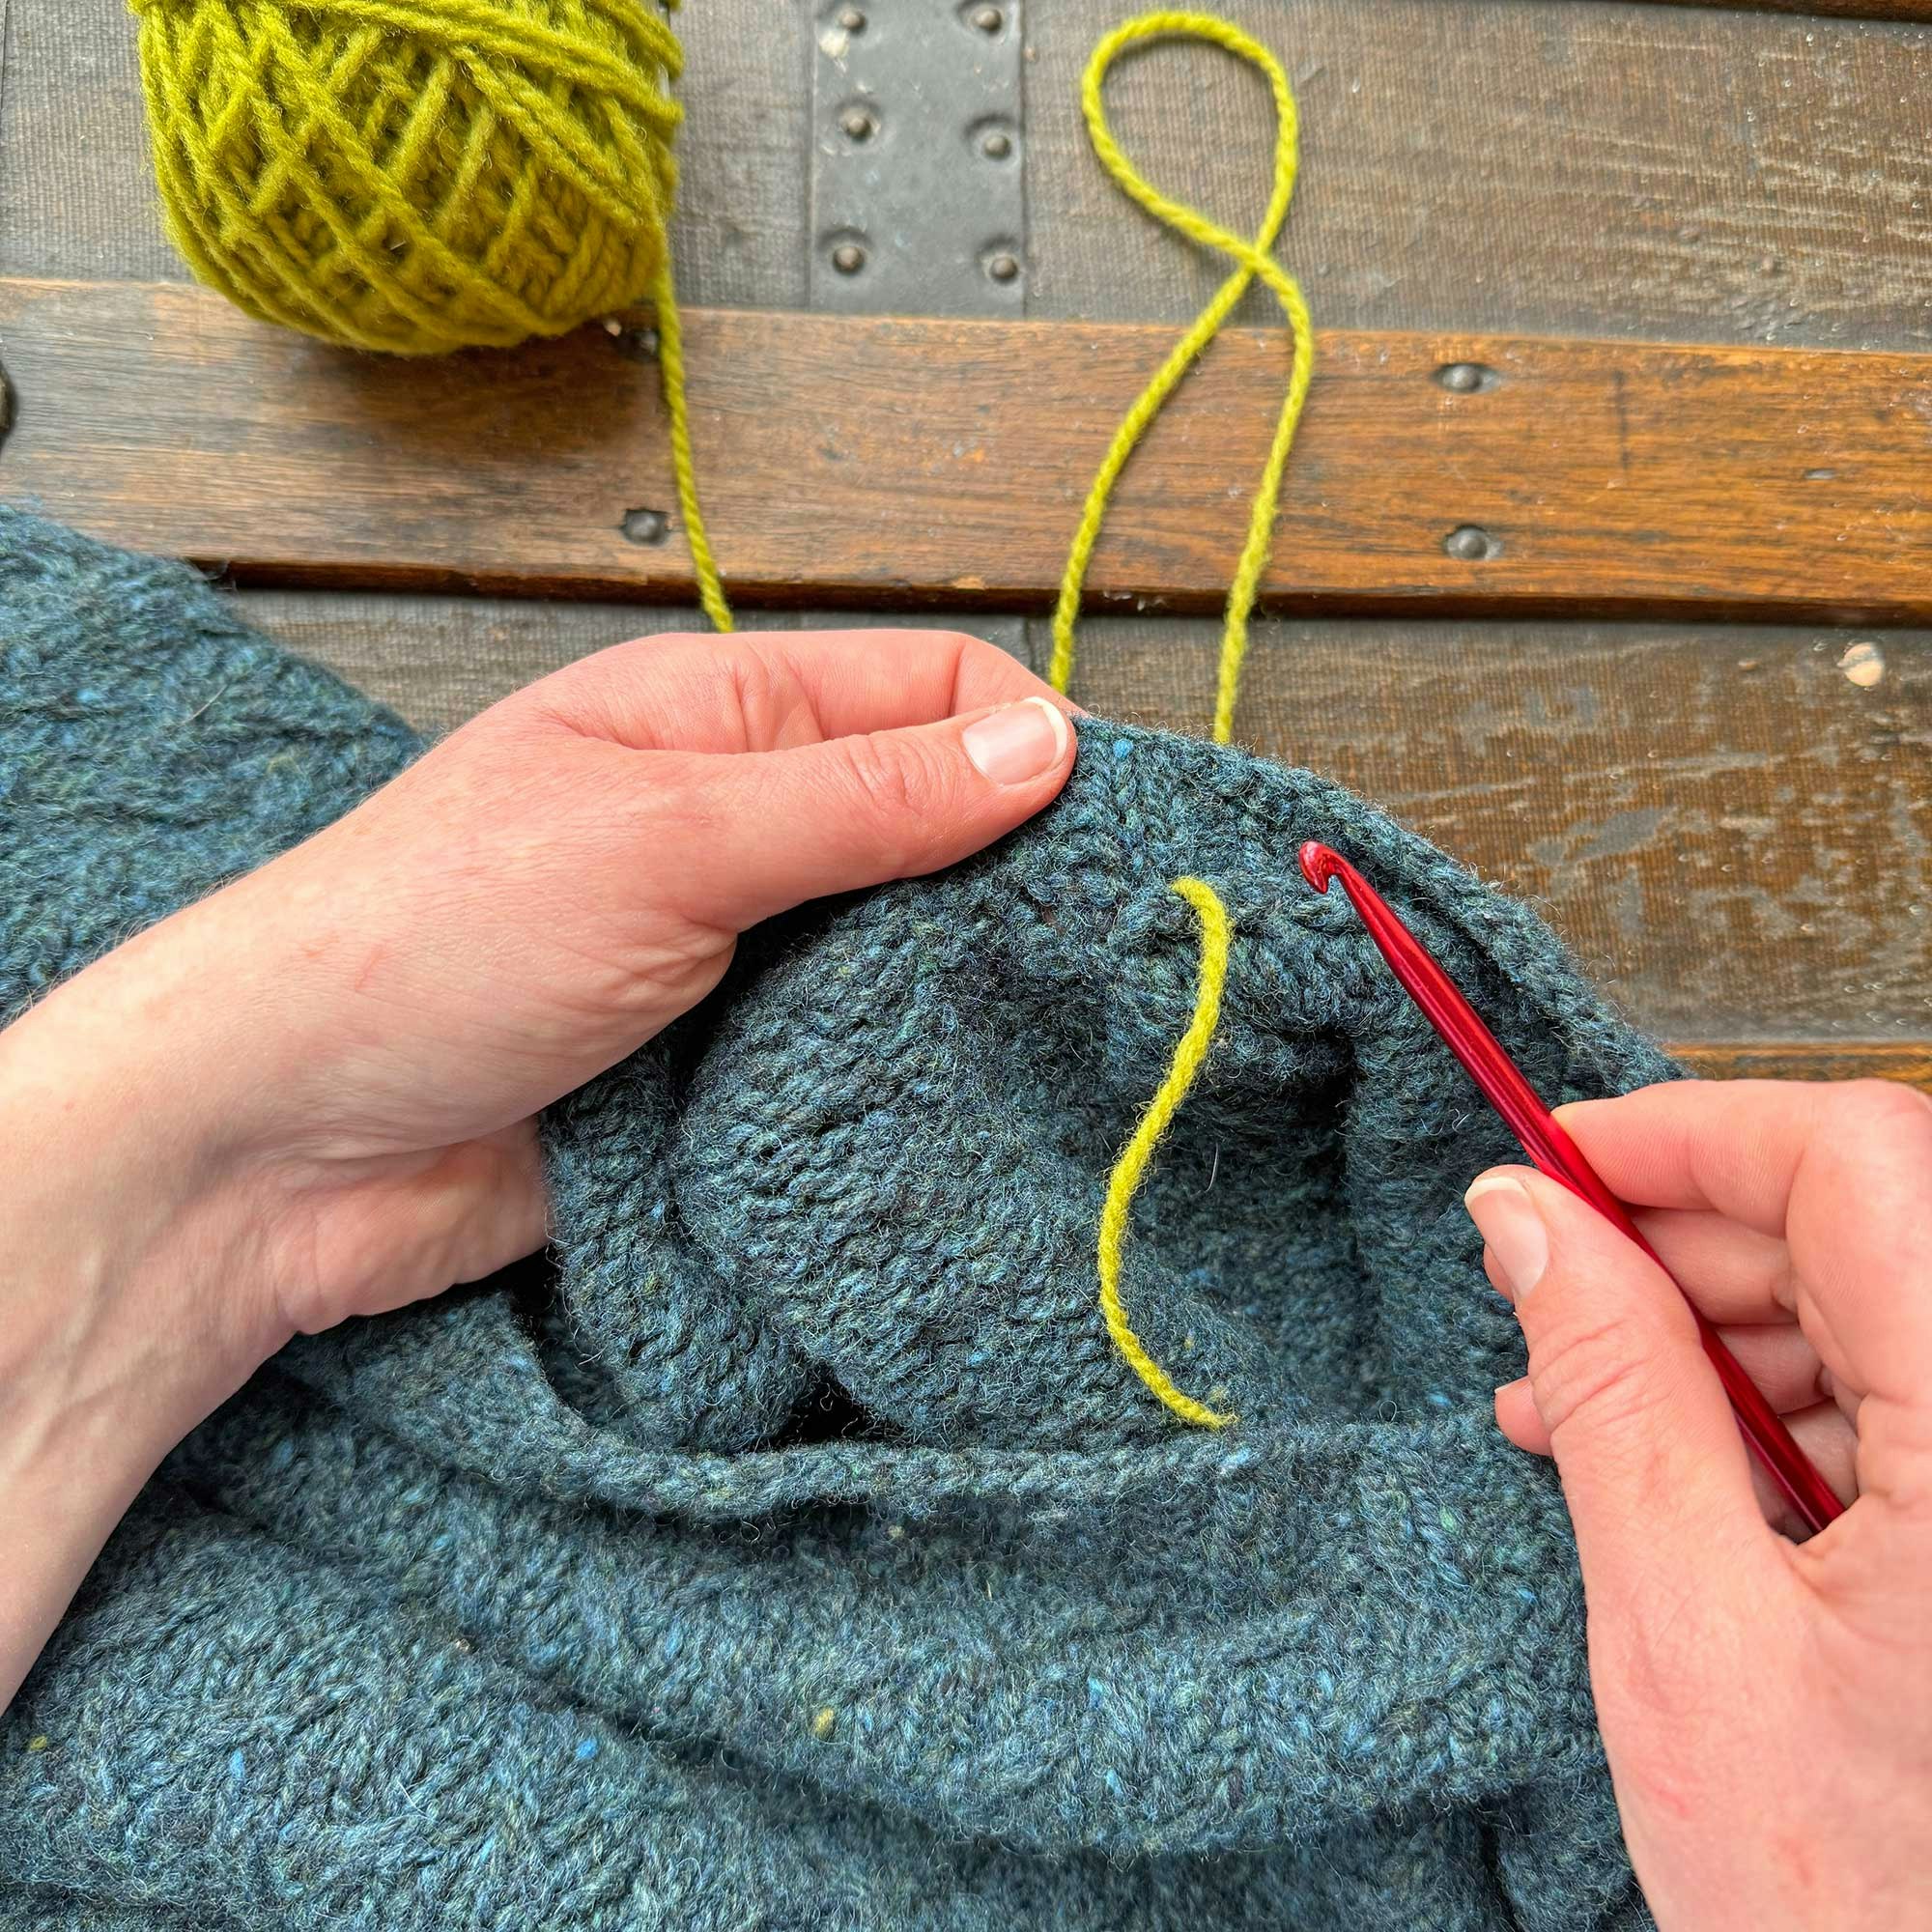
Step 6: Pull to the WS as a loop.
Step 7: Insert the hook at the base of the rib again but a stitch or two forward (to the left). Pull up a loop as before.
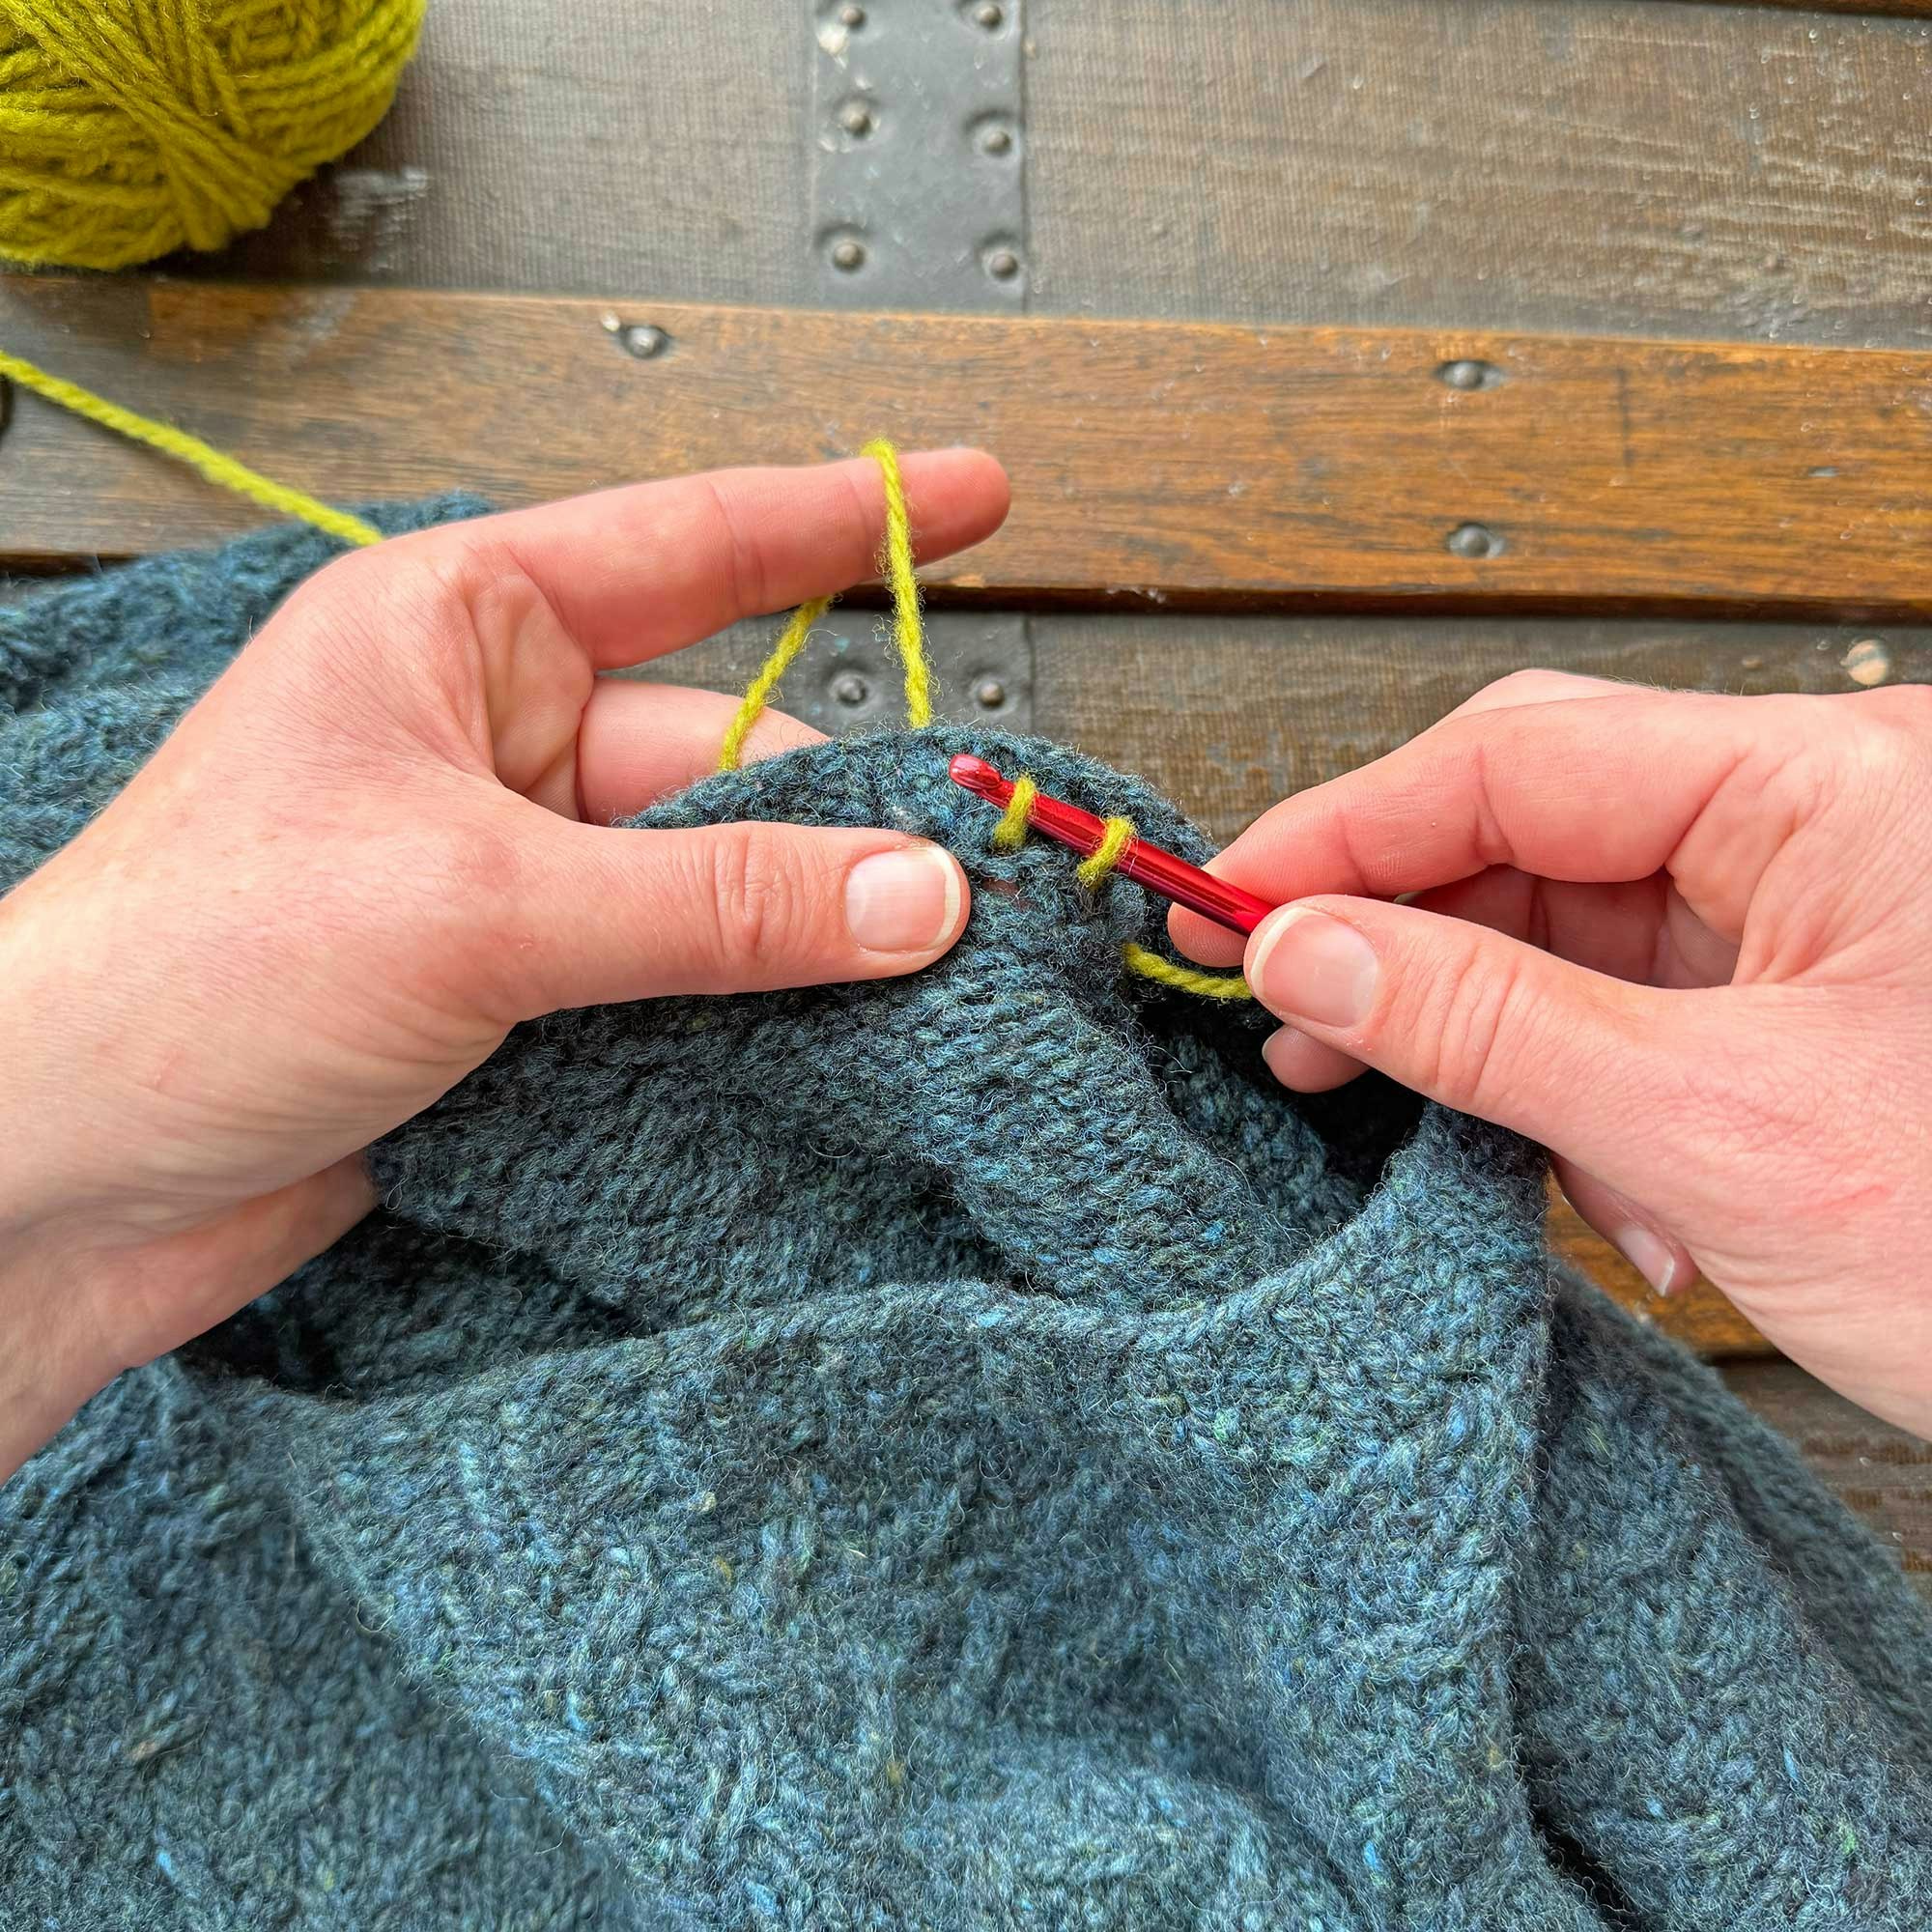
Step 8: Pull the new loop through first loop so only one loop remains on the hook.
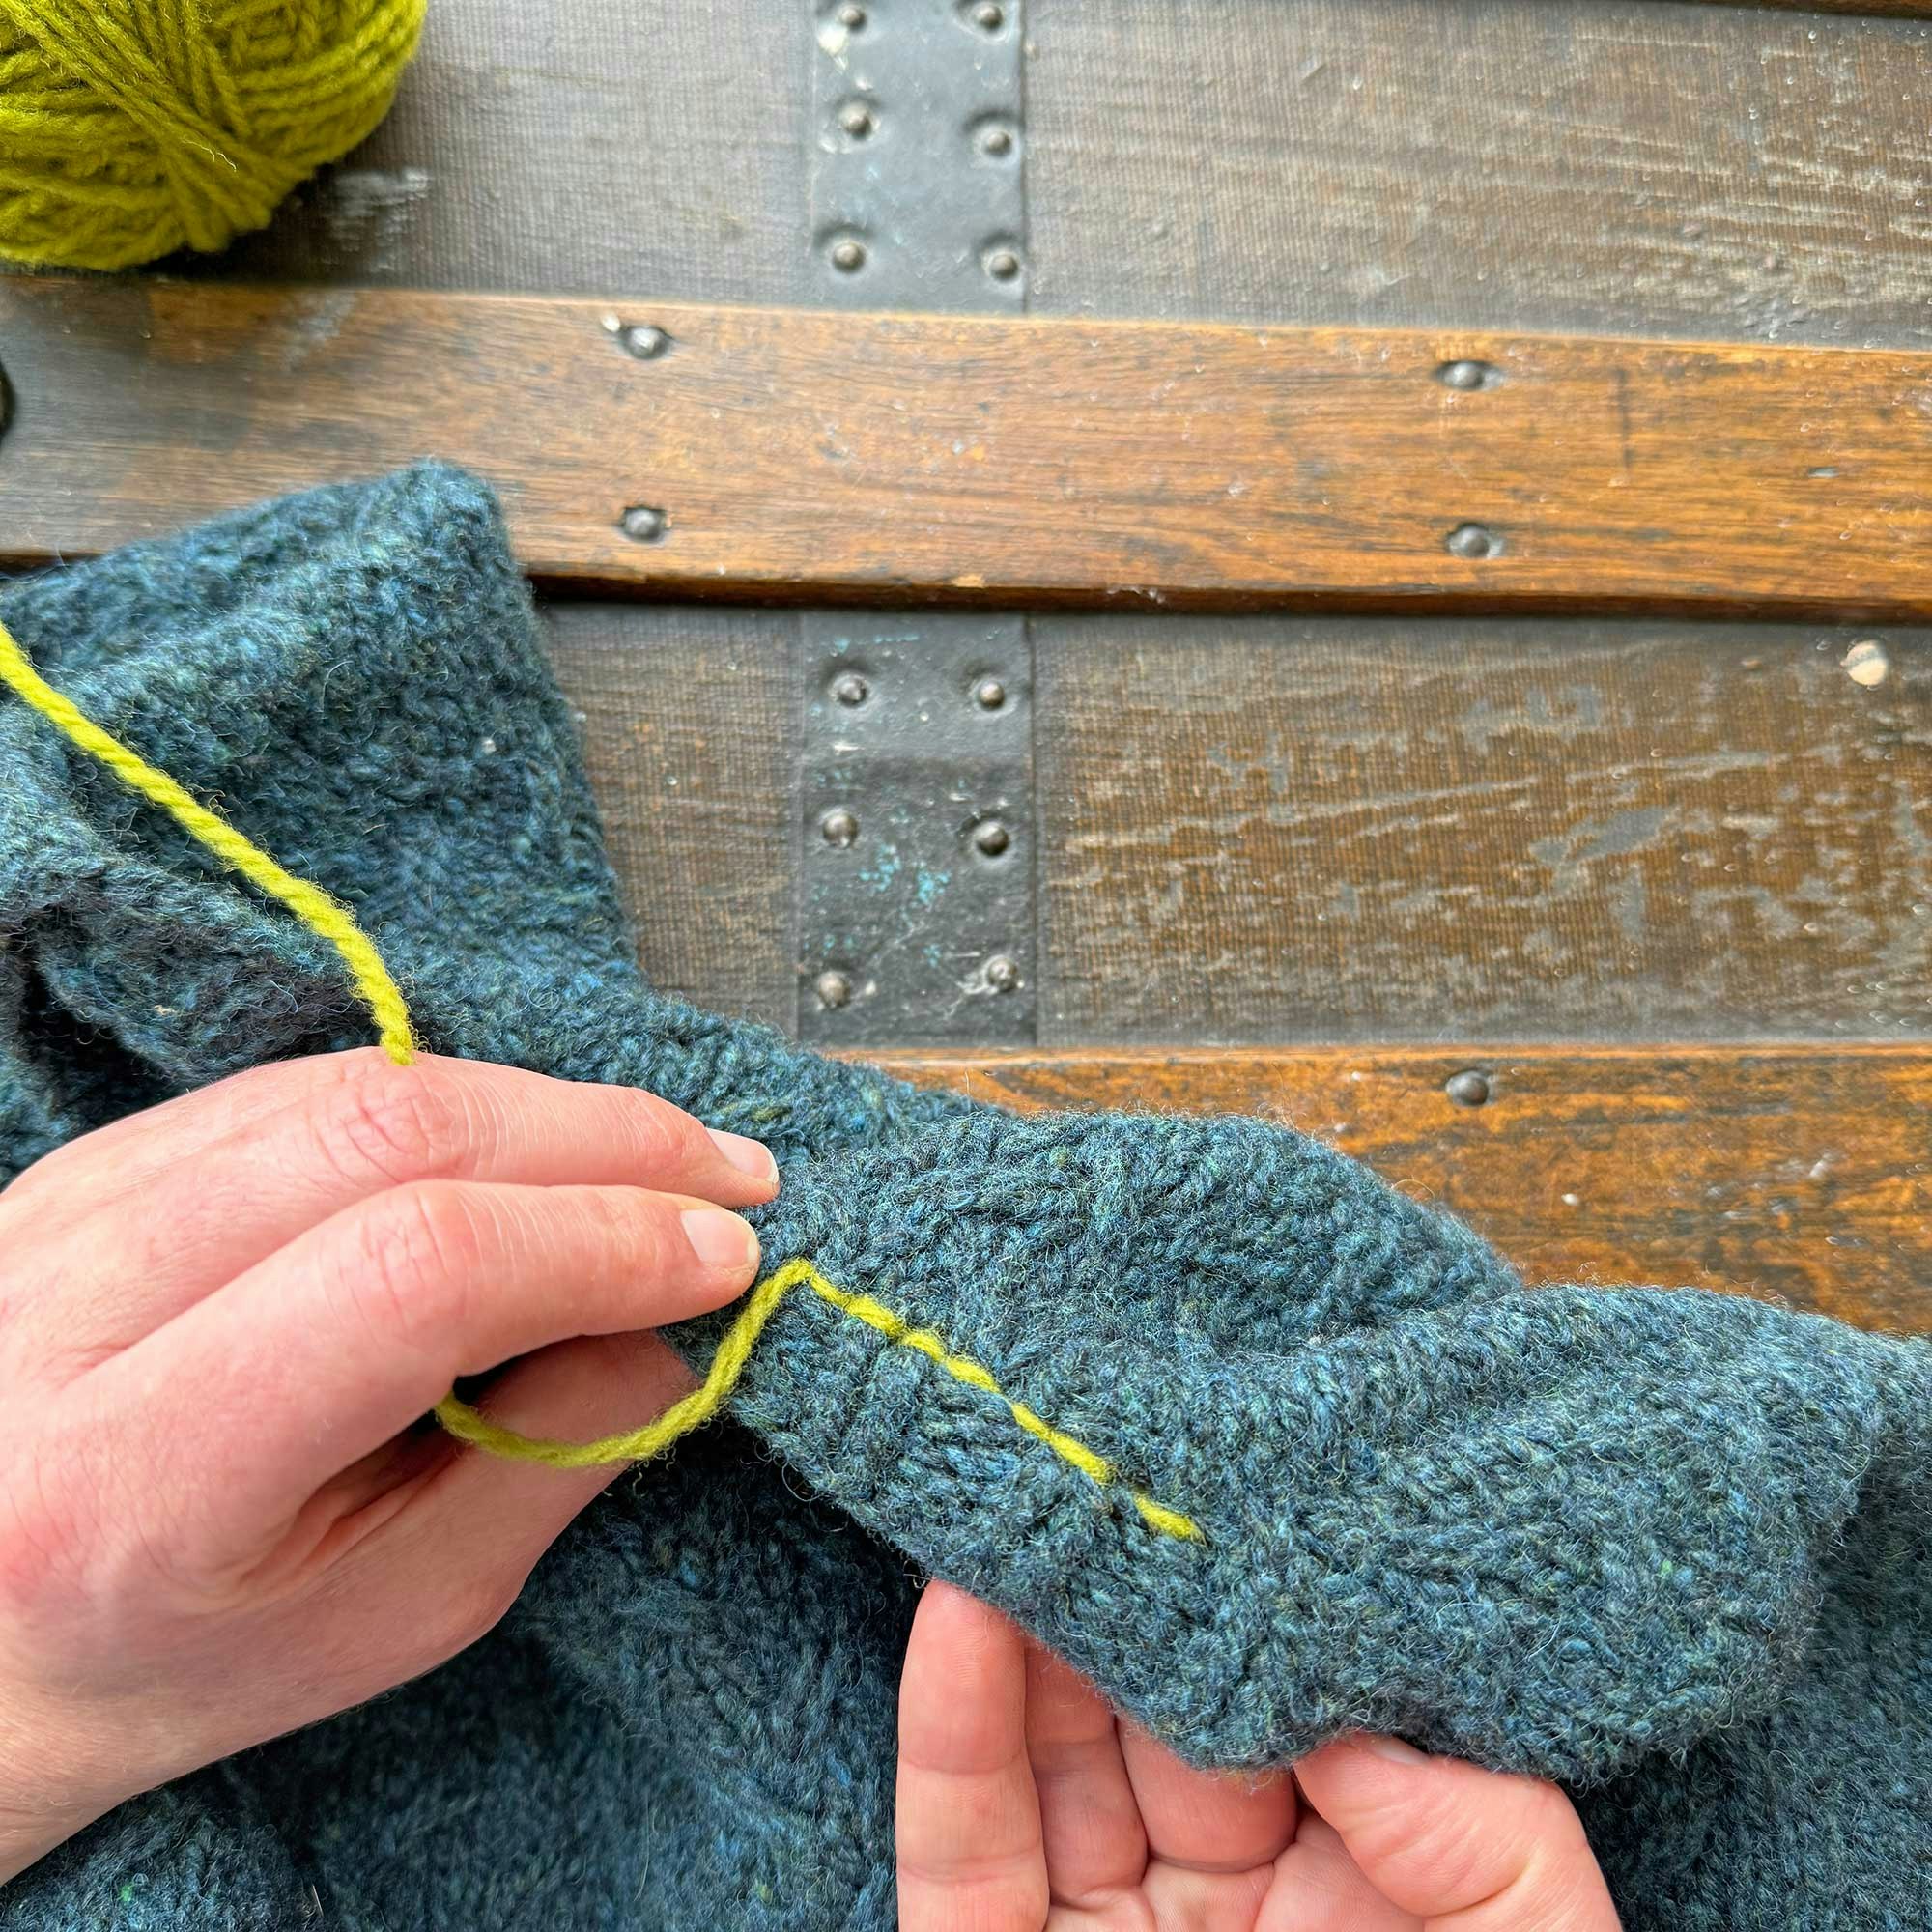
Step 9: Continue working a crochet chain in this way across the back neck.
Step 10: Occasionally check the other side of the work (which is the RS of the sweater) to make sure the row of chain stitches is tidy.
Again, I used a contrasting color for the crochet chain here so you could see it more easily. By using leftover yarns from the sweater, you can create a nearly invisible finish. I hope you'll give this a try!
— Kate
Resources
Kate Larson (she/her) is Senior Editor of Farm & Fiber Knits. For nearly as long as Kate has been handspinning and knitting, she has been helping others find their paths as makers and forge deeper connections with the landscapes that produce the wool and cotton, flax, and silk that they hold in their hands. While Kate has published a book, many articles and patterns, and several instructional videos, she especially loves celebrating the work of other fiber folks. The editor of Spin Off from 2018–2025, she directs spinning events in addition to editing Farm & Fiber Knits. If you can’t find Kate, she’s most likely in the barn having a chat with her beloved Border Leicester sheep.