Subscriber Exclusive
Easy Indigo: Refresh Your Stash with This Beginner Tutorial
Do you have some odd balls in deep stash that could use a summer refresh? Natural indigo dye can be easier to use than you think!
Do you have some odd balls in deep stash that could use a summer refresh? Natural indigo dye can be easier to use than you think! <a href="https://farmfiberknits.com/easy-indigo-refresh-your-stash-with-this-beginner-tutorial/">Continue reading.</a>
https://farmfiberknits.com/cdn-cgi/image/format=auto/https://www.datocms-assets.com/101500/1755728805-larson-indigo-header.jpg?auto=format&w=900
Contents
Like many knitters, I have leftovers. Really nice leftovers. For large projects, I usually buy an extra skein just in case, and I also often end up with partial balls at the end of a project. I love knitting with DK weight and currently have a lovely collection of oddments that I'd like to use together in a project... but they don't create a palette I like. So, I pulled out a few skeins to overdye with indigo—my go-to for overdyeing my knitting stash.
Indigo: A Knitter's Best Friend
Overdyeing is a great way to harmonize a group of mismatched skeins, and indigo is my go-to for overdyeing knitting yarn because it works on nearly all fiber types. (It does not dye acrylic, but nylon reportedly does take some color from indigo. See Resources.) So, you can gather your wool/flax and mohair/silk and alpaca/cotton yarns and give them a dunk in the same dyepot.
Dipping your toe into the world of indigo dyeing can be intimidating. There are many recipes for making an indigo vat, and there is a mind-boggling amount of good (and bad) advice online. If you are indigo curious and new to natural dyeing, an indigo starter kit is one of the very best ways to get started. Let me show you how easy it is!
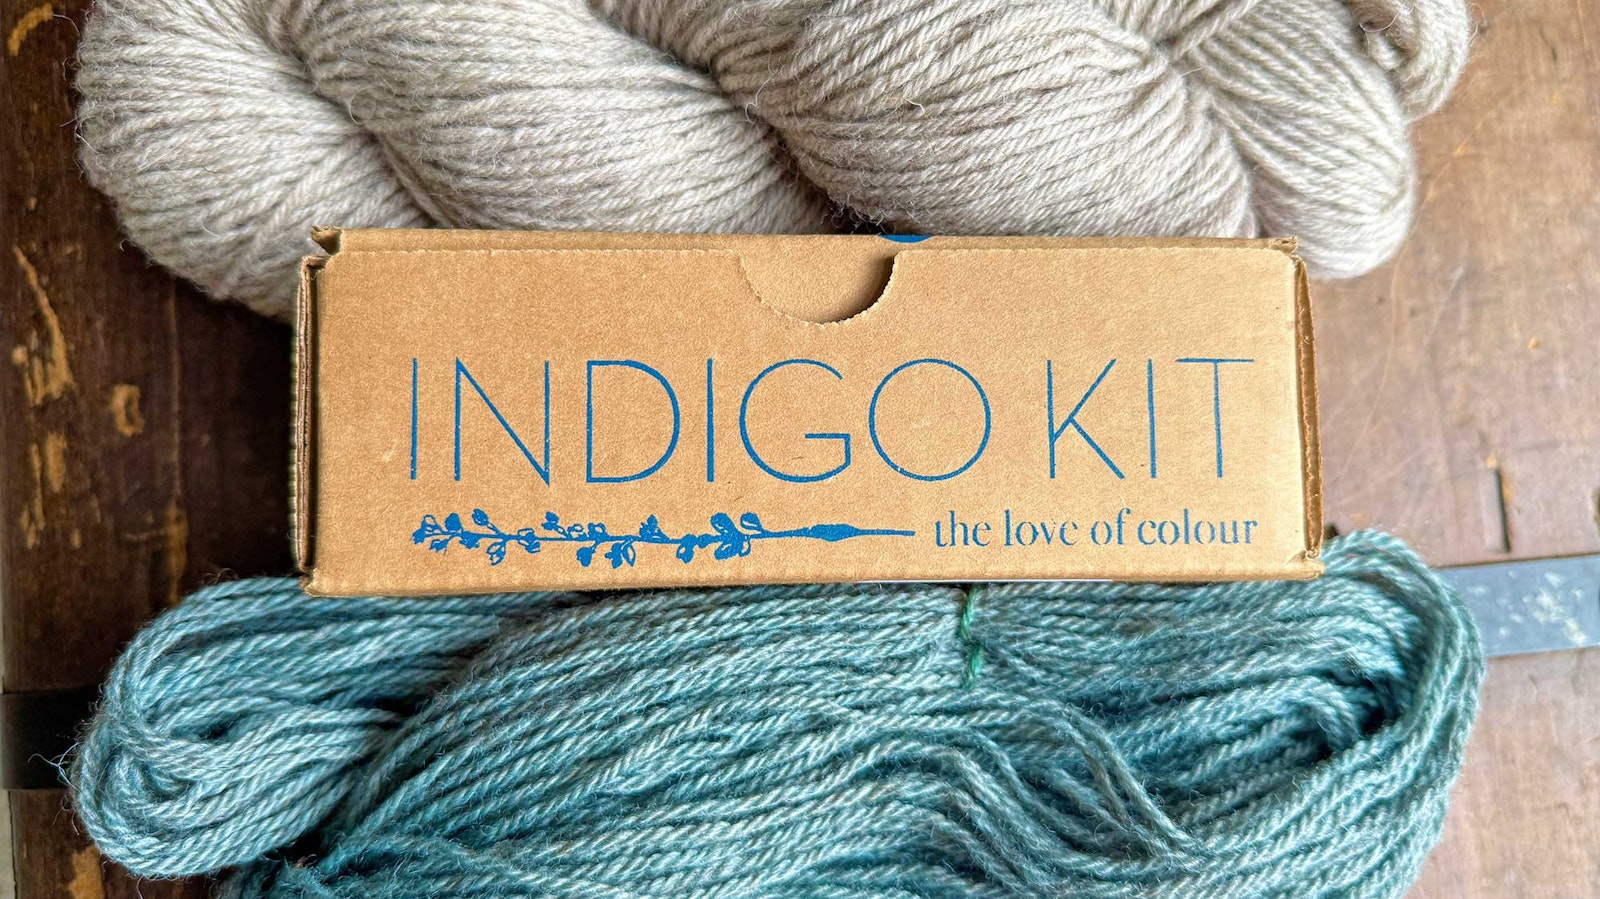
 Fructose Indigo Kit from The Love of Colour. Kate pulled several skeins to overdye: white and yellow Cormo from Mitchell Wool and undyed gray from Laxtons.
The Fructose Vat
While I love to nerd out on indigo chemistry, I want to keep this how-to as simple as I can. The purpose of indigo kits is to keep the experience straightforward, providing you with pre-weighed ingredients that are ready to add to your vat. I asked Toronto-based dye company The Love of Colour if I could give their fructose indigo kit a try, and they sent me one to show you here. This is a common recipe for getting your feet wet (haha) with natural indigo. It contains indigo powder (derived from plants), fructose granules (as in sugar from fruit), and pickling lime (also commonly called calx, which is short for calcium hydroxide). That's it—literally just add water!
Every indigo dyer I know has a slightly different approach, so you should follow the instructions given for whatever recipe or kit you are using. I'll outline the main steps here with a knitter using a variety of natural-fiber yarns in mind, and you can see the beautiful blues that resulted at the end.
SUBSCRIBER EXCLUSIVE
Like many knitters, I have leftovers. Really nice leftovers. For large projects, I usually buy an extra skein just in case, and I also often end up with partial balls at the end of a project. I love knitting with DK weight and currently have a lovely collection of oddments that I'd like to use together in a project... but they don't create a palette I like. So, I pulled out a few skeins to overdye with indigo—my go-to for overdyeing my knitting stash.
Indigo: A Knitter's Best Friend
Overdyeing is a great way to harmonize a group of mismatched skeins, and indigo is my go-to for overdyeing knitting yarn because it works on nearly all fiber types. (It does not dye acrylic, but nylon reportedly does take some color from indigo. See Resources.) So, you can gather your wool/flax and mohair/silk and alpaca/cotton yarns and give them a dunk in the same dyepot.
Dipping your toe into the world of indigo dyeing can be intimidating. There are many recipes for making an indigo vat, and there is a mind-boggling amount of good (and bad) advice online. If you are indigo curious and new to natural dyeing, an indigo starter kit is one of the very best ways to get started. Let me show you how easy it is!
Fructose Indigo Kit from The Love of Colour. Kate pulled several skeins to overdye: white and yellow Cormo from Mitchell Wool and undyed gray from Laxtons.
The Fructose Vat
While I love to nerd out on indigo chemistry, I want to keep this how-to as simple as I can. The purpose of indigo kits is to keep the experience straightforward, providing you with pre-weighed ingredients that are ready to add to your vat. I asked Toronto-based dye company The Love of Colour if I could give their fructose indigo kit a try, and they sent me one to show you here. This is a common recipe for getting your feet wet (haha) with natural indigo. It contains indigo powder (derived from plants), fructose granules (as in sugar from fruit), and pickling lime (also commonly called calx, which is short for calcium hydroxide). That's it—literally just add water!
Every indigo dyer I know has a slightly different approach, so you should follow the instructions given for whatever recipe or kit you are using. I'll outline the main steps here with a knitter using a variety of natural-fiber yarns in mind, and you can see the beautiful blues that resulted at the end.
[PAYWALL]
Preparing Your Yarns
 Don't skip the ties or skeins will tangle. I find this easiest to do by laying the loop over my knee.
Skeins are usually the best way to dye your yarns. If your yarn is in balls, wind your yarn into a skein (loop) by winding around a swift or even the back of two chairs.
Tie the two ends of the skein together. Then, you'll need to tie in several more places. (Really. Don't skip this step.) I suggest a minimum of four ties. To keep the skein tidy during dyeing, I loosely weave scrap yarn through the skein as shown above. Keep the ties a bit loose so they don't prevent the dye from absorbing.
Now, you'll need to wash the yarns in hot water with a little soap. Rinse in the same temperature water and leave the skeins to cool. They should still be damp when added to the vat.
Choosing a Dyepot
The kit I am using is designed for about 5 gallons (20 liters), so a plastic 5-gallon bucket works well. During the summer, my vat stays warm enough that I don't need additional heat. During cooler weather, you will need some way to gently heat the vat, so plastic might not work for you. Most kits give you many alternative options and suggestions.
Following the instructions, I filled the bucket with hot water and headed outside.
 Summertime indigo dyeing can be easily done in a plastic bucket.
Adding the Ingredients
All three packets of ingredients go in first, stirring constantly. Stirring in a gentle whirlpool keeps things moving and incorporates the ingredients so they can start to work.
 Both the indigo powder and calx are fine powders that take quite a bit of stirring to incorporate.
Indigo Magic: Watching for Color Changes
The familiar blue of indigo powder is not able to bond with our fiber as it is. It needs to undergo a chemical process called reduction (removal of oxygen), and then indigo can attach to the fiber. But don't get nervous! Much like the long-ago makers who developed these techniques, you don't need to fully understand the chemistry to learn to observe and respond to the vat changes. Here is what it looks like when everything is added and stirred:
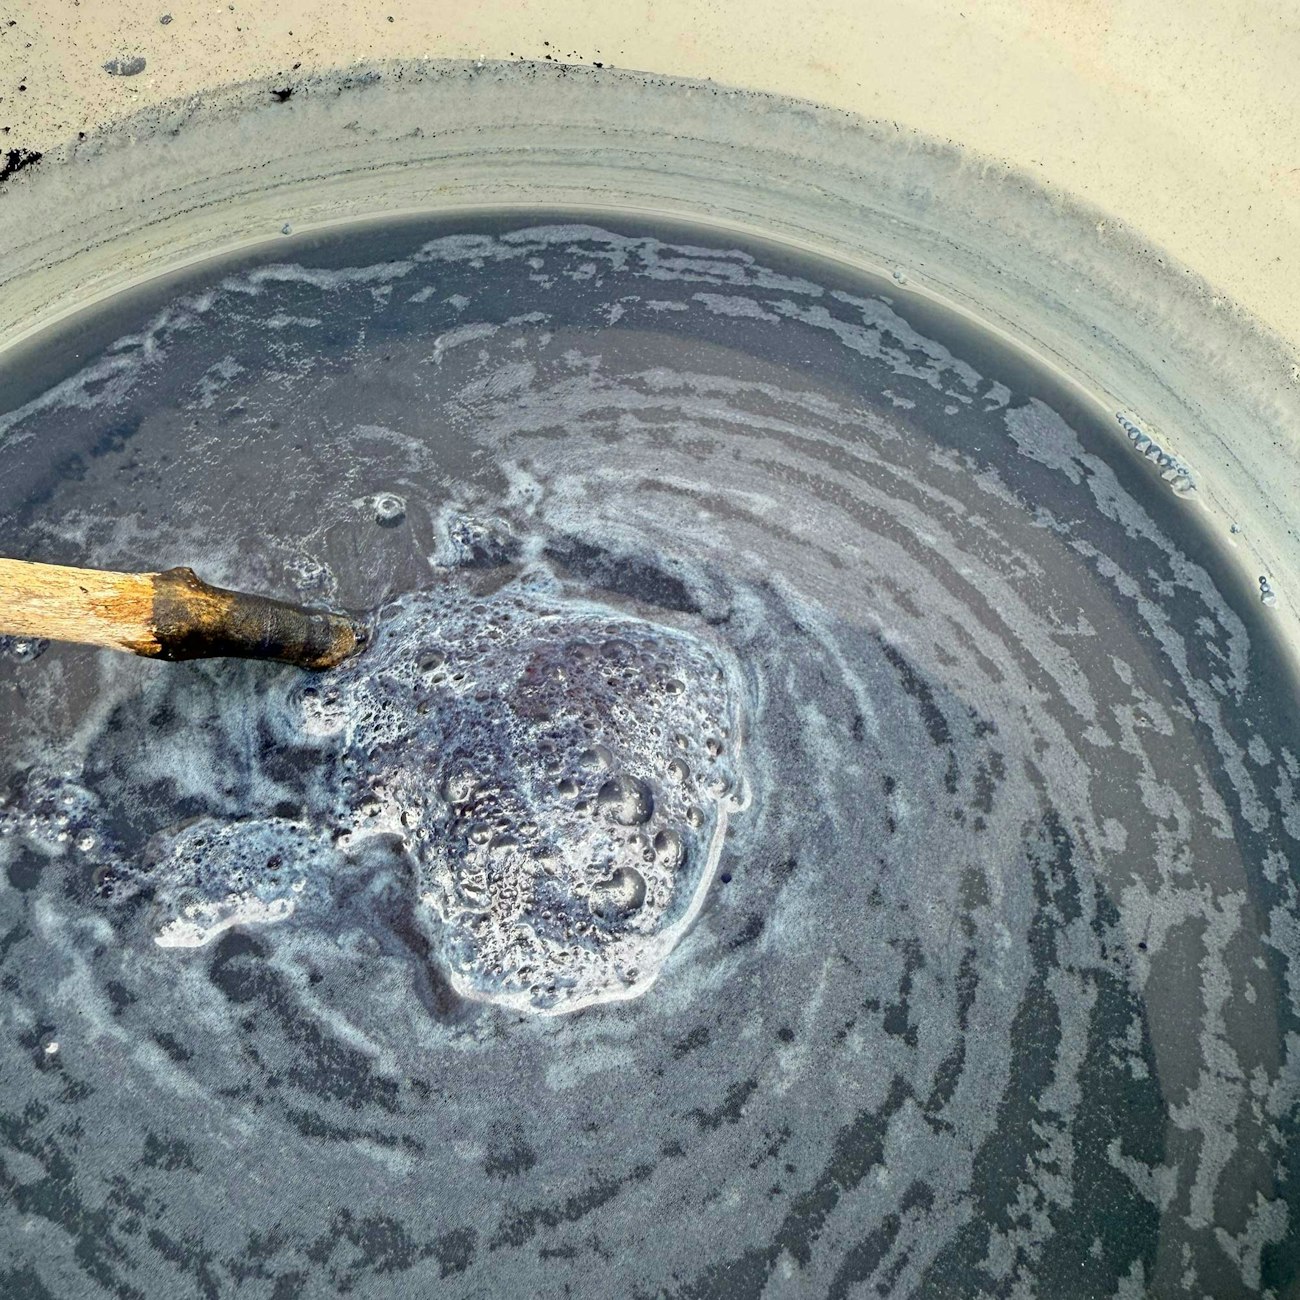 See how this vat is blue, just like the indigo powder? That means it isn't ready for dyeing.
At this point, the vat solution is indigo blue and murky. When the vat sits for a time, it will begin to turn a clear green/yellow with a metallic purple sheen on the surface. This is the reduction process. Here is what my vat looked like after an hour:
 Nearly ready for dyeing. Next, I stirred again, making sure to incorporate the remaining indigo powder from the bucket rim.
When the vat is reduced and you see these color shifts, it is ready to use. One little test I often use is to stick my finger into the vat an inch or two. If I can see my finger through the clear, green/yellow solution, the vat is ready. If I can't see my finger in the murky blue, the vat is not ready for dyeing.
Adding the Yarn
Our goal is to keep the vat reduced, so we don't want to add any oxygen (air) with splashing or dripping. Slowly slide your skeins into the vat, avoiding bubbles as much as possible. Leave them in the vat, gently stirring occasionally. My kit said to leave the skeins for 15 to 30 minutes.
 Slowly lower the damp skein into the vat and then push it below the surface so it is fully submerged.
Removing the Yarn
When removing the skeins, carefully slide them up the side of the pot, squeezing out as much liquid as possible without dripping into the vat.
When the yarns emerge, they should be a green or teal color—not indigo blue. As you begin shaking your skeins (well away from your vat), incorporating oxygen, they will shift to a true indigo blue!
 Slide the skein out of the vat by pressing against the rim. No dripping!
Darker blues are created with multiple dips in the vat rather than a longer soaking time. Very dark colors might even take 10 to 20 dips! As you can see on my yellow skein, even just one dip can be beautiful.
 Just one dip in blue! It will lighten when washed and dried.
The color will be a shade lighter once fully dry. If you'd like to dip again, just wait about 15 to 30 minutes so the indigo has fully oxidized. It's just enough time to knit a few rows and sip some iced tea.
When you are done dipping, give your skeins a rinse in clean water. Allow the skeins to dry for at least a day, and then wash them with some soap and a dash of vinegar or lemon juice.
 Ordinarily, I would have given this another dip or two, but I wanted you to see the results of a single dip. Tomorrow, the vat will yield even darker blues.
Now that my skeins are dry, you can see that after just one dip, they are more harmonious than they were before. I hope this encourages you to look at your knitter's stash of odd balls in a new way!
—Kate
Resources
Indigo Kit provided by The Love of Colour.
"Frequently Asked Questions About Indigo." Botanical Colors.