Snags, moths, and daily wear can leave our knits with holes. Woven patches are a great way to combat holes large and small before they can run and enlarge. We’ll show you three easy ways to get mending now.
Snags, moths, and daily wear can leave our knits with holes. Woven patches are a great way to combat holes large and small before they can run and enlarge. We’ll show you three easy ways to get mending now. <a href="https://farmfiberknits.com/3-easy-woven-darns-to-save-your-knits/">Continue reading.</a>
I mentioned in a mending post a few weeks ago that Swiss darning (also called duplicate stitch) is a great method for stabilizing knits that are wearing thin but have not broken into a hole. While there are ways to work duplicate stitch over a hole—where there are no longer stitches to duplicate—it is more challenging. Many knitters turn to woven darns when facing an ugly hole in a beloved knit.
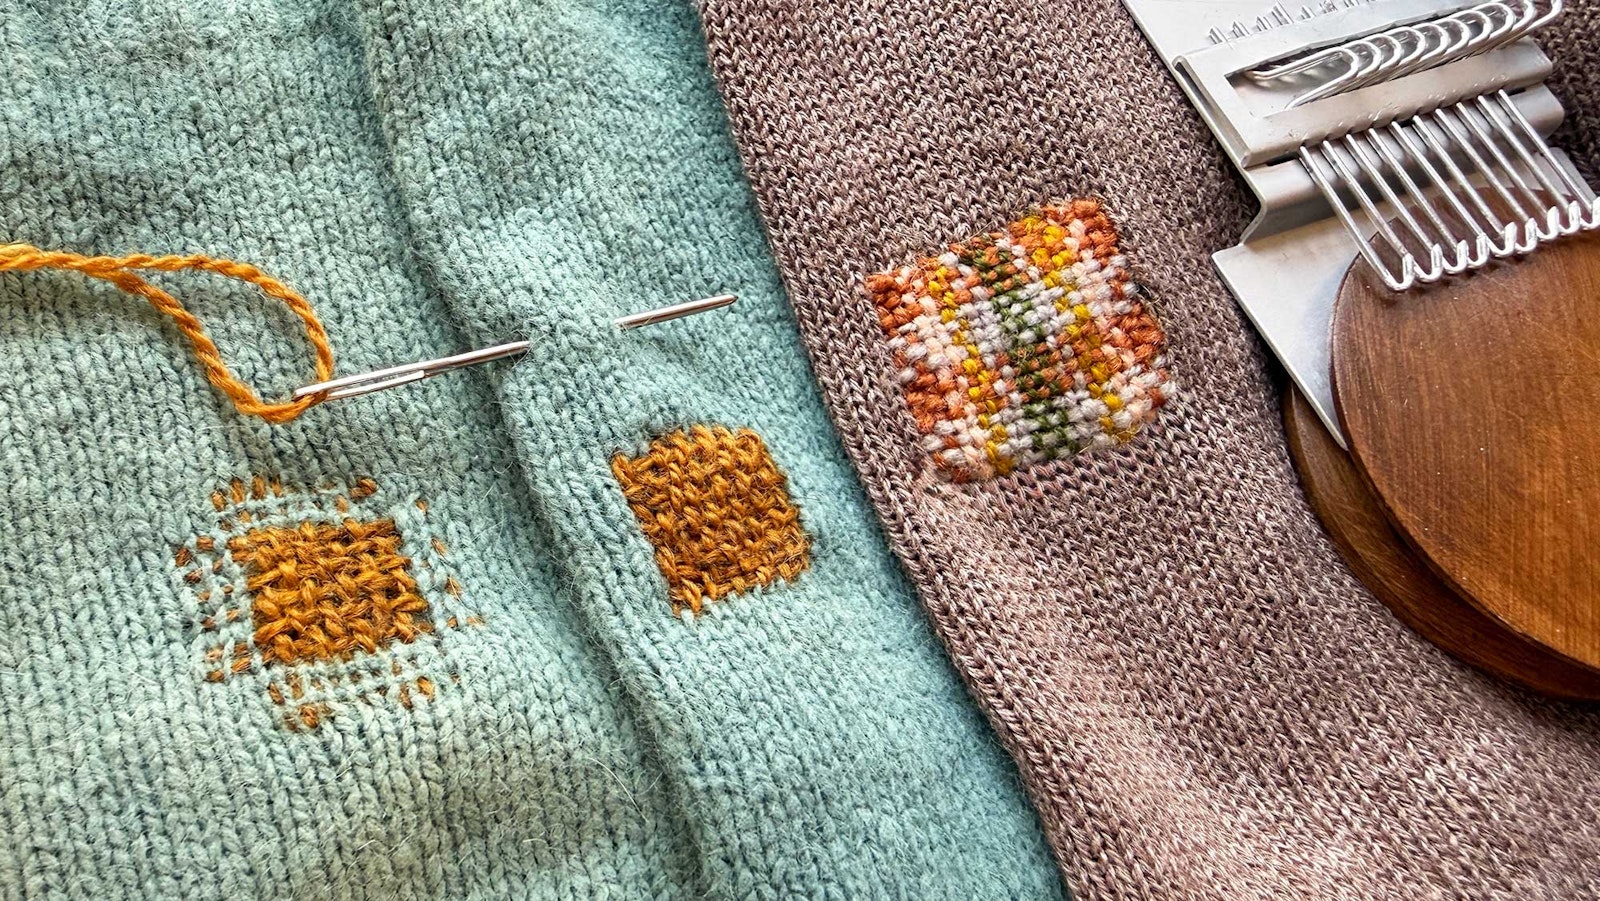
All three methods I’ll show you here result in a woven patch, but they are quite different to work, and there are a few key differences in the result. The biggest differences are between Method 1 (shown on the far left above) and the other two. Method 1 includes a few stiches at the edge of each row of the darn that secures the mend to the fabric. It has a speckled appearance, and I also think the behavior of the fabric is different compared to the other clean-edged woven mends. Take a look:
I find that Method 1 with its supporting neighbor stitches is less likely to distort the surrounding fabric when it is stretched. Knitted fabric stretches a lot; woven fabric does not. The running stitches that surround a woven mend stretch a bit. So, I might use these mends in different parts of a sweater.
Mend with us!
This is Week 3 of our month-long mend-along, and next week we are planning a live session where we can put some of our recent tutorials to good use. I find that many knitters have trouble deciding which mending method to use, what yarns would work, and so on. We’ll look at a few examples of knits in need of mending, discuss the options, and look at the results.
Week 5: Mending Inspiration! Freehand Mending Techniques and Tips
Get Started with Woven Darns
Now, grab something from your mending pile and let’s try some woven darns. Here, I’m using a thrifted sweater that I’ve dedicated to mending practice. If you are worried about jumping into beloved knits, try pulling something that is no longer wearable or even knitted swatches that are no longer needed. You’ll be joining a long tradition of mending samplers; check out this Dutch example from 1761.
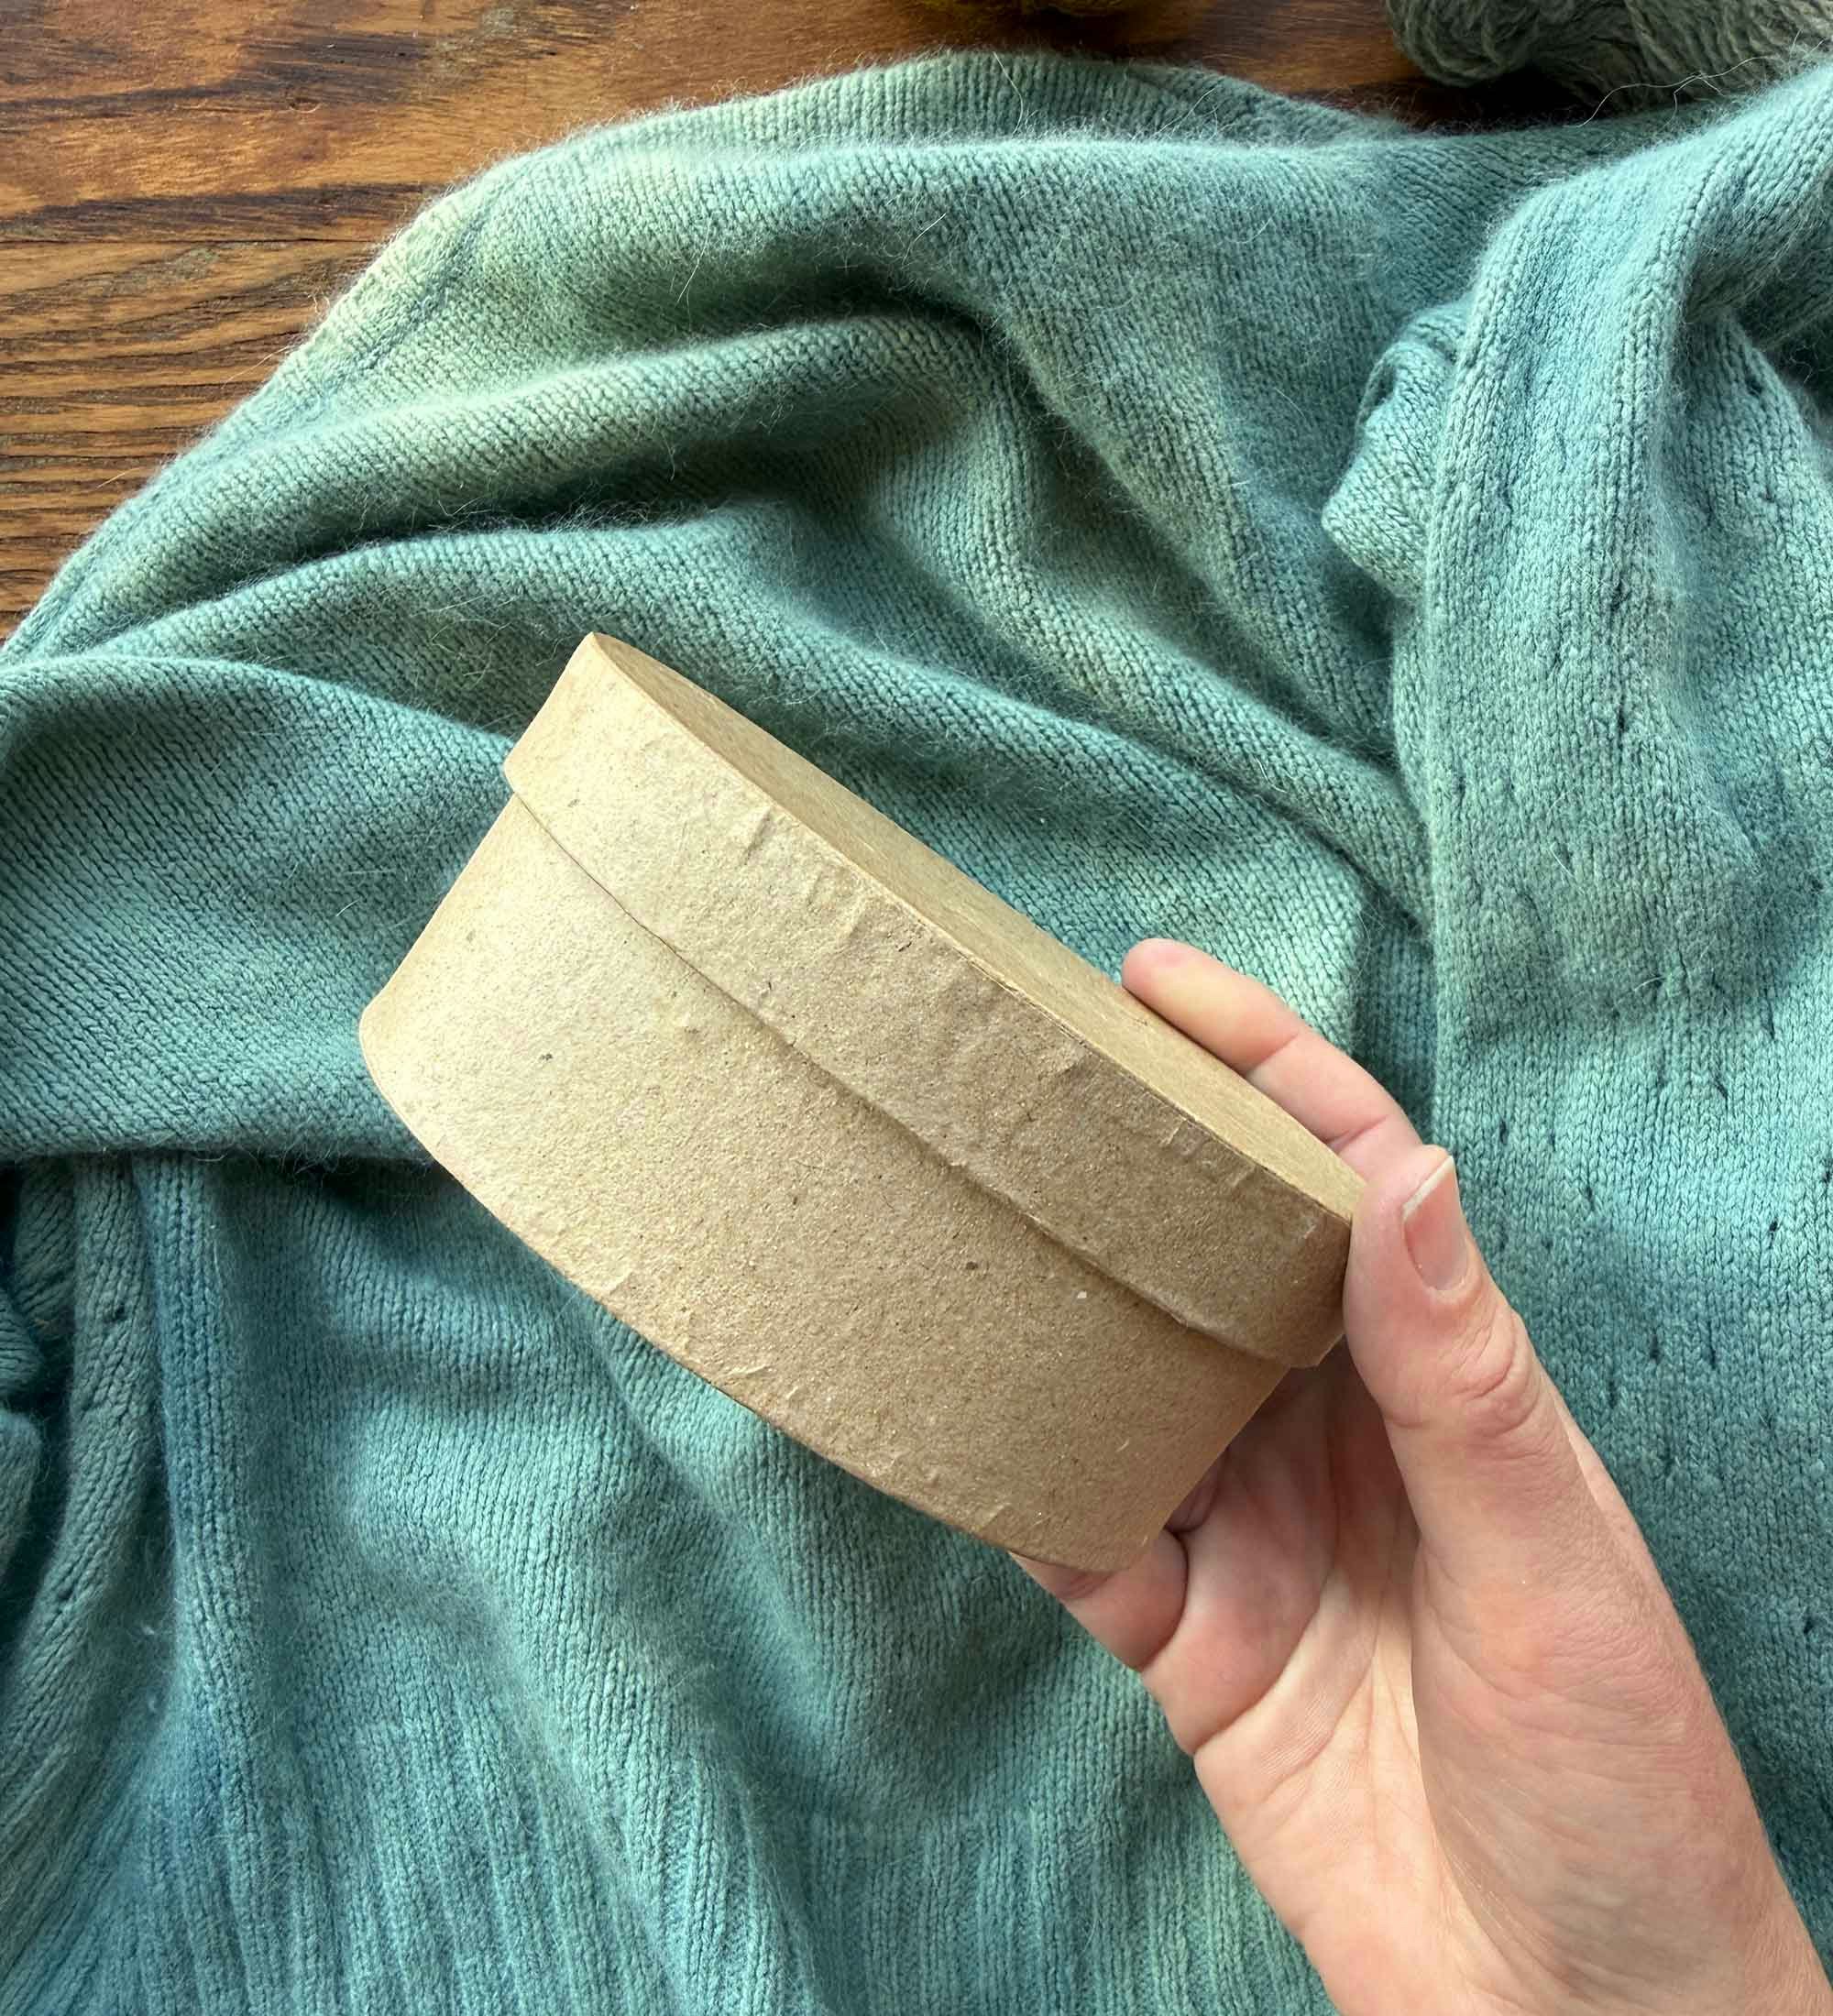
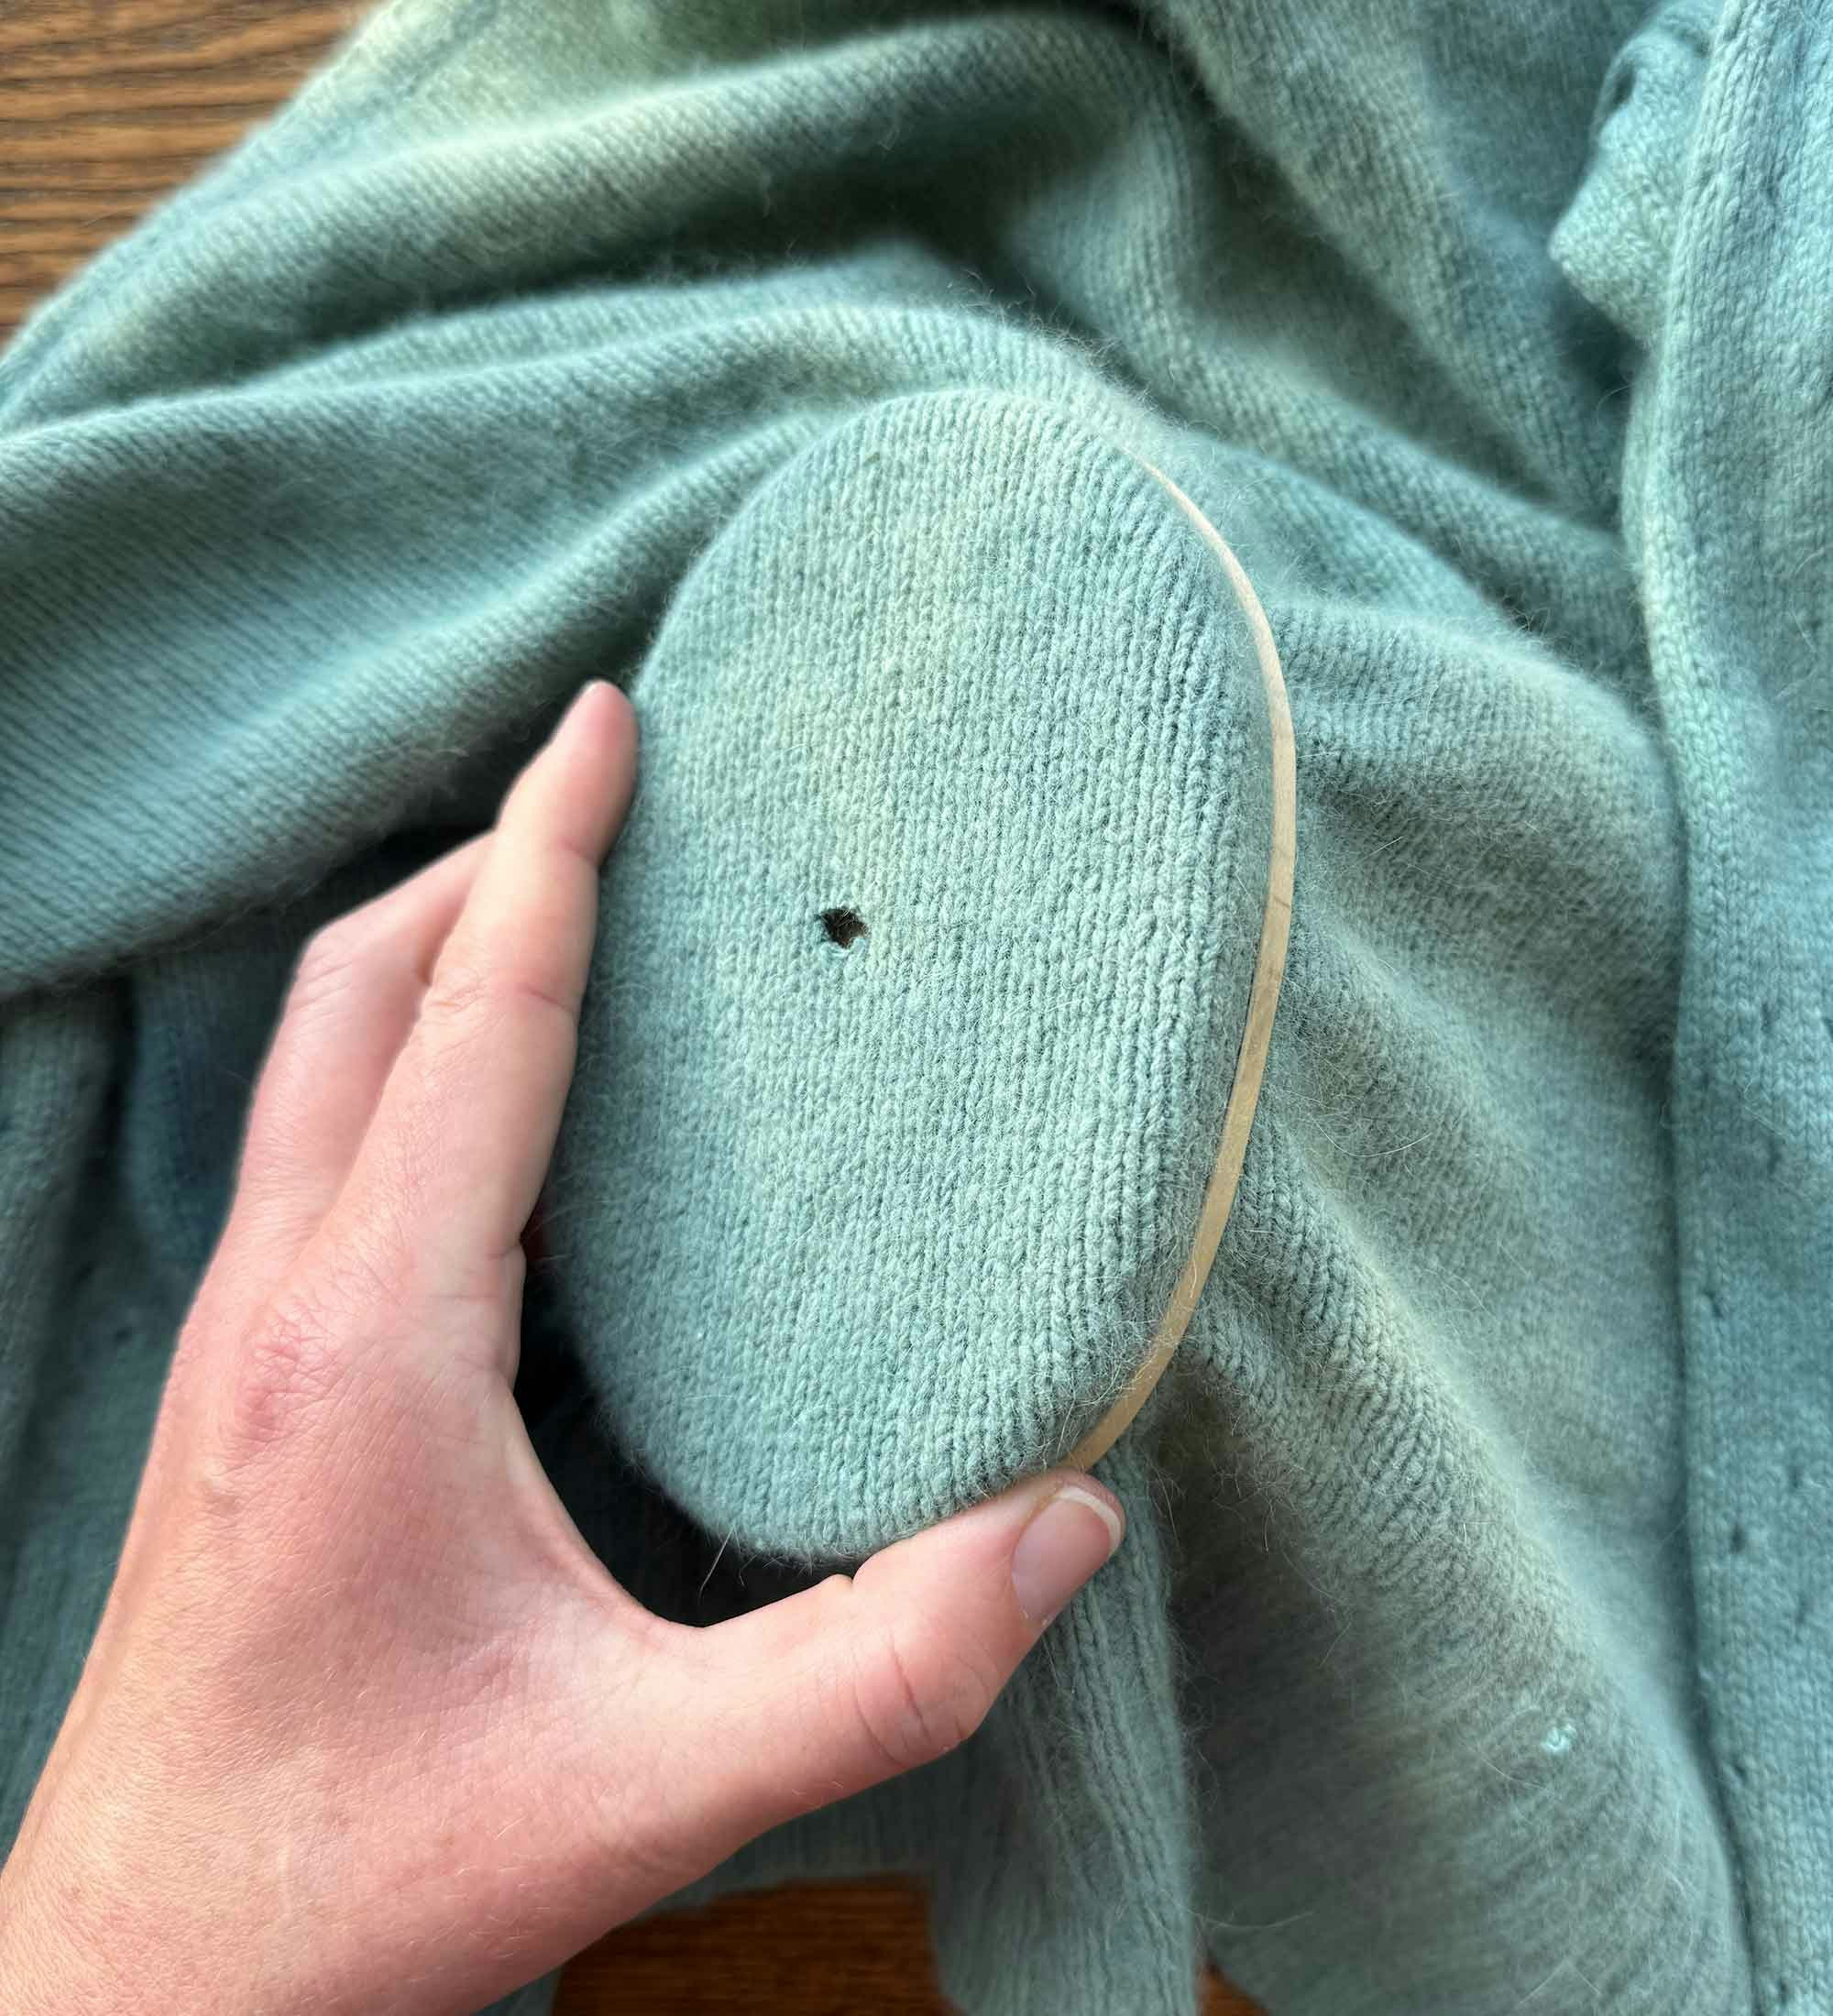
For Methods 1 and 2 shown here, you’ll need something to hold your knitted fabric that is in need of mending.
Unlock the Full Article with a Farm & Fiber Knits Subscription
Get instant access to this article and the entire Farm & Fiber Knits library of projects, inspiration, and expert instruction. With your subscription, you'll receive:
Connect more deeply with your yarn—learn the stories of farmers, shepherds, and dyers
Knit patterns that celebrate natural fibers and slow, intentional making
Support a community of small farms, women makers, and independent yarn companies
Includes print and digital issues of Farm & Fiber Knits, delivered directly to you
With must-knit projects and unforgettable stories, Farm & Fiber Knits invites you to see the craft world through fresh eyes.
Plans start at just $5.83/month (paid annually). Cancel anytime.
I mentioned in a mending post a few weeks ago that Swiss darning (also called duplicate stitch) is a great method for stabilizing knits that are wearing thin but have not broken into a hole. While there are ways to work duplicate stitch over a hole—where there are no longer stitches to duplicate—it is more challenging. Many knitters turn to woven darns when facing an ugly hole in a beloved knit.
All three methods I’ll show you here result in a woven patch, but they are quite different to work, and there are a few key differences in the result. The biggest differences are between Method 1 (shown on the far left above) and the other two. Method 1 includes a few stiches at the edge of each row of the darn that secures the mend to the fabric. It has a speckled appearance, and I also think the behavior of the fabric is different compared to the other clean-edged woven mends. Take a look:
I find that Method 1 with its supporting neighbor stitches is less likely to distort the surrounding fabric when it is stretched. Knitted fabric stretches a lot; woven fabric does not. The running stitches that surround a woven mend stretch a bit. So, I might use these mends in different parts of a sweater.
Mend with us!
This is Week 3 of our month-long mend-along, and next week we are planning a live session where we can put some of our recent tutorials to good use. I find that many knitters have trouble deciding which mending method to use, what yarns would work, and so on. We’ll look at a few examples of knits in need of mending, discuss the options, and look at the results.
Week 5: Mending Inspiration! Freehand Mending Techniques and Tips
Get Started with Woven Darns
Now, grab something from your mending pile and let’s try some woven darns. Here, I’m using a thrifted sweater that I’ve dedicated to mending practice. If you are worried about jumping into beloved knits, try pulling something that is no longer wearable or even knitted swatches that are no longer needed. You’ll be joining a long tradition of mending samplers; check out this Dutch example from 1761.
For Methods 1 and 2 shown here, you’ll need something to hold your knitted fabric that is in need of mending.
1) Speckle Method: Reinforced with Surrounding Stitches
This is a very traditional way to weave darns, and if using mending yarns and threads that match the base fabric, it blends nicely. But I love seeing my mends! I’m right-handed, so you might choose to use a mirror image of these instructions if you are a leftie.
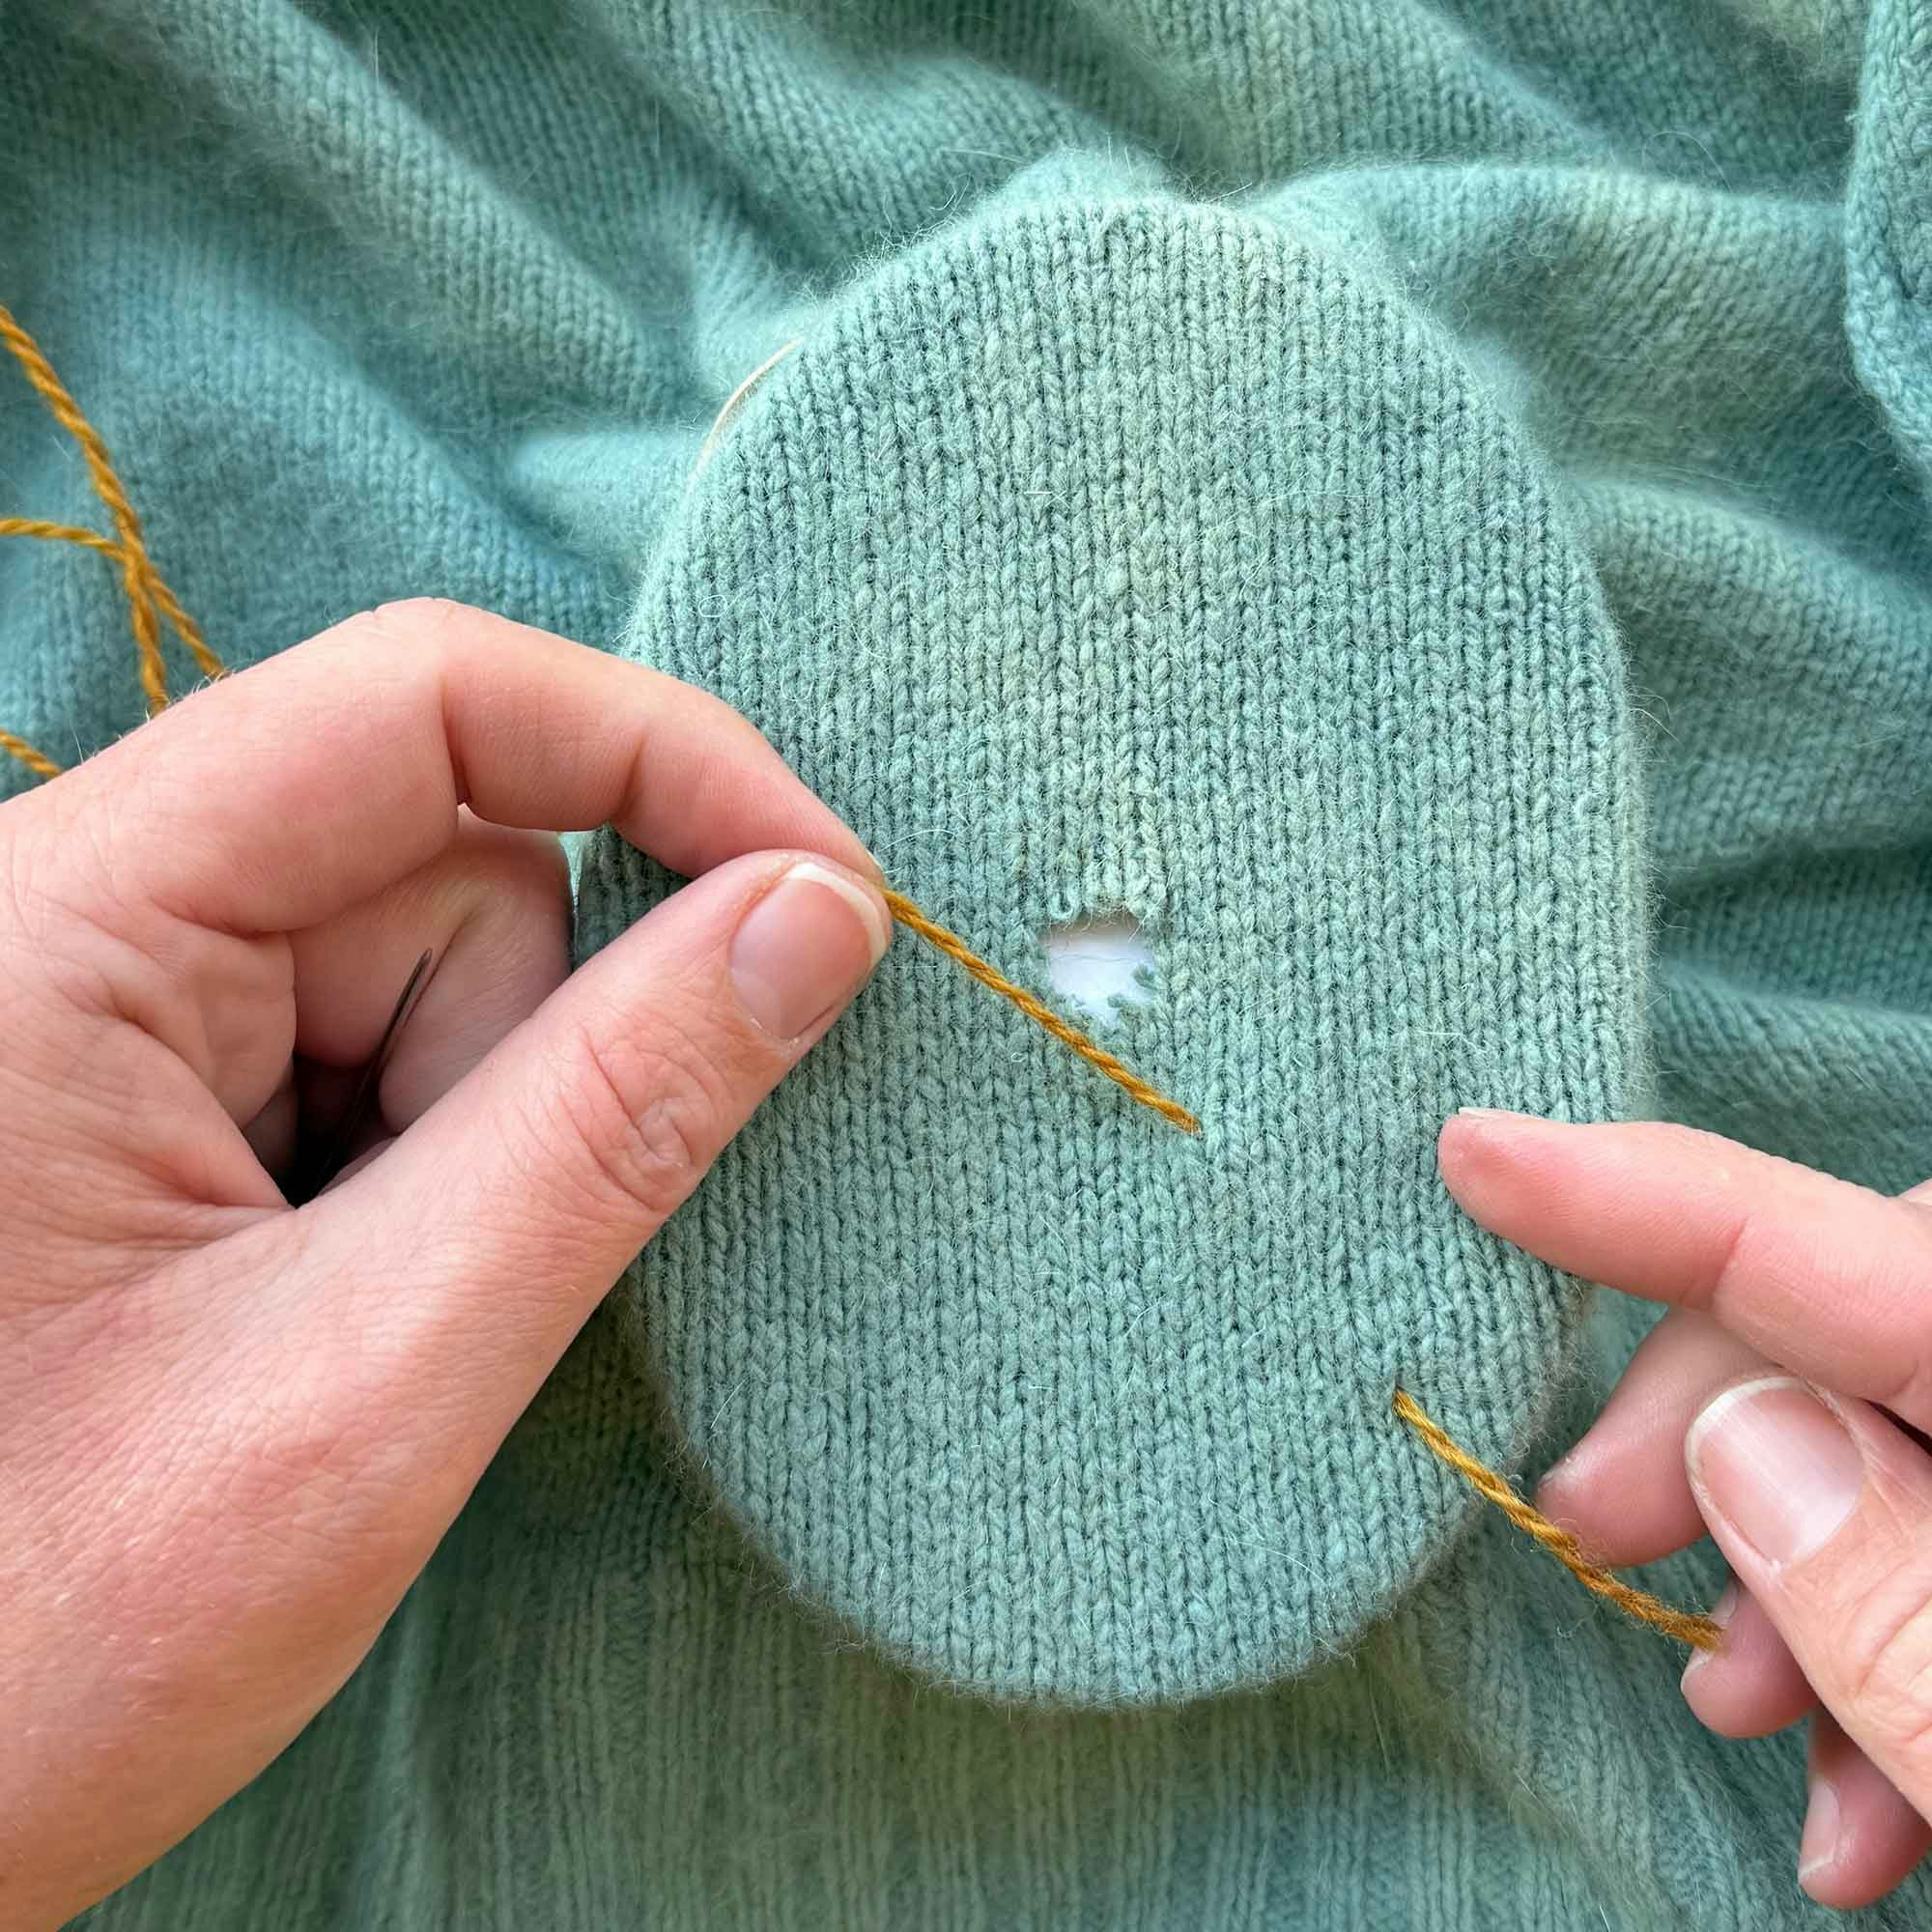
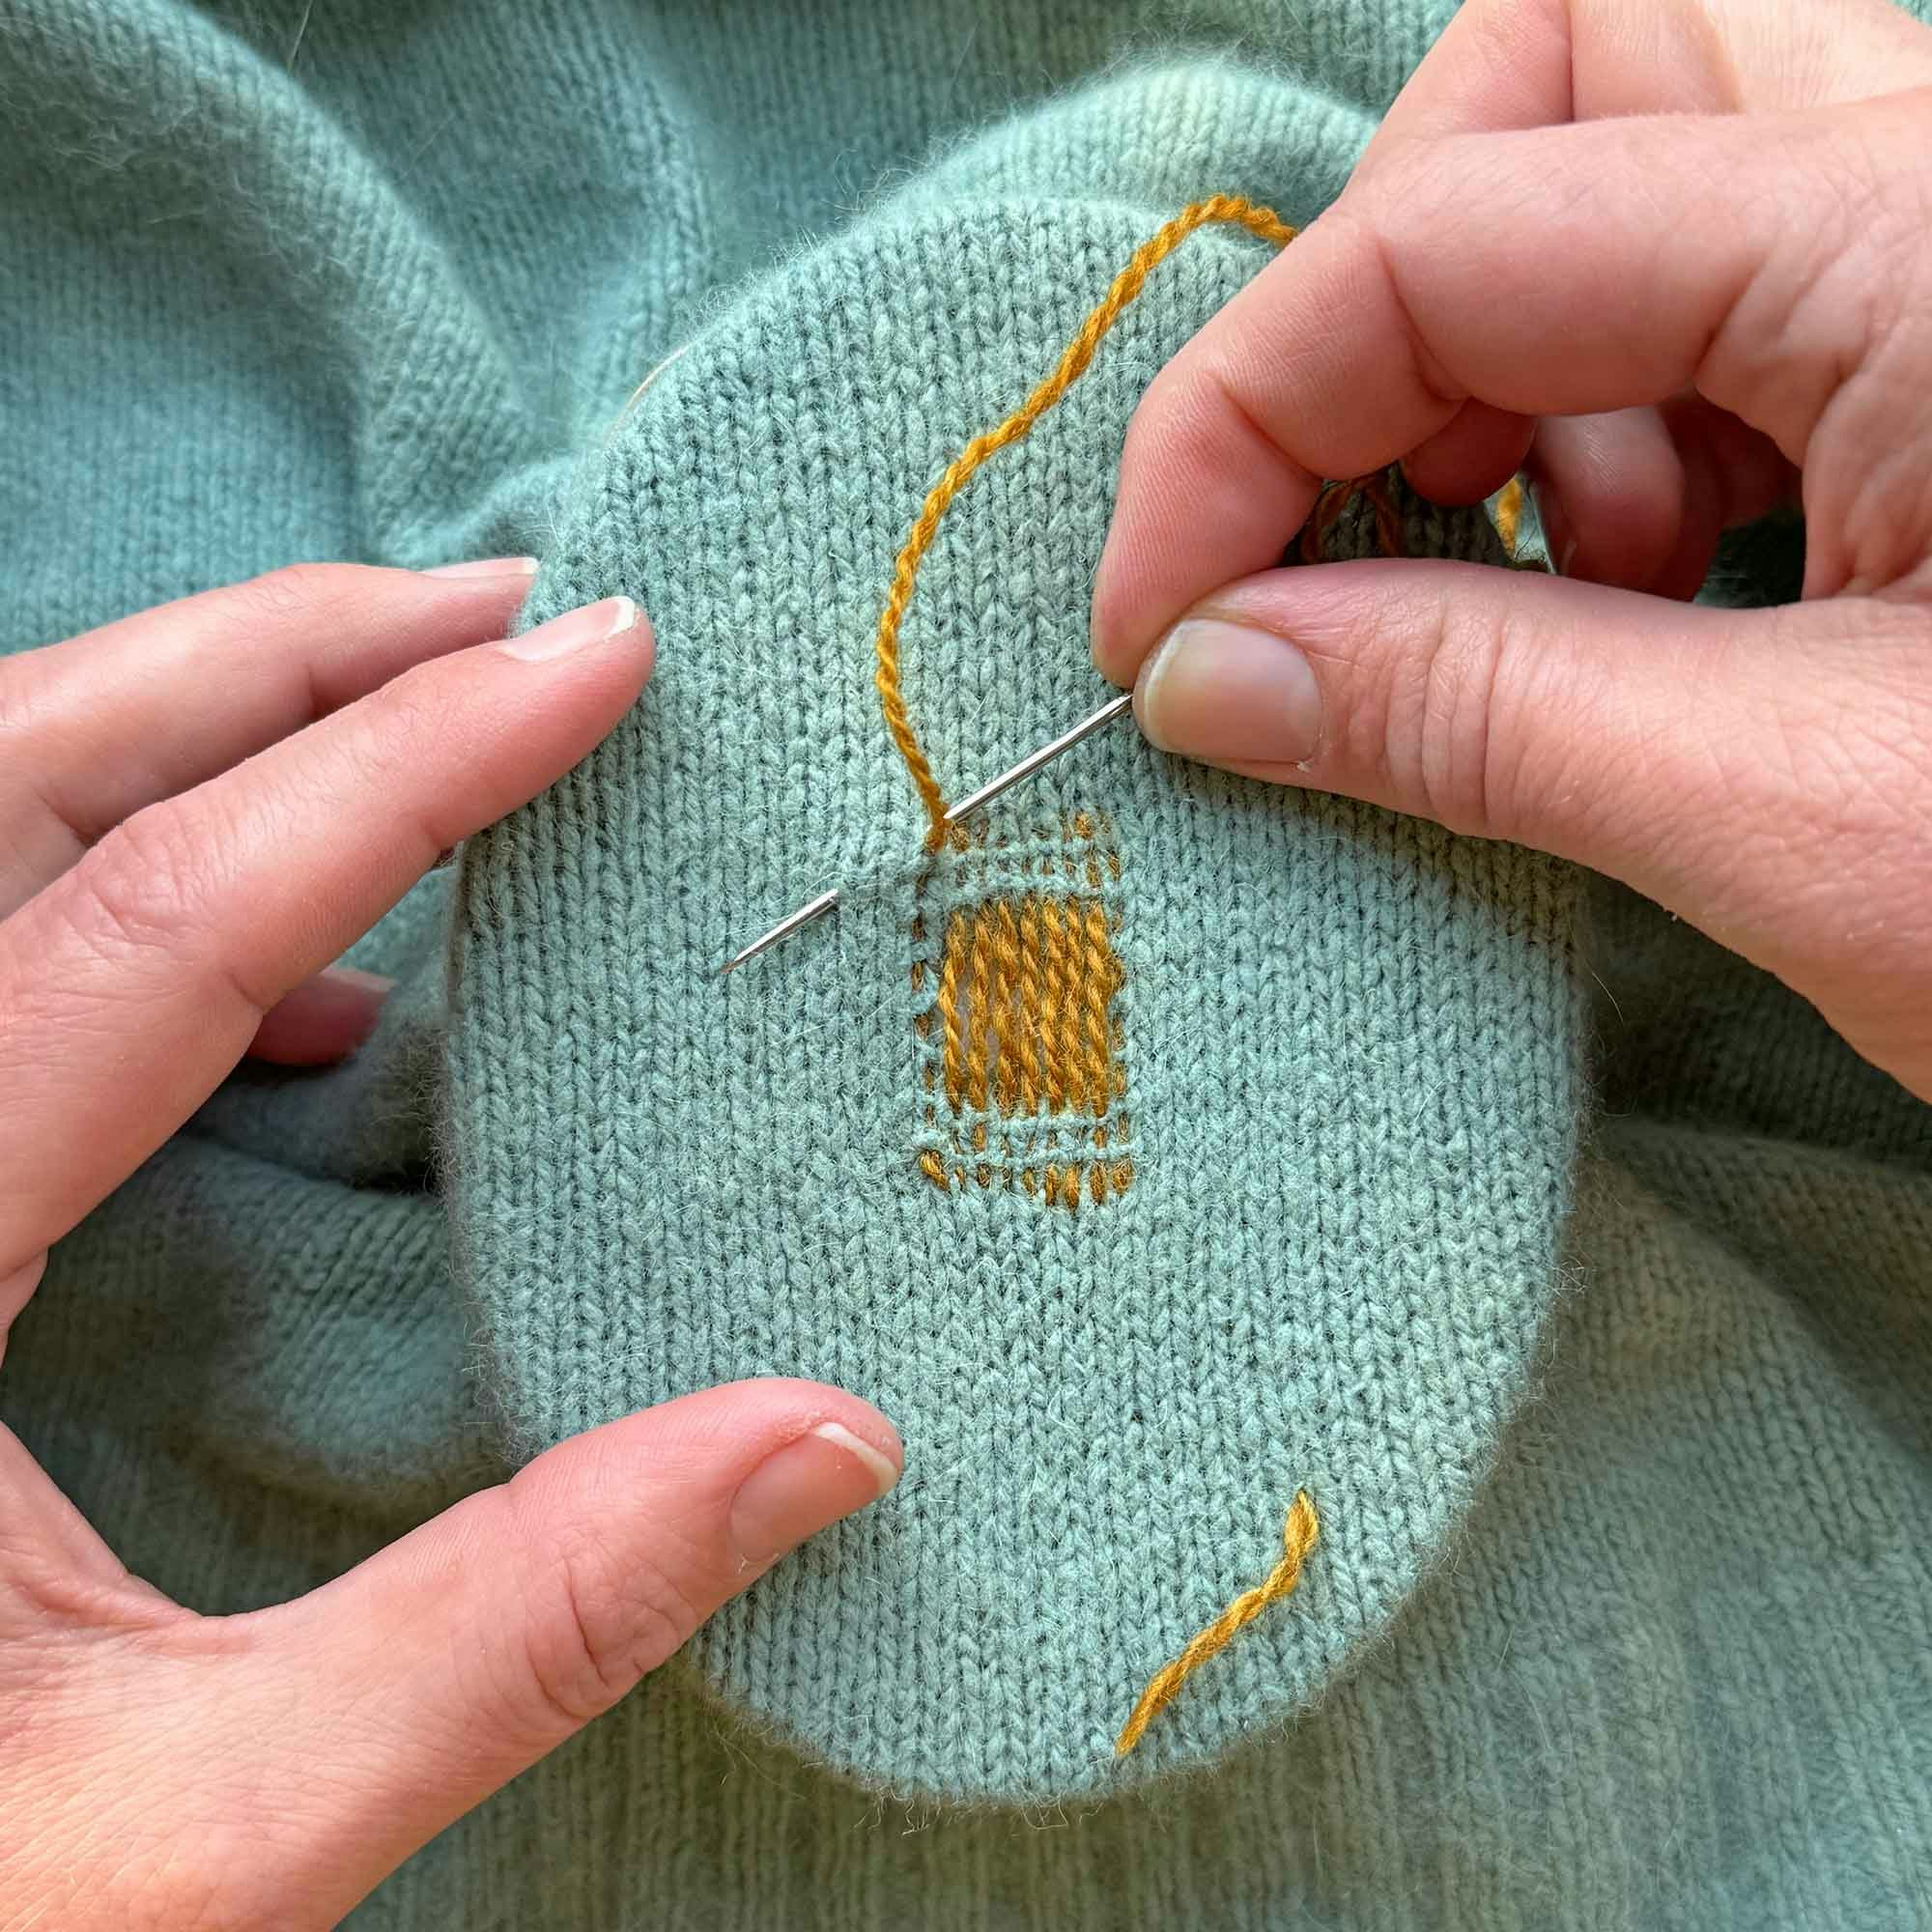
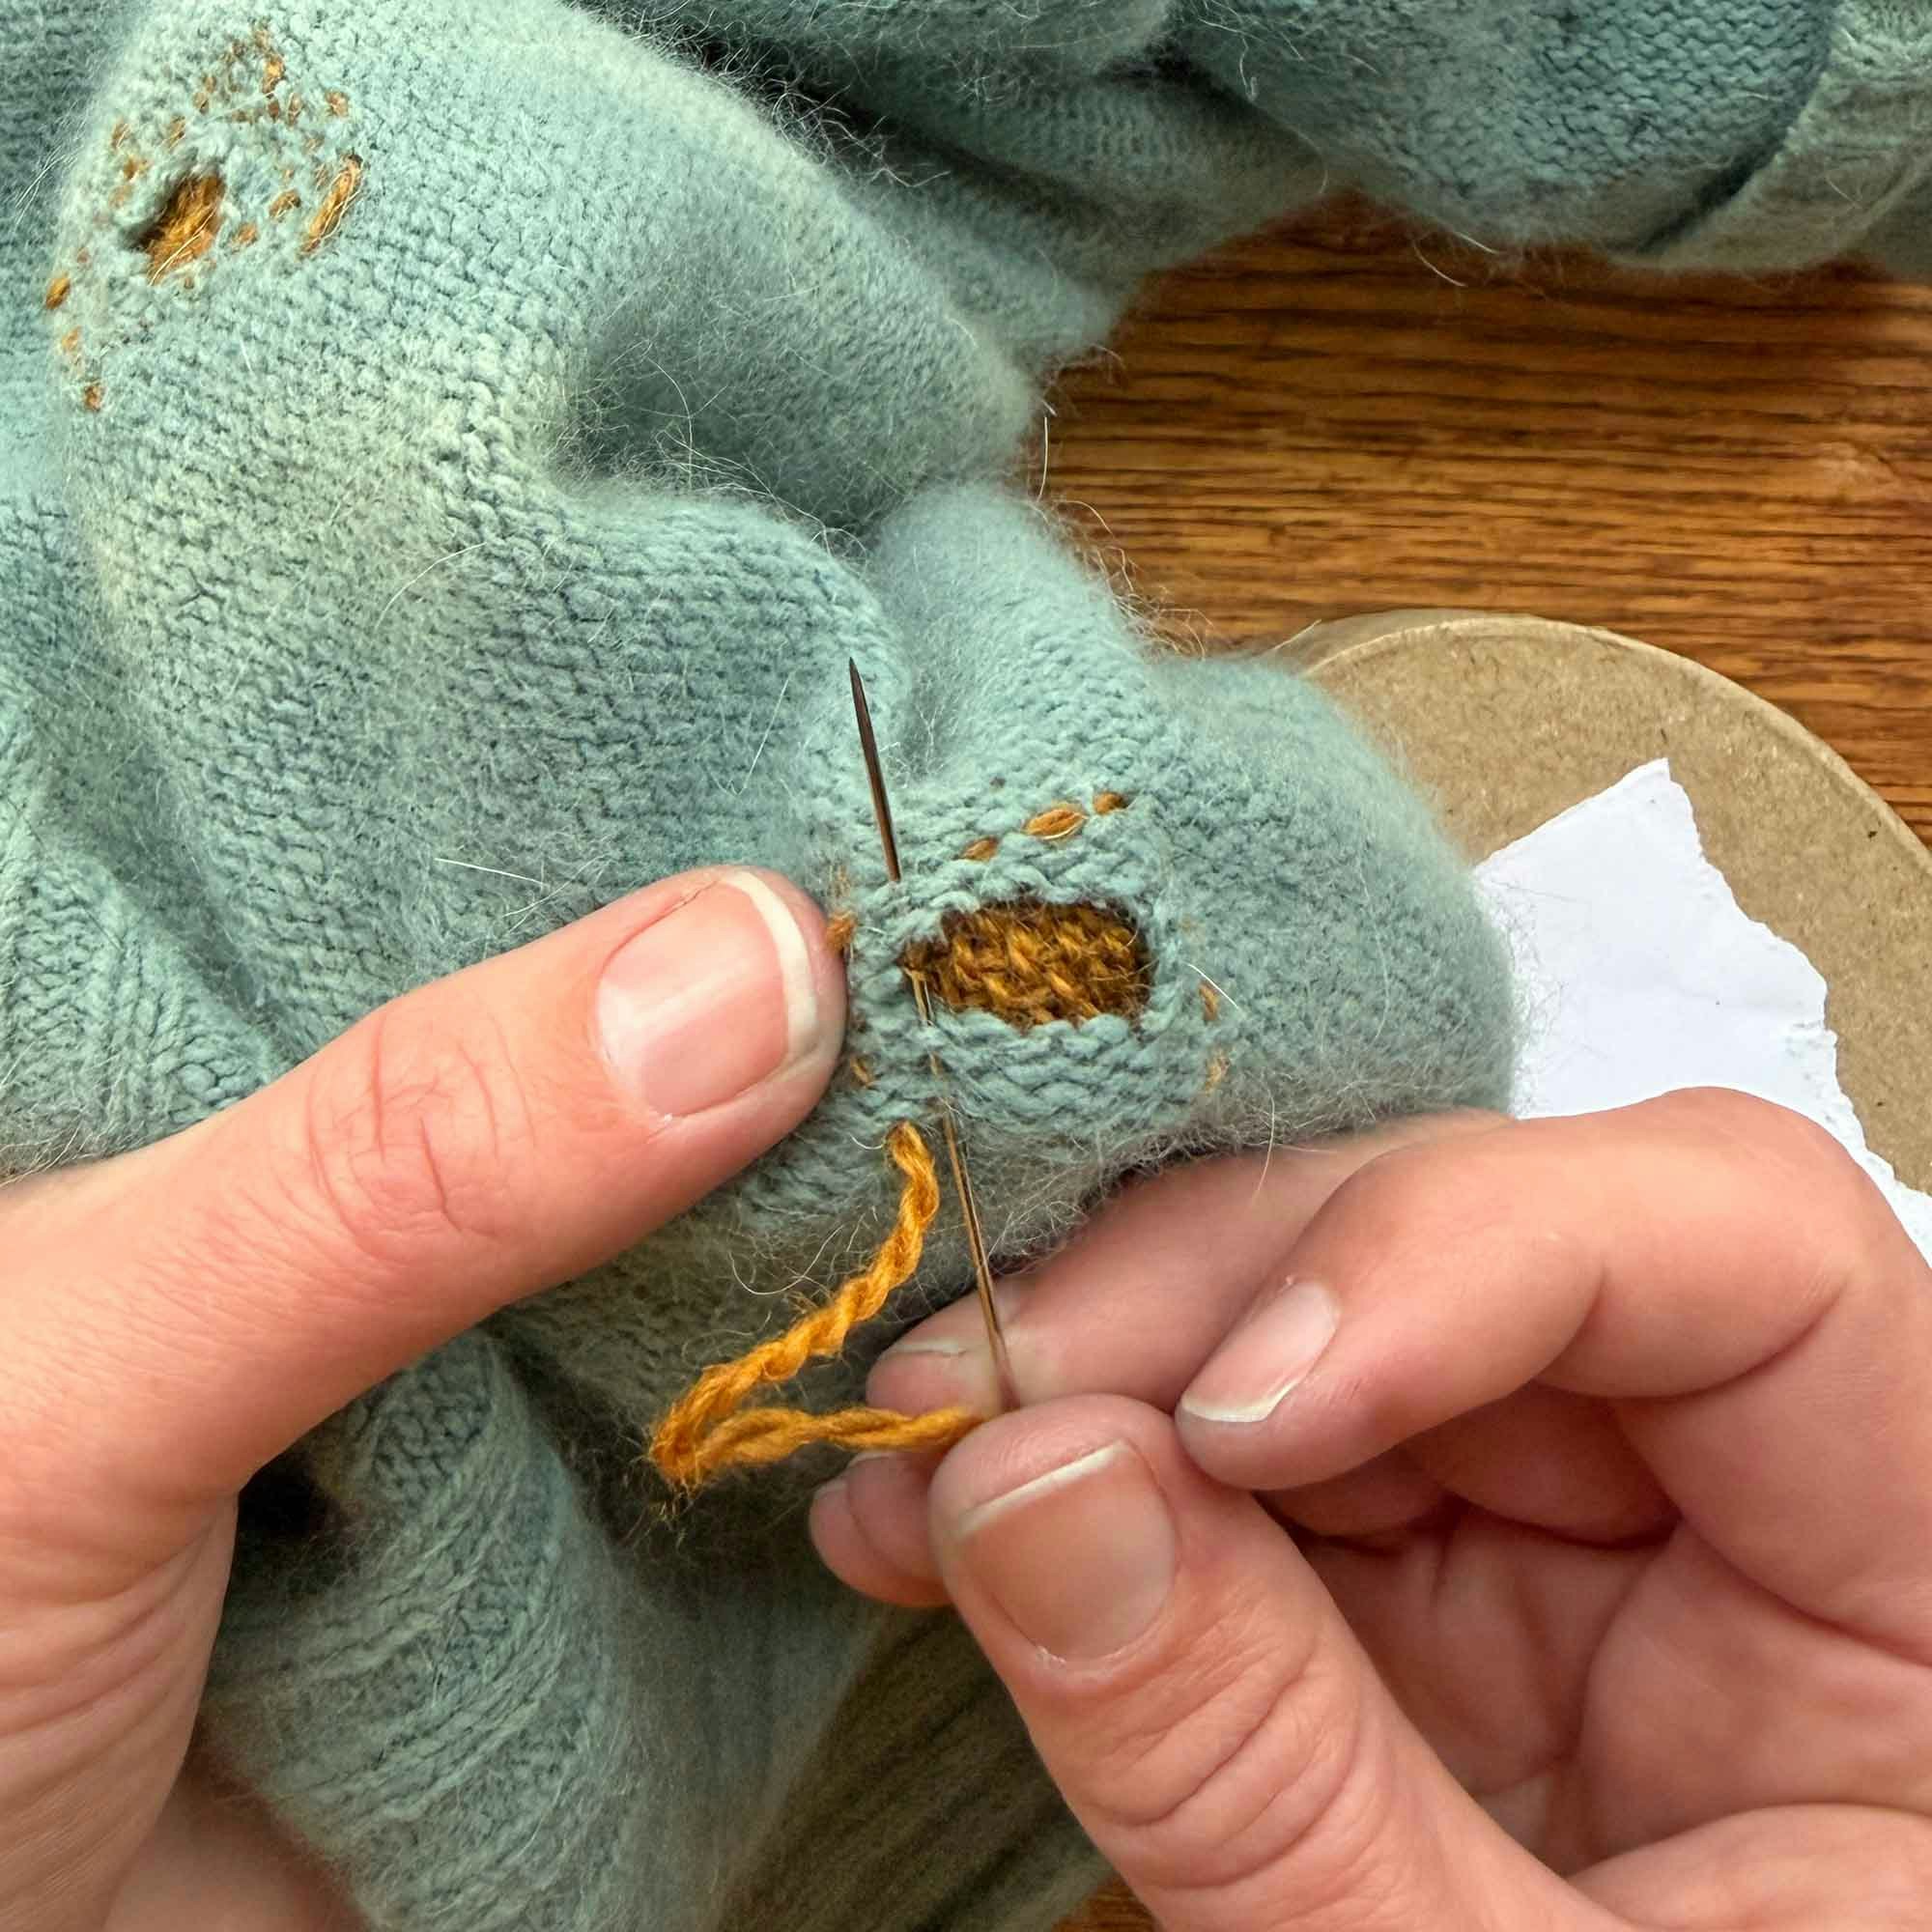
To start, insert your needle several inches away from the darning area and pull the yarn through until a short tail remains.
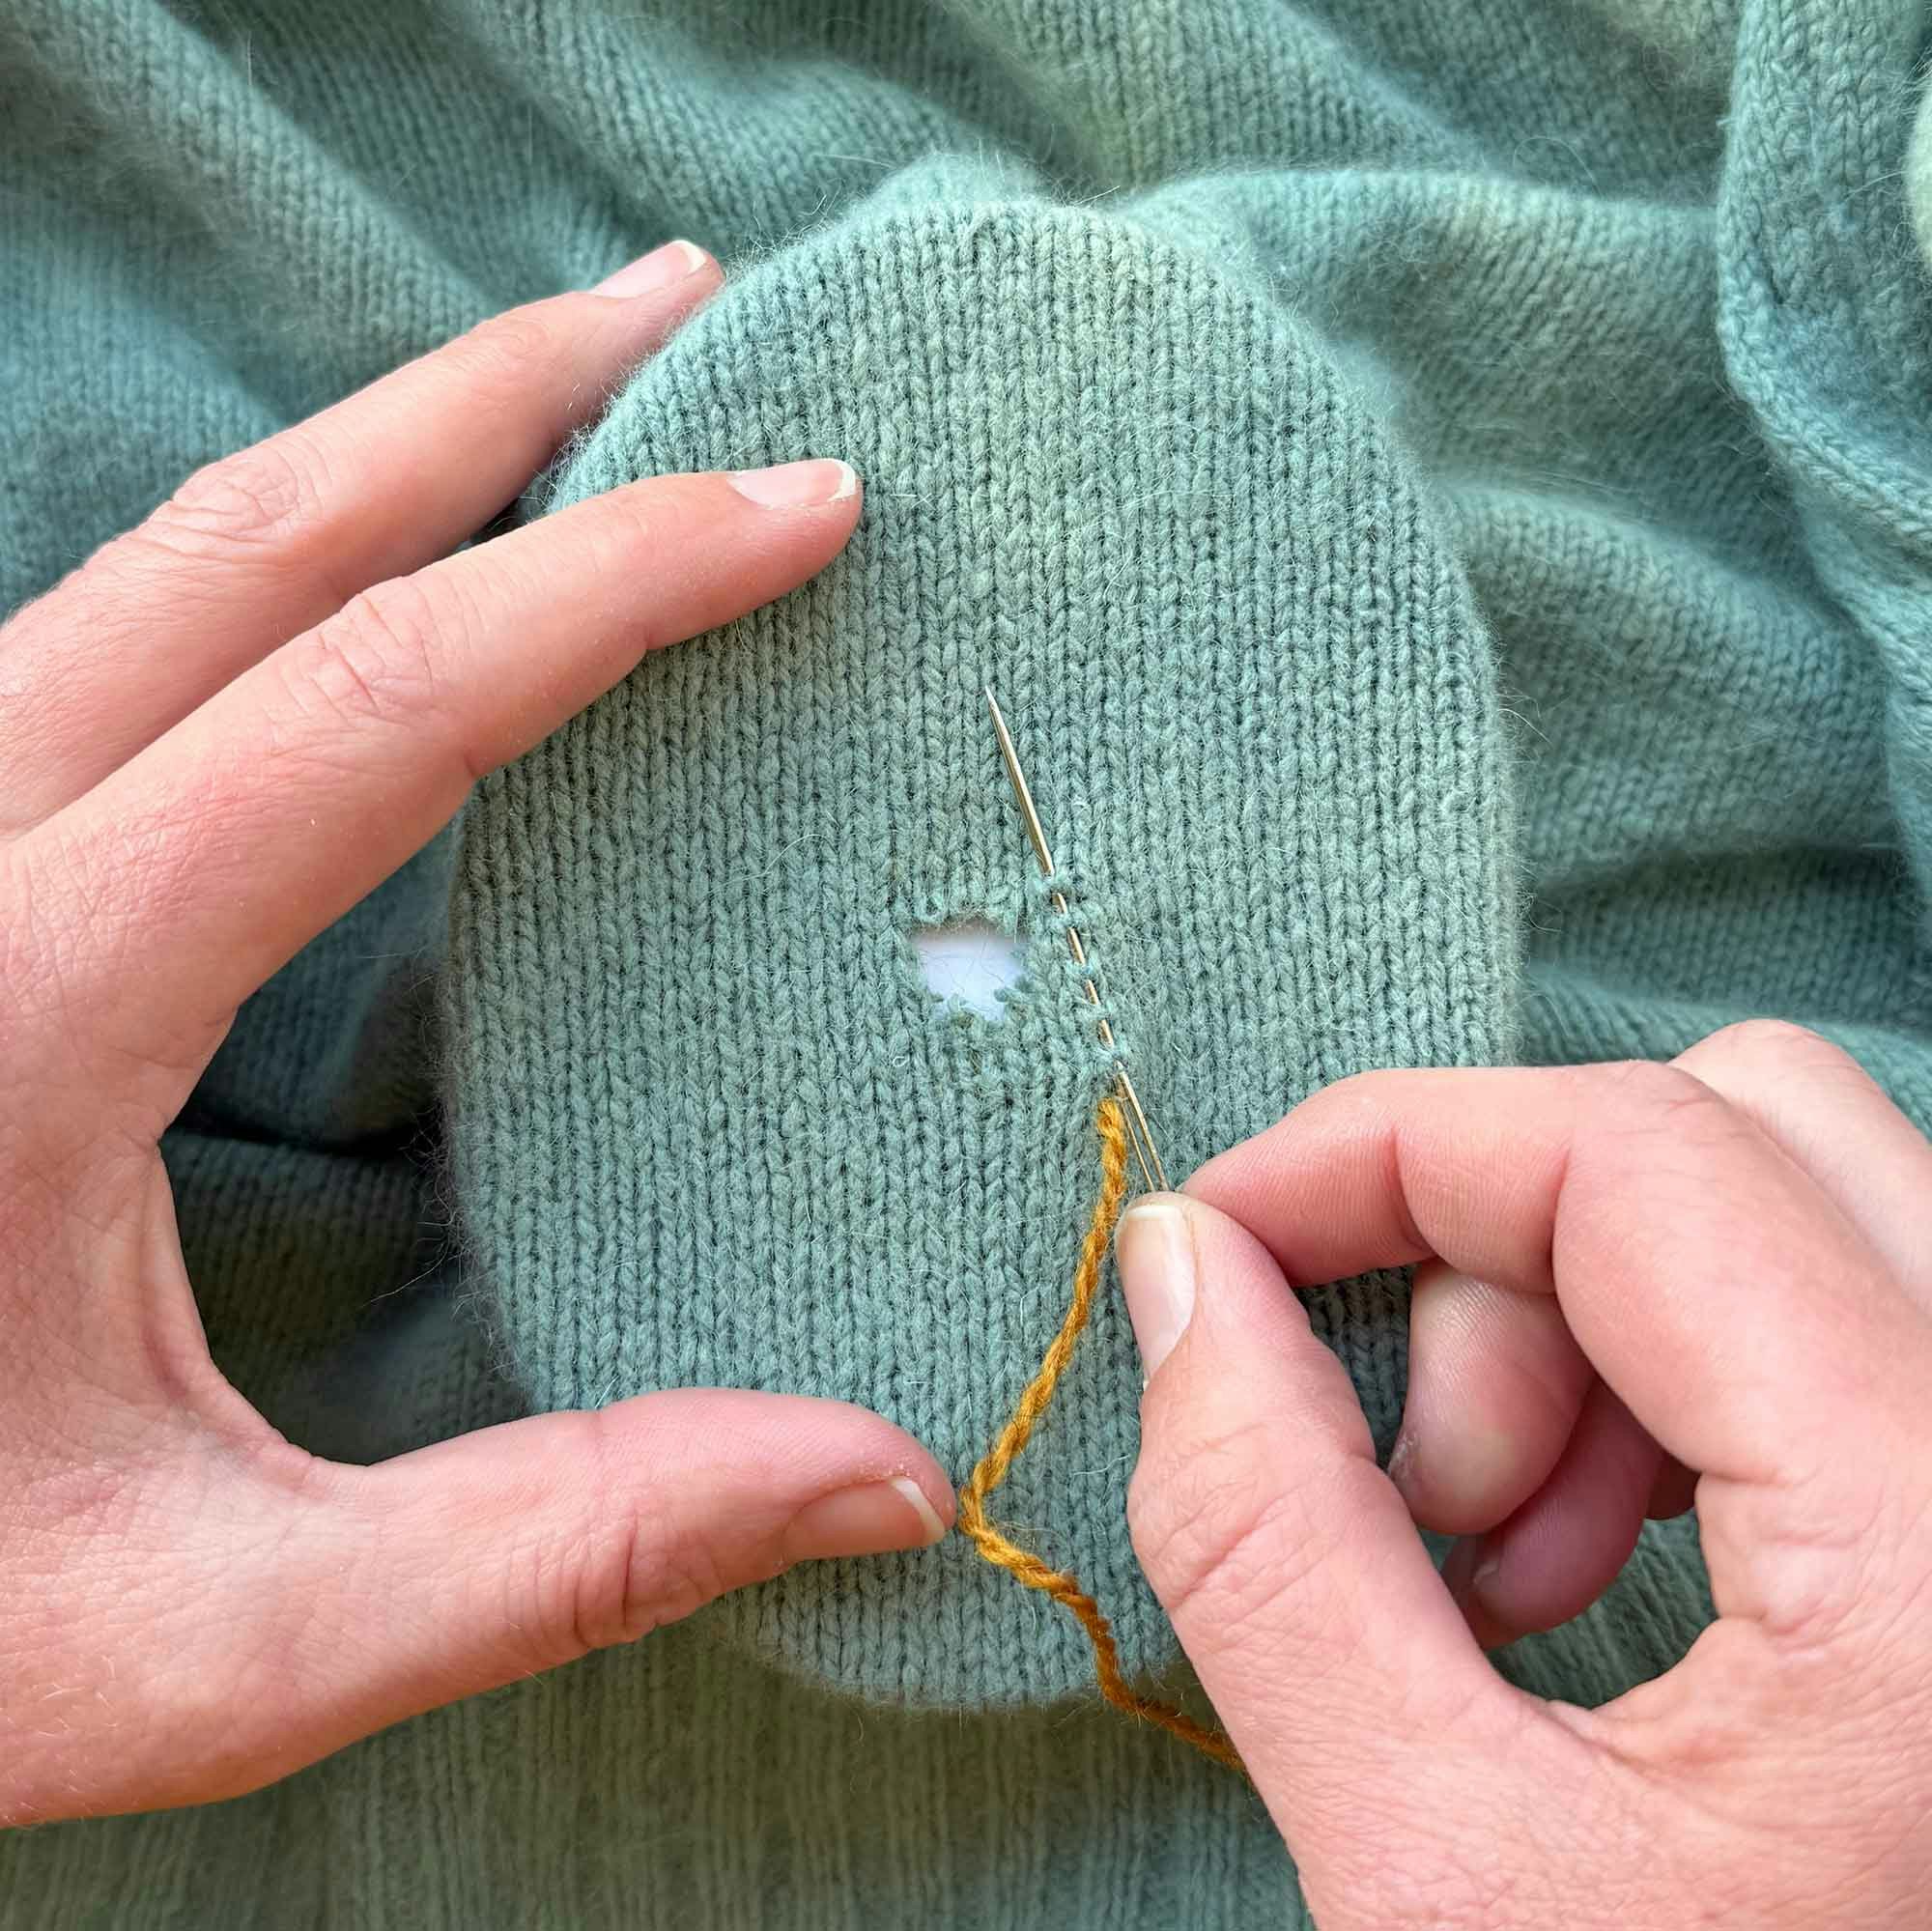
Next, begin a vertical line of stitches, going over and under the bars that form purl stitches on the wrong side. When you get to the top of the mend, work the next row of stitches from top to bottom.
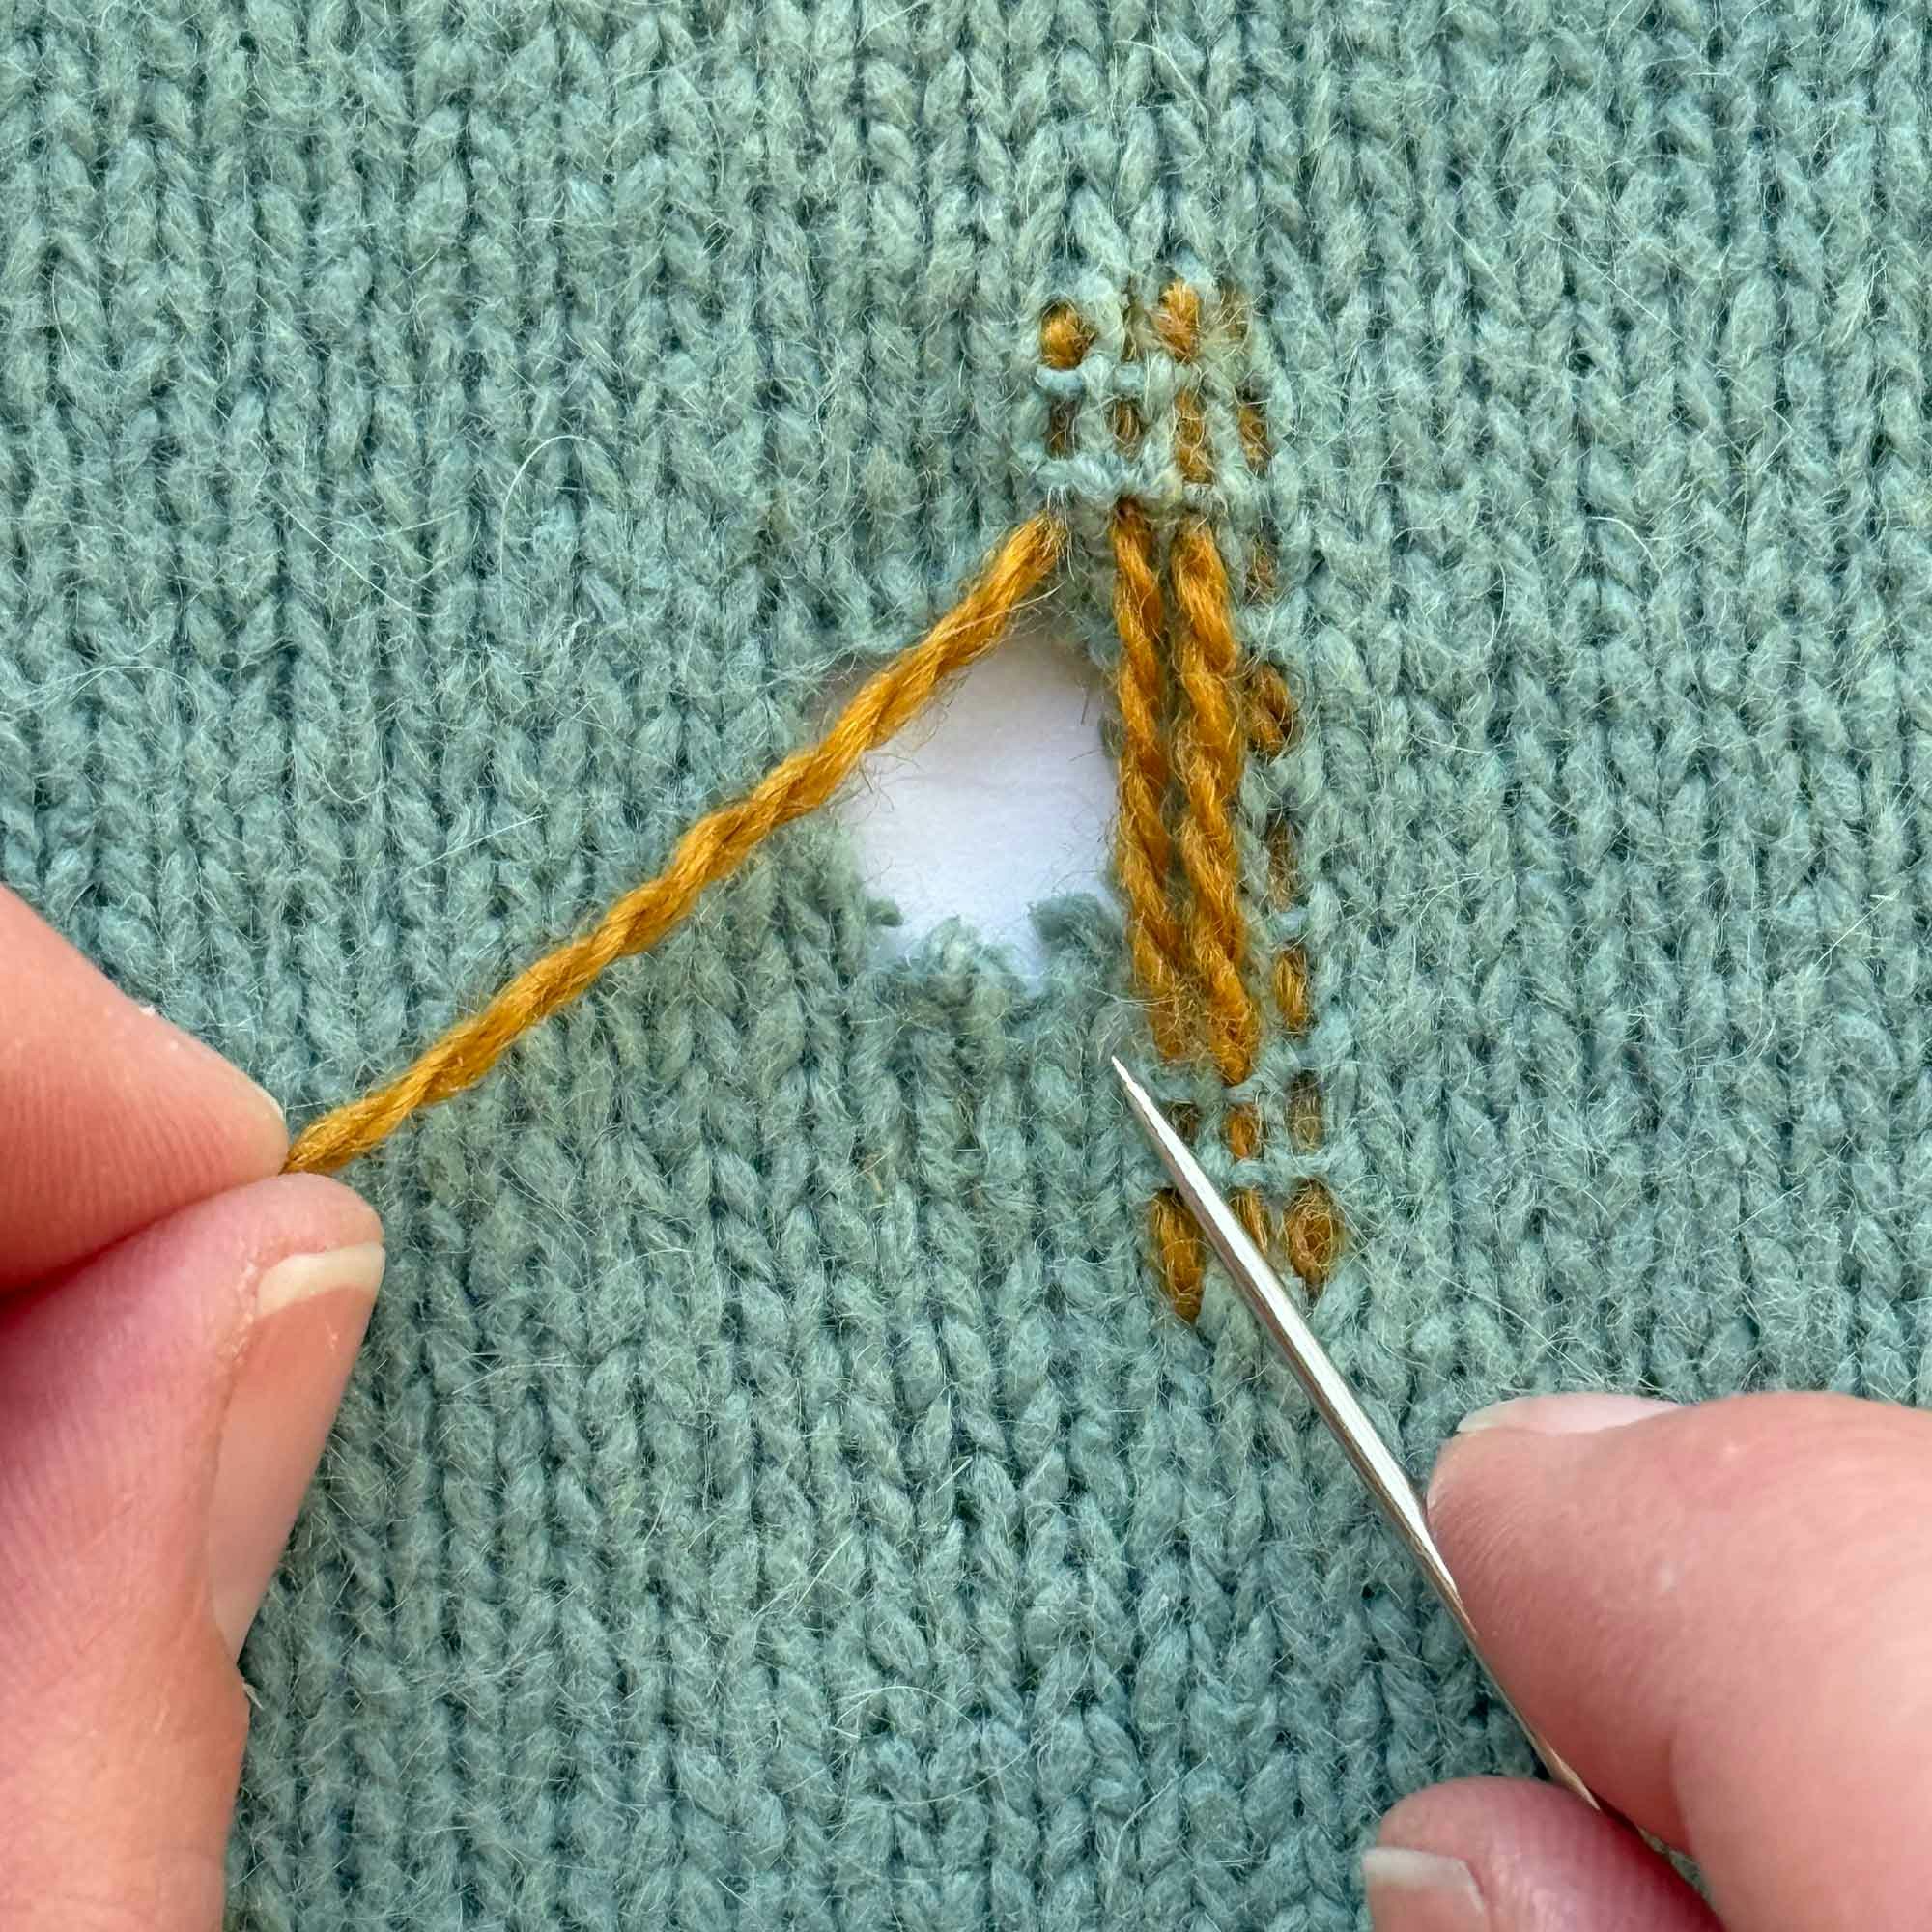
When you reach the hole, the mending yarn stretches over the surface and begins stitching again on the other side of the hole. These long strands will be woven later. I decided to align my short stitches above and below the hole for this mend, but they can also be more random, creating organic edges to the mend. It’s up to you!
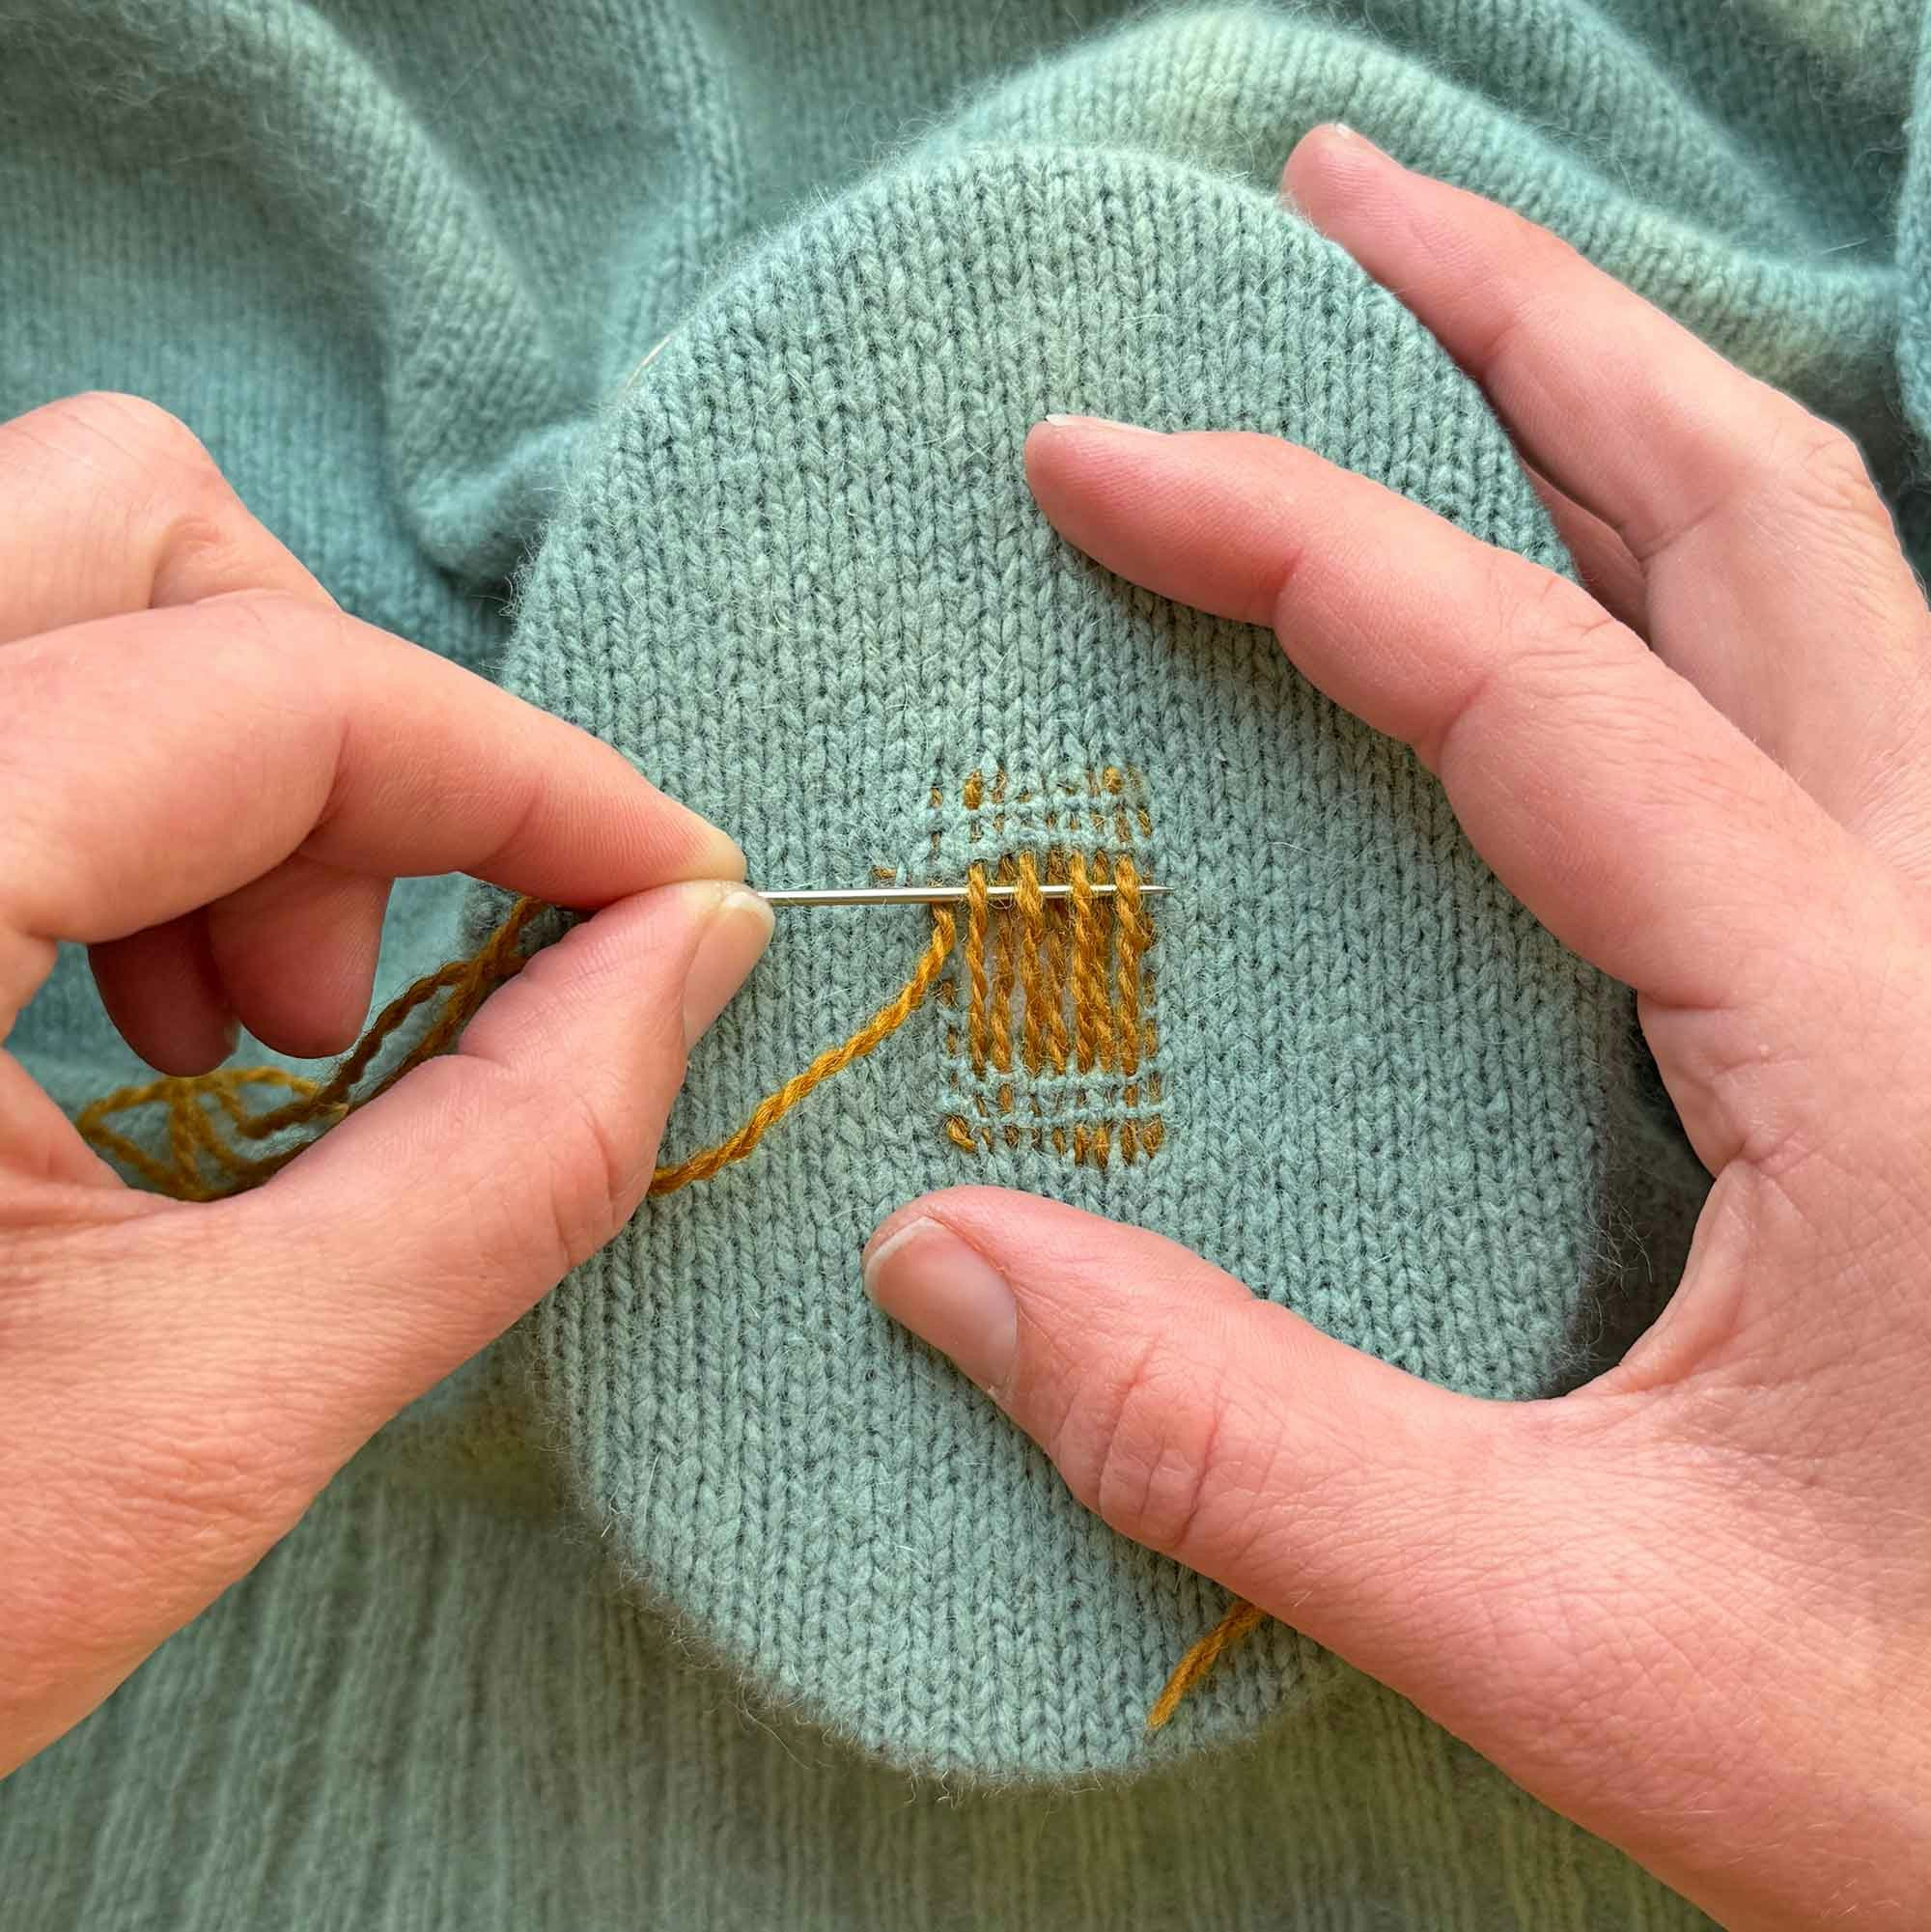
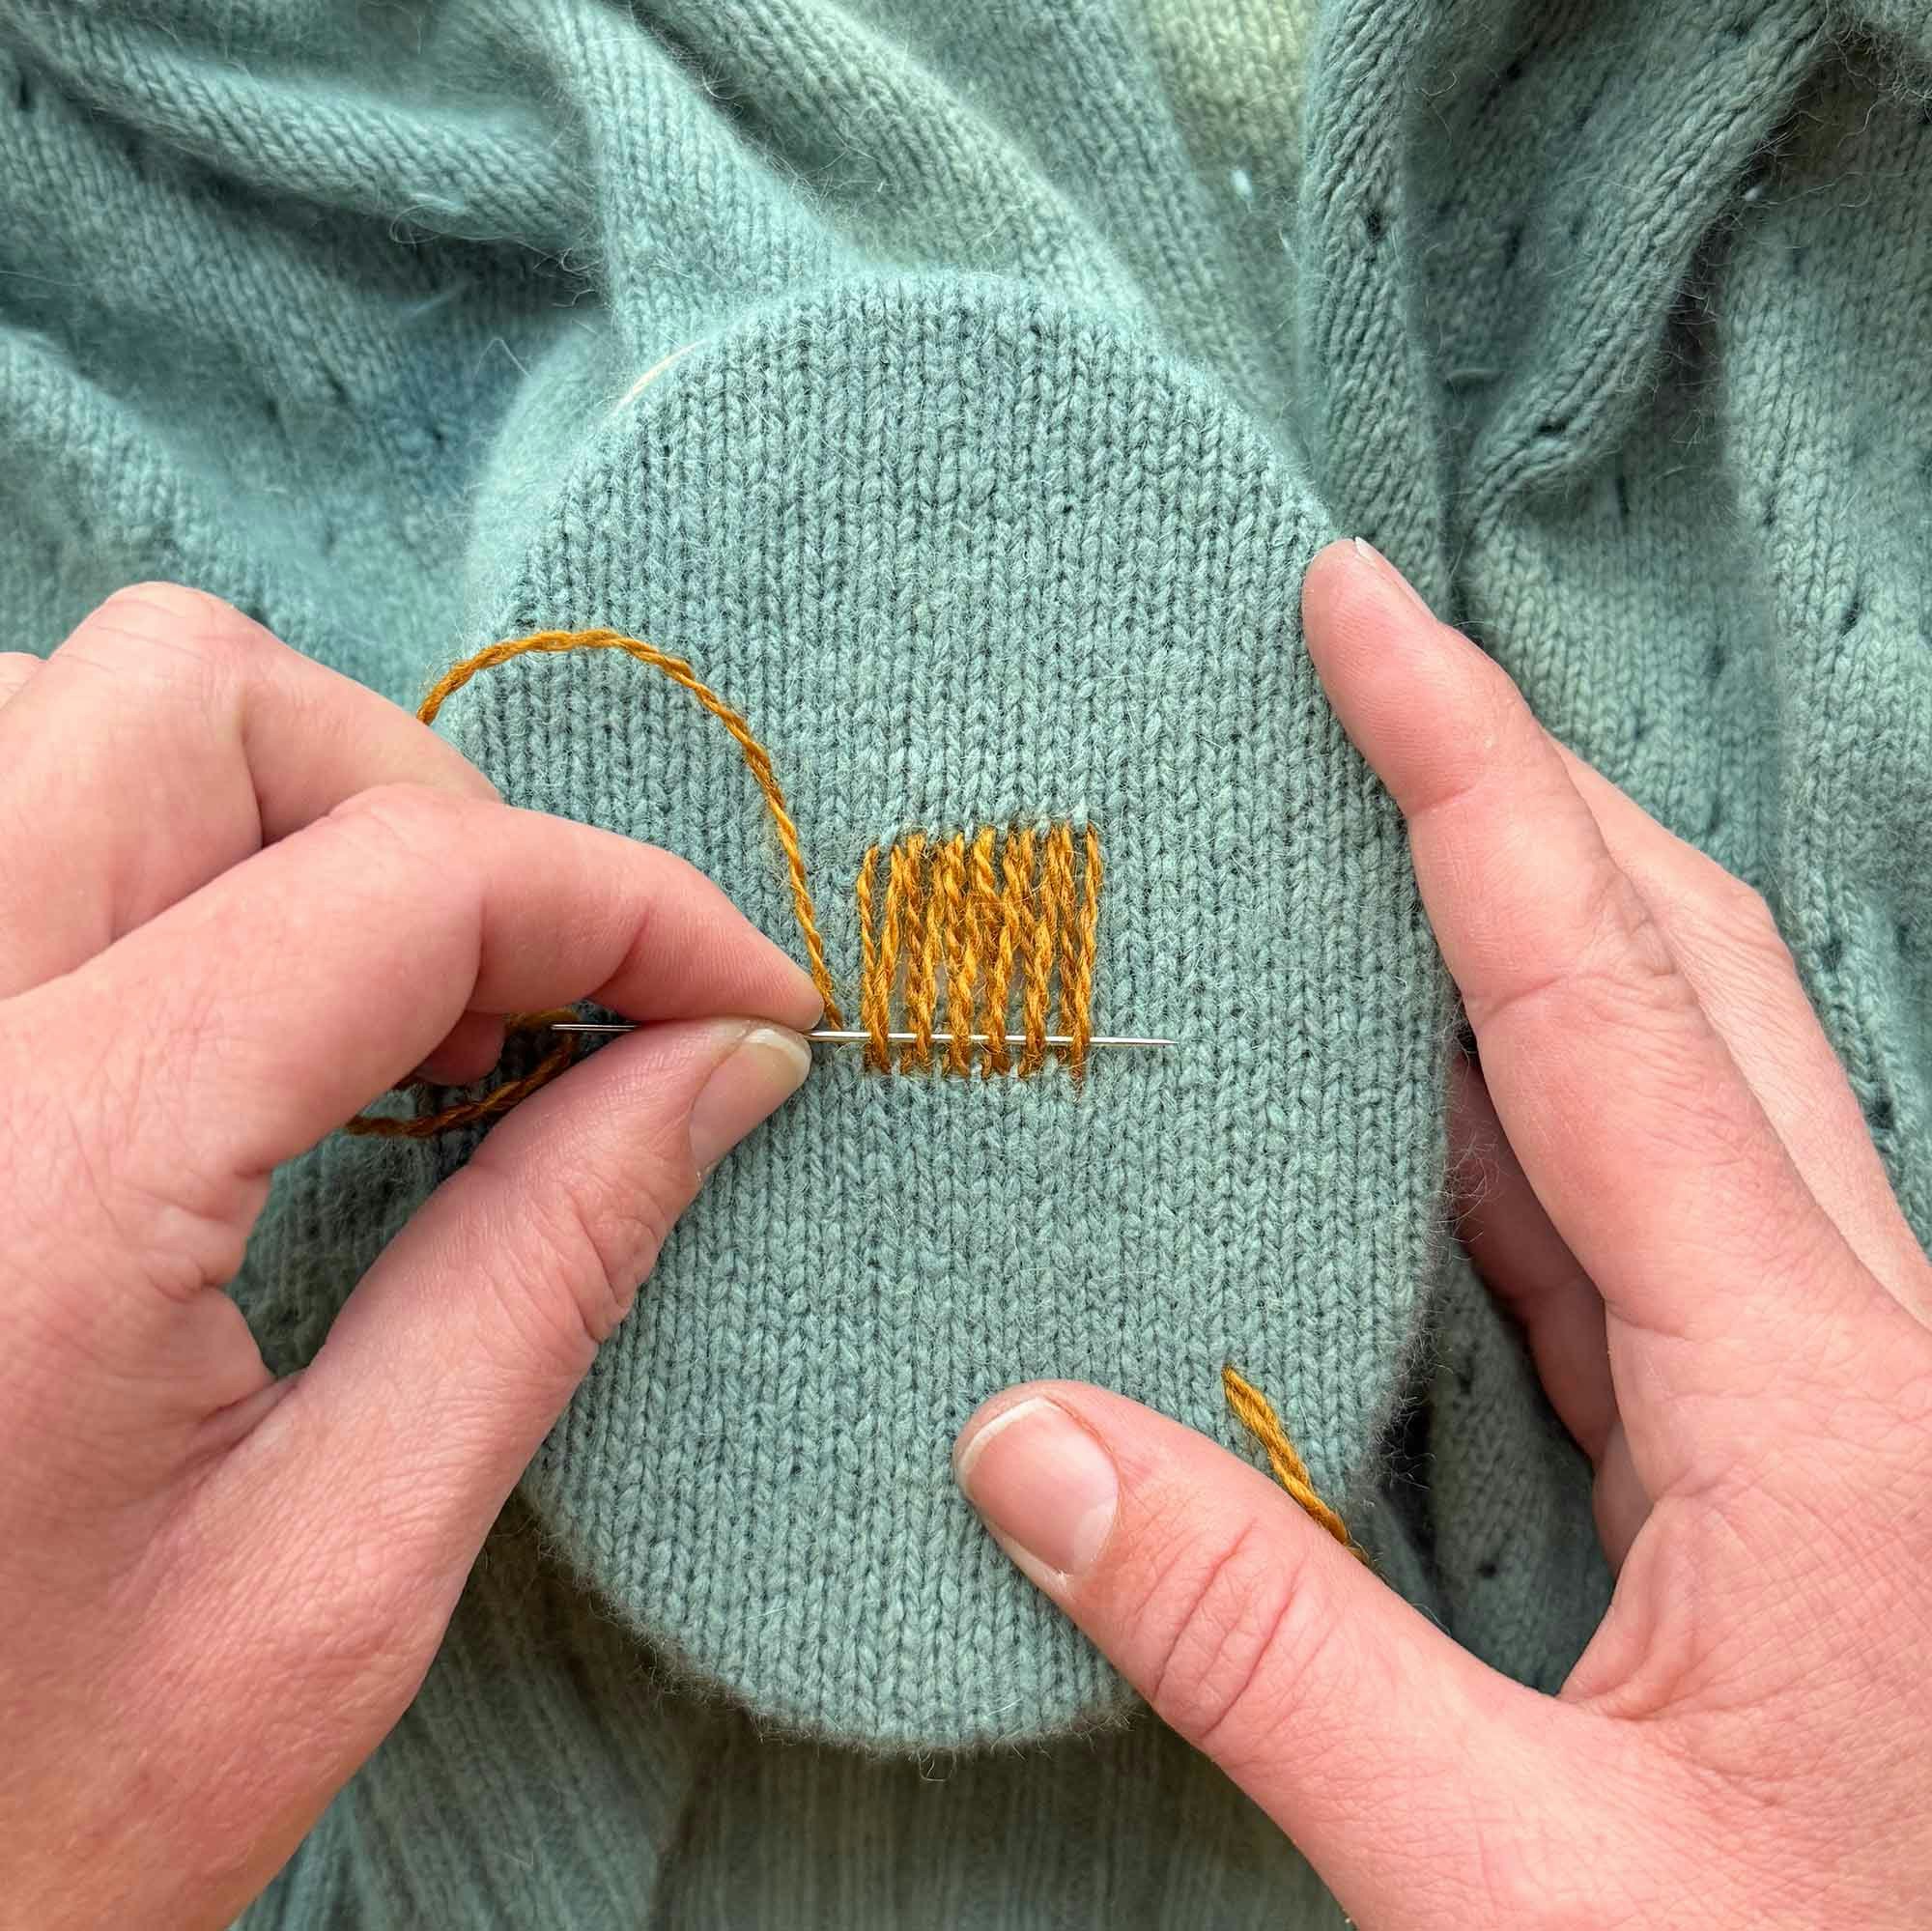
To begin working horizontally, you can either insert the same needle and thread so it can begin the first row, or you can start with a different color.
Work a few stitches and then weave the needle tip over and under every other thread (for plain weave). Finish by adding a few short stitches on the other side of the hole.
On the next row, create a few short stitches again, and now the needle tip will pass over and under the opposite threads. So, if the needle went over a thread on the last pass, it will now go under.
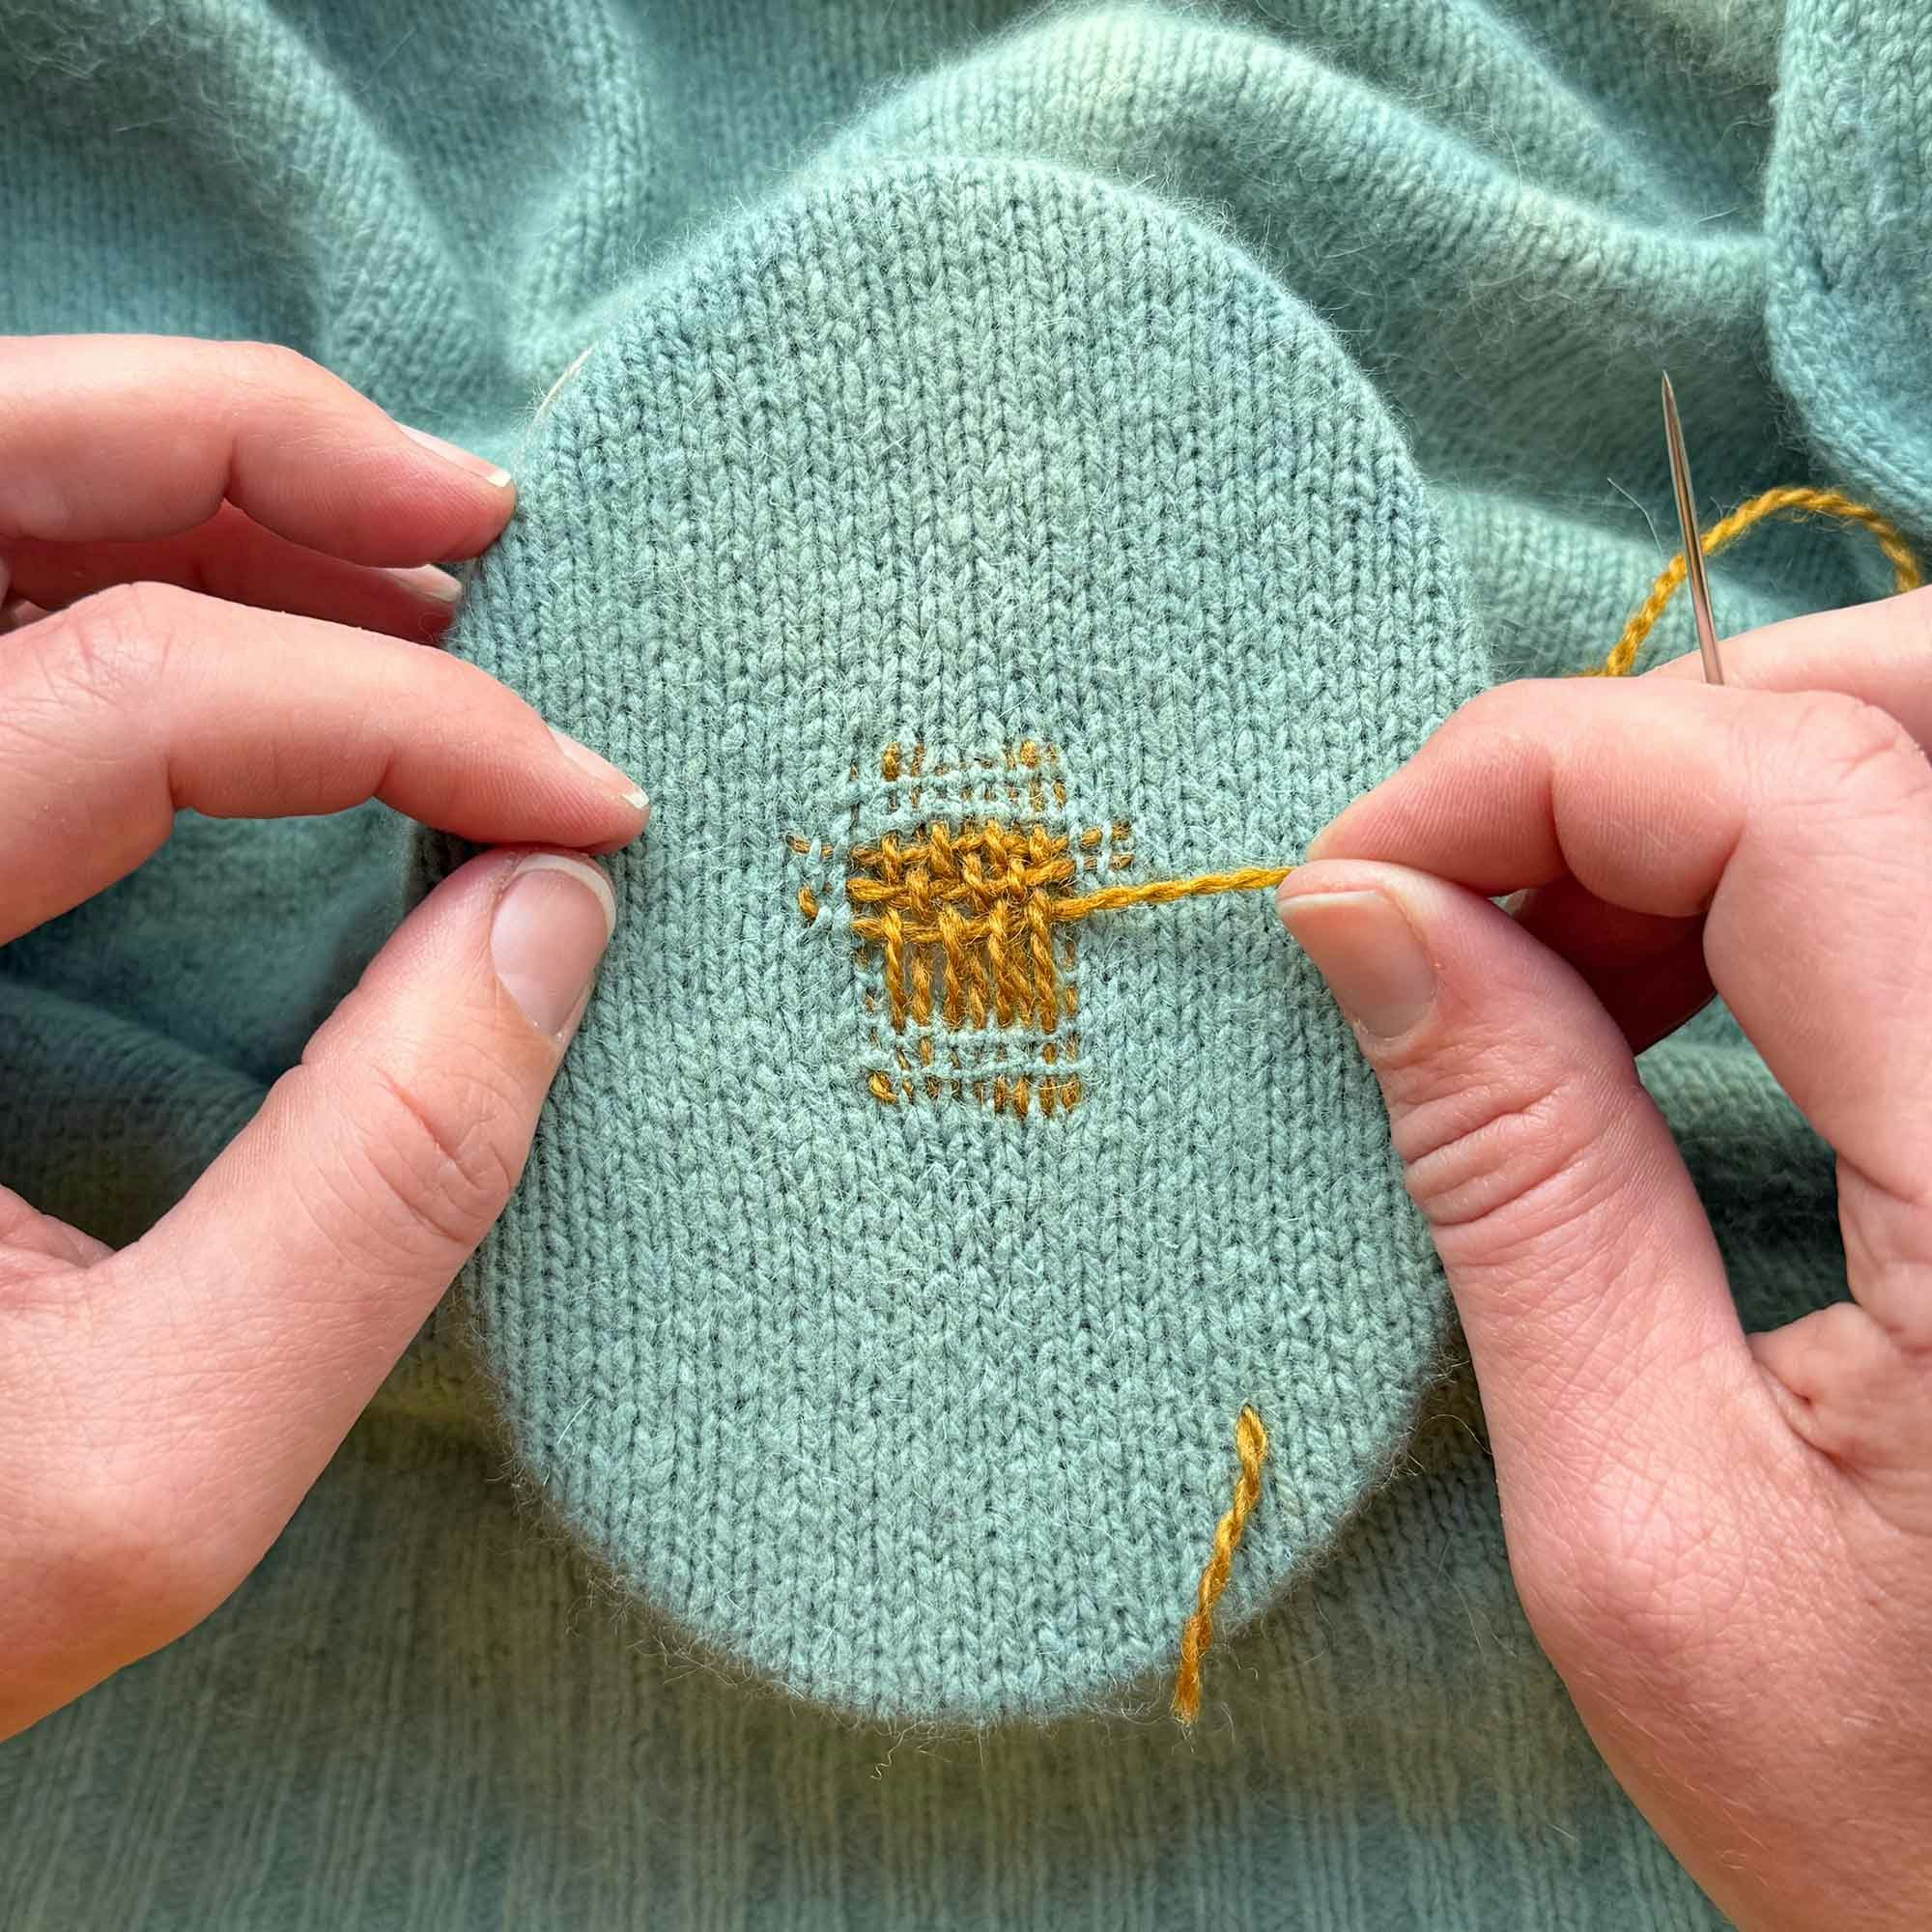
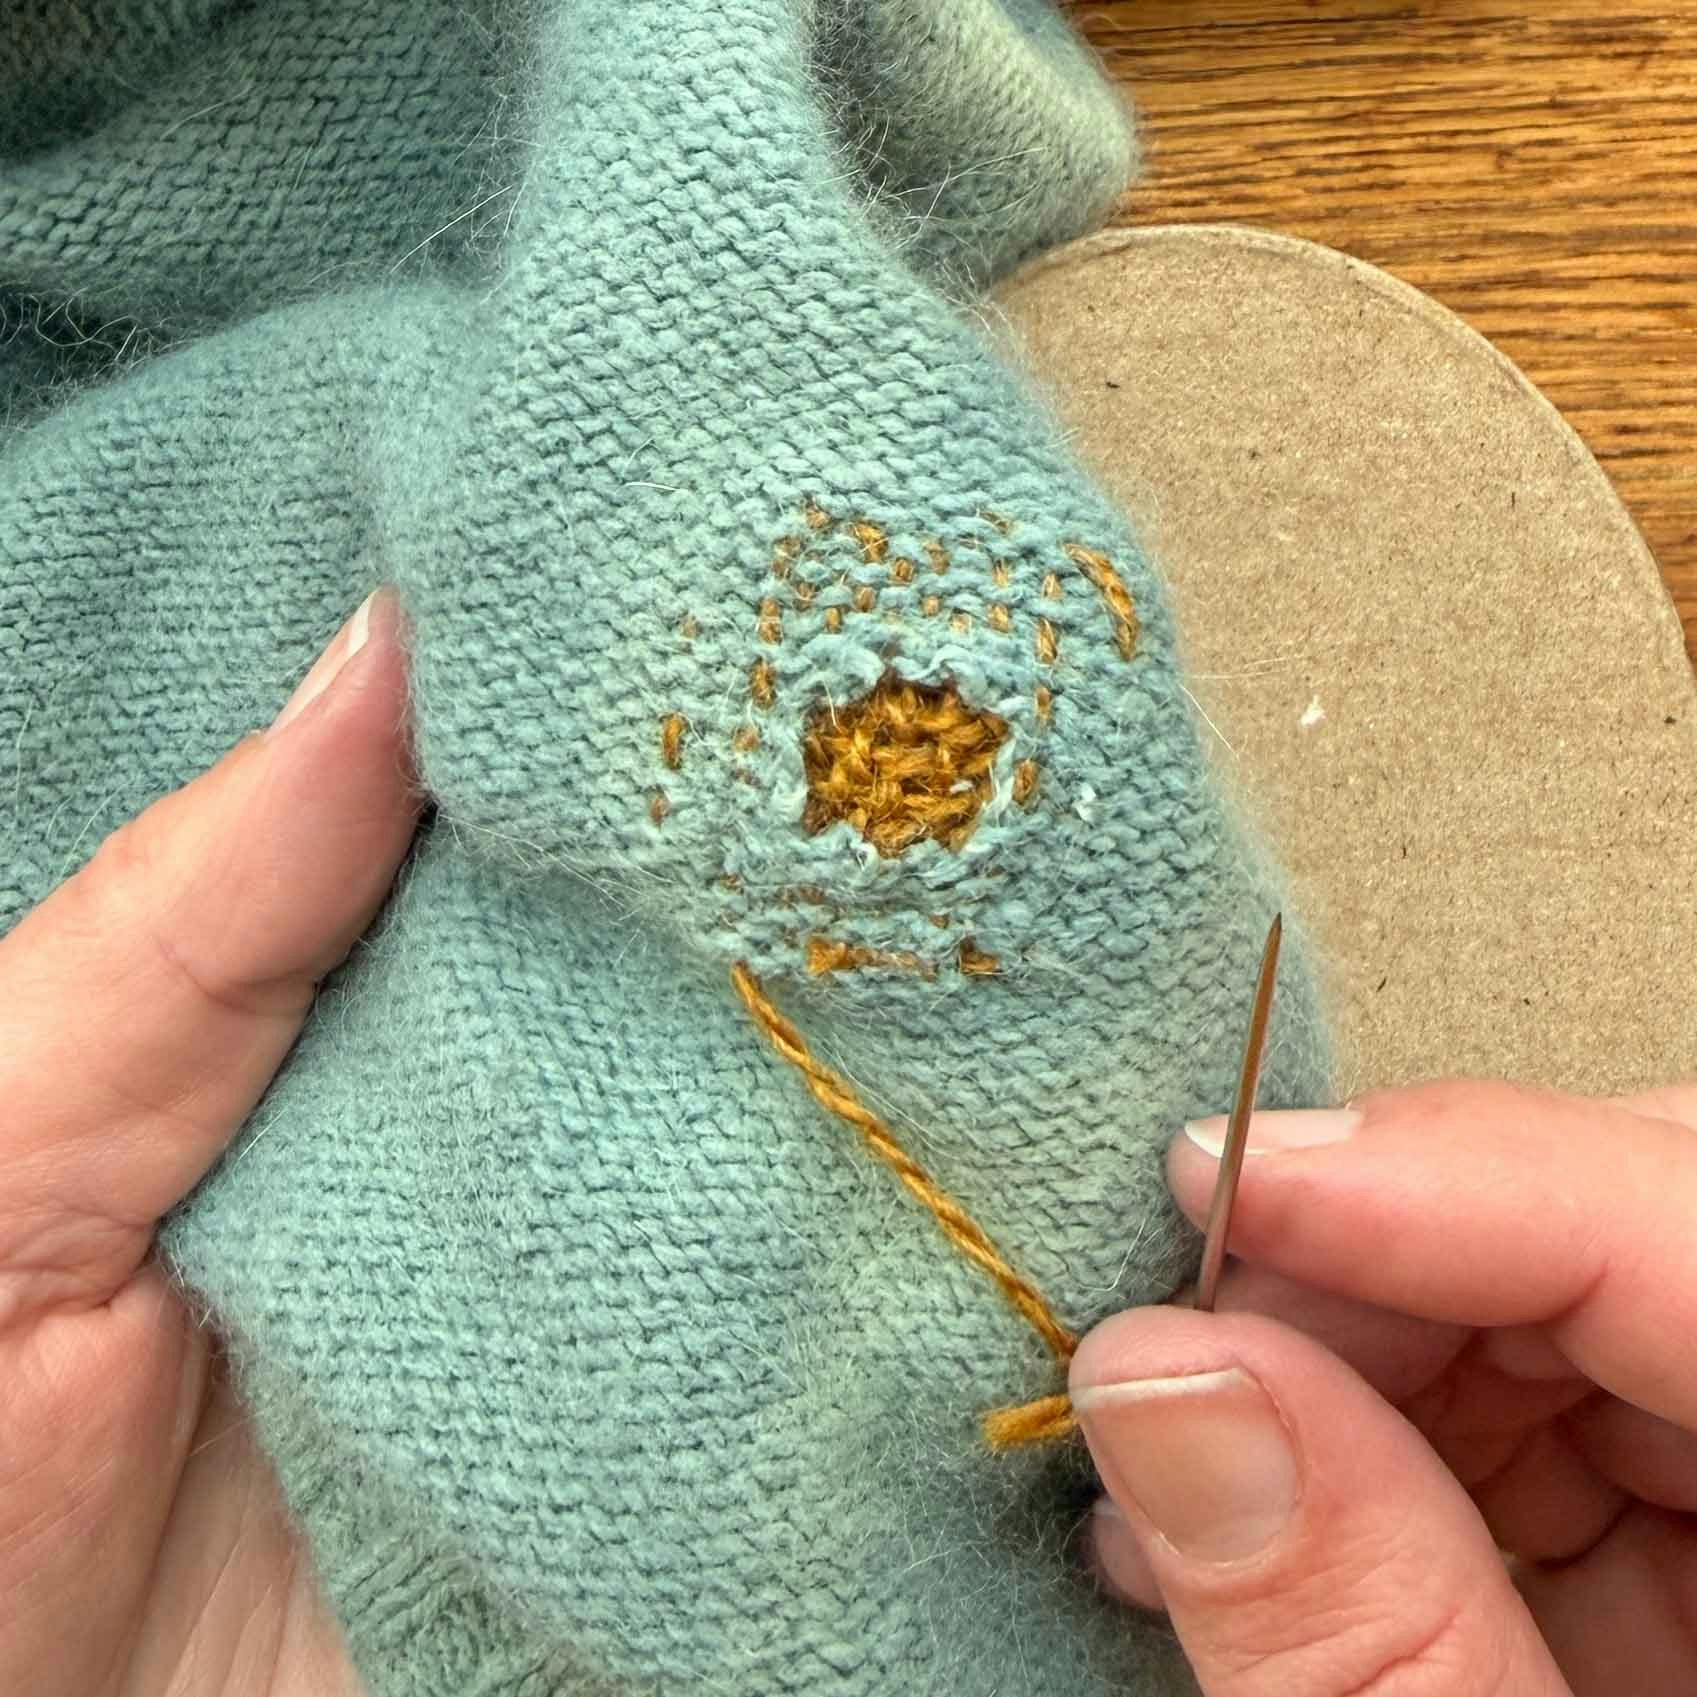
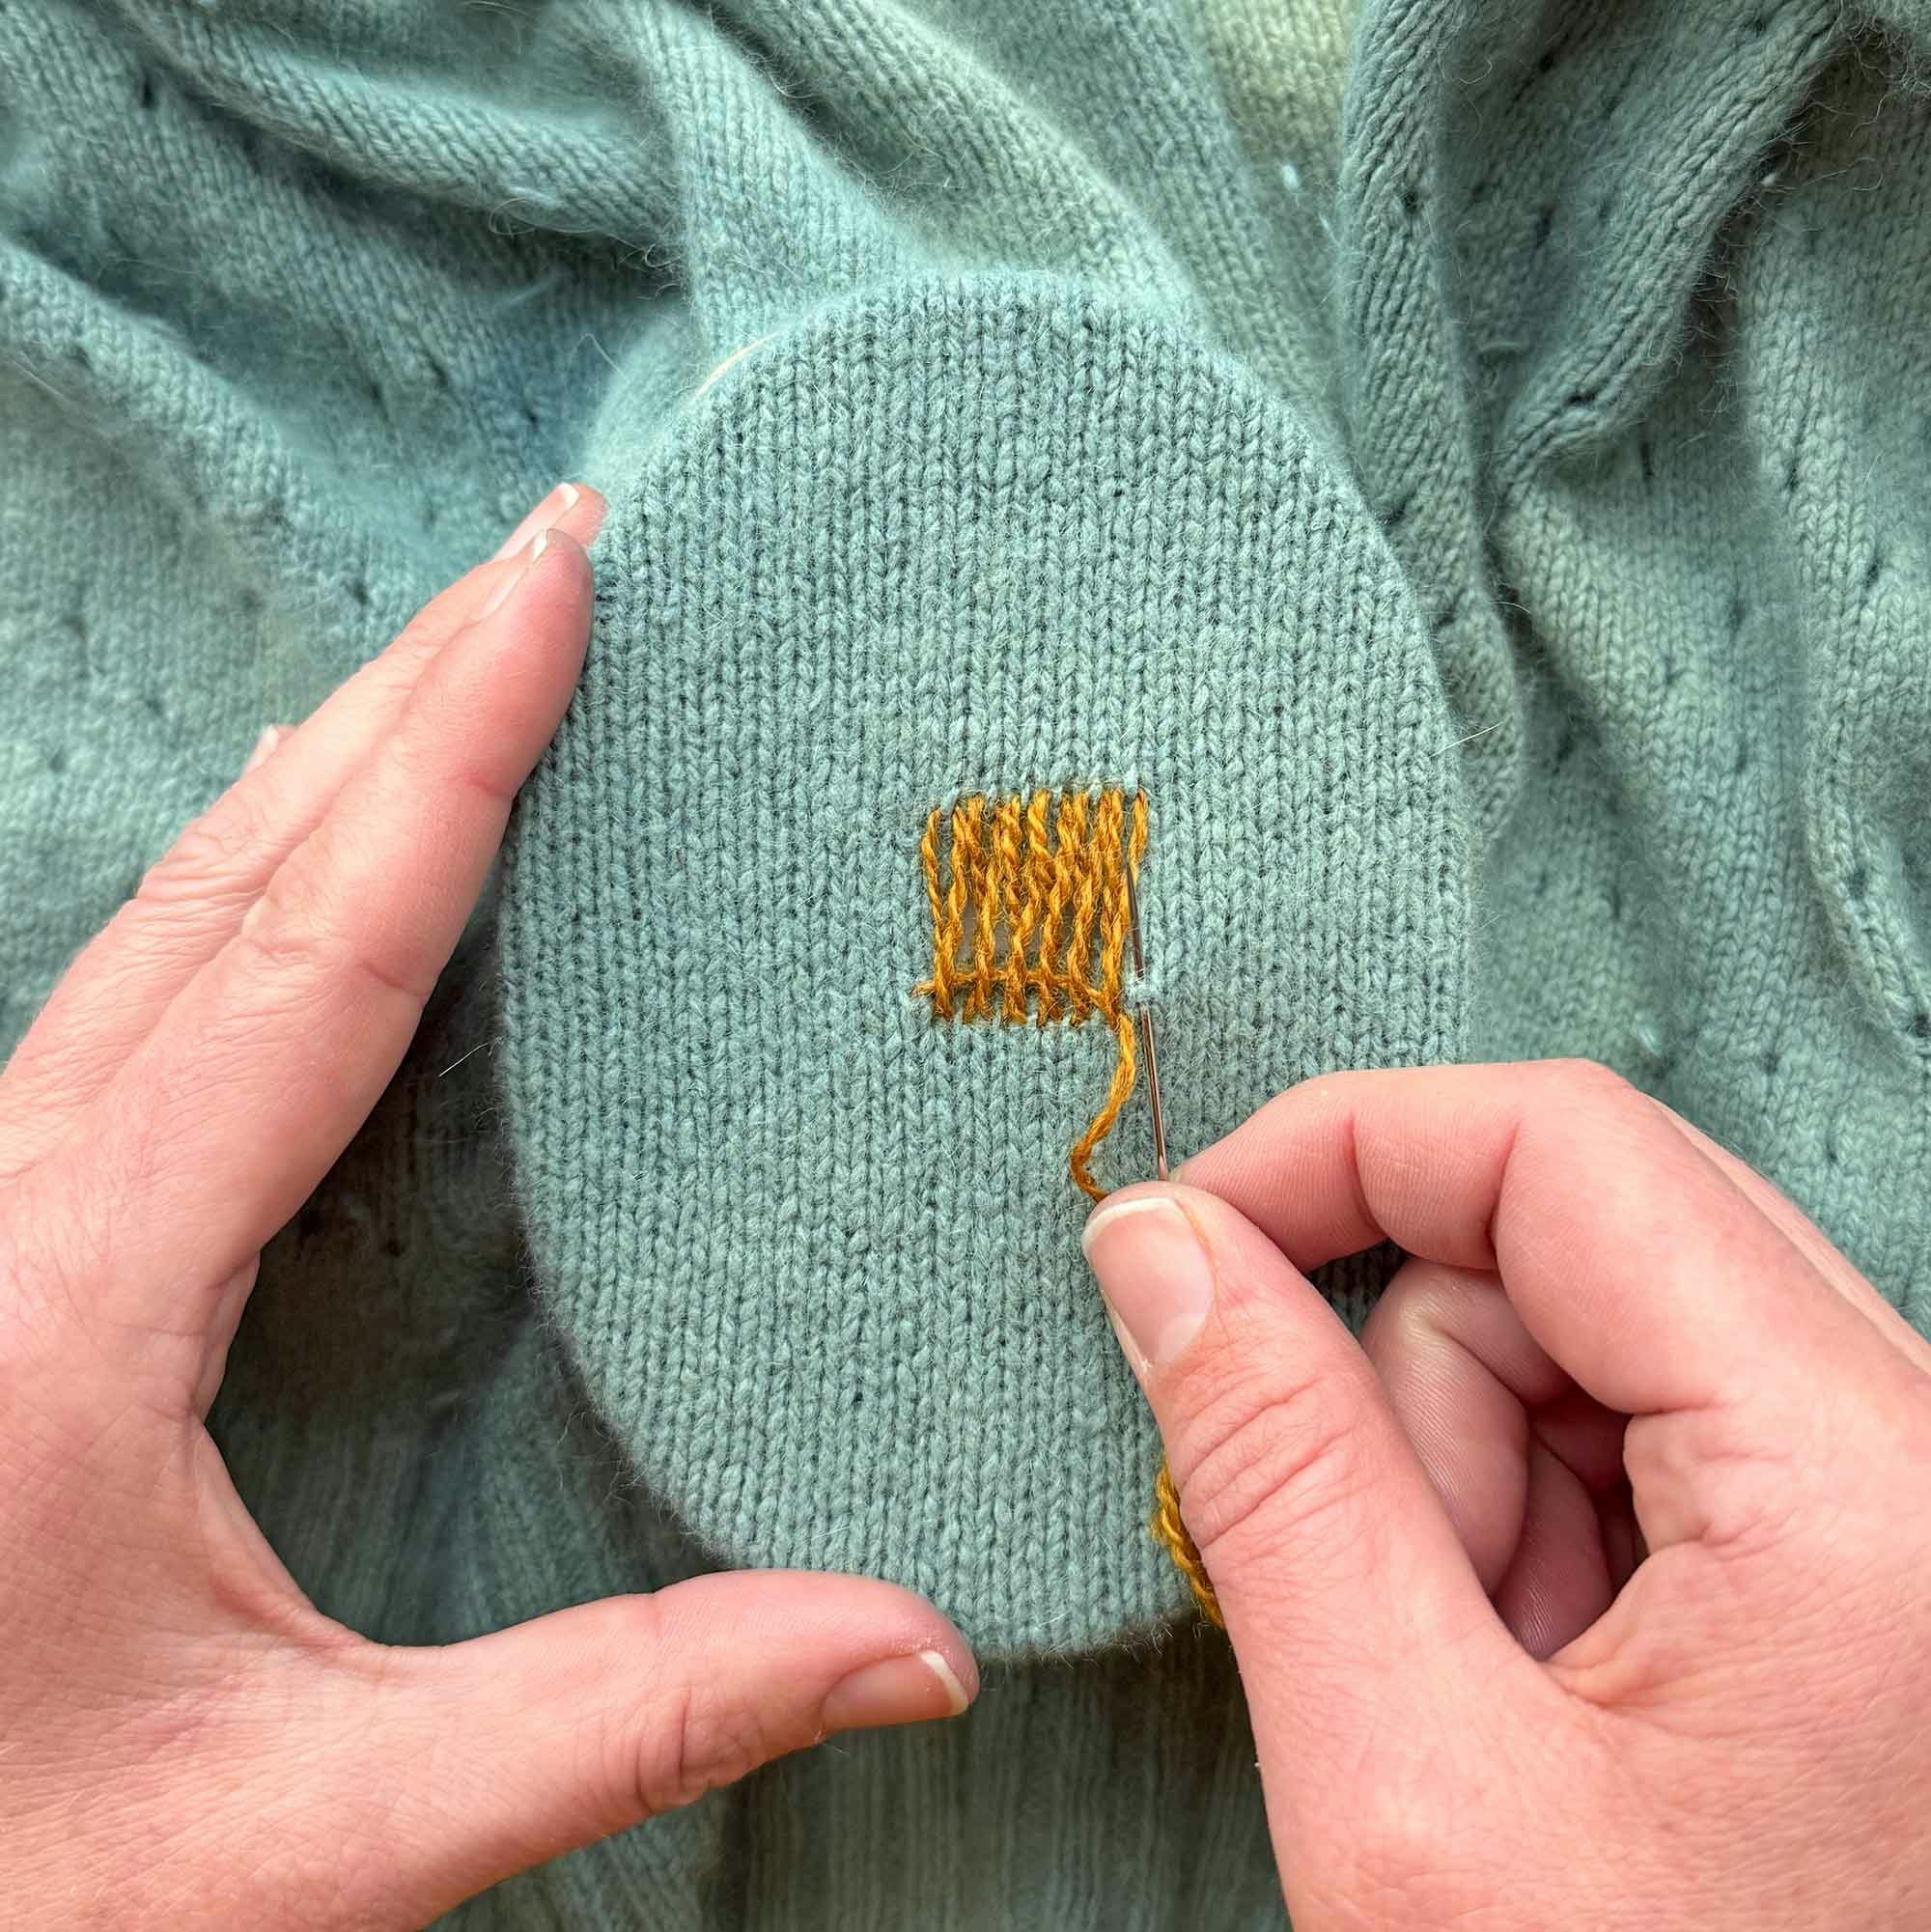
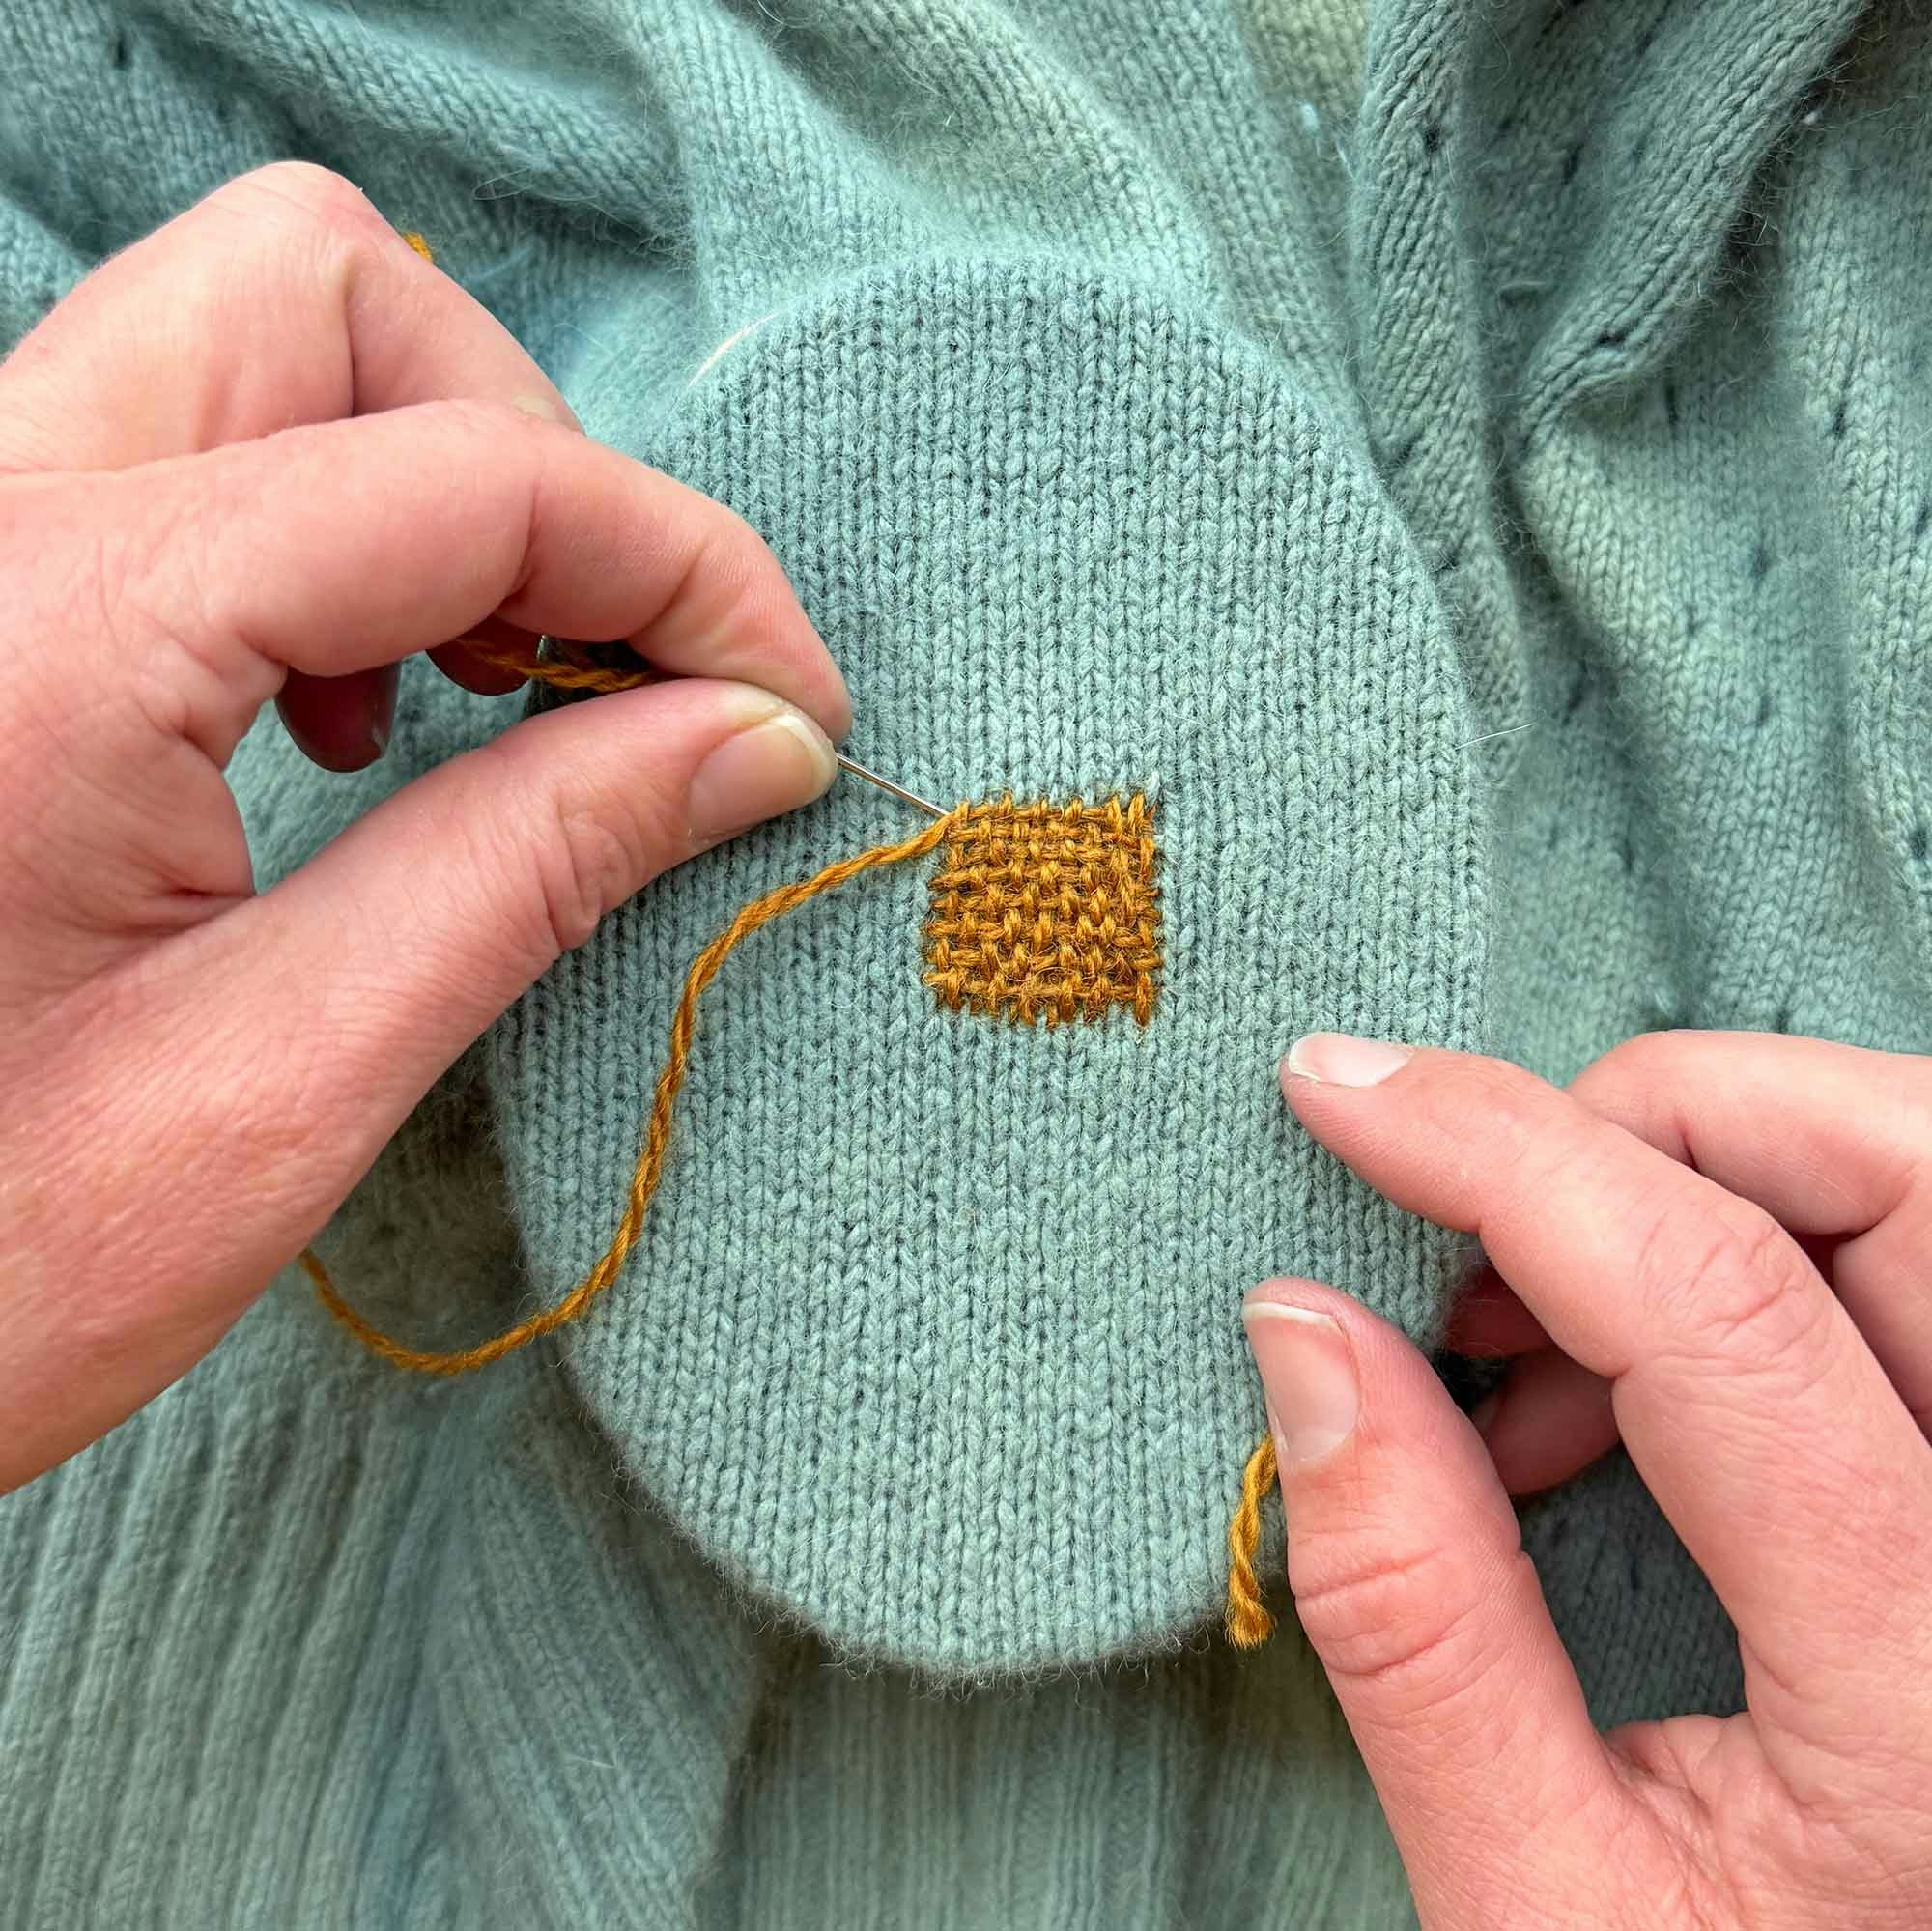
Continue working rows back and forth until the woven patch is complete. Insert your needle to the wrong side of the work, remove the fabric from the rubber band and form, and turn it over.
Weave in any remaining ends on the back of the work.
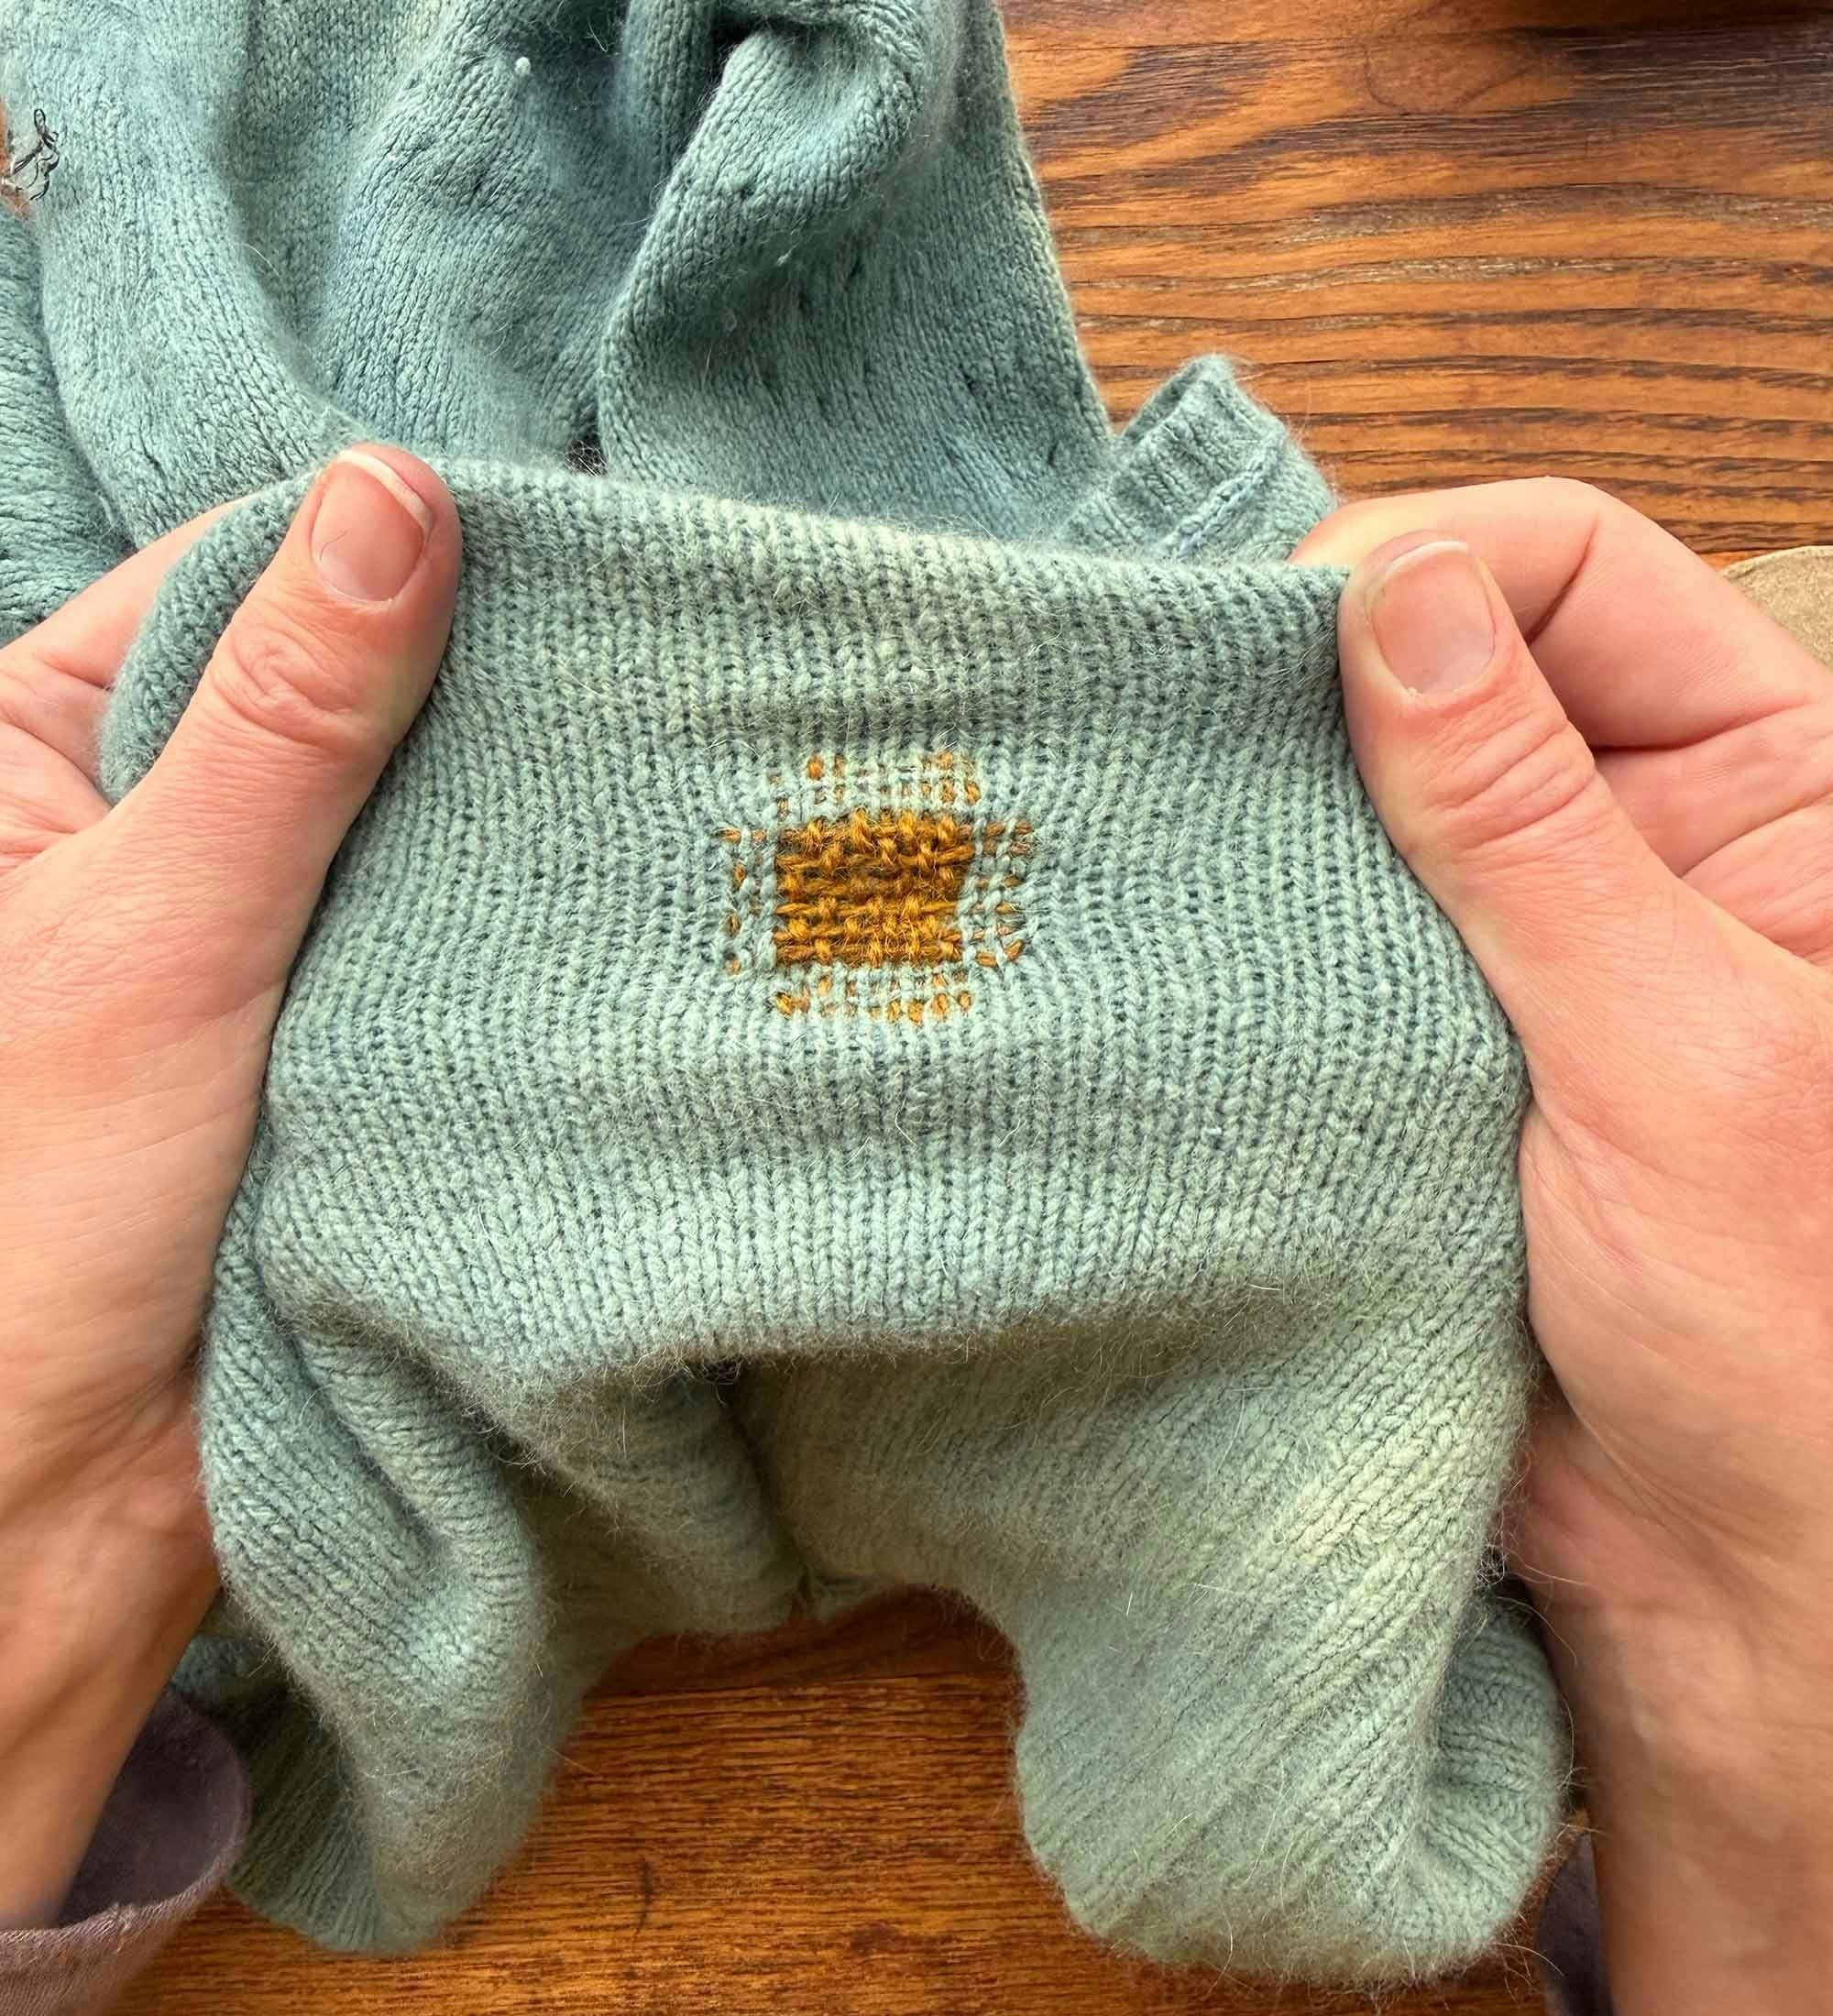
The surrounding speckle of stitches helps to secure the hole and connect the mend and base fabric.
2) Handwoven Patch
This method is similar to the first, but it doesn’t have the additional stitches that secures it to the knit fabric, creating cleaner edges.
Next, stretch the yarn over the full length of the mending area, and insert the needle into a stitch in the fabric above.
When long stitches cover the mending area, begin weaving the needle tip over and under the threads, creating a plain weave. Pull the yarn through.
Secure the previous row and begin the next by inserting the needle under a stitch and pull yarn through.
Continue weaving back and forth, always passing the working yarn under a stitch on each side of the woven patch as it forms. Then, insert the needle to the wrong side.
Turn the work over after removing the fabric from the form. Weave in the ends under the patch area.
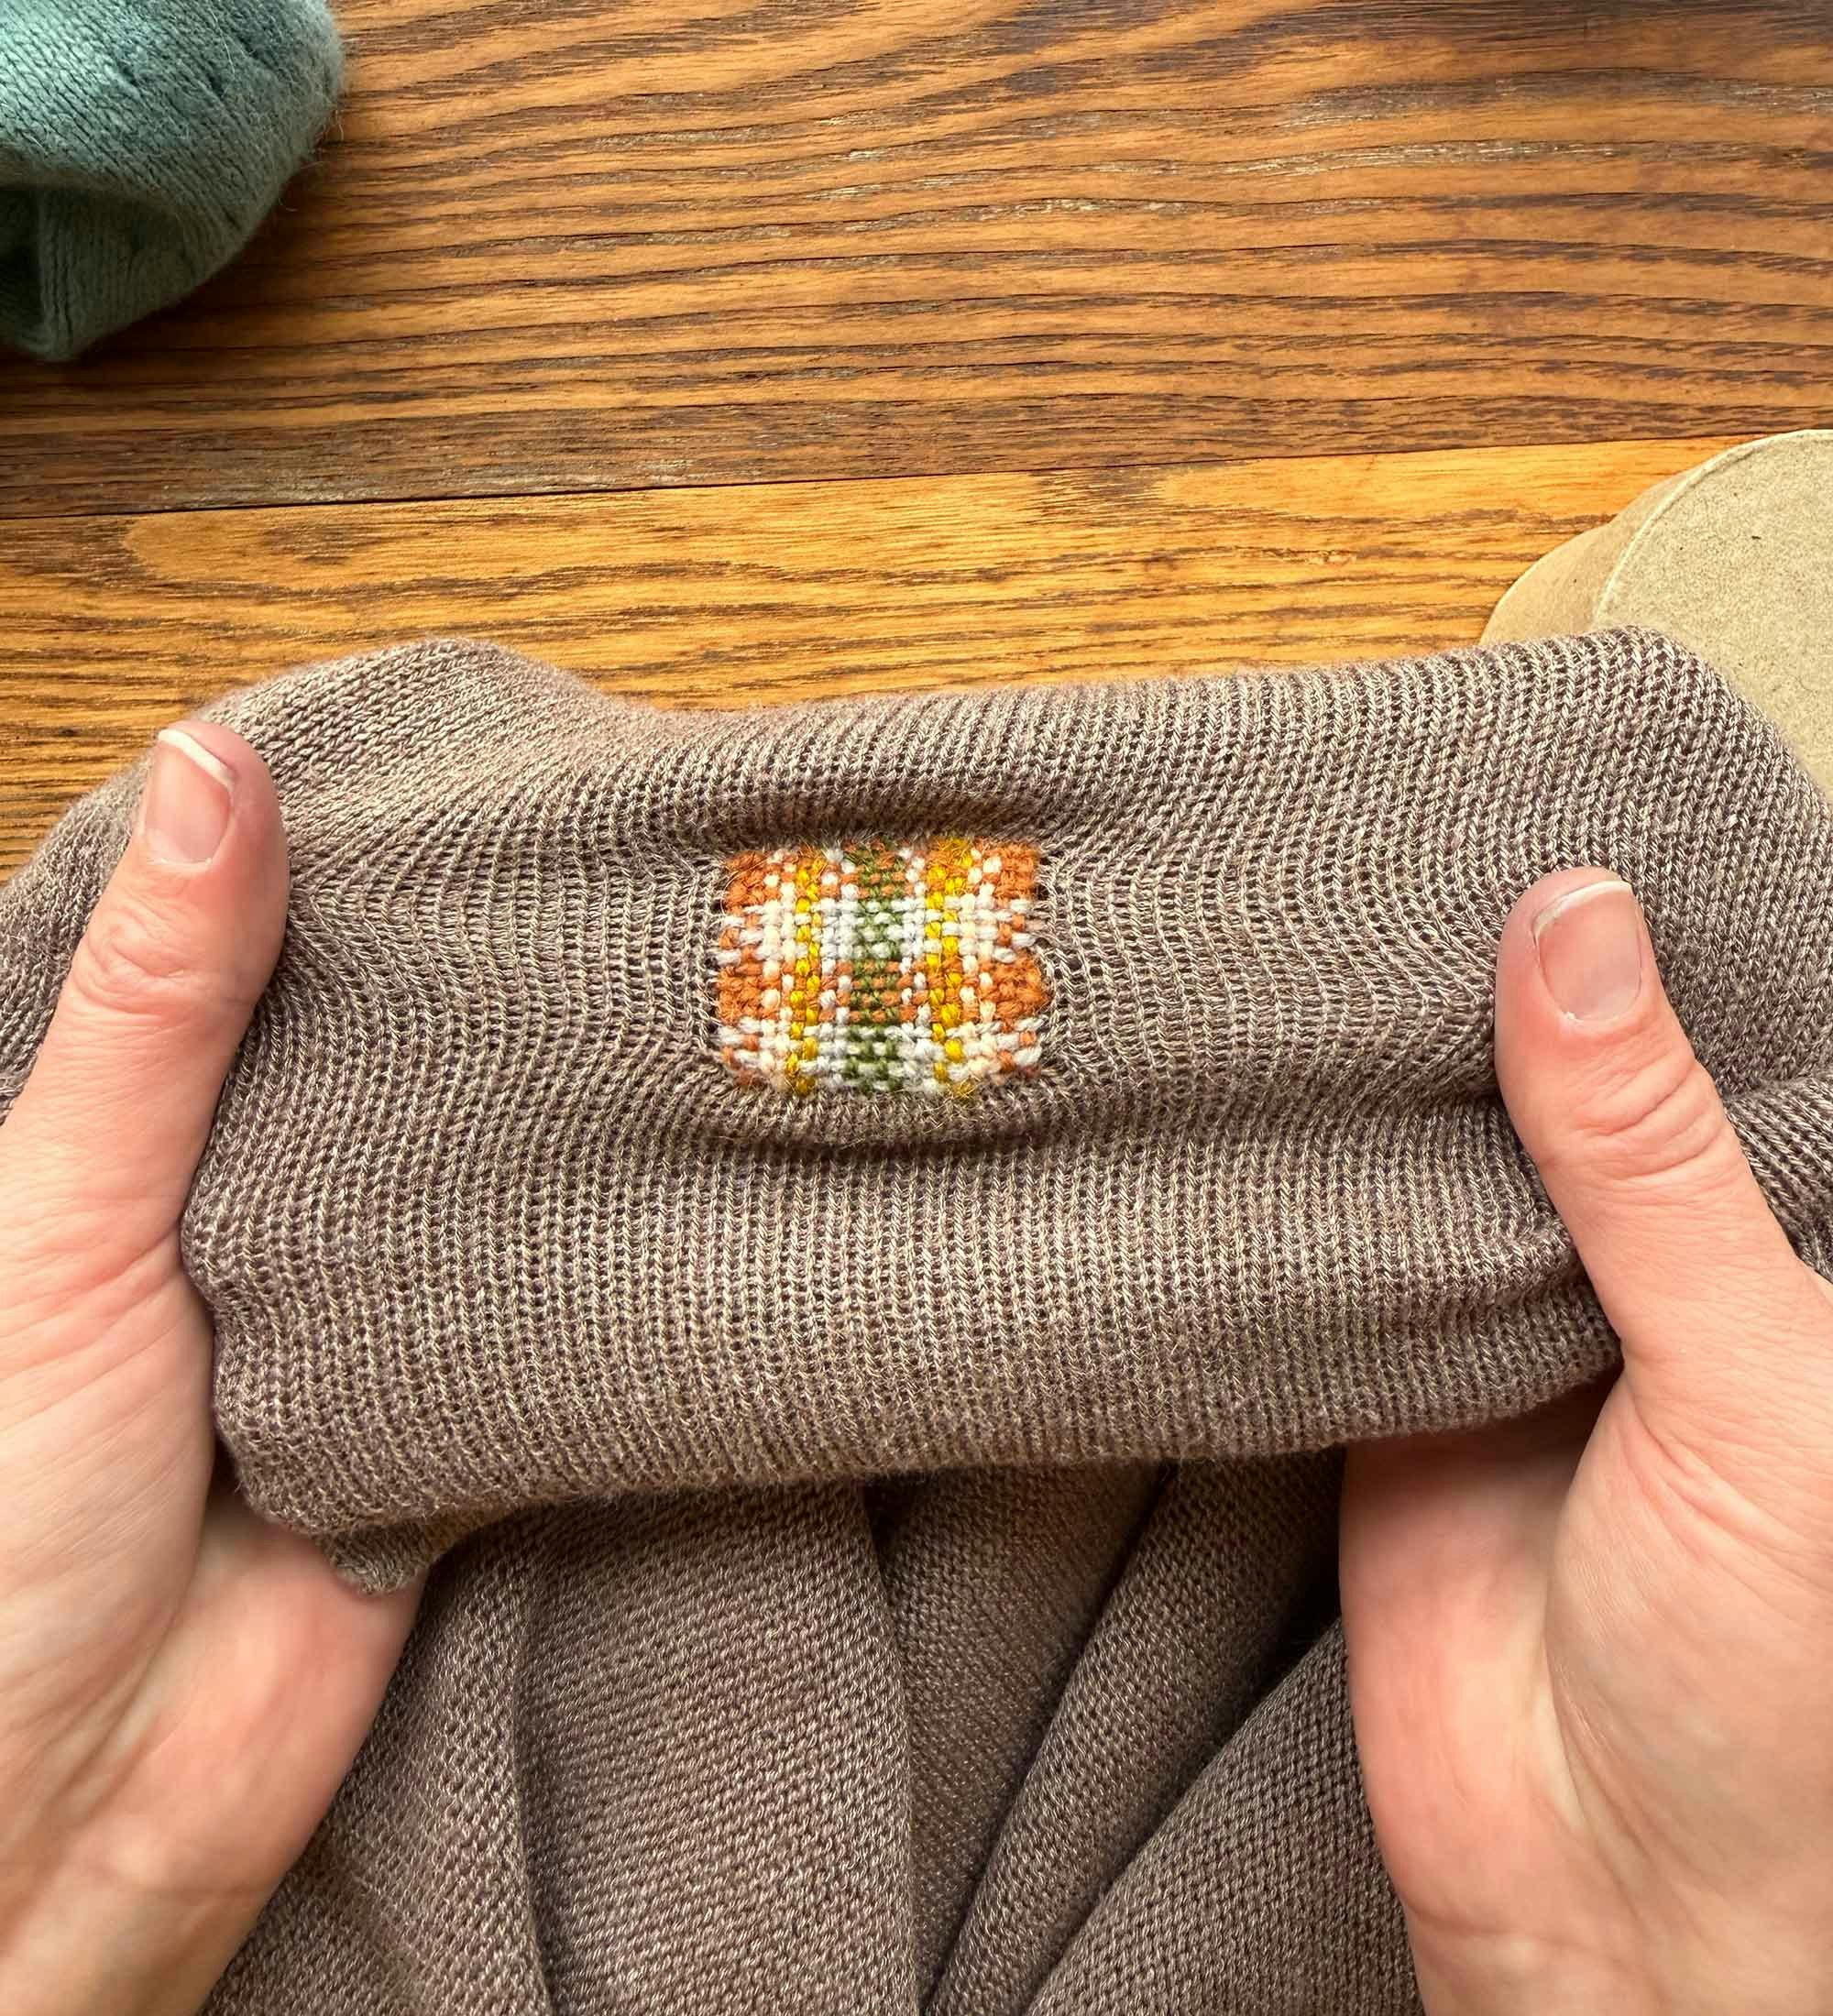
Look at the image at the top of the page again to compare Method 1 and 2. The woven patch area is the same, but how it is secured is different. Which is better? It depends!
3) Loom-Woven Patch
The 1940s saw a boom in small gadgets designed to make mending faster and easier. One was a Speedeweve brand mending loom, and several modern versions are available on the market today. I have recently been trying out the Rosie’s Speedweve-Style Mending Loom from the Woolery.
Kate recently added a Rosie’s Speedweve-Style Mending Loom to her growing collection of mending looms and gear.
This mending loom makes a woven patch very similar to the Method 2 mend above. However, the loom helps to speed up the process by lifting and lowering the threads so you don’t have to manually pick the over-and-under pattern when weaving. They are a lot of fun!
Here’s a video tutorial I created so you can see the loom in action.
Best wishes for tidy mends, and I’ll hope you’ll join us for the mend-along!
— Kate
Kate Larson (she/her) is Senior Editor of Farm & Fiber Knits. For nearly as long as Kate has been handspinning and knitting, she has been helping others find their paths as makers and forge deeper connections with the landscapes that produce the wool and cotton, flax, and silk that they hold in their hands. While Kate has published a book, many articles and patterns, and several instructional videos, she especially loves celebrating the work of other fiber folks. The editor of Spin Off from 2018–2025, she directs spinning events in addition to editing Farm & Fiber Knits. If you can’t find Kate, she’s most likely in the barn having a chat with her beloved Border Leicester sheep.

 The surrounding speckle of stitches helps to secure the hole and connect the mend and base fabric.
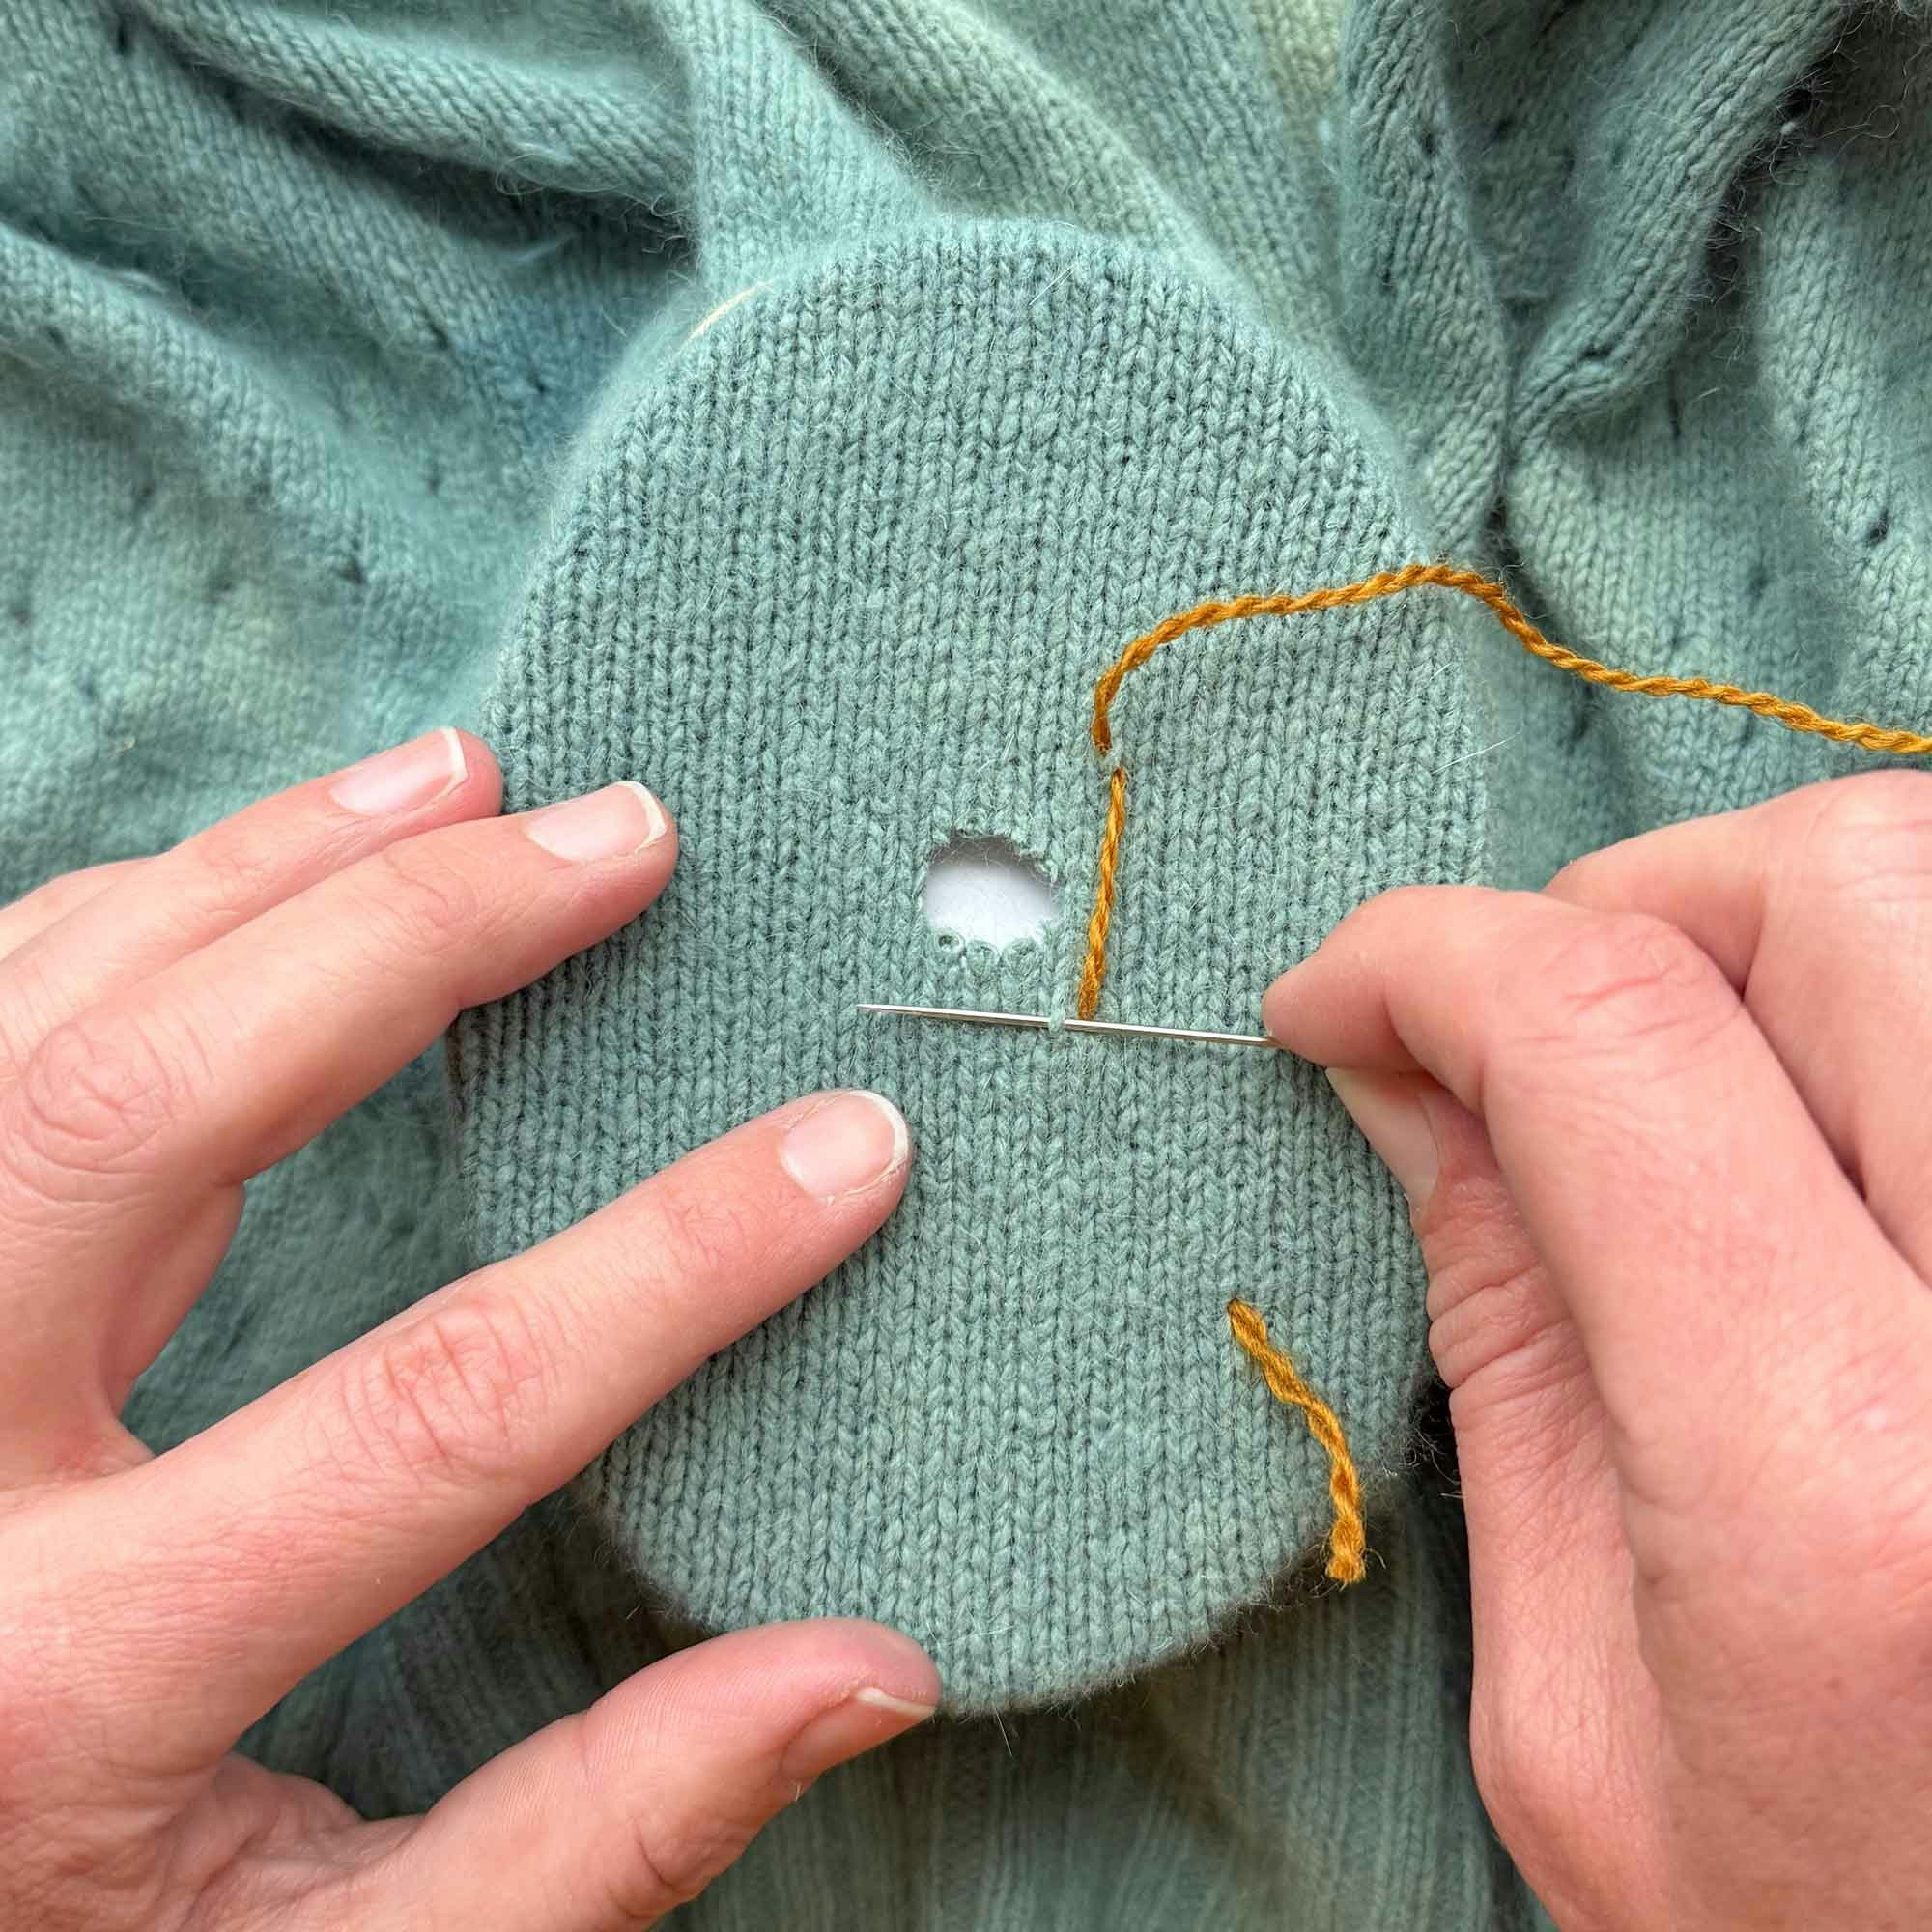
 Kate recently added a Rosie’s Speedweve-Style Mending Loom to her growing collection of mending looms and gear.